
Intruduction
Hello! I'm back again, my name is Ochkis, and I've been studying to draw digitally for a years now and I'd like to share some tips and basic about shading, lighting, and shadows. Hope you like it
This tutorial is for people who at the early start of the drawing and all the above, contain step by step how to make a base color, shading, and lighting, and also included with a video but with subtitles, because my computer is a potato (The one use for typing not drawing) T-T
Maybe in the future I will try to upgrade my set up.
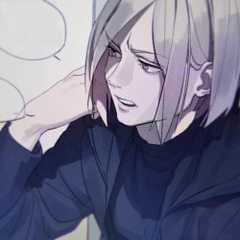
Video Tutorial
I present to you my video on shading , lighting ,and shadows
Go and visit Youtube Channel "Ochkis", if you like it and want more, you can support me by subscribe, like, and share my video
Thank you
Watch this video bellow for more detailed step by step process.
1. Preparing (line art, color, and layer set up)
1. LINE ART
The first step is creating a new layer and start drawing using you finest selection of brush that you can find, I will post mine in this tips too so stay tune .
You can start with the sketch an add the line art color trace based on where the light will be on
2. COLOR BASE PALETTE
To start choosing about base color you should know what kind of color, and what purpose. Of individual color, to learn that I created a simple graph to show you which color is you want to choose, and for what purpose
And when we want to mix color a lot of people to tend pick a random color and try to make it work, although it is possible to do that kind of a thing is not really recommend for people who just started drawing recently .
When mixing color try to look the closest color beside the one you've been selected, and if you noticed that in the graph above, some of the slidin color palette had a different function such as for lightning and shadowing, which I will explain further more later
3. LAYER SET UP
The most crucial thing when you've coloring is how you set up your layer, because if you don't you will get lost and confuse where you at when take a breaks, where you left on your your, and etc.
So here is my layer set up before I even start coloring,, shading, and etc
Ok to start up building the base layer you need to select the line art layer, you can use mask but I don't really like using it because I think is limiting me to do more color effect like out side of the layer, and to that you can use auto select
Ok next thing to do is to select the outer side of the line art, and then invert the selected area, this will bring you to a similar effect to mask, but the plus point is you can also add an extra effect like a stread of hair to the color, unlike mask that only in the selected area
Ok cool next we need to add a new layer bellow the line art, and fill it whole
And after that delete the unnecessary base part of the, after that you can start building the base color with each part of the color (Hair,Clothes,Accessories,eye), we can put those part together but to maximize the shading color I recommend to add each part, you don't need to add a skin part because we use it as base color.
I personally recommend to you, to separate each base color for each part of your drawing, and I know that it will take more time , but you got more plus point because you also will learn what color work and not beside drawing digitally , you're also improving your traditional.art
2. Add The Source of Light and Shadows
What I like to start before shading is try to know where the light come from, and where the will be add, by using an Airbrush. (soft) you can add a new light from a layer.
And to do that think something more simple first like a sphere or a cube.
And then after you done that, implement what you just learn to your drawing.
After that we're finally ready for shading.
3. Shading
Now before we got to the main event shading isn't just for make a drawing 3D object but also implanted for the texture of the color we want, for example clothes, fur, and etc.
With the right brush you can also make a texture on your draw.
For example:
And what is good about them that they were so nice and publish it for free download.....still had to take care of my stomach after purchasing. Clip studio paint T-T
Ok enough with the joke, so after that since you already learn where was the light source was you can start by creating a falling shadow which is a faint of shadow on your clothes, skin, hair, background, and etc
Ok that was nice to make a shadow of the clothes is actually pretty simple just follow the body line of your character , think of how you want to draw them by imagine a wet clothes on a rainy day, same as, the hair, their will always darker on the opposite of the light, and fall to the bottom because of gravity.
When shading you can use blend to erase the rough path of the shade but don't over do it, just slightly blend so there is a fell in depth of the shade.
Ok that was cool and so all, but I hear you ask "how do we do that?"
Well the answer is by using the blending mode, in which scenario blending mode will give layer a power to adjust their own color into the surrounding area
Multiply mode enable them to automatically adjust their color, brightness, and and contrast into their surroundings , and darken just their brightness , there is a ton of mode inside the blending.mode, and the only way to know which is which is trial and error, and conclusion from multiple analysis , so what are you waiting for? Explore it, Experience with it and play with it, until you know the general overview of what they did.
I will be covering that in the future so stay tune
4. ADD MORE DARKER SHADING INTO IT
By doing this it will enhance your drawing with a more realistic depth of shadow
4. Lighting
And we made it to this part, to make some lightning from our arrow that have been aiming for our character for the rest of this tutorial.
So how do we do this? Ok so for a starter you need to add another layer that will explain about the function of each layer
With the simple light you can make a 3D glossy hair effect.
After you done with the basic lightning we can move to finalizing
5. Finalizing
After learning all of that you know what that mean decoration adding butterfly ,spark, and other things that you imagine before drawing and finally you are done, you can also add another light to brighten your drawing using new layer and blending mode (Add Glow)
Thank you
Thank you for reading or watching my video, and for all of you who liked ,share, or comment I really appreciate that, and stay tune for more follow me on youtube, or this account, stay safe and good luck, I see you again next time.
Peace✌
My Social Account
Dieser Beitrag gefällt


Kommentar