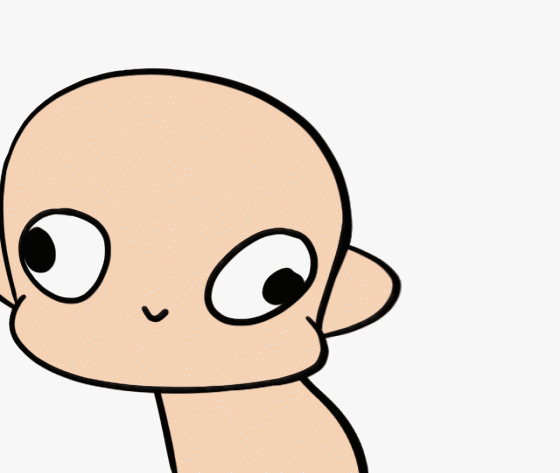
Easy Animated Emotes (Step by Step Tutorial)
Full Video Tutorial
Before we Begin:
Download the Sample file:
Google Drive Link:
You can learn a lot if you follow along the video so please download the sample file so we can do this together!
Setting up the Work Space
We need to set-up the Clip Studio Animation Tabs :
1. Turn on the Timeline
Window—> Timeline
2. Create an Animation File
File —> New —> Animation
After doing the steps above, your screen should look like this:
Now we are ready to open our file, and animate along!
Lesson 1: Making a Spinning Head Emote
1. Open the “FunEmotes.clip” file that we downloaded. It should look like this:
How it will look like after we finish:

Step By Step Process:
Assigning Cells
1. Create a New Animation Folder
2. Drag the John Folder inside the Animation Folder
and Rename the “John: folder to —> “1”
And the “Folder” —> “John” for easy tracking
3.Go to Cell 1 and Assign the “1” Folder
4. Duplicate folder “1”
There will now be a new folder named “2”
5. Go to Cell 3 and Assign the “2” Folder
6: After following the above steps:
Duplicate folder “2”—->There will now be a new folder named “3” —> Go to Cell 5 —-> Assign Folder “3”.
Then:
Duplicate folder “3”—->There will now be a new folder named “4” —> Go to Cell 7 —-> Assign Folder “4”.
The Finished assignment should look like this:
Activating the Onion Skin
To make working with the Emotes easier, we will use the Onion Skin Feature.
It makes you see through all your drawings so that you can know where it was before and where it will be in the future. To turn it on follow the steps below:
Blue represents the Previous Drawing & Green represents the Next Drawing
Moving the Image
1. Expand the “1” Folder —> Select Head Layer —-> Use the Move tool to change the head’s position
2. We will do the same for the other Layers but adjust the position of the head like below:
Move “2”s Head here:
Move “3”s Head here:
Move “4”s Head here:
3. Use the Liquify tool to adjust the Head and Body
*The liquify tool is usually found in the Blend Sub tool
Use the Liquify Tool Push mode —> Select the Head Layer —-> Click and Drag the Head
Do the same with the Body:
Use the Liquify Tool—> Select the Body Layer —-> Click and Drag the Body
4. Adjust the head and body for all the other folders using the liquify tool:
Playing the Image
You can easily Preview how it moves by pressing “Play” in the Timeline but don’t forget to press the “Loop Play” button so it repeats until you stop it.
To Stop the Animation , press the “Pause” Button. it is found where the Play button was:
Adding Motion Blur Effects to your Emote
To make your emote have more energy, let’s add some motion blurs!
Select the Head Layer —> Go to Filter —> Blur -> Motion Blur
Adjust the settings until you are happy with it then press OK
He is now more energized! So we’re almost done!
Exporting Your Emote
Since we are happy with our Emote. We are going to export it to a GIF so we can send it to our friends.
Go to File —-> Export Animation —->Animated GIF
*Note: The Inner square is the Area the GIF will cut so everything outside the inner square will not be seen during exports.
It will ask you to save the file, so Save it wherever you want it
Lastly, it will ask you to Adjust the GIF settings and Press OK:
YOU ARE DONE CONGRATULATIONS!!! OPEN THE FILE AND WEEEEEEEEEEEE!!!

Lesson 2: Making a Licking Emote
I highly advise you to finish Lesson 1 before you start here:
Some steps will be skipped since they were discussed in Lesson 1.
However, if you are following along with the Tutorial Video. It’s OK to start here.
How it will look like:

Initial Setup:
After learning how to assign our folders from Lesson 1
We will make 4 Folders and Assign the Cells as follows:
Cel 1 = Folder “1” | Cel 3 = Folder “2” | Cel 5 = Folder “3” | Cel 7 = Folder “4”
It should look like this:
Moving the Image:
1. Go to “2” Folder —> Select the Tongue Layer —-> Select the Liquify Tool —> Click and Drag the Tongue
2. We are going to make image bigger using Scale & Rotate:
Select the Tongue & Head Layers —-> Edit—-> Transform —-> Scale & Rotate
*You can also press Ctrl T while selecting the layer
Click the small boxes corner to resize the image like below:
3. Using the steps above, we will adjust the tongue, head and body of each folder.
Folder 2 will look like this:
Folder 3 will look like this:
And folder 4 will look like this:
Adding Effects to the Emote
We’re going to make our emote look more fun by giving him some spit effects.
Create a new layer —> Select any brush & change the color to blue —>Paint his spit
We will be doing it with the other layers as well. They will look like the images below:
Folder 2 will look like this:
Folder 3 will look like this:
Folder 4 will look like this:
Then all you have to do now is Export as a GIF just like in Lesson 1
CONGRATULATIONS YOU MADE A LICKING EMOTE!!!!

Lesson 3: Making an Exploding Emote
Do you still have the energy to do our 3rd emote?
I highly recommend finishing Lesson 1 & 2 before you start here.
Again, if you are following along with the Tutorial Video. It’s OK to start here.
How it will look like:

Initial Set-up
After learning how to assign our folders from Lesson 1 & 2
We will expand the Timeline from 8 —>12 , then, make 6 Folders this time and Assign the Cells as follows:
Cel 1 = Folder “1” | Cel 3 = Folder “2” | Cel 5 = Folder “3” | Cel 7 = Folder “4”
Cel 9 = Folder “5” | Cel 11 = Folder “6”
It should look something like below:
Expanding the Head
Like the previous lessons, we are going to use the Liquify tool but this time, we are going to use the Expand mode.
Select the Liquify Tool —> Press Expand Mode in the Subtool Settings —-> Click & Drag
We will expand the Head & Body Layers of all the folders and it will look like below:
Folder “2” will look like this:
Folder “3” will look like this:
Folder “4” will look like this:
Adding Radial Blurs
Let’ give the emote some more energy so we’re going to add some Radial Blurs.
Select the Layer —> Click Filter —->Blur —->Radial Blur
A Red X will appear, it is the center of the blur so put it in between his eyes.
Then, adjust the strength until you are happy and press OK
Look how happy he looks:
Final Adjustments for Your Emote
1. Make a New Layer and paint it red.
2. Change the Blending Mode to “Color”
3. Create a Folder and insert the Head & Body
4. Drag the “Color” layer above the Folder and Clip it
5. Go to Folder “6” and make a New Layer
6. Cover the Screen with Yellow and Red
All your Layers will Look like those below:
Folder “1” will look like this:
Folder “2” will look like this:
Folder “3” will look like this:
Folder “4” will look like this:
Folder “5” will look like this:
Folder “6” will look like this:
Finally, we Export it into a GIF & and we are finished!
CONGRATULATIONS! YOU FINISHED ALL THREE EMOTE!!!

Closing Message
Thank you for following along the Tutorial & I hope you learned at least one thing new!
If you have any questions & messages! You can Comment on the Youtube Video or
Feel free to DM me on Twitter @ChokiliciousMe or @KokiRocchi
You can also use the hashtag on twitter #CKEmoteTutorial to show me what you made!
I’ll try to look into them once I have any free time!


Kommentar