
Foreword: The charm of creating flowers and plants in a hand-painted style
Hi! It’s me GwaGwa( ˶ˊᵕˋ)੭ ♡
Recently, I am taking on the one-flower-a-day challenge. I will share how I observe the flowers, complete the drawing, and finish the painting.
You are also welcome to follow me and draw together!
Clip paint studio EX computer drawing is used for teaching throughout the process
If you are curious about how to digitize a hand-drawn manuscript, welcome to watch the previous tutorial! (ゝ∀・)
"This teaching is quite long, so I will break down many chapters so that students can directly find solutions to specific problems in the future! 》
Elementary concepts—create simple line sketches starting with C, S, and I!
Learn to simplify shapes and quickly outline your flowers!
Disassemble flowers and turn them into models, no longer afraid of how to observe a large number of branches and leaves
Learn about C, S, and I line drawing!
What are C, S, I? The painting techniques I often hear about are not as difficult as imagined
Below I will share my favorite usage through demonstration!
Simplify shapes and quickly outline your flowers!
Let’s look at this reference picture. What do you see at first glance? How would you draw it ( •́ _ •̀ )?
painstaking way of observing
If you draw like in the picture, you are not wrong, but we can learn a more efficient way!
The shape of flowers often contains a large number of S and C curves, so many people subconsciously use a large number of S and C curves when copying. **
good observation mode
A large number of I straight lines are used to draw the draft in the picture, which can quickly and accurately capture what the eye sees!

"Be sure to try this method when you want to sketch outdoors. You can practice your sketching skills efficiently!"
Disassemble the geometry and assemble your own flowers!
It can be observed that although the angles are different, the structure of each flower is quite similar!
We can practice using geometric shapes.
Stp1. Leaves and petals—figure 8 practice
The figure 8 shape is often used when describing petals and leaves, and is a good helper for easily dismantling twisted shapes.

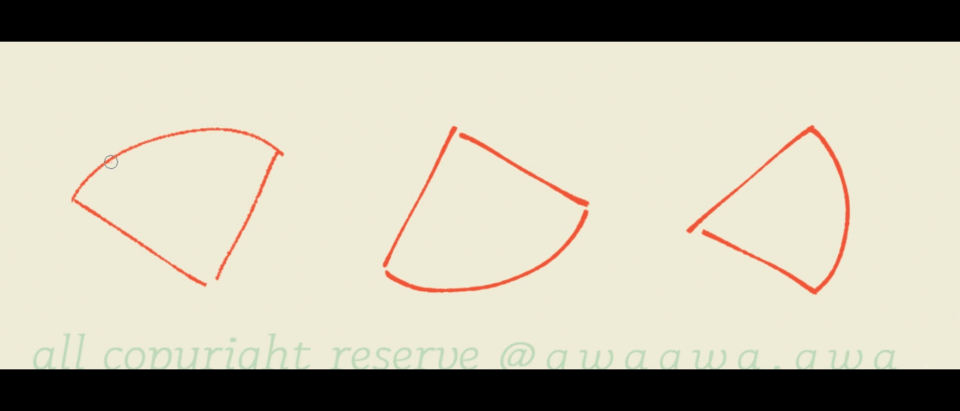
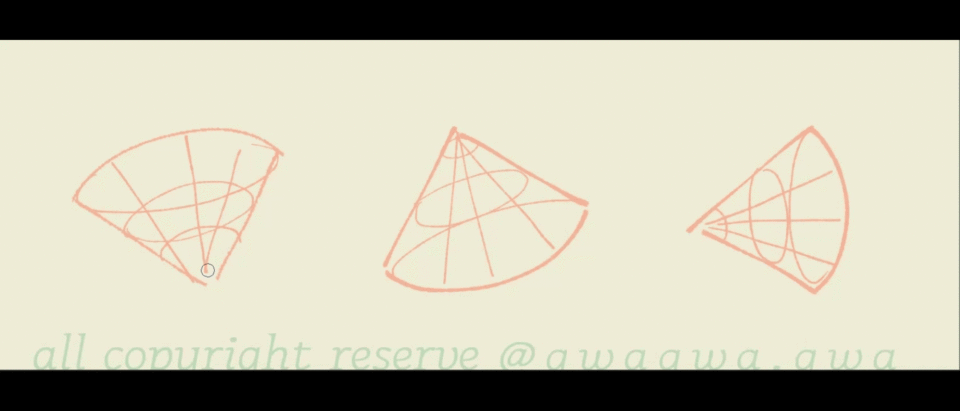
Stp.2 Flower Angle—Cone Exercise
- Sector Circle = Cone
As shown in the video, you can first determine the size of the flower through the fan shape, and then determine the blooming angle of the flower through the 2~3 small circles. , helps you quickly exercise flowers in all directions.
Stp.3 Complete Flower—Sphere and Rectangle Practice
Did you find it? Use these three shapes ● ▲ ■ etc., geometric shapes
You can create various combinations! It also helps you have a good shape to assist you in the original process.
※Combined Vase Draft>>Finished Process Demonstration
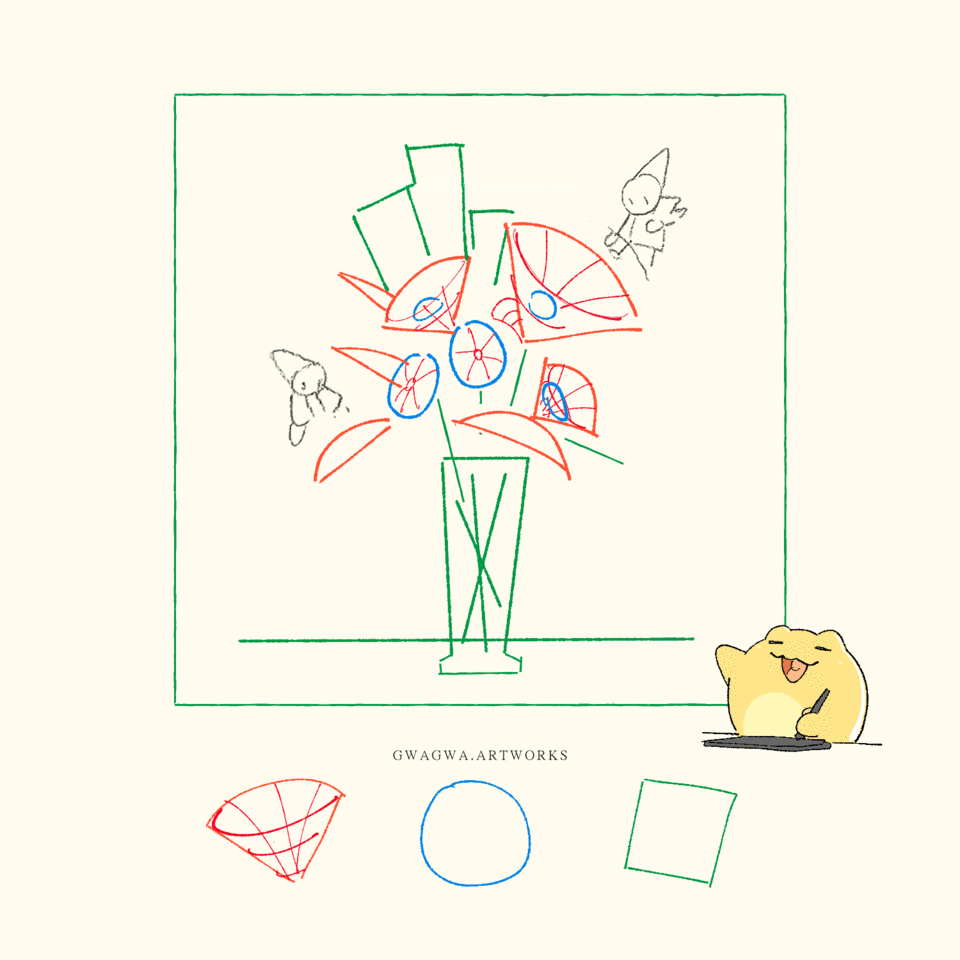
Combine your own flowers! This step can help you practice the aesthetic relationship between the placement of objects!
Key points of this section:
- Separate petals, leaves, and branches, and you can create and copy flowers freely like combining Lego.
- Use the I straight line to outline the outline of the flower and quickly capture what is in front of you.
- Capture flowers and plants using three shapes ●▲■ geometric shapes.
Continuously upgrade Level up!—Three kinds of flower painting methods!
We have already understood the basic shapes of petals, leaves, and angles -.
Let us break down the logic of the three types of flowers together. After hands-on practice, you can also analyze your favorite flowers and plants!
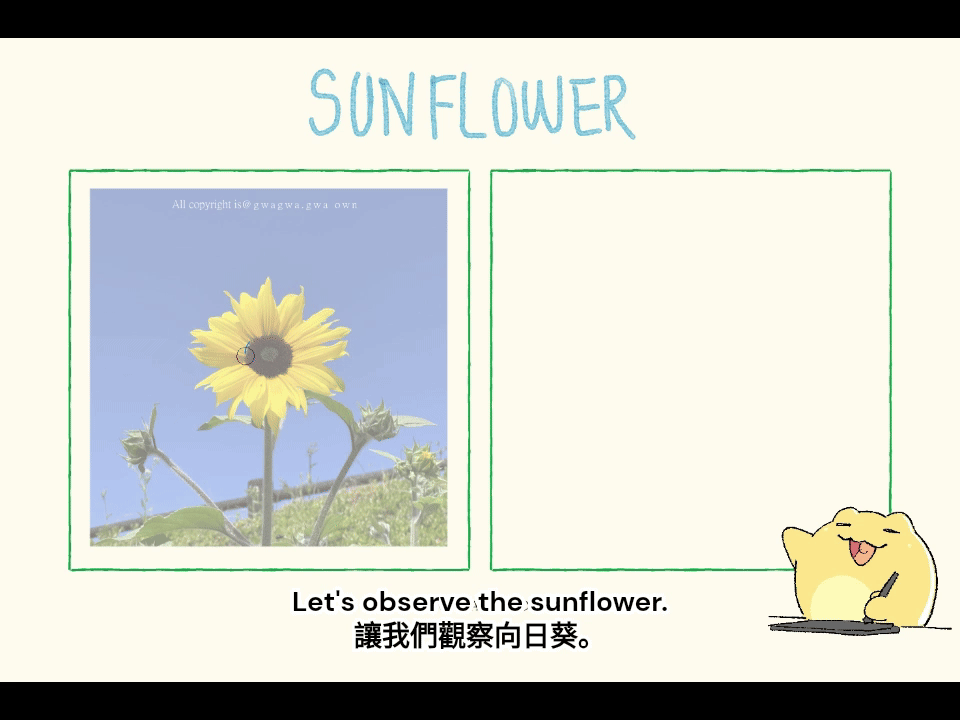
Lv.1 Sunflower
Let’s start with a simple and cute sunflower!
Use Fan, Circle, Straight line to create the basic shape of the sunflower
Use cross dislocation (blue dot) to find the pattern of petals
Use figure 8 to capture leaves
Lv.2 Morning Glory
- The basic shape of morning glory is like a pentagon+star, and looks like a small trumpet when viewed from the side.

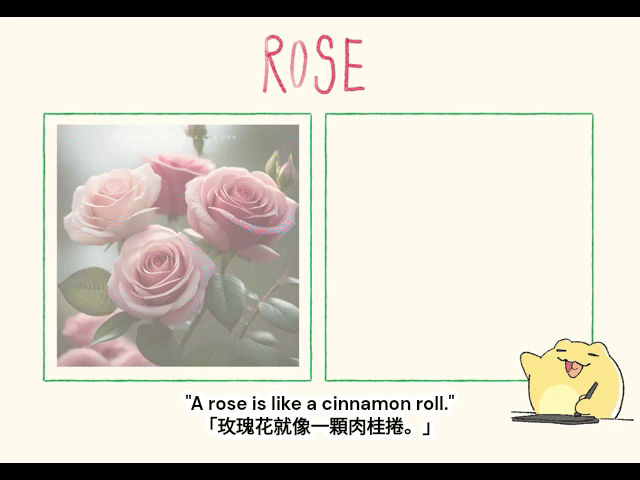
Lv.3 Rose
- The basic shape of a rose is like a cinnamon roll, with petals arranged staggered along a spiral
Style and material expression! Watercolor style, pastel style
We will help you learn the characteristics and logic of these two styles to help you have more combination options when creating!
Watercolor style
Crayon pastel style
Paper Texture! —In an instant, it becomes hand-painted
I like to use this step at the end. Using the material at the beginning makes it difficult to fill the paint bucket with color.
During the coloring process, the color selection will also be affected by layer effects.
Therefore, it is recommended that you do this step when the final draft is completed! **

Here is the brush material pack used in this teaching. Students can also use what they like as long as they understand the concept.
You can use any brush!
Watercolor effect
Brush features: translucent layers, wet edge effect, color blending
Finally coming to the watercolor effect! Next you will learn
How to simulate the transparency of watercolor blooming.
Tips to improve the layering of the picture.
Students can see that the brush itself has many materials, so after setting the paper material, you can turn it off first.
※This demonstration uses these brushes
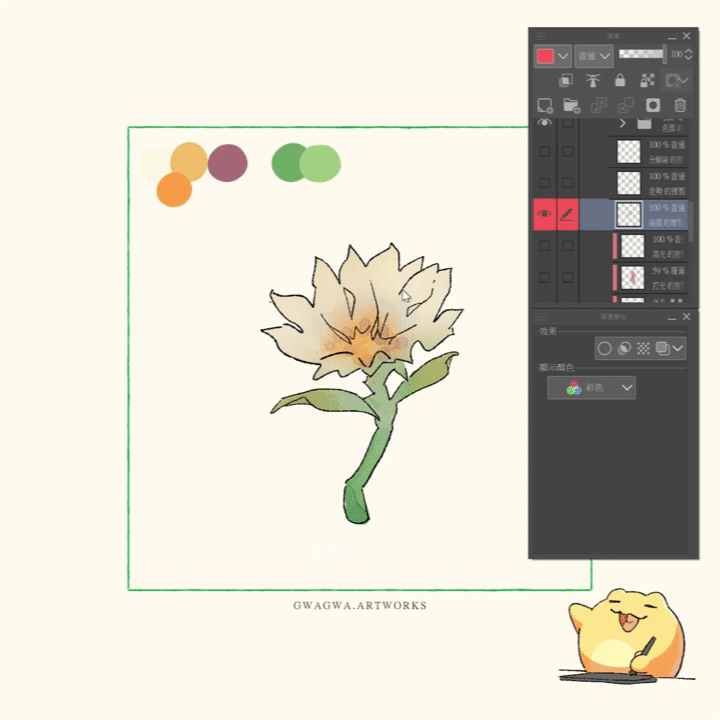
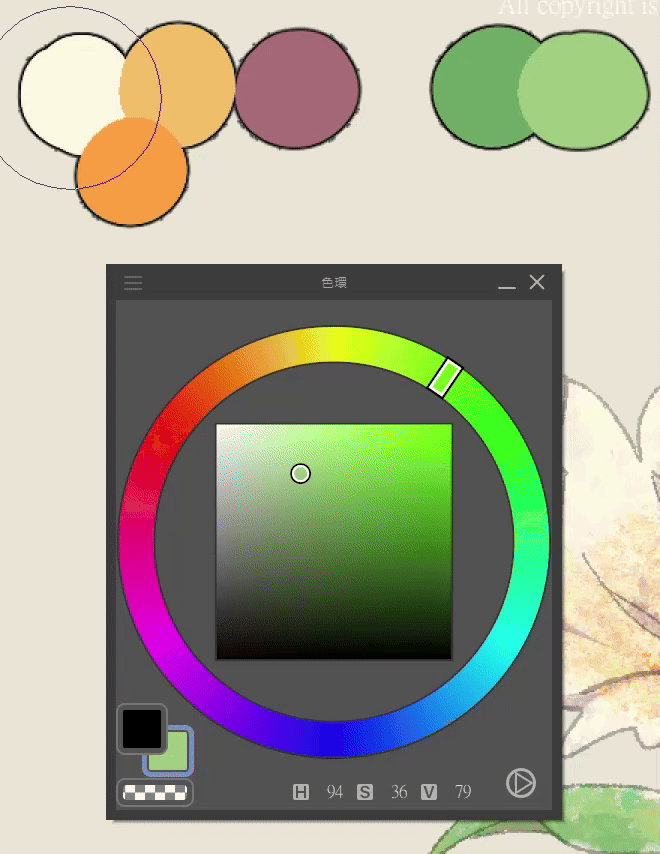
Stp.1 Color ticket selection—Make your color color palette!
Color selection principle: high brightness, medium to high chroma
A little helper for keeping colors clean!
The principle of one shallow and one deep can help increase the contrast and increase the three-dimensional sense.

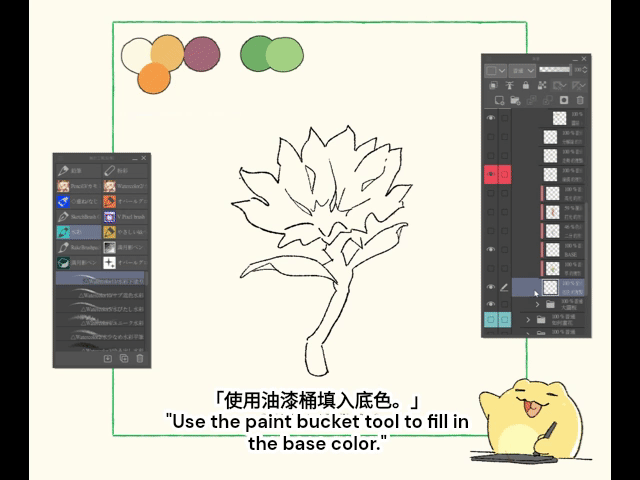
Stp.2 Render the base color.
※Brushes used in teaching
Stp.3 Watercolor edge—Watercolor edge effect.
※Detailed steps:
Click on the Line Art layer > Click on Border Effects>Watercolor Border>Layer Opacity: 35%~45% > Range: 0.4 > Transparency Effect: 20 > Lightness Effect: 40 > Blur and Width: 0.70
Pastel style: Crayons style
Demonstration brush characteristics: thick paint blending, rough edges, smear effects
※Brushes used in teaching
Stp.1 Render the base color.
The color selection method can be viewed in the watercolor style ↑. Here we directly show how to express the characteristics of pastels. No further details
Ending: Turn the flowers you drew into brushes!
Once we have learned these techniques, we can use flowers more flexibly!
Stp.1 Draw flowers and register materials

"Edit > Register Material > Image"\
"Edit > Register Material > Image"
- "Enter the material name."
Enter the material name.
- "Check > Use as brush tip shape."
Check the option > Use as a brush tip shape.
- "Click a location to save (you can choose to add tags)."
Choose a location to save it (optionally add tags).
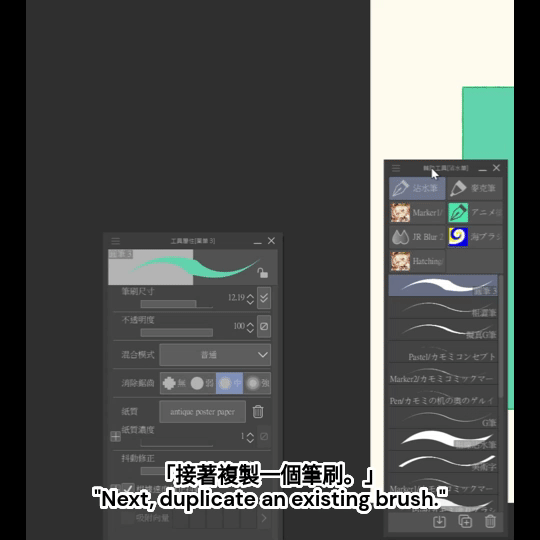
Stp.2 Copy brush and set parameters
 + "Next, Freely duplicate an existing brush." Next, Freely duplicate existing brush.

+ "Click to open the editing panel." Openthebrusheditingpanel.

      + "Click>Brush Tip>Material>Add Brush Tip Shape. Click>BrushTip>Material>AddBrushTipShape.
    + "Enter the material name and locate the flower material. Enter the material name and locate the flower material.

+ "This completes the initial setup.
The above are the setting parameters suitable for painting grass and flower fields. You can adjust them to create your own brushes (˶’ᵕ’˶)
The above is the teaching for this time. The completion process is attached below.
If you have any questions or want to see, please ask^ ^
If you like it and find it helpful, please help me share, like and follow my IG! Thank you so much!
https://www.instagram.com/gwagwa.gwa/
Users who liked this post


Comment