Easy transparent clear sea [draw and animate]
Introduction
Hello, in this tutorial I will show a very easy way to create transparent water effects for an illustration with only 4 layers and to duplicate it to create an animation.
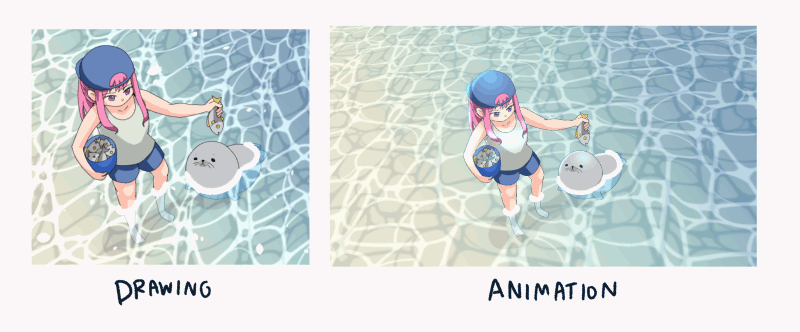
Video tutorial
check the video tutorial for steps in action
The basic concepts of Transparency
To make something look transparent, you can just change the layer opacity down from 100%
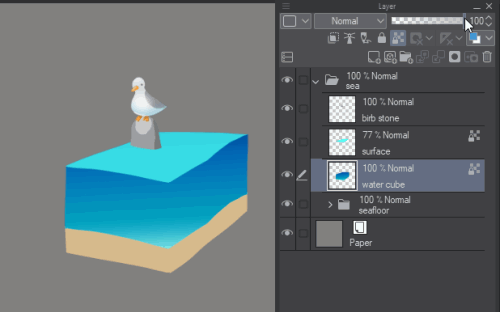
And use the layer mode to enchant the result.
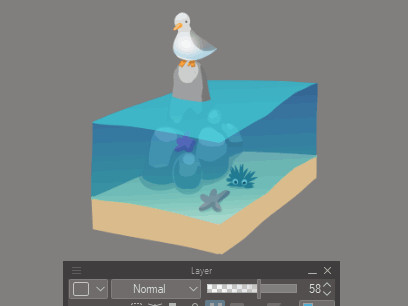
(choose any mode you’re happy with)
To make it look more like water, the important additional touches are the water surface reflections and its drop shadows.
This is the basic idea for how water transparency works, let’s apply it to the drawing!!
Making a water surface (or download it)
Note : I already registered this material to Clip Studio Assets, you can download it and it is ready to use
To create the pattern :
Create a new file and draw random waves with the Pen tool.
Draw additional curves where the waves intersect
(Note: try to make it into a simple shape structure)
Then crop it and make it into a seamless pattern tile
Check my previous tutorial for turning the drawing into seamless patterns :
(also water example in part 4)
Create 2 versions of the seamless pattern
The original one and the one with blue effects (duplicate the effects and apply blur filters)
The normal tile, and the blur tile for glowing effect (optional).
register the material to the material library for easy to use
Apply to artwork (non animated)[Clip Studio Paint Pro/EX]
Prepare the drawing.
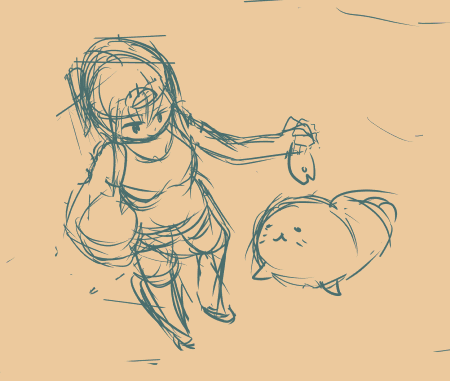
Create a new layer above the drawing and paint the water level in white
Make selection below water line with the lasso tool,select layer folder, then cut it with [Ctrl+X] and paste it with [Ctrl+V]
This will make split folder for part under water
Create new layer between 2 folders and fill with the Gradient tool
(select the gradient choice then drag it onto the canvas to fill, you can also customize your own gradient by clicking on the color dot above the gradient bar)
Adjust the opacity to create the transparent effect.
Drag the water surface material into layer panel (above the gradient layer)
Adjust the layer mode to Overlay to make it look more shiny
[Optional] Drag the blurred version of the pattern into layer panel and set the mode to Add(Glow) it will make a more glowing effect
(adjust the opacity of the layer material to make it softer)
Hold [Shift] and select both effect layers, then press [Ctrl+t] to transform edge
This method will allow both objectives to be adjusted together
Set the mode to Free Transform and move the corner of the pattern to the drawing’s perspective.
Enter to confirm the transformation, and you will get an easy shiny water surface!
To make the shadow effect, copy the blur layer (or water surface layer in case of you don’t make the blur effect) and drag it beneath the water gradient layer
Use the Object tool, and move it a bit down.
Then set the layer color effect in the layer property to darken the color
And then set layer mode to linear burn
There you will get an easy transparent effect
Begin to Animate!! The basic of wave animations
The movement of the wave relates to the ground perspective line
The basic wave will start small and reach a big wave at a point, the wave will be slower when it’s bigger.
Here is the reference animation along with the time.
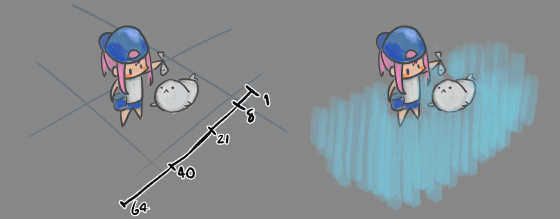
Prepare the file for the animation[Clip Studio Paint EX]
Create a new canvas for the animation, here I pick the animation template (1920*1080) with frame rate of 24 for smooth movements and playback time 100
You will get the default animation folder, it is not needed delete it
Copy the drawing and place it on the canvas
Also set the paper color to the same as the original one (sand color)
Because we’re going to add movements to the layer, use the perspective ruler to make a proxy of the movement.
To create the perspective ruler, hold click on the position where you want to place the line, then move it to align to the perspective, each 2 lines will be gathered at 1 perspective point.
If you’re not used to perspective, imagine the rectangle floor beneath the character, then gather a pair of lines to each perspective point

The perspective ruler will appear in purple when it is active.
(and green when inactive)[default setting]
Separate parts above and underwater[like in previous part], then add the gradient layer as we did in the previous non-animated image
>Animation step 1 : Create wave foam
Create 2 new layers and draw the foam lines horizontally on both layer
(I use the texture pen for the foam alike)
Note: you must disable snap to perspective ruler to draw freely from it
click on the perspective ruler Object tool, then disable the snap in tool property panel
Convert both layers to Image material layer.
Use the Object tool with the free transform mode to adjust the corners of the object a bit.
(this will activate the free transform mode in Layer keyframe animation)
On the timeline, enable the layer keyframe
Use the object tool to adjust the starting position of the wave on frame 1
Use the smooth interpolation keyframe to smoothly animate with exponential curves
(by default, it will move fast from first node and slower when it is near the last node which matches our need in the wave animation)
Resize it bigger on the last frame and adjust to the perspective line (zoom out to see the control border of object)
[Optional]
To create the fast moving at beginning and slower at the end like we design the wave
Create the middle frame where the wave reaches the middle of the image
And drag a diamond icon a bit front to shorten the time taken to the point
The first wave is done!
Repeat the step with another wave layer and make it lapse with each other.
This will make the movement of the wave foam
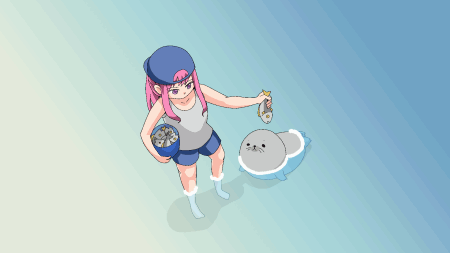
Note: adjust the layer opacity at points of the timeline to create fade-in and fade-out effect
>Animation step 2 : Create water surface
In this step we will use perspective line to help with the movements of the surface layer
Select the perspective ruler layer and use the object tool to adjust the ruler
then Toggle on the snap (in tool property panel)
Draw 2 rectangle on the ruler layers for guides of the water surface movement,
The starting point is small, and the end point is larger and spans out more, like how the water wave moves.
We need to draw the proxy for perspective movement because the object transform node is not going to snap with the perspective ruler
The next step, import the water surface material to the canvas and adjust it to the start point (use Object tool)
Enable Layer keyframe and add the keyframe to the first frame
This will apply to the adjustment on the first frame
Then select the last frame and adjust the materials to the end position
This will make the water surface move with the wave
then make the wave reverse a bit in the end, add keyframes to the position before the last keyframe
Then drag it to swap the position (move new frame to last frame)
Adjust the layer mode and opacity of water surface to have it done
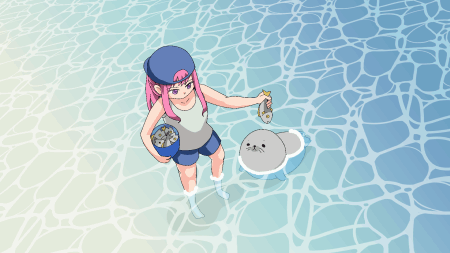
>Animation step 3 : Mask the wave to create separation movement
To make the movement looks more natural, separate the waves in two parts to make it move independently
In Clip Studio, we can easily create a mask for the layer and animate it separately from the object in the layer.
Here is concept of mask and layer animation

it will hide some parts of object so the wave is not overlapped when we move
Disable the layer keyframe of the water surface by clicking on the layer keyframe again
Make the selection on one side of the wave
Duplicate the water surface layer for the other part
Then create mask by right clicking on the layer and select Layer Mask > Mask Outside Selection
This will make the water surface behind the wave show only behind the wave
Make the inverse side of the mask to the other side of the mask too
Right click on the mask, then Select from Layer>Create selection
Then right lick at the layer we copied before and make mask of the selection
Now the 2 sides of water are separated
When you enable the keyframe again, you can also set the keyframe to the layer mask
Resize the mask to 300%
This will make it cover the entire canvas when the wave is fully down
(the blue area is the unshow area)
Right click on the mask and check the show mask layer to highlight the area that is not shown
Adjust the mask of both sides to match the position of the wave
(the keyframe will automatically be created when you adjust the mask)
[important!] make sure your tool is active on the mask when editing, so it does not affect the layer movement
The result (here you can adjust the opacity and movement of the water surface separately)

>Animation step 4 : Make it loop
By the settings of the timeline at first, the return wave was put behind the wave animation
Note: I named the sides so it is less confusing
If we hide the Top edge, at an early keyframe there will be a gap because the mask of the Bottom edge has not yet arrived at the point.
This image shows that both edges didn’t appear during the entire timeline, but will appears like this
The Top edge is not going to appear until the last frame,
And the Bottom edge is not going to appear in the first frame.
The only condition is making the first keyframe of the Top edge to be the same as the last scene of Bottom edge.
So, we are able to move the backward movement at the end of the bottom edge to the top edge.
Since the animation is the movement of the same image material, we can simply copy the diamond icon at the end of the Bottom edge by right click > copy
Then right click on the first node of the Top edge and paste
(each diamond icon on the timeline contains property information of the object, if we’re using the same dimension object, the property information will be pasted completely with no error )
Warning: the property of the mask can’t replace the property of transition, make sure you copy the correct layer node
Repeat the step with the final keyframe of the Bottom edge(place it at the end of Top edge timeline)
When finished, move the ending bar to the last keyframe of the Bottom edge
The animation will be appear in a smooth loop
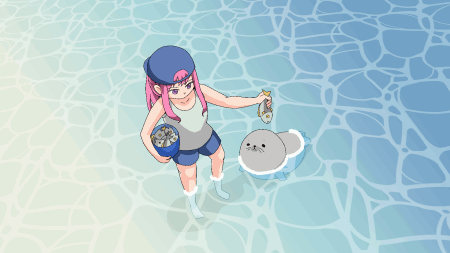
[Important] make sure you also make the opacity adjustments the same for the connect frames
Note : clean up the unwanted keyframes outside of the envelope blue bar. It will make it less confusing when it is needed to edit later
>Animation step 5 : add water surface glow and drop shadows
>> Surface glow
Bring the blur material to the canvas like how we did it with the non-animated version
Duplicate the layer below
Disable layer keyframes of the layer, then drag the mask icon to the layer of the blur material
Then remove the copied layer, you will get the same layer mask on blur material
On the canvas, move one corner a bit to toggle free transform mode in Layer keyframe
Select entire keyframe of the layer below by clicking on the top bar of the timeline
Then right click and select Copy, to copy the entire timeline
Then select on the blur material layer, set enable layer keyframe
and delete the timeline
Then select the first frame, and paste the timeline we copied before.
This will give you perfectly overlapped frames, set the layer mode to add (glow) and adjust opacity until satisfied with the result
Repeat the steps on other parts of the water surface.
>> Drop Shadow
copy 2 blur layers, and 1 wave layer, then place it under water gradient layer
We have to shift the layer down at each keyframe diamond icon to avoid the software from creating additional transformation diamond icons.
Select the diamond then use the object tool to shift the layer down into the canvas
Make sure you focus on the transform bar(top bar of layer timeline)
(so we shift down the first keyframe and the last keyframe of blur layers)
(and shift down 3 keyframes of wave layer)
Change layer mode of 3 layers to multiply and set layer color effect to darker color
Now the wave will also have transparent effects
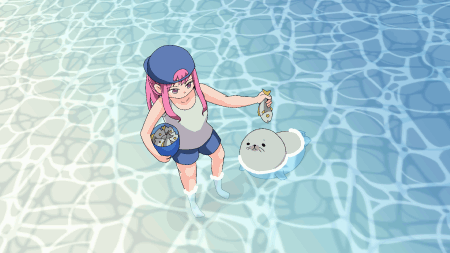
Note : for the drop shadow, make sure the first frame of blur layer is also at the same position and opacity as the last frame of bottom edge
Final touch
When the loop is done, now we can edit the frames such as :
>> Water contrast with characters :
Create animation folder and paint the white color on the character parts that contrast with the water
Repeat into loops
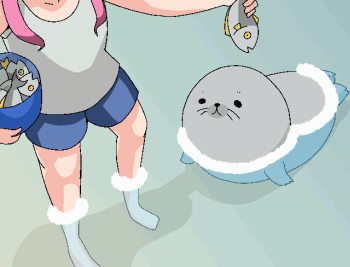
>> Water splash :
Create another animation folder with the droplet spray (in airbrush sub tools) apply on the water wave to create water splash .
And also additional foam on the seal when the wave reaches it
>> Character adjustment :
Adjust vector ink of the character with the object tool to match the background
check my previous tutorial for more detail about vector layer manipulation :
Add clipping mask layer above the character folder to add lighting effects
Set layer mode to add (grow) then paint with soft airbrush
Apply gradient effect to the top layer to make the image look smoother
The final result
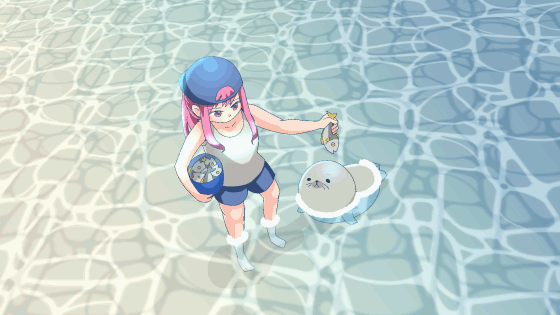
I hope this technique will help you get some idea about adding transparent sea animation to your job!!
Have fun animating!!


Comment