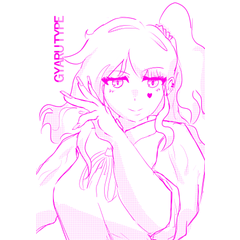
Turning anime cell coloring into watercolor.
Hello! This is Inma R. and I'm going to show you how to turn a simple and clean coloring style like anime cell into watercolor. Giving our illustrations a watercolor effect doesn't have to be complicated!
1) Getting started.
I create a new A5 canvas (14.8 x 21cm) at 350dpi and I work on my sketch. I use a red color because it will make it easier to ink the illustration later.
Once my sketch is done I create a vector layer for the lineart. I make it vector because of all the possibilities a vector layer offers (editing the brush shape and size, moving lines around, erasing options, etc.). I am using this pen to ink:
I change the blending mode of my lineart layer/folder to multiply and I set it as reference layer for convenience (it's the little icon of a lighthouse).
2) Base color.
The next step is to apply base color. I put each element into a different layer, and put each layer into a folder (control + G) so that when I start adding more layers I can keep everything organized. I make the sketch layer invisible instead of deleting it because I like to keep sketches for the future (you never know what you'd need it for!).
When an element has more than one color, I create a new layer on top of it and I click on the "clip at layer below" icon. This is the case for the ears, for example.
I do the same thing for other elements like the pattern on the scarf, the white part of the eye (it's in the skin folder), etc.
I will leave the background for the end. For now I focus on the character.
3) Shading (basic).
I will start by shading in a very easy and simple way. I create a new layer within each folder, I set its blending mode to multiply and I clip it at the layers below.
To shade each element I'm going to use maru/mapping pen. I create a new layer on top of all the other layers where I paint a little circle with the color I'm using to shade each part. This way I will be able to pick up colors again later if necessary.
I made the shadows dark so the watercolor effect I will apply later will be more noticeable.
Remember there is a different shadow layer for each layer folder! This will make it easier to work on effects without affecting other parts of the illustration.
4) Shading (watercolor).
Now that I have shaded the character, it's time to work on the watercolor effect. The first step is to lock the opacity of each shadow layer.
Next I will choose white as the main color (sub color doesn't matter) and I will use the opaque watercolor brush that comes with the software.
I will now lighten the shading using this brush and the white color. Because the layer is set to multiply, white works like an eraser without actually erasing anything on the layer.
This is what the layer actually looks like when I'm done:
[TIP] If we apply white leaving a little margin from the edges, it will create a a watercolor border effect.
The next step is to make the edges of the shadows less solid. First we need to unlock the opacity of the shadow layer, and then we will blur the edges using the blurring tool or a pen with huge antialiasing.
5) Applying cold/warm details.
When I work with warm colors (red in this case), I like to give the shading a little cold touch here and there (blue).
The first step is to create a selection from the shadow layer. We do this by right-clicking on the shadow layer -> selection from layer -> create selection.
Now I create a new layer on top of the shadow layer (I call it "cold" and leave its blending mode as normal) and I apply some cold touches using the airbrush with a blue color.
[TIP] Don't press the airbrush too hard so that it doesn't completely cover the colors underneath. If blue becomes too noticeable, you can always lower the opacity of the layer.
6) Lighting.
To apply lights to the hair I use this brush:
For light effects anywhere else I either use the airbrush or the same oversized pencil I used to blur the edges of the shadows.
I create a new layer on top of the "cold" layer and set its blending mode to screen. I will use a yellowish orange color to apply lights because it works best over red colors.
[TIP] Use the blurring tool to soften the bottom part, but leave the top part sharp.
To accent the lights a bit more, I create a new layer on top of the "light" layer and I set the blending mode to Add (Glow). Using the airbrush, I apply more lights to some parts.
Now that we know all the steps, we apply them through all the different element folders (eyes, scarf, skin, etc.).
7) Background and texture.
I made a simple background using this brush:
The background is on a layer under all previous layers, but when I want some parts to cover the character (like the stars) I do it on a layer on top of all the previous layers.
It is time to apply the watercolor texture. For this tutorial I’m using one from this pack:
[TIP1] If the texture you’re using is too small, you can either scale it up or use the tiling menu so it will repit over the screen.
[TIP2] So that the texture will not alter the colors we chose (unless that’s your intention), it’s important that it is gray. If you apply a color texture, you can turn it gray by going to Edit → Tonal correction → Hue/Saturation/Luminosity. Move the saturation bar all the way to the left and it will become gray.
Now we rasterize the texture layer (right-click on it → rasterize) and we do the following:
1. Set the blending mode to Overlay and lower the opacity to 20.
2. Duplicate the texture layer and set the blending mode of this second layer to Color Burn.
You will notice that some parts of the texture don’t look right, especially over the face.
We will fix this by using the blurring tool around those parts on both texture layers (that’s why we rasterized them, otherwise we cannot apply this step). You can blur any part where the texture bothers you, though I usually only do it on the face.
With this we’re done!
Feel free to check my YouTube channel for more tutorials and speedpaints:
Or follow me on my social media to check more of my art.


Comment