
I will explain how to draw a moonlit night using various colors.
I will introduce three patterns.
A. Paint the blue moonlit sky
First, I will explain how to draw a blue moonlit night.
First, paint the canvas with the bucket tool.
The canvas size is 800 × 800px72dpi.
You can set the size as you like.
Paint in a dark color with a little bluish shade instead of black.
Next, create a new layer and apply a gradient.
Use vivid light blue.
Gradient tool → [Transparent color from drawing color]
Set the tool properties to the state of the image.
(Shape: straight, do not repeat)
Check the angle increment and set the value to 90
This is convenient because you can easily create vertical and horizontal grades.
Drag from bottom to top to apply a gradient.
After applying the gradient, lower the opacity of the layer and blend the colors.
Create another new layer and apply gradation.
Make the drag distance shorter than in the previous Grade.
This completes the empty grading.
A. Draw the moon in the blue moonlight night
Next, draw the moon.
Create a new layer.
Select the ellipse from the sub tool shape.
Set the tool properties to the state of the image.
(Line / Paint: Create paint, check the vertical and horizontal directions)
Draw the shape of the moon in light blue.
Next, draw the moon pattern.
Create a new layer and multiply the layer mode.
Clip on the layer below.
Use a slightly dull light blue
Slightly lower the opacity of the "Shakumo Brush" and apply it.
Click here for the brush ↓
https://assets.clip-studio.com/ja-jp/detail?id=1696171
Draw a little more pattern.
In the same way, create a new layer → multiply and clip on the lower layer.
Draw a pattern to lower the opacity of the pen and slightly hit the dots.
Comparison.
(Cloud brush pattern only → Cloud brush pattern + round pen pattern) ↓
Then let the moon shine.
Duplicate the moon layer and set the layer mode to additive (flash).
Select Filter-> Blur-> Gaussian Blur.
Move the triangle to the right to blur.
I feel like the moon is shining.
The moon is now complete.
A. Blue moonlit night clouds & finish
Next, draw a cloud.
Create a new layer and multiply the layer mode.
Using purple grey
Draw clouds with the “Puki Cloud Wave Brush”.
I think it is good to draw in the middle.
I think that the lower cloud looks like it when drawn thinly.
Click here for the brush ↓
https://assets.clip-studio.com/ja-jp/detail?id=1696171
Finally, finish.
Select “plaster” from the material and drag and drop it on the canvas.
Set the layer mode to multiply and set the opacity to 7%.
Using textures will make your picture more interesting.
It was completed.
B. Yellow moonlit night
Next, I will explain how to draw the yellow moonlit night.
The blue moon layer
Duplicate layer → duplicate layer.
From here, the main task is to change the color.
Edit the undercoat color → Adjust color → Adjust hue / saturation / brightness.
The color is slightly more purple than the blue moonlight color.
I will put a grade.
The blue moonlit night was two grades of the same color,
Here are three different colors of Grade layers.
Grade 1: Dark purple
Grade 2: 60% added (light emission) orange with strong yellow color
Grade 3: Light yellow
Adjust the moon and pattern to yellowish color to complete the yellow moonlit night.
I think it became warmer than the blue moonlit night.
C. Red moon night
The last is the red moonlit night.
The procedure here is the same as for the yellow moonlit night.
Duplicate the blue moon layer and adjust the color with hue, saturation and brightness.
On the red moon night, the same red color was applied.
The wider grading range has reduced the opacity to 70% (gradation 1).
Adjust the colors of the moon, patterns and clouds to complete the red moonlit night.
I think it became an eerie and suspicious atmosphere.
Finally
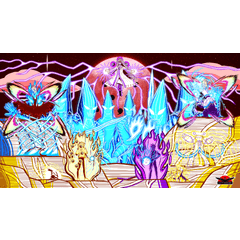
Comparison image & layer configuration.
You can see that the atmosphere changes drastically just by changing the color even with the same drawing style.
This concludes the course.
Thank you for reading this far!
Users who liked this post


Comment