
I will introduce the trick to complete one illustration in a short time.
This illustration took about 2.5 hours.
It's not particularly fast, but it usually takes 4 or 5 hours when I draw
I hope you can think of it as a little trick to get a little faster.
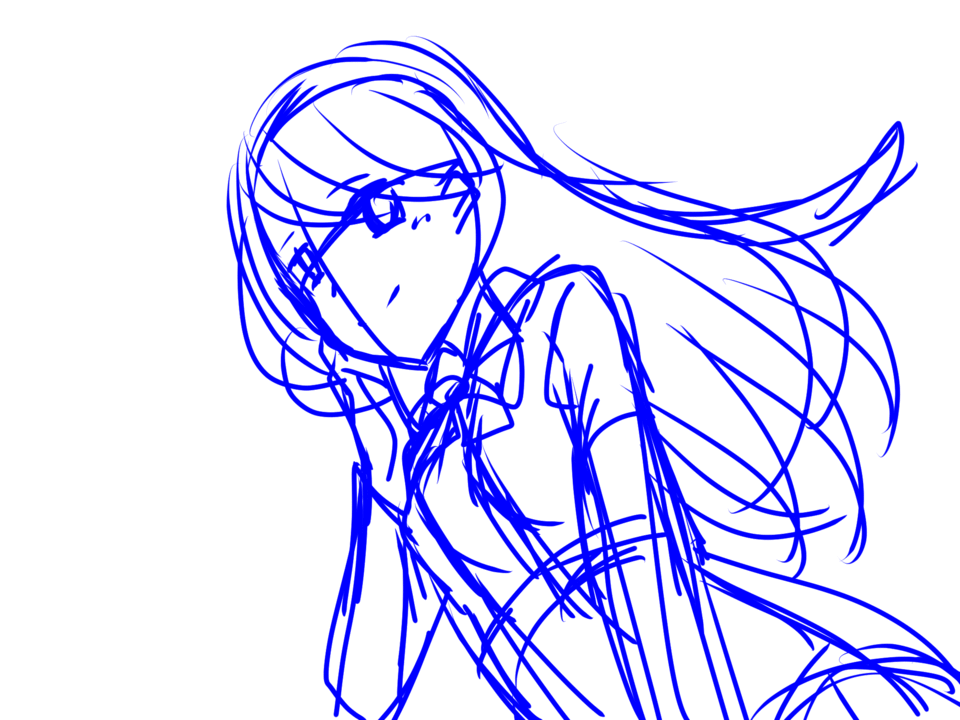
1. Draft (about 3 minutes)
First, draw a rough sketch.
I usually draw a small rough and then enlarge it, but this time I drew it larger.
The trick to make this faster
・ Draw what you are used to drawing
・ Use the original image
Is it around?
If you are unfamiliar with drawing, you have to look up each time when you draw, and it is easy to get confused and you will lose time.
When I have time, I draw a lot of rough and think which composition is good.
In the case of speed painting, I took the plunge and made the first composition that came to my mind
Let's quickly decide!
I think this will save you a lot of time.
2. Line drawing (about 1.5 hours)
Draw a line drawing with separate layers for each part.
It is convenient to use the auto action when naming the layer.
Eliminating a small amount of work will reduce the overall work time.
You may find it difficult to draw a line drawing while paying attention to the pen pressure.
In such a case, it is better to draw without paying attention to the strength of the line, and then erase the tip with an eraser to make it thinner. It is difficult to do two things at the same time: "draw a line at the place you want to draw" and "adjust the pen pressure to draw the line with different strengths", but I think it will be easier if you do it one by one I will.
3. Painting (about 1 hour)
I will apply the undercoat.
First, select the background area around the person.
After selecting all, reverse the selection → fill to undercoat.
I will apply clipping to that layer.
Paint using the three layers of "Clipping at the bottom layer", "Lock opacity of layer", and "Selection from layer".
I will draw the background.
You can save time by downloading your favorite brush and using it.
Combine copies of display layers → Gaussian blur → Increase color saturation by tone correction and decrease brightness → Set layer mode to screen. I think it was a little brighter.
Combine copies of display layers → Blur with Gaussian blur.
Erase from face to chest with layer mask.
I think the eyes were concentrated on the faces of people because the surroundings were blurred.
The petals are scattered.
After drawing the petals with the cherry blossom petal brush, blur it with Gaussian blur.
I think that the petals will feel more realistic if they are drawn small toward the upper left.
I think that the screen became gorgeous by scattering the petals.
Create a new tonal correction layer.
I adjusted the tone curve blue a little.
I think the screen is yellowish and warm.
I just briefly explained the points.
The video version explains in more detail, so please check it out if you like.
I am also active at pixiv.
Thank you so much for reading this far! !!
Users who liked this post


Comment