

Hello! welcome to this tutorial in which i will show you the love
Hello! Welcome to this tutorial where I'll be showing you my workflow for integrating weather into your illustrations.
I will approach it from the point of view of the drawing technique and also from the storytelling, and talk a little about the weather as a tool to help us tell a story.
Video tutorial
I. THE SUNNY WEATHER ✿
Its main characteristics are:
✿ Blue sky.
✿ White clouds.
✿ sun in all its splendor.
Color:
✿ Saturated colors
✿ Colors lean towards warm colors.
✿ STORYTELLING ✿
At the level of storytelling, I would put this type of weather in drawings where the character is happy, joyful, in my perception it can communicate innocence, I also feel that a clear and sunny sky can be a symbolism of the mind of a character, of how his mind she is calm and lucid.
✿ Time to draw ✿
After having your idea for the illustration and the sketch we start with the sky:
The first thing is to make a gradient between blues, the lightest blue goes in the part of the sky that is closest to the earth, then we add a simple sun, making a white circle.
We continue with the clouds, remember to make them white and draw them at a safe distance from the sun, also remember that we can use the clouds as a tool to direct the viewer's eye in this way:
We continue with the background and character details, keeping the colors warm and saturated.
Let's not forget that to add depth the furthest elements within the drawing comply with the following:
✿ Have smaller scale.
✿ Less detail
✿ Atmospheric perspective.
SUN! to create the last details with the sun:
1- We put a soft Gaussian blur on it.
2- With the spray brush we make a glow, which we will put a blending mode on and lower the opacity.
3- as a final touch you can put glitter on them!
Here are some of the brushes I usually use:
And voila! the drawing would be finished with sunny weather!
II. CLOUDY WEATHER ✿
Its main characteristics are:
✿ There is no sun (don't tell me).
✿ Gray clouds.
✿ Dark mood.
Color:
✿ Desaturated colors.
✿ Colors that lean to cold.
✿ STORYTELLING ✿
If a sunny weather can mean that a character has a clear mind, a cloudy weather is the opposite, this type of weather in terms of storytelling can talk about a character who has doubts, his mind is full of heavy thoughts, we can also express that the character in question is discouraged, feels without energy, perhaps he is going through a bad time and feels dejected.
Let's keep in mind to draw this type of weather that what we are seeing in the sky is the darkest part of the clouds, which is the bottom part, in this type of weather the clouds are dark and gray, I usually use shades of grays leaning towards blues.
Let's remember not to go overboard with dark tones, it will depend on each drawing but personally I do not recommend using such dark tones and much less black for the clouds, also keep in mind that the clouds are usually very close together and tend to overlap each other.
✿ Time to draw ✿
To make a cloudy sky I start by creating a gradient of shades of gray with a brush that has a soft-edged texture.
Here are some cloud brushes that I find very good:
We can leave the cloudy sky just like that, but if we want to give it more details we follow these steps:
1-We are going to draw the silhouette of the clouds, but only the bottom part. To make this part of the drawing easier for us, we can draw irregular shapes with rounded edges.
2-now with a brush of our preference we fill these guide figures and little by little we begin to give detail to the clouds, for this part I like to use the spray tool to better define the shape of the clouds either by erasing parts or adding more volume.
Ten finds to give clouds depth than clouds when they are closer:
✿ They are darker.
✿ They have more scale.
✿ The edges (edges) are more diffuse and smooth.
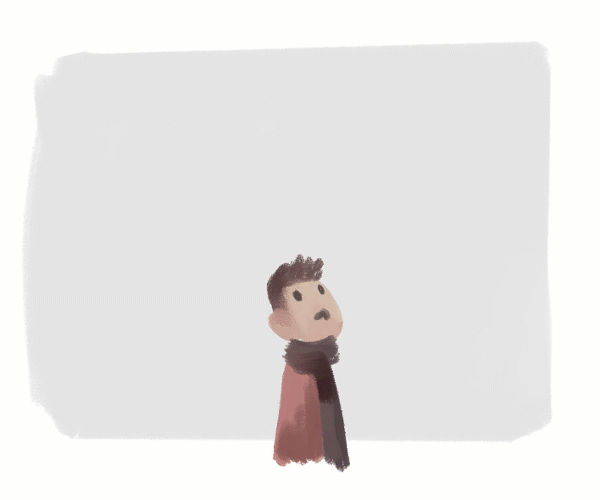
And ready!
In the video tutorial you can see the speedpaint process of this drawing:
III. RAIN ✿
Its main characteristics are:
✿ Gray clouds.
✿ Water drops.
Color:
✿ Desaturated colors.
✿ Colors that lean to cold
✿ STORYTELLING ✿
For the most obvious storytelling interpretation of rain, it is the action of crying, the drops of water being a metaphor for the tears shed (or not) of a character, it is also associated with sadness, melancholy and loneliness.
but this is not always tied to meanings of sorrow or affliction since, depending on the composition and colors that we use, it can represent calm and cleanliness.
✿ TYPES OF DROPS ✿
The rain usually has a defined direction, so the drops have to follow it, this does not mean that it has to be so exact, the drops can vary their direction in a subtle way to make it look more organic.
We can draw the drops by hand, one by one, and then duplicate them, or we can use brushes, personally I find it the most practical option. Here are some brushes I usually use:
To add depth to the rain when drawing, we can make the drops further away have a lower opacity and size than the drops that are closer, we can even blur some drops to highlight the ones that are closer.
making a mix of different raindrops will make our drawing look more interesting.
✿ CONTRAST ✿
Remember that to draw rain and to really appreciate the drops we must create contrast between the background and the drops, I usually resort to color or focus contrast.
When drawing rain we will not only be drawing the drops as such but also the interaction they will have with the rest of the elements within the drawing. The interactions I always draw are:
1- droplets hitting surfaces as well as producing a reaction.
2- accumulated drops on the surfaces and accumulated water accumulating on the surfaces.
Some examples of how the drawings look with rainy weather applying all of the above, remember that you can see the process of both in the video tutorial.
IV. SNOW ✿
In snowy weather as well as in rain we need to create contrast with the background so that we can appreciate the presence of snowflakes.
✿ STORYTELLING ✿
As for storytelling, snow can be very flexible: snow, being white, can represent purity, innocence, peace, and we also have the direct association of snow and Christmas, but on the other hand, we can go on the cold side and use the snow as symbolism of loneliness or sadness.
The great thing about this type of weather is that we can draw a sunny day with snow in which the colors can be more saturated and therefore cheerful, the drawing will give a more optimistic and positive vibe while on the other hand, the same cloudy drawing, with desaturated and muted colors giving space to other types of symbolism.
✿ TYPES OF SNOWFLAKES ✿
The types of flakes that I integrate in my drawing are:
1- round flakes, which convey a calmer and more tranquil environment.
2-Elongated flakes, I usually make them blurry, and they give this sensation of speed, chaos and disorder.
You can draw the flakes manually or use brushes, personally I prefer brushes for practical reasons, here are some that I really like:
The types of flakes and their direction can greatly change the perception we have of a drawing, we can take this into account when drawing and thus continue enriching the message that we want to convey with the drawing.
To give depth to the snowflakes we do exactly the same as with the rain, we place snowflakes in a smaller scale as well as less opacity in the background, we apply a Gaussian blur and they will be ready.
When drawing snow we have to find the interaction of the snow with the environment and the characters, since the snow accumulates. In the case of the characters, snow generally accumulates on their hair and clothing.
In the rest of the elements found in the drawing such as plants, houses, objects, etc.
we have to draw the interaction with the snow in a different way, since being static elements the snow will accumulate in a different way. Remember that to give everything a more organic touch, you can make certain elements are completely covered by snow while others may be protruding from it, as in this case the grass.
Not only must we take care that snow accumulates on the elements within the drawing, but also if the flakes are falling in a specific direction the snow accumulation must be congruent to that direction.
Let's not forget that when we make floors completely covered with snow, it is to place the footprints left by the characters, sleds, cars, etc., everything that interacts and has movement within the drawing leaves footprints in the snow.
To have a more complete experience of the tutorial, give it a look at the video tutorial, it is more complete in terms of information and you will be able to see how the drawings are made <3
V. THE END
Thanks for coming this far, I hope the tutorial has been helpful, don't forget to practice a lot~
See you in the next tutorial!
Users who liked this post




Comment