
Let's draw various decorations with the X-mas brush.
It takes a lot of time and effort to draw colorful Christmas decorations one by one. However, if you use Clip Studio, you can draw very easily and quickly.
There are various and wonderful Christmas materials, but today I will draw using a brush set I made myself. Before starting TIPS, we recommend downloading the 'X-mas brush set' material below from the Asset Store. In addition, another material used in TIPS is additionally introduced.
+(Modified on 12.26) The recommended material has been deleted, and it is currently not available for download. We introduce other similar materials. Please refer to the 3rd URL.
Watch as a TIPS video
Browse through TIPS posts
1. Brush introduction and pre-preparation
The 'X-mas brush set' material consists of a total of 16 brushes. Each brush is drawn with materials that are easy to combine, so you can design decorations easily.
Open [Window]-[Material] on the top bar and click the 'Downloads' folder to check the downloaded materials. Drag the 'X-mas brush set' downloaded above to the [Sub tool] and install it.
Each brush is set to draw in the direction of the stroke. Let's use it directly to understand it easily.
2. Draw the basic shape of the Christmas tree
Let's make the basic shape of the tree for the Christmas tree. Select the 'tree' brush to draw the top of the tree. And I add a new layer below this layer and draw in the downward direction. Repeat drawing 4-5 times by adding a new layer below.
Add a new layer at the bottom to draw additional leaves in the empty space. It suffices to draw without worrying about the direction and size.
However, do not fill in all the blank spaces! It's a good idea to leave a little blank space.
Let's add a shadow to give it a three-dimensional effect. Add a new layer above the layer you want to shadow. Check 'Clip to layer below' and set the blending mode to 'Multiply'. Then, with the airbrush, I paint the inside of the wood with a dark color.
3. Decorate the Christmas Tree
Add a new layer on top. Decorate the tree with different decorative brushes. You can tie a ribbon to the bell, or put a hat on the star. Decorate it beautifully and make your own tree!
Let's draw a light bulb using a brush. Decrease the 'ball(D)' brush size small. Draw the light bulb by adding a new layer below the decoration layer so that the decoration is not obscured. And duplicate the layer. Set [Filter]-[Blur]-[Gaussian blur] to about 7px.
Check 'Lock Transparent Pixels'. Choose a color between gray and light orange. Click [Edit]-[Fill] on the top bar to fill the layer with the blur effect applied. Set the blending mode to 'Screen' to make it glow. If there is not enough light, duplicate the layer once more.

The tree is complete! Draw a stand or a gift box according to your preference.
4. Applying the Christmas Brush
Let's draw various Christmas decorations in the same way as the tree. You can design Christmas wreaths, ceiling decorations and more.
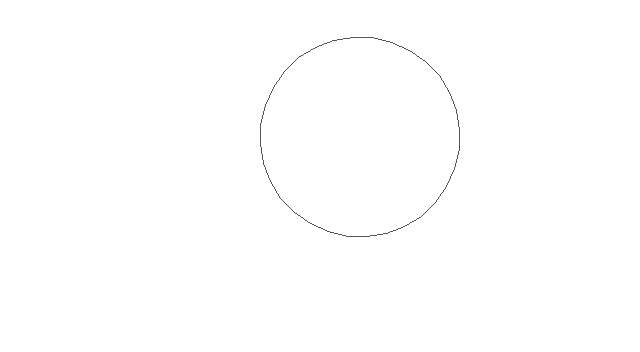
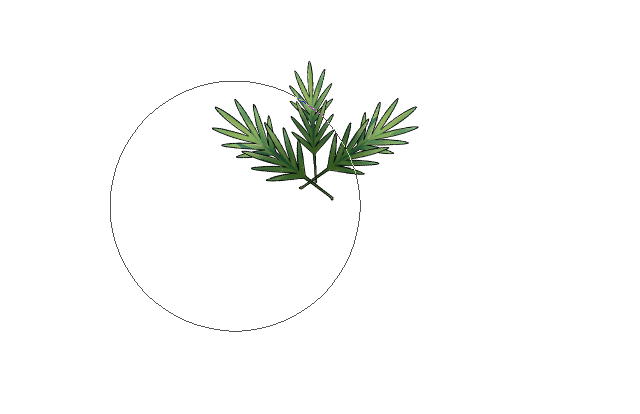
Draw a circle with the 'tree' brush to create the Christmas wreath. For a round shape, add leaves to trim the missing parts.
You can combine decorative brushes to create richer objects. Let's put the finished decorations on the wreath one by one.
<3. Decorate the Christmas tree> Add the light bulbs and shadows in the same way as the table of contents. Feel free to draw in other shapes as well!
5. Designing a Christmas Card - Background
Now let's design a Christmas card. Creates a new canvas. I will make it based on the postcard work size of 104*154 (mm). Please feel free to create it according to the size of the card you want to make.
Paste the pre-drawn Christmas decorations on the new canvas. You can also draw a new one. Create a new layer below the Christmas decorations layer. And paint the background in the color you want.
Create a new layer above the layer with the background color. Set the drawing color to sky blue. Click [Edit]-[Fill] on the top bar to fill the entire screen. Then click the 'Tone' icon in the layer properties to create a point. I set the tone lines to 8.0. A pattern of black dots on a white background would be great. Rasterize the layer by right-clicking on it.
Set the blending mode of the rasterized pattern layer to 'Color Burn'. Lower the opacity to a level where the dots are slightly visible.
Create a new layer on top of the pattern layer. Now let's create a border for the card. Select the rectangle inside the card using the 'Selection' tool. Click [Selection range]-[Invert selection] on the top bar. Set the drawing color to white and execute [Edit]-[Fill]. Is the white border finished?
Let's draw another thin border this time. Select the 'Shape' tool. Select 'Rectangle' and set the brush size to 6px. When everything is set, drag to draw a box.
This time, let's paint the inside of the Christmas wreath. Create a new layer under the wreath and brush it with a bright color. Paint with a basic brush such as a 'spoon pen'. When you have finished painting, copy the dot pattern layer from the background layer and paste it over the layer you just painted. And adjust the opacity.
6. Designing a Christmas Card - Text
Now, let's write a font on the card.
Go to dafont.com to download fonts suitable for Christmas cards. Write your text in 'Preview' and click 'more options'. Check '100% free' and click 'Submit' button. '100% free' shows fonts that are not a problem even for commercial use. So be sure to check it out!
When you find the font you want, download and install it. After installation, you may need to restart Clip Studio to activate the fonts.
(Modified 12.23) Update Clip Studio to the latest version. You do not need to install a separate font or restart Clip Studio, you can directly add the font file as shown below and apply it right away!
Use the 'Text' tool to enter text in the center of the wreath. You can change the color of the text by dragging the written phrase.
Create a new layer above the text layer and check 'Clip to layer below'. And set the blending mode to 'multiply'. Draw a shadow under the text with a dark color using the default brush.
Next, select both the text layer and the shadow layer and 'rasterize' them.
Let's add a border to the text. Select the rasterized text layer. Select the border from [Layer Properties] - [Border Effect]. Set the border thickness to 3-5px and the border color to white.
Let's add a shadow for the entire text. Duplicate the text layer. Then, uncheck the border of [Layer Property] - [Border Effect] to remove the white border. Select a dark color for the drawing color, and then run [Edit] - [Fill]. If the text has changed to dark, drag it down so that the order of the layers is down. Use the 'Move' tool to move it a little to the lower right so that the shadows are visible.
Adjust the opacity and the text is complete!
7. Designing a Christmas Card - Done
Select the 'vine' brush from the 'X-mas brush set' to decorate the empty space of the card. Open [Window] - [Material] and check the 'Golden Brown' material downloaded above. Drag the image with the finest grain out of the six images onto the screen.
Adjust the size of the material to fit the card with Ctrl+T. And if you check 'Clip to layer below', the material will be composited. To make the color brighter, I create a new layer and fill the entire card with a very light orange color. Check 'Clip to layer below' and set the compositing mode to 'Screen'. Adjust the opacity to get the desired gold color.
It modifies the position and design as a whole. I added Christmas decorations at the bottom. I moved the gold line upwards for overall balance.
Now, you have a wonderful Christmas card.
I hope you like it too!
finish
It's a pity that the explanation is long, and there seem to be some omitted techniques,
We hope these TIPS have been of sufficient help to you.
How was your 2021?
Actually, Christmas is not a very meaningful anniversary for me. However, it was nice to be able to use Clip Studio to make cards, create materials, and try designs this time. In particular, it was very fun because it felt like decorating a real Christmas tree. (lol)
We also recommend that you make Christmas cards for your loved ones or yourself ♥
SNS
Users who liked this post


Comment