
Hello everyone, welcome to my tutorial!!
Adding animation to the light and background is one of the quick way to present your art as an animated illustration.
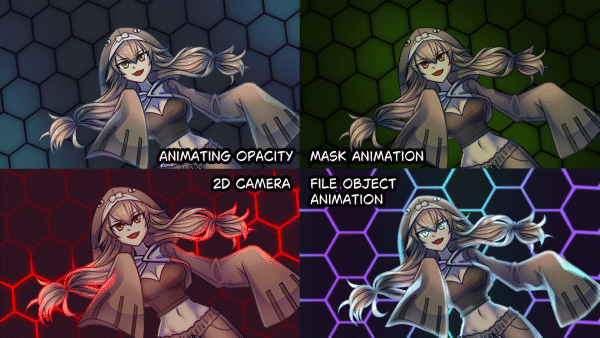
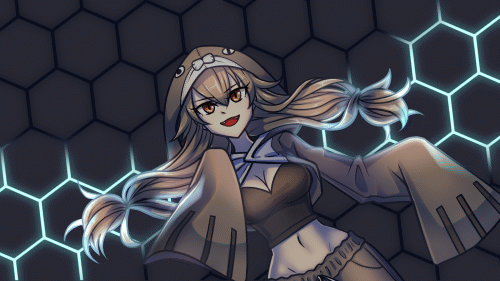
In this tutorial, I will show you 4 animation techniques from Clip Studio’s features that you can use to create an animated illustration by the movement of the light, the camera view and the background.
Video tutorial
The video version if you want to see all the process in action >w<
Preparing the file
Let’s start by preparing the file.
For the animated illustration, I’d recommended working on a new canvas so you will not get confused with the layers
Create a new file.
On the Project : [illustration] , you have an option to create an animated illustration.
You can set the cels and frame rate,
Higher frame rate is more smooth, but it will make the playback time shorter
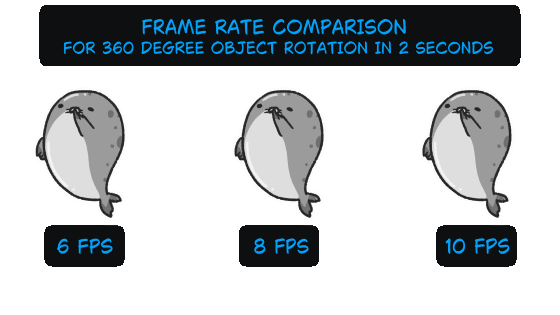
(This option is very useful for the Clip Studio Paint Pro version that has 24 cels limitation for animation)
When you create the file, you’ve got an animation folder, and the timeline from your setting.
you can open the timeline panel by [Window>timeline]
Note : If you use the older version of Clip Studio that doesn’t have this option,
you can create it by clicking on the [New timeline] icon on the timeline panel, and set the playback time (cels) and frame rate manually
Delete the animation folder (We’re not using it here)
Then import the file(.csp format) to the canvas
go to [File > Import > Create file object]
The imported object is not transparent.
Delete the paper layer on the original file
Save the file..
The file object will be automatically updated.
Now you can move the art without touching its original file,
and you’re ready for the animation!
Note : If the file is not automatically updated when saved,
Update it manually by the menu on the [Tool property] panel of the [Object] tool
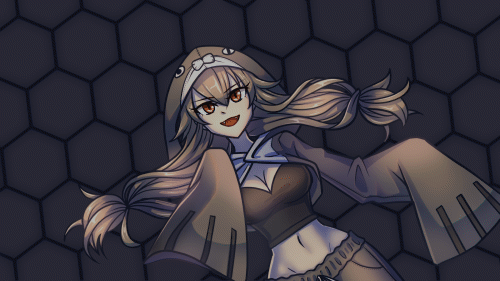
Technique # 1 : Animating opacity
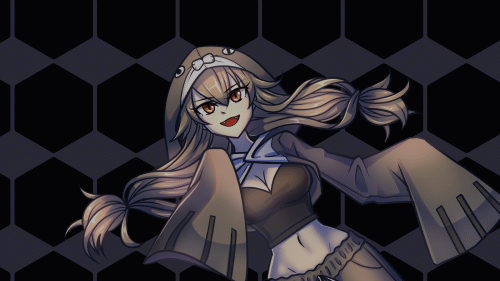
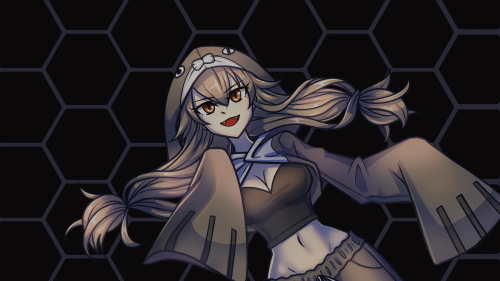
Let’s create some cool hexagon background with light animation
I downloaded a hexagon material from Clip studio Asset
The downloaded asset is in the folder [Download] in the [Materials] panel,
Drag the material to the layer panel, under the character object layer
Make selection from the object layer
[Right click > Selection from layer > Create selection]
Create a new raster layer
If the line is too thick, you can shrink the selection before filling the color
The shrink selection will left some gap on the edge of the canvas,
Adjust the size to fill the canvas area [Edit > Transform > Scale/Rotate] (or [Ctrl+T])
Copy the layer and apply the blur filter,
go to [Filter > Blur > Gaussian blur]
This will create some depth to the hexagon tiles
Put both layers in a folder,
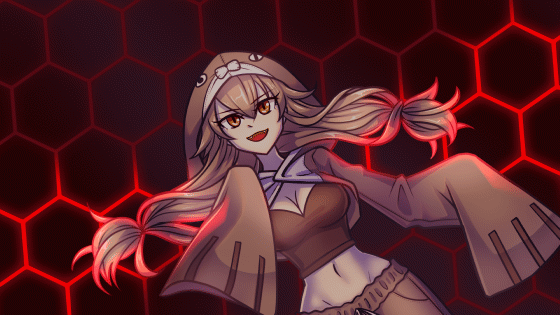
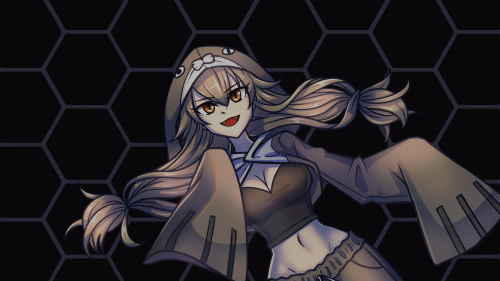
This is the light-off version of the background
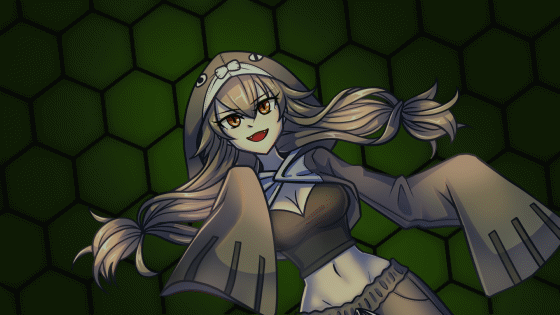
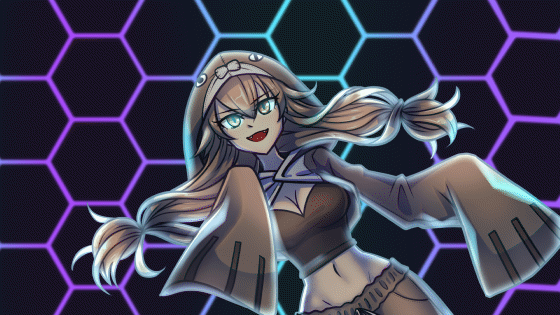
Next, create the light-on version of the background,
Copy the background folder
Lock the transparent on both layers and fill with the light color
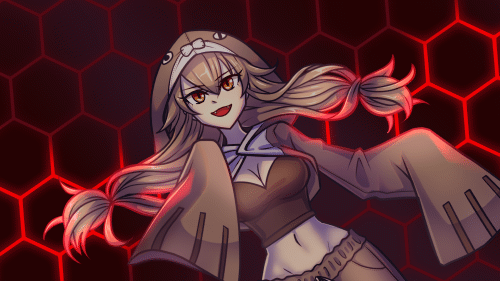
Now, we have 2 versions of the background : light-on and light-off
On the [Timeline] panel,
Select the light-on folder, and click on [Enable the layer keyframe] icon,
Expand the layer option on the timeline panel [+]
You will see the timeline for the opacity.
Pick the position for the start frame on the opacity timeline
Then adjust the opacity to 0
The keyframe will automatically appear on the timeline
Set the end frame, click on the [New keyframe] icon
This will create a new keyframe with the same setting as the start frame
Select the position between the 2 keyframes,
Adjust the layer opacity up to 100,
the keyframe is automatically created!
Preview the animation by click on the play button
Now you get the very easy illuminated background effect
You can adjust the speed of the animation by adjusting the position of the keyframe
Now it’s slower

Let’s also add the light reflection on the character too!
Make selection on the character object layer, and create a new raster layer
Then go to [Edit > Outline selection] and give some thickness to the line
Deselect and blur the edge .
This will simply add the highlight on character’s edge,
Edit some detail manually if you want
Set the layer mode to [Add(glow)]
and clip it to the character object
Reduce brightness to the character with a layer filled with the background color
in [Multiply] mode and clipped on the character object
Set the keyframe on the light and shadow on the character object for the more realistic result!!
Note :
When enable the [Layer keyframe], you cannot paint on the layer
but you can toggle it on-off to edit the layer,
the keyframes will stay the same
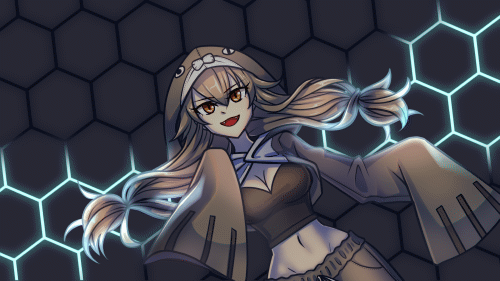
Technique # 2 : Mask animation
Instead of just illuminate,
let’s add the movement to the light with the layer mask animation!
Make the selection for the light strip with the [Selection] tool : [Polyline]
On the light-on background folder [right click > Layer mask > Mask outside selection]
The mask thumbnail will appear on the layer folder
Click on the mask thumbnail and apply the blur filter
When you enable the layer keyframe,
you will see the timeline of the layer mask too
Add a new keyframe for the start frame..
and move the mask to the left with the [Object] tool
On the end frame, move the mask to the right
The moving light effect is done!! Super easy!!
Let’s apply the mask animation for the character object too!!
Instead of repeating the whole step, copy the folder with the mask
Delete all the layers inside
Disable the layer keyframe
Move the folder to above the character,
Then move the highlight layer to the folder
You will see that the layer mode is not work,
you have to set it on the folder instead.
(And also clip the folder to the character object too )
When you enable the layer keyframe again,
the highlight will move together with the background!!

You can edit the mask area to make the highlight shows on the larger area.
Disable the layer keyframe first.
Click on the layer mask thumbnail, and paint around the edge with the [Soft airbrush]
Enable the layer keyframe again,
Now it looks better!!

I edit the color tone to green and paint darker color on the edge as the final touch,
here is the result
Rotation movement
You can also apply the rotation movement to the mask
At the start frame, resize the mask so it covers the area when you rotate
On the end frame, in the [Tool property] panel, set the [rotation angle] to 360
The rotation speed is not steady and seamless..
This happened because of the keyframe is in the [Smooth Interpolation] mode
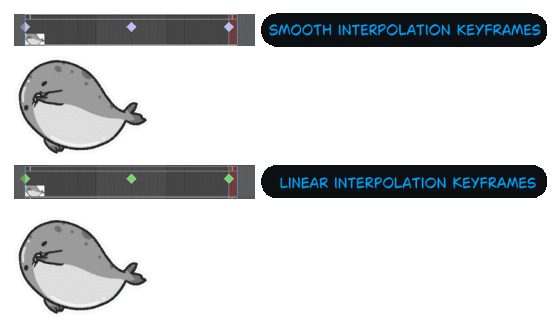
If you want to make the steady move speed
you must change the keyframe to [Linear interpolation] mode,
Set the keyframe mode at the [Add Keyframe] dropdown icon
Select the keyframe and click on the [Add Keyframe] icon to change the keyframe mode
Drag the end keyframe to the edge,
this will make the mask rotate in with the seamless loop
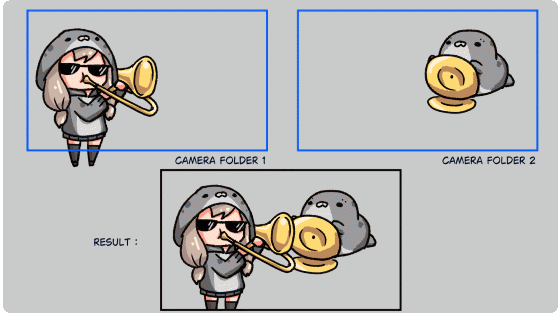
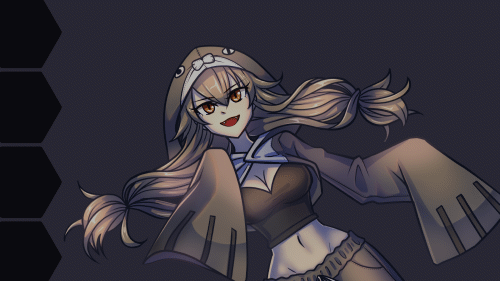
Technique # 3 : 2D camera
The 2D camera folder simply create the camera view for object groups on the canvas.
You can have multiple camera folders to display different camera view for object groups on the same canvas.
You can animate the 2D camera folder to create camera movement for the objects inside the folder
Create a new 2D camera folder,
Go to [Animation > New animation layer > 2D Camera folder]
You will see the blue edge(default color) on the canvas
Put all the background folders in the 2D camera folder
Then, adjust the camera view (the blue border) with the [Object] tool
Be careful for the timeline position when you adjust the camera view,
It will automatically create the keyframe on camera folder timeline
Setup the movement keyframe to the camera folder in seemless loop
You can preview the camera by the option [Show camera’s field of view]
on the [Tool property] panel
I put the character objects in another 2D camera folder
This easily create some depth from character to the background!!
Technique # 4: File Object Animation
Let’s create more complicate animation : the syncronized background
You can make it by using only 1 file object!!
Create a new file.
Keep the animated illustration setting the same as your animation file,
and delete the animation folder
Create a new layer and draw a hexagon by the [Figure] subtool : [Polygon]
Crop the file by leaving some gap around the hexagon shape,
Create selection on the hexagon and expand the selection area
Delete the paper layer and save the file
Import the hexagon file as a file object to the animation canvas
Select the file object with the [Object] tool,
In the tool property panel, enable the [Tiling] option
The tile is a bit weird, but we will fix it later
Back to the hexagon file,
Enable the layer keyframe and create shink animation in short loop
When you save the file, the animation will also show on the main file.
The problem for hexagon tile is :
you can’t simply create it with the tiling options
Instead of repeat it on both direction,
Rotate the object by 90 degree and enable the tiring direction on one side
Copy the file object and place it on next to each other manually
Repeat the step until the area is filled,
And arrange the object layers by its order
The tiles shrink all together now
Let’s make the syncronized movement!!
On the timeline, click and drag on small bar above the clip bar to shift it backward
By moving the clip, the animation is played on the different time
but the tile strips are disappear from the timeline,
To fix this , right click on the last frame, and [Split Clip]
Move the clip to the front
Then expand the clip by draging on the small square on the corner of the clip
The background is now syncronized!
I add a bit rotation movement to the hexagon file, the result is cool too!!
With these features, you can create wonderful effect to your animated illustration in very short time!!
I hope my tutorial give you some idea on using these feature on your animated illustration project, Enjoy animating and see you in the next tutorial
Users who liked this post


Comment