
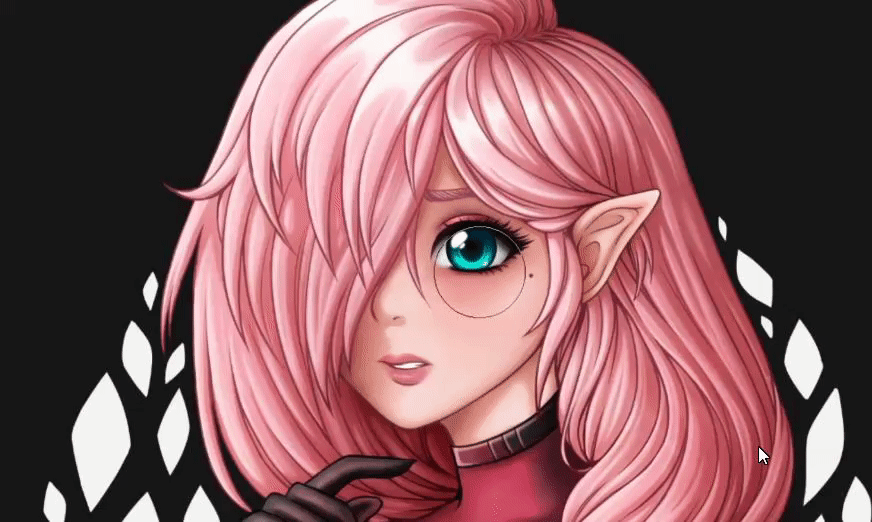
Introduction
Hello everybody and welcome to our first tutorial of 2022!
I’m professor Crimsy and in today’s class I will teach you how to use the new liquify tool in Clip Studio Paint. This tool has been an awaited feature for a while so I’m very excited to show you what it is, how it works and also present you 10 scenarios where you can use it.
So without further ado, let’s begin the ritual! :)
PS: to get the full package, I highly recommend watching the video right below! It will give you a better context and understanding of the information presented in the texts below it.
What is the liquify tool ?
The liquify tool is a brand new sub tool that arrived in Clip Studio Paint Ver 1.11.6, which you can find in the Blend tools menu next to the blend brushes.
Essentially, this tool is very powerful because it allows you to quickly modify the position, size and orientation of entire areas of pixels in your art by simply dragging your pen around your image.
Liquify tool overview
As you can see, the liquify tool only has a few parameters to play with, notably the brush size the strength and the hardness of the liquify effect and the ‘’only refer to editing area’’ box (which we will all go over soon), but the most important parameter here is the mode we have selected for our brush.
There are 7 different modes we can choose from:
1. Push
2. Expand
3. Pinch
4. Push Right
5. Push Left
6. Twirl clockwise
7. Twirl anti-clockwise
These modes all produce very different results, so let’s go over each of them individually to see what they do!
TIP: it's important to mention that the liquify tool can only be used on a single layer, masked layer or limited selection at once, not on an entire folder, so before using this tool keep in mind to backup your folders and flatten your layers in a single image layer.
Strength, hardness & Only refer to editing area settings
First, let’s quickly go over the other couple of settings you can play with to adjust the effect of each liquify mode. Note that every mode is affected the same way by these settings so I will only use the push mode for this demonstration.
STRENGTH
First, we have the strength slider which increases or reduces the intensity of the liquify effect you’re using. The lower the amount and the more soft and subtle the effect will be and the higher you go and the stronger the effect becomes, to the point of creating heavy deformation.
HARDNESS
Next up we have the hardness setting, which determines the sharpness of the deformation in your brush strokes. For example, a low amount of hardness with make the effect look smooth and organic, like so, but the higher you get and the sharper and rounder the effect will become.
ONLY REFER TO EDITING AREA
And lastly we have the ‘’Only refer to editing area’’ box. This option is mostly for isolating areas of your art and modifying them without the outside influence of neighboring pixels. For example, if you check the box and select something, the transformation happening inside will not consider the presence of any pixel outside of the selection, but if you leave the box unchecked, it will keep their influence into consideration when applying the liquify effect.
The Push mode
First, we have the push mode. This mode is probably the one you will find yourself using the most as it allows you to move areas of pixels smoothly towards the direction of your brush stroke.
TIP: Note that pushing things around will not make lines or colors blend together, all it does is deform, stretch or compress pixels towards each other, but it will apply some sort of smoothing effect to the area you went over once you’re done with your brush stroke. This applies to all the other modes as well.
The Expand mode
So next, we have the expand mode. This one applies a magnifying glass effect to your art and works by making pixels gradually expand outwards from the center of the brush as you keep applying more pressure or add more brush strokes in your canvas. This last bit of information is important to underline because unlike the push mode, the expand mode works from the moment you put pressure on your pen and up until that pressure is lifted, meaning the speed of your brush strokes will affect the result of the liquify effect, including if you keep your brush on the same spot and keep applying pressure.
Though you should know that if you keep pressing down too long, you will end up with a trippy looking effect.


The Pinch mode
Following this, we have the pinch mode which is essentially the opposite of the expand mode. This mode allows you to reduce the size of an area by moving the pixels inwards, towards the center of your brush. Again, you may use it by just holding down the pressure or use brush strokes to get different results, but all in all, it works the same as the expand mode, except it shrinks things down instead.
TIP: now is a good time to mention that by pressing alt on your keyboard, you can summon the expand mode while in the pinch mode. All modes that have an opposite function work with this shortcut so it’s a good thing to keep in mind to save a little bit of time.

The Push left and Push right modes
Next up, we have the Push Left and Push Right modes. I combined these two modes together because they’re pretty much twin features and basically what they do is slide vertical strips of pixels to either the left or the right, as opposed to dragging them like the push mode does. These two modes only work when doing vertical brush strokes.
Another interesting detail is that if your brush goes from top to bottom, the pixels will slide on the chosen side of the mode you selected, but if you do a bottom to top motion, it will slide it in the opposite direction. So you pretty much have both modes into one, but I suppose they gave us both options because not everyone is comfortable with the motion down and up as opposed up and down, but it’s just a guess.
The Twirl clockwise and Twirl anti-clockwise modes
Lastly, we have the twirl clockwise and twirl anti-clockwise modes. Again, these two modes can be explained as one because do pretty much the same thing. What these modes do is create a rotation effect within the area of your brush which move the pixels in a circular motion in the left or the right direction. This mode also works like the expand and pinch mode, so the effect takes place the moment you hold down the brush and if you keep applying pressure in one spot you will get the same glitch effect.
10 scenarios where you can use the Liquify tool!
Alright, that pretty much covers it for the liquify tool and all its features, but if you are still wondering exactly when or for what you should be using this tool, then I really recommend you reading this next part as we will speedrun a bunch of different scenarios where this tool becomes very useful, starting with:
1. Make quick post-process fixes
This is the most obvious use for the liquify tool, but that’s because every mode of the liquify tool can be used in that scenario:
1- With the push mode you can fix a wonky looking face.
2- With the expand and the pinch mode you can adjust the size of disproportionate elements.
3- With the push left/right mode you can correct the placement or curvature of varying elements.
4- With the twirl modes you can correct the angle of slightly crooked elements.
I highly recommend the liquify tool if only for all those very convenient reasons, but it’s far from being the only thing the liquify tool can do.
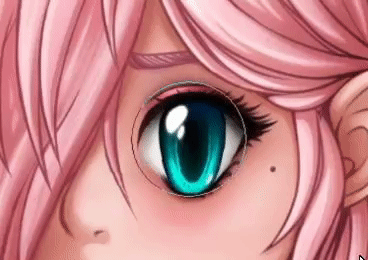
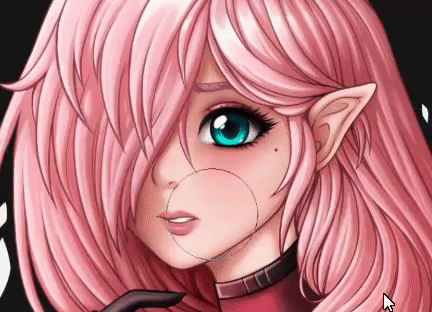
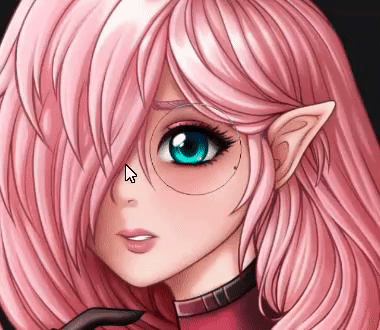
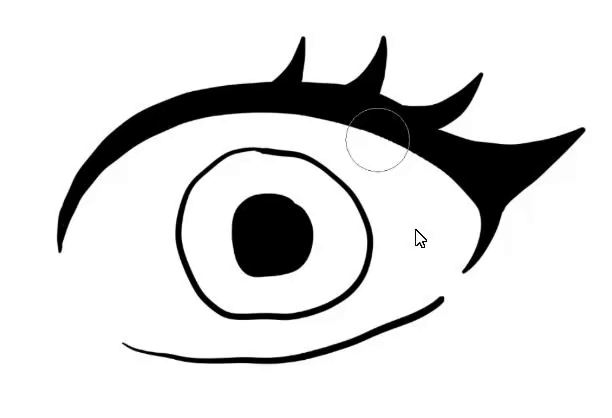
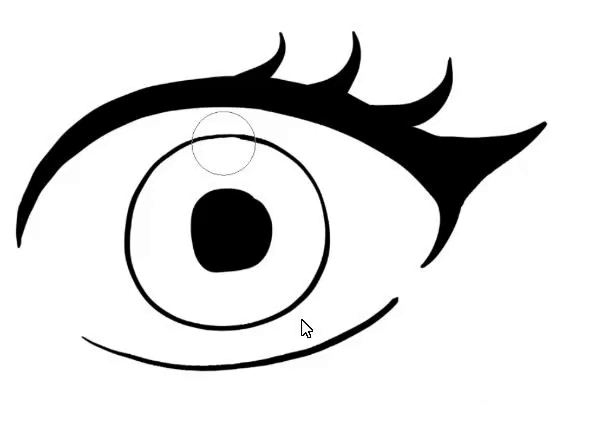
2. Quickly iterate your art
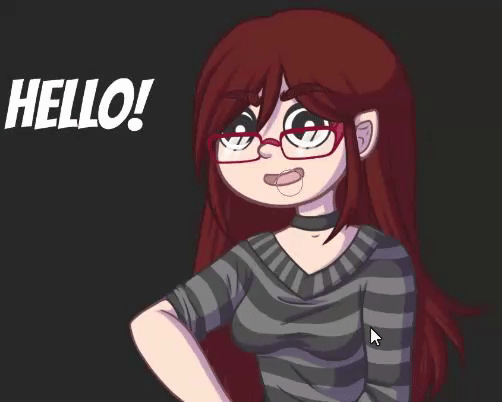
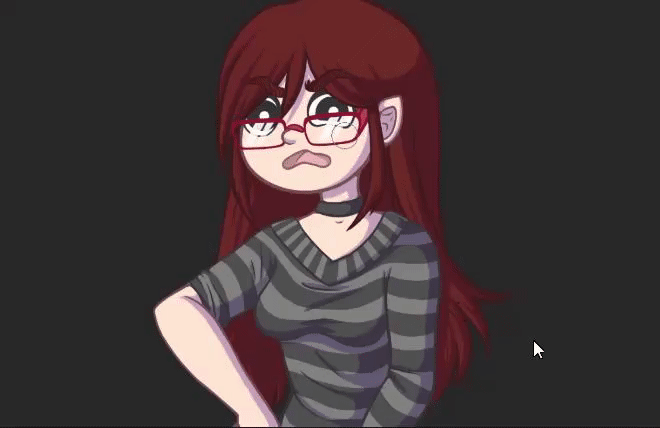
If you like playing around with the facial expressions of your characters, if you create reference sheets, concept art or in my case these YouTube stills I’ve been using for a while, then the liquify tool will make this process even more fun and easy for you. Instead of having to redraw everything all the time, create duplicates of whatever you want to iterate on, like in this case the eyes and mouth of my character, hide the originals and then mess around with the liquify tool to quickly create multiple alternate versions and see what looks best.
Disclaimer: while efficient, this method is really fun and addictive and I am not liable for anyone spending hours doing this...
3. Fix mistakes early on
It’s easy to forget that the liquify tool is not limited to only being used on finished artwork because that’s what we see most people online using it for, but the liquify tool can and should also be used at any stage of your art creation process. For example, you can easily fix proportions issues early on like the very common ‘’head that’s too big and the hands and feet that are too small’’ occurrence using the pinch or the expand modes. Also, on the plus side, since sketches are usually messy, you won’t have to care much about any stretch happening when moving things around.
4. Cleanup shaky lineart
Although I strongly recommend you watching some lineart tutorials in order to globally improve the quality of your lineart, the liquify tool can be good for beginners and artists drawing with a mouse and who need help fixing especially unruly curves and shaky lines. You would be surprised how somewhat salvageable even the shakiest of lines can be. Simply use the push mode with a low strength value and gently move the lines until the bumps are all smoothed out and that’s it. Of course the liquify tool cannot do miracles, but with enough patience you can achieve a lot with this tool.
5. Adapt patterns onto clothes
This is one manga artists will especially love because the only tool we had before to fit patterns onto clothes was the mesh transform tool, which is a great tool for lots of things, but it gets highly overshadowed by the liquify tool when it comes to organically fitting a straight pattern onto a curvy surface. Of course for better results you should use layer masks to separate the different clothing pieces and adjust them separately, but I think you get the gist, just use the push tool and adjust the pattern to the curves of your character’s clothes and that’s it!
6. Customize texts and speech bubbles
Another really quick manga related use for the liquify tool is for customizing texts and speech bubbles. Simply rasterize your layers and just get creative with it! As shown here, the distorting effects you can create with this tool can make for some very dynamic and dramatic looking texts and speech bubbles.

7. Make simple animations
This is something probably most people would not consider, but indeed, you can use the liquify tool in some instances to create simple animations. I will not go into detail about how to animate in this tip, there are lots of tutorials out there that explain it well, including this one I’ve made that covers keyframe animation in details, but to summarize this process quickly:
1. Get your artwork, open your timeline window.
2. Create a new animation timeline.
3. Create a new animation folder and put your image layer inside
4. Duplicate it and set the layer copy on the second frame
5. Start slightly moving the parts of the face you would like to animate.
Of course in this case it would be better to separate the elements we want to animate from the rest of the face and separate the character from the background, but for the sake of this very quick demonstration it won’t be necessary.
Then once you’re happy with the movement, press play and there you go! Obviously this was made in a few minutes and is a super a simple and dumbed down example of how the liquify tool could be used to animate, but I think it shows how much potential this tool has to offer when it comes to animation.

8. Create special effects
While the liquify tool can be great for fixing things, it can also be used for calculated destruction. >:)
For instance, you can use its different modes to create special effects like fire, smoke, glare and ominous things like distorted backgrounds and ghosts, among many other things. Because the liquify tool does not blend colors together, it can be really good at simply morphing things into twisted and wiggly shapes for some very unique results.


9. Create abstract art
This type of art is really not my forte, but there is no denying the potential use digital artists could make of the liquify tool in this area. Just for the sake of it, I created this really trippy abstract artwork by only playing around with the different tool modes and settings on a random color palette. Now, there is a lot you could do with this by only adding color mixing and more brushes and effects to the mix, but to keep it simple I stuck to only using liquify and this is the result I got. If anything it makes for a really fun exercise, so I recommend trying it!

10. Create the BEST 'cursed' art
Alright, let’s end on a memorable one, because yes, it is bound to happen to anyone playing around with the liquify tool because we all love to go above and beyond and we end up creating the most cursed art possible. The possibilities are pretty endless here, but among other things, making eyes obscenely big, making mouths creepy as they can be, using the push tool to take proportions to absurd levels and of course using the twirl mode to add a touch of nonsense to everything. Be it for memes, for YouTube thumbnails or just for fun to scare away your friends, you will absolutely want to use the liquify tool for this. ;)

Conclusion
Alright, that pretty much covers it for the Liquify tool, its features and all the uses I could think of for it. Thank you for watching! Please show the video some love if you found it helpful and join our growing community to support me and get access to more tutorials like this, it’s free and it really helps the channel!
To all the readers, thank you for checking out this tutorial, I really hope you got some neat tips out of it, until next time everyone! :)
Best wishes,
- Crimsy
Users who liked this post


Comment