How to use layer blending mode using folder layers
What is a folder layer?
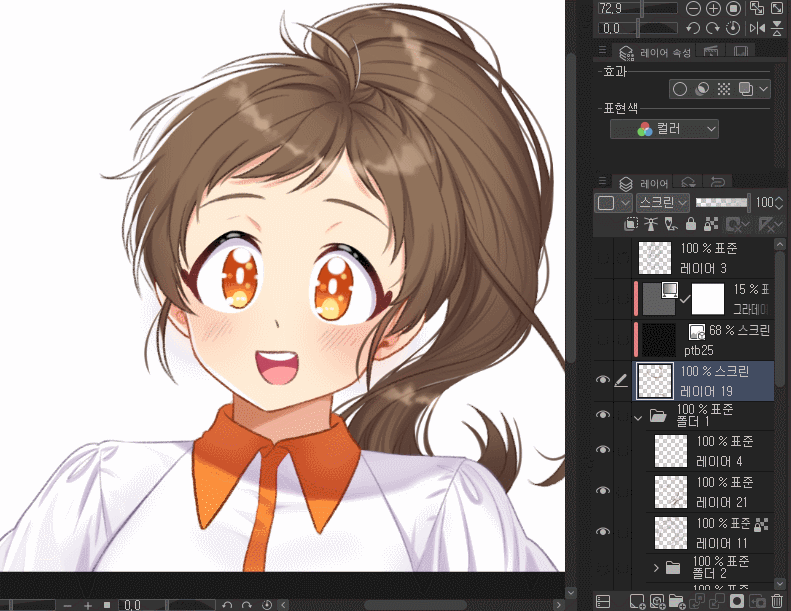
When drawing, there is a situation where the layers are stretched out.
In that case, if you use the folder layer
You can organize it neatly like this!
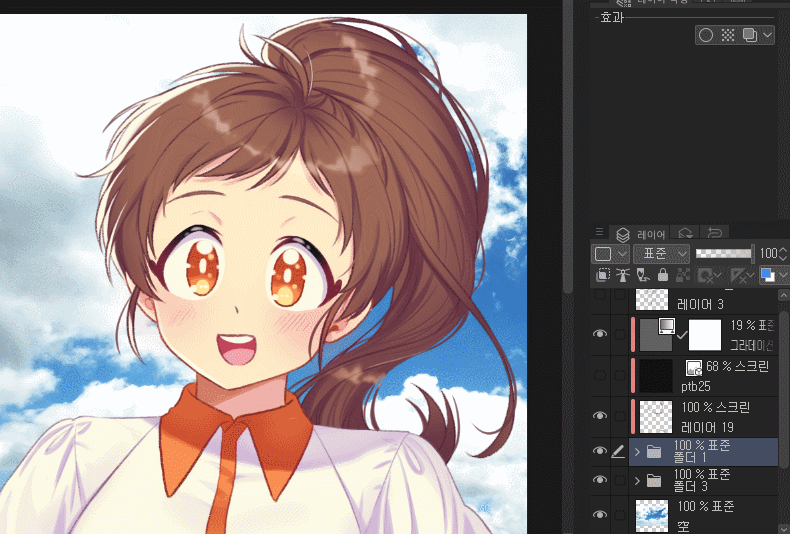
However, you shouldn't just stick to the folder layer.

This is because, like the GIF above, the protruding part becomes visible and becomes messy.
Let me explain "what to do in this case".
Layer blending mode of folder layer
Folder layers also have a blending mode like normal layers.
In the GIF shown above, "What happened to the color changed noticeably just by putting the [screen] layer in the folder?" You must have thought
This is because the folder layer is set to [Standard].
When the [Screen] layer is placed in the folder layer set to [Standard], it operates as a [Screen] layer inside the folder, but it is recognized as a standard layer to layers outside the folder.
So, in the end, how to make the screen layer not recognized as a standard layer?
Let me show you a simple way to solve this

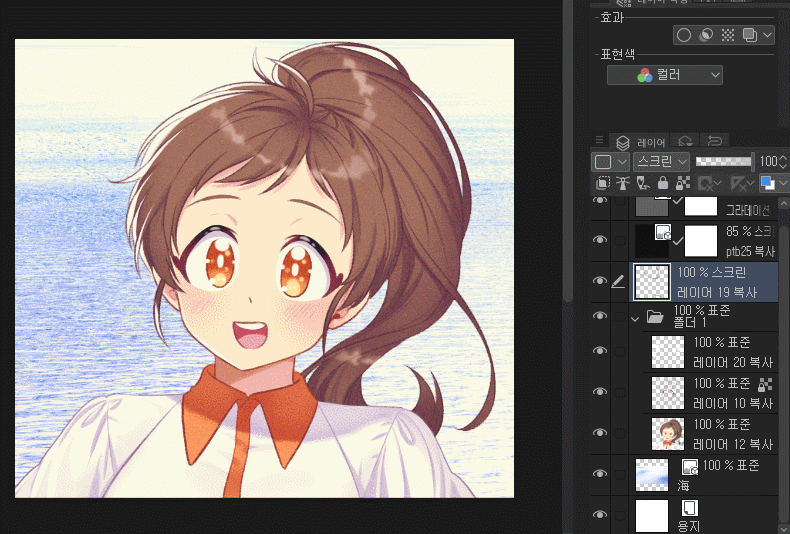
In this way, you can set the blending mode of the folder layer to [Pass].
If you set it to [Pass], all layers in the folder layer are recognized as just putting them in the folder without touching the respective blending mode.

However, when the folder layer is set to [Pass], there is a situation where "I want to apply the correction layer only to the character, so I put it in the folder, but the correction is applied to the background!"
Folder layer in folder layer

It is possible to create another folder layer in the folder layer.
Using it, create another folder layer in the folder layer, put all the character layers, and clip the correction layer on the lower layer

In this way, when you want to add correction to only part of the character, there are ways to put and manage all folder layers.
There are endless ways to use the blending mode of the folder layer! What if you try it out?
↑Click here for more clip studio tips


Comment