
Introduction and Tutorial in Video Format
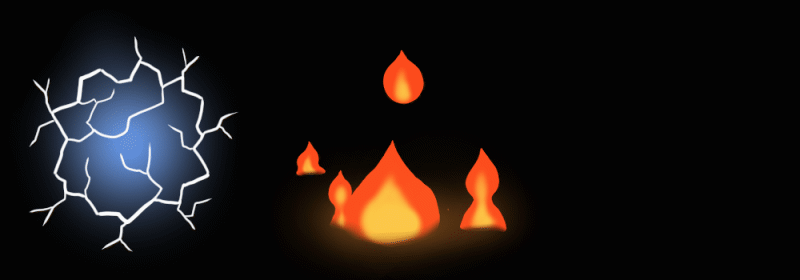
In this tutorial, I'm going to show you three ways to create some fun animated effects to add a little magic to your art in Clip Studio Paint.
I'll go over creating these lightning, fire, and sparkle effects, each using a different type of animation.
Here's the tutorial in video format. There's also a full text version below!
If you need a primer on animating in Clip Studio Paint, check out my Animation Overview tutorial. If you're not sure how to set up animation on an existing piece of art, I've got a tutorial for that too!
Electricity: Frame-by-frame Animation
Let's start with animating some lightning a frame at a time.
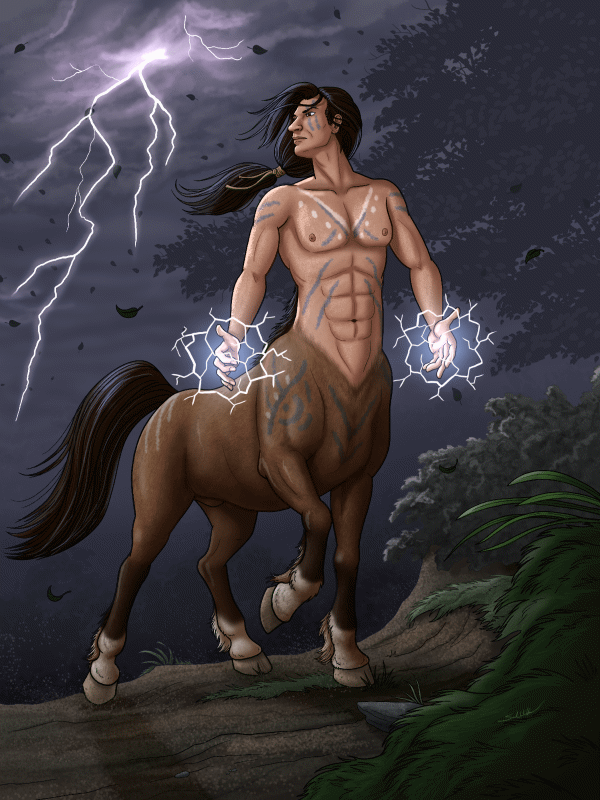
This is one of my illustrations featuring a centaur wielding the power of lightning!
"Storm Warrior" (2013) by Sarrah Wilkinson, AKA MsRedNebula
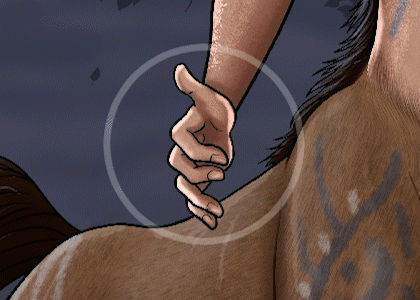
Here, I've removed the effects layer and flattened the rest.
I'll create a new timeline with a frame rate of 6, and a playback time of 6 frames.
HINT: If you don't see the Timeline panel, go to the Window menu and click Timeline.
First, I'll create a layer above my artwork where I'll draw some guides.
Setting a layer as a Draft layer gives it a nice visual indicator that it's a working layer, with a pencil icon on the right and a light blue bar on the left. It also means it won't get exported with the animation, even if I forget to hide this layer later.
Under the Figure tool, I'll choose the Ellipse subtool and change these settings:
Line/Fill: Create Line
Aspect type: ☑ Checked, with option Specified Ratio - This always creates a perfect circle.
— You may need to click the plus sign and specify W: 1 and H: 1
Start from center: ☑ Checked
— If you don't see this option, open the Subtool Detail palette by clicking the spanner in the corner. The start from center option can be found under Shape Operation. Click the eyeball next to it to make it display in your tool properties.
Adjust angle after fixed: ☐ Unchecked
The above options enable you to quickly and easily draw a circle from the center. The other options, like the brush size, will depend on the size of your art.
NOTE: The figure tool may show a different icon instead of a circle, depending on which tool you've used most recently. It may look like a square, line, or polygon instead. It'll change to a circle when you select the Ellipse subtool.
Select white on the color wheel.

Draw a circle as a guide to where the balls of lightning will appear.
I'll also drop the opacity of the Guides layer to 25% so it doesn't get in the way.

On the Timeline, add a new animation folder, and then add in a first animation cel.
Now I'm ready to draw in my electricity. Under the Pen tool, I'll choose the G-pen subtool.
I'll use a small brush size - 10px in this case - and keep the color on white. I'm also using a graphics tablet to draw, which allows the pen tool to taper depending on my pen pressure.
The way I like to draw electricity is with straight lines and random angles, jutting in and out of my circle guide. Smaller forks will branch off and gradually taper until they disappear.
Then, I create a second frame, and do it all again! Because lightning is so chaotic, I don't want to look at the previous frame - just draw a new pattern each time following my circle guideline.
I'll go ahead and repeat this for each hand in the remaining frames.

To finish off the effect, I'll create a second animation folder to add some glows. On frame 1, I'll add my an animation cel to this new folder.
Switch over to the Airbrush tool with the Soft subtool selected, and make the brush big enough to cover the hand.
Select a very light blue color.
Paint in a soft glow effect around each hand.
Layer Blend Modes With Animation Folders
I want my glows to use the Add (Glow) blend mode.
However, if you just try to set the layer's blend mode to Add (Glow), nothing happens!
This is because the blend mode of animation folders are set to Normal by default. If the blend mode of a FOLDER is Normal, the blend modes of individual layers inside of it will only affect other layers in that same folder. Setting the folder's blend mode to Through allows the blend modes to pass through and affect the layers beneath.
You've got two options:
You can either change the folder's blend mode to Through to show the effect - or simply leave each layer on Normal and change the whole folder to Add (Glow) instead.
Either way works, but in this case, since I know I want all of the layers in the folder to use the Add (Glow) blend mode, it's easier to just set the folder itself to Add (Glow).
I've painted in a slightly different glow on each frame with the airbrush. Like the lightning, I kept it very loose and random on each frame for some chaotic variation. I also added some subtle reflected glows on the centaur's body.
Note that the guides I created on my draft layer did not get exported with the animation - a useful feature.
With that, this animation is finished!
Flame: Sequential Animation Using Onion Skin
Animating motion in a sequence is a little more complex, but the onion skin feature is there to help. Now, let's play with fire!
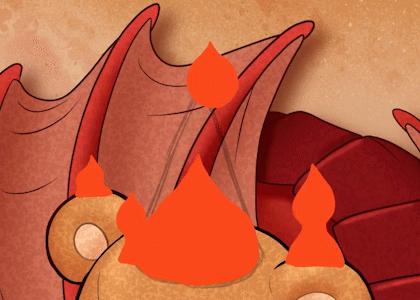
"Why Baby Dragons Can't Have Nice Toys" (2023 redo) by Sarrah Wilkinson, AKA MsRedNebula.
In this illustration, I demonstrate why young dragons might need non-flammable toys. :)
Here, I've removed the fire effects so I can animate them, and flattened all remaining layers to get them out of the way.
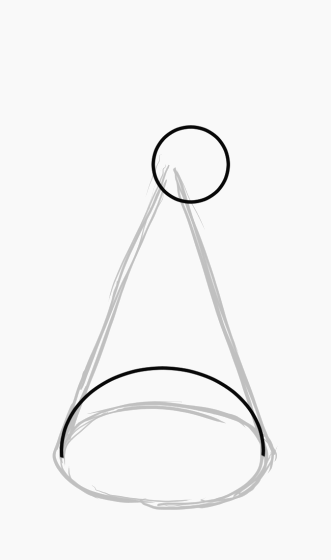
As I did with the lightning, I'll start by creating a layer to sketch in my guide. I'll change its opacity to 25% and set it as a Draft layer since it's just for this working sketch.
On this layer, I'll sketch in the base and the general, conical shape of my flame. I'm using black this time since it's easier to see on this piece.
Next, I set up the animation by creating a timeline. In this case, the timeline will be 12 frames per second and 12 frames long.

I'll then add in an animation folder and first cel.
You can set entire folders as Draft, so all the layers within them are considered Draft layers as well. I'm going to set this entire animation folder to Draft so I can use it to create frame-by-frame guides for the fire animation.
Again, this prevents these layers from being exported with your animation if you forget to turn them off. It's also just a nice visual indicator that these are working layers and not part of your final art.
Now, here's a great trick for animating fire!
Let's pretend there's a bubble rising out of the teddy bear's head. Draw a half-sphere on the first cel.
I'll then go to frame 7 and add a cel there, then draw a small circle at the top representing the end of this bubble's path.
Note: I'm using the Ellipse subtool again to draw the circles easily.
At frame 3, I'll add a new cel to draw the bubble in-between.
To do this, turn on the onion skin feature by clicking Enable Onion Skin on the Timeline.
I'll turn the art off for the moment so you can see it better.
Enabling onion skin allows you to see the previous cel in blue, and the next cel in green.
I'll draw the middle bubble a little below the halfway point between the two, because I want its progress to speed up a bit as it rises.
Using the onion skin feature, I'll continue to add in the rest of the bubbles for this first sequence.
I'll repeat this pattern starting a new bubble on frames 5 and 9, with the first ending on frame 11 and the second looping back around to the beginning to end on frame 3.
For variation, I also made the path of the bubbles starting on frames 5 and 9 follow slightly curved paths. That's completely optional!
Do you see the fire yet? If not, bear with me - no pun intended! It'll make more sense in a minute.

Next, I'll make a new animation folder above the guides, and add the first cel.
I'll also turn the art back on so the fire is visible in context.
For the base color, I'll choose a saturated red-orange.
For the base color, I'll choose a saturated red-orange. I'll draw in the flame using the G-pen subtool with a large brush size, 80 in this case.
On the first cel, form a cone around the base, using the bubble as a guide. Fire tapers as it gets further away from its fuel source. Ignore the other bubble up top, I'll get back to that in a moment.
Hint: Keep the form loose and irregular. Avoid perfect symmetry. Like electricity, fire is chaotic!
Add a second cel. This time, I'll still draw the base but pinch it in a little before flaring out to follow the shape of my bubble guide.
Same with the third cel, pinch it in a little more and make the flame smaller to match the bubble.
Note: I still have Onion Skin enabled. It's not strictly needed at this point, but it can be helpful.
By the fourth cel, the pinch becomes pretty extreme.
Then, on cel 5, the top flame breaks off and I start over with a similar shape as the first frame.
The little pinched off flame keeps shrinking for a couple frames before disappearing entirely as I repeat the cycle.
I'll keep going until all the frames are filled, not forgetting to loop back and add the upper flames to the first few cels.

When I play the animation, you can see the fire take shape!
At this point, I like to spend a little time refining my flame shapes and adding a few smaller, secondary flames using the same technique.
For the brighter interior part of the flame, I'll choose a yellow color.
This time, I prefer to use the soft airbrush subtool.
I'll also disable onion skin and turn off the guides; they're no longer needed.
I'll go through and paint in an interior of a similar shape to the flame's outline on each layer. You can create a separate animation folder for this, but I'm just painting directly onto the existing flame cels. It's up to you.
Next, I switch over to the Eraser tool with the Soft eraser subtool.
I'll use It to fuzz out the bottom of the flame a little bit to blend it in.

Finally, I'll add a new animation folder on top and add a cel.
This one will be for some glow effects, like I did with the lightning. I'll change the folder's blend mode to Add (Glow).
Hint: Don't forget you can name each animation folder. It's okay if you've only got a few folders like this, but just imagine if you've got a dozen or more!
Using the same soft airbrush and color I did for the interior bright part of the flame, I paint in some subtle glows and highlights on each cel.
Use a very light touch with your tablet, or you can turn the whole folder's opacity down if your glows are too intense.

And there you have it - a poor, innocent teddy bear on fire!
Sparkles: Keyframes, Tweening, and File Objects
For some movements, it's easier to let the computer handle the in-between frames. Keyframes allow you to animate motion, rotation, and even opacity easily.
Keyframe animation can get very complex, so I plan to dedicate a whole tutorial to it later on.
First off, you'll need a sparkle graphic. If you've already got one you want to use, great! If not, I've made a free download available from Clip Studio Assets here:
Or, if you want to see how I made it, you can follow my quick tutorial linked here:
Start with the sparkle graphic in its own square canvas. Include a temporary black background on its own layer (or just use Clip Studio Paint's paper layer in black). This'll makes it easier to see.
I'm using a 1200px by 1200px canvas, but it doesn't matter as long as it's square and the sparkle pretty much fills the whole canvas.
Create a Timeline with a frame rate of 12. I want my animation to be 12 frames long, but I'll actually make the playback time 13. You'll see why in a moment.
Keyframe animations do not require an animation folder and can be created on any layer or folder.
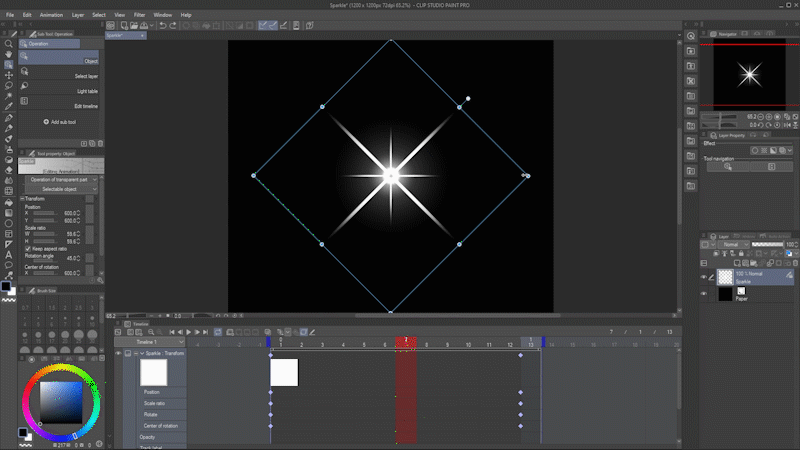
Be sure the sparkle layer is active, and the playhead is on the first frame, then click Enable keyframes on this layer.
When you enable keyframes, you'll notice you can no longer edit the layer normally. It's now treated as an object, so to animate it, go to Operation and select the Object tool.
Hint: You can turn keyframes off to edit the layer if you need to. They'll still be there when you turn keyframes back on.
First, I'll add rotation. With the playhead on the first frame, click here to add a keyframe.
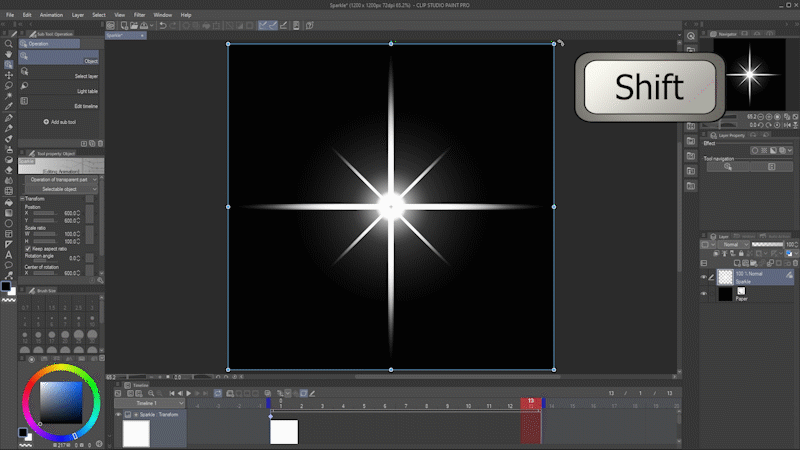
Move the playhead to the last frame. Then, use the Object tool to rotate the image 90 degrees. Hold down Shift to lock rotation to 45 degree increments.
Two things to note. We made a change, which caused Clip Studio Paint to automatically add a new keyframe. Also, a keyframe is always added before the playhead, which is why I made this timeline 13 frames long.

When I hit play, the program goes between the rotation at the starting keyframe, and the rotation at the end.
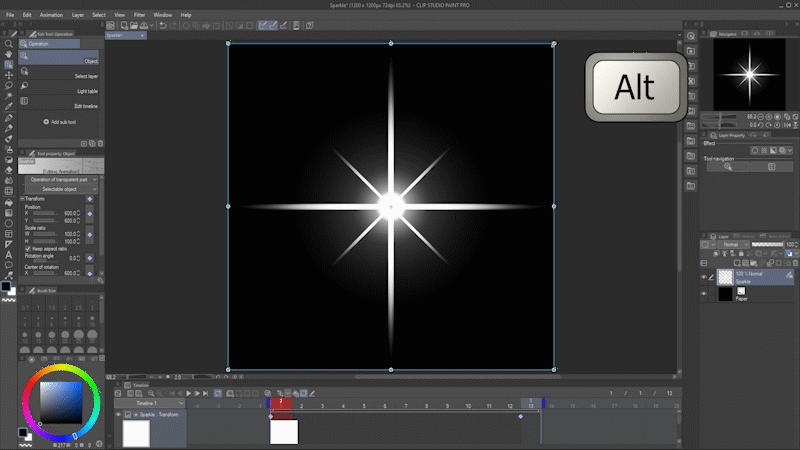
Next, I'll change the size of my sparkle.
Return to frame 1. Click and hold a corner anchor, and, before moving, hold down the Alt key to resize around the central pivot point.
When I scrub through the animation now, you'll see it gets bigger over time because the scale is already keyframed on the last frame.
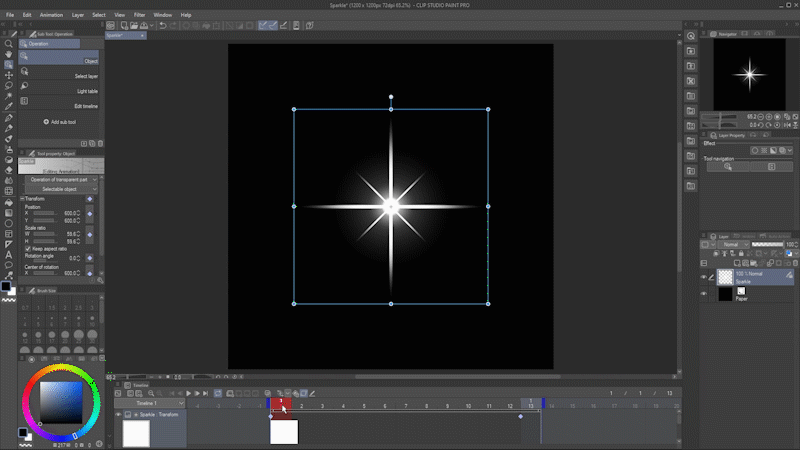
However, I want it to start and end at the same size.
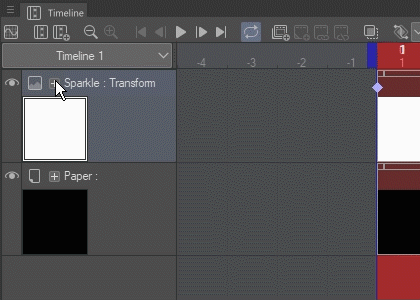
On the timeline beside the layer name, click the small plus button for more options, and then click the arrow that appears beside it to show each transform keyframe separately.

Move the playhead to frame 13. Select the last keyframe on the Scale Ratio line, and delete it by clicking Delete Keyframe.
The size change is now gone.
Now, click Add Keyframe to lock this as the new final size while retaining the rotation I added earlier.
Now, go to frame 7 and make the sparkle larger. The transform keyframes are automatically added.
Here's how the animation looks now:

Finally, I'll change the sparkle's opacity over time.
Go to frame 1 and turn the layer's opacity to 0.
You'll notice a new Opacity keyframe appear.

Move to frame 7 and change it to 100%, then to frame 13 and change it back to 0.

And voila! We have a sparkle!
Now let me show you something really cool you can do with it.
First, we'll need to prepare the file to be used as a file object.
Delete the black background. (Hiding it is not sufficient, you must delete it at this point.)
Make sure you save the file in Clip Studio's .clip format.
You can now close this file and open up some image you want to add sparkles to.
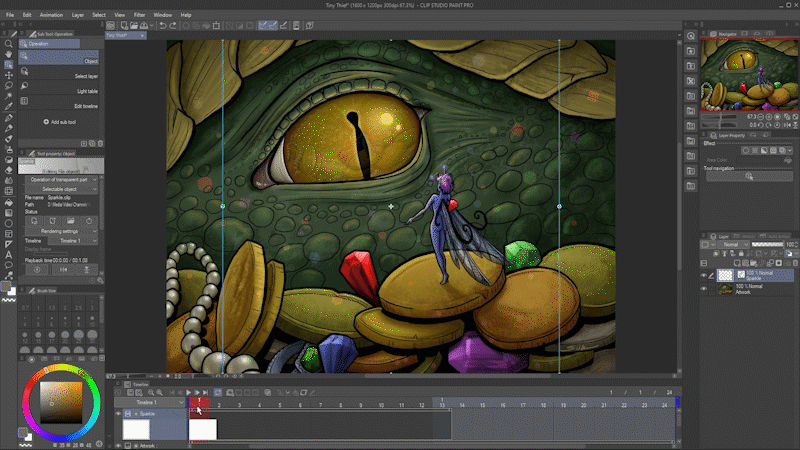
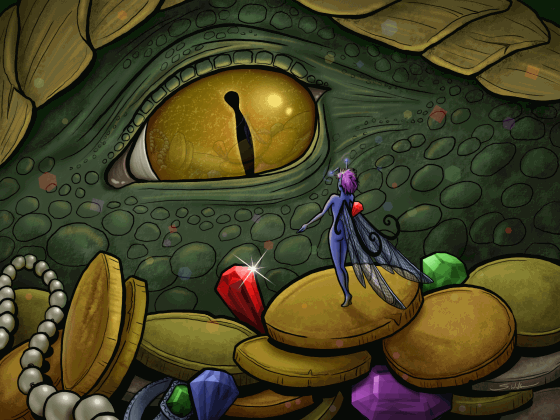
"Tiny Thief" (2010) by Sarrah Wilkinson, AKA MsRedNebula
Here's one of my illustrations with a bunch of treasure. Let's make it sparkle!
Here's the image with the sparkle effects removed so they can be animated, and as before, I've flattened the artwork so it doesn't take up a lot of space on the timeline.
I'll create a timeline with a frame rate of 12 and a playback time of 24.
Go to File - Import and choose Create File Object.
Navigate to wherever you saved your sparkle, select it, and choose Open.
This notification may appear, if you haven't clicked 'Do not show again' in the past. It contains useful information about using file objects in Clip Studio Paint.
Click OK.
Ordinarily you'd be able to see the file you just pulled in, but check this out.
Since the file contains an animation, it automatically comes in with all of its frames!
Go to the Operation tool, with the Object subtool selected.
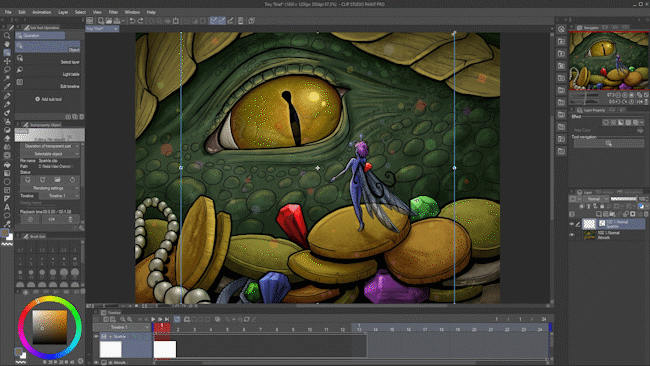
Using the Object tool, move and resize the sparkle.
Right-click on the Sparkle layer and select Duplicate Layer.
You then have a second sparkle you can move and resize to a different location, and move on the timeline so it plays at a different time.

To loop one of the sparkles back to the beginning of the timeline, right click on it and select Split Clip. Then, move the first half to the end of your animation and the second half to the beginning.
With a few more sparkles added, here's my final result.
A Brief Note on Exporting Your Animations
You'll find all the options for exporting your animation in the File menu, under Export Animation.
You can export as an image sequence, animated GIF, animated PNG, or a movie file in AVI or MP4 format.
I go over exporting animations in more detail in my Animation Overview tutorial:
Conclusion
That's it!
Hopefully this tutorial got you jumpstarted on doing some fun animated effects in Clip Studio Paint. Tag me @MsRedNebula on Twitter or Instagram and show me your animations.
Animation is a big subject and there's lots more I can talk about. Follow me here on Clip Studio Tips for more, or subscribe over on my YouTube channel. Let me know if there's anything you'd like to see me cover.
Have fun, and happy animating!
Users who liked this post


Comment