
Hello everyone, Today we will go for some magic class with magical software ‘CLIP STUDIO!!’
This workshop tutorial will show you how to make a magical effect for the summoning scene. You can apply it to enchanted your illustration

Or add it to your animation scene with some transformation.

This tutorial contains 3 main parts, how to create the symmetrical summon ring with the symmetrical ruler tool, how to make the simple rotation loop with the Object tool, and how to apply it to your animation scene.
My tutorial mainly focuses on how to create things with Clip Studio’s tool. You can easily follow it step by step if you’re very new to the software, or get some idea to improve your working method if you’re already expert with the tool.
Let’s start!!
Video tutorial
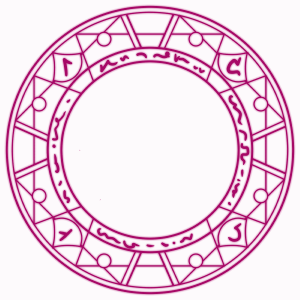
Part 1 : Draw the summon ring
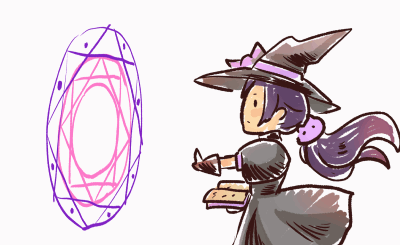
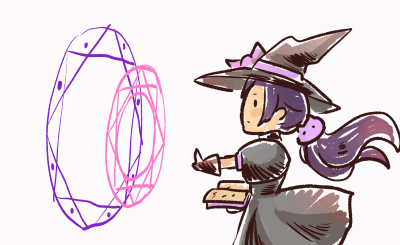
To make the summon ring is easy with a Symmetrical ruler
You can draw the symmetrical shape that can rotate in one point perfectly
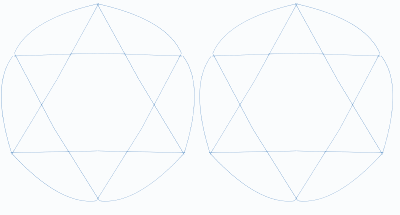
However, the symmetrical ruler works better with a hand-drawn summon ring.
Sometimes when you add shape after, the center of rotation for the object will not the same as the center of the symmetrical ruler
This image is supposed to be 90 degrees rotatable but when making it in a loop, you can see that without the symmetrical ruler centered at the center of rotation, it can’t be 90 degrees perfect rotation.
(it has a bit of jumping on the looping. However, this problem can also fix with rotation to 360 degrees but you will need a longer timeline to keep it smoothly slow)
If you draw it with the grid it can be rotated perfectly
You can also put the symmetrical ruler draw inside the grid later with the material transformation method
Tips :
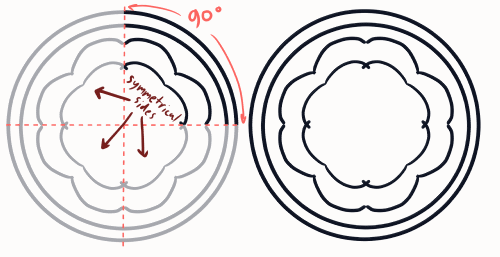
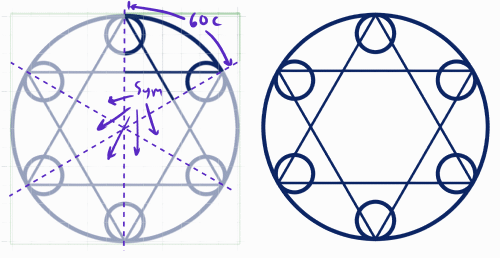
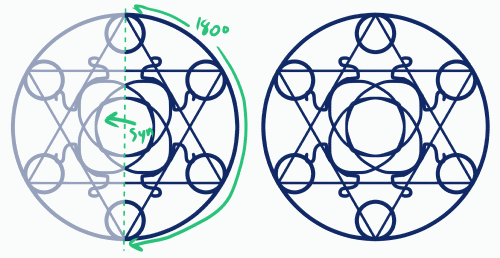
The rotation angle I mentioned here will help you optimize your file, the more narrow means you will need fewer frames to make it rotate slowly
From these examples: for the same speed,
If 90-degree symmetrical use 16 frames to rotate in a perfect loop,
The 60-degree symmetrical will need only 12 frames,
And the 180-degree symmetrical will need 32 frames.
(don’t worry, it’s not necessary just in case you need the file to be a bit smaller)
Make some plain design for the ring, I use the symmetrical ruler to help with the design
You can find it in [Ruler] subtool, here I use 8 lines symmetrical with checked on line symmetry
Hold [Shift] and drag the line at the middle of the canvas, it will snap to the vertical, horizontal, and 45-degree alignment of the canvas.
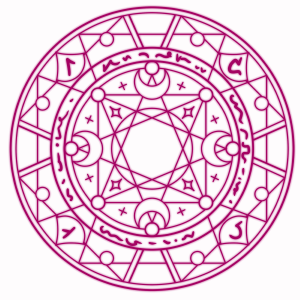
Here I will make 2 levels of the summon ring, to make it look detailed and detailed when moved.
Simply draw it in 2 layers separately
For drawing the rune that may not need a symmetrical ruler,
you can hide the symmetrical ruler or disable the snap to a special ruler on the command bar.
Tips: try to keep your design in a clean shape to be easy to create the vector ink on the grid. Using the geometry shape will make it a more neat look.
Next step, we will draw the vector line for the design
Enable the grid, go to [View > Grid]
Then set up the grid with [Grid/Ruler Setting]
Set the grid to match your work detail, give some gap between the line for easy to drag the shape.
Lower the opacity of the ink layer, and create a new vector layer
Make sure you enabled the snap to grid
Start with the circle part, I use the Ellipse tool in [Figure] subtool
Drag from the intersection on grid line that touch top and left side of the circle edge
The circle will snap to the grid, drag down until it fit the sketch line
You may adjust the grid later when working on smaller details
Here I adjust the grid to the square shape inside the circle, you can see the grid before adjustment is not lay on the line, it will not be able to draw on actual sketch
Use the rectangle or polygon tool [with rectangle figure] to draw the square shape
For other polygon shapes, you can select polygon in figure choice and set the number of corners
Create a new vector layer and draw a triangle like the way it appears on sketch
If we just draw the shape overlapped other, there will be some side of the shape that overlapped, here the bottom of the triangle will be overlapped to one side of the square
To avoid the overlapped lines, use the [Control point] tool in [Correct line] subtool with the split mode to split the side from the triangle
Then you can simply delete the line with the vector eraser mode in the eraser tool
Here is the technique I use for part rotation since Clip Studio not yet provide the feature for the move and snap object to the grid
(and I want to make it as vector layer ink, so I will teach you how to make it perfectly in Clip Studio)
draw circle in a new vector layer, cover all the shape
Hold [Shift] to select triangle layer and the blue circle layer
Create the free transform edge, [Edit > Transform > Free transform]
Or [Ctrl + T]
Now you can hold the [Shift] key and rotate the shape to the direction you want (in 45 degree step)
Click [Ok] or press [Enter] to commit the transformation
With this method, you can easily rotate everything around the center of rotation.
Copy the layer and repeat the steps, you can use the same blue circle for all the parts.
When finished, merge the layers, don’t merge the blue circle with the finished shape, so we can use it for other parts rotation.
For the moon shape, I draw 2 overlapped circle and erase the unwanted part
[important!] the shape symmetrical must be aligned with a grid line that projects from the center of rotation only!
You may see its size is too large for the sketch we made.
Create free transform to scale it.
[Important!] DON’T scale the image with click and drag (because it will not snap to grid) you must set the scale ratio in the tool property panel only (make sure you set the [keep aspect ratio] checked)
Hold [Ctrl] and use [↓] key (crosshair key on keyboard) to move the shape down to its position
(you can also move with [move] tool and hold shift to keep it align)
Make sure your drawing is still inside the blue circle
repeat the same steps as we did to the triangle parts
For some part that not able to rotate with 45-degree step, set the rotation angle in the tool property (here I’m moving the + )
I use 25 degrees for one side and -25 degrees for another side
Then I merge the layers and move like other parts, with this method, you don’t need to calculate all the rotation angle for each object
You can also flip it to place it on other side
The star is made like this
When finished, merge all in one layer and erase the unwanted part
The inner summon ring is finished.
Draw the outside ring with the same method
(for the rune, disabled the snap to grid and just write it inside)
If you want to change the thickness of ink, you can use the object tool
Hold [shift] key to select multiple vectors part
And in tool property, you can adjust the brush size
The summon ring is ready
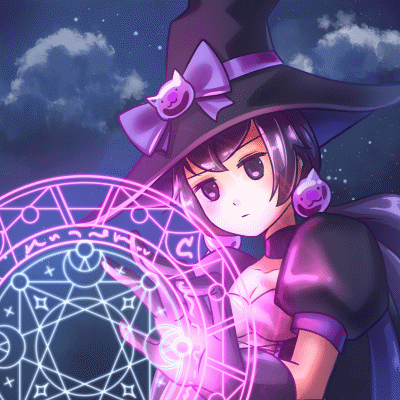
Part 2 : Apply the summon ring to the illustration
In this part, I will add the moving summon ring to the illustrator I made
Prepare the file to import
[Right-click on the layer > File object > Convert layer to file object]
Convert with drawing area
With this method, you will easily save the file with transparent background and well crop with no change on the center of rotation.
Now time to animate it.
Open the file, and add more offset to the image by [edit > change canvas size]
Add some pixel to both dimensions of the canvas
We need to make an offset to create the blur version of the ring to use as the light effect for the summon ring.
Copy the layer and rasterize it
Then use the filter [Gaussian blur]
Adjust the strength to create the soft light effect
Then apply the rotation movement to the ring and the effect layer, I will use the layer keyframes feature to help with the transformation.
Create a new timeline with the setting of framerate 8 fps (for animated illustrator)
Select both layer and enable the layer keyframe
Select the first frame and click the create [Linear interpolation] keyframe icon (will appear in green)
Also create keyframe at the end of the timeline
Select the drawing with [object] tool at the last frame, set rotation angle in tool property panel to 360
Note: you must select only one layer to edit the value
Drag the last keyframe to the end of the timeline to remove stopgap of the loop
You will get the perfect rotation ring
(the summon ring will rotate 360 degree in 24 frames)
If the ring move too fast, you can insert more frame to make it move slower
Right click on the timeline and [insert frame]
Set the amount of frames you want to add
Now the summon ring will rotate 360 degree in 72 frames
Save the file in 2 files, the ink line and blur effect line
Delete the effect layer and save the file
Then [Ctrl+Z] to undo, delete the ink layer and use [Save as] to save in other file
Repeat the step with the inner ring too.
I switch the rotation angle to the inner ring because it is 90-degree symmetrical
So instead of starting from 0 and rotates to 360 in 72 frames like the outer ring,
I started from 180 and rotates to 0 in 72 frames (rotate only half round when outside rotate to full round)
Outer ring (rotate full round clockwise 0 >> 360 degrees)
Inner ring (rotate half round counter clockwise 180 >> 0 degree)
It will rotate in perfect loop like this
We will have 4 files
Apply to the illustrator, create the new timeline with the same framerate setting as the ring file.
Then import the ring and the effect into the canvas with [File > Import > Create file object]
Import altogether by select multiple files
Select all the ring layers and use [Move tool] to move them together
Use the free transform [Ctrl+T] to adjust the size
Set the effect object blending mode to [Add(Glow)] to create the light effect
To recolor, the ring, use the layer color for effect, you can click on this icon or in the layer property panel
Select color and click the bucket to apply on the bar
Add more light by create the new later with glow mode above all ring layers
And paint the extra light with soft airbrush
Add also effect of light on the character by copy the outer ring effect and move over the character
Clip the light effect to the character to make it not leak out to the background
To make it more natural, create new layer and paint the light area with soft airbrush
Create selection by Right click > Selection from layer > Create Selection
(or hold [Ctrl] and click on layer thumbnail)
Then right click on the effect layer and [Layer Mask > Mask outside selection]
Hide(or delete) the airbrush layer (we no longer need it)
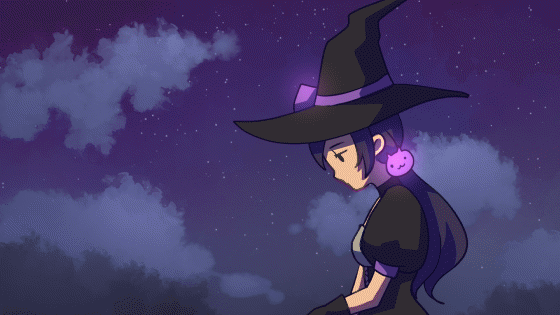
Result
Part 3 : Apply a transition to the summon ring
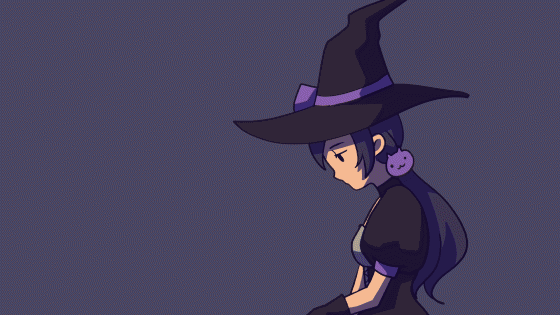
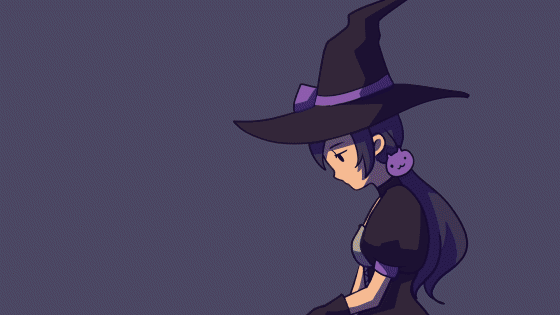
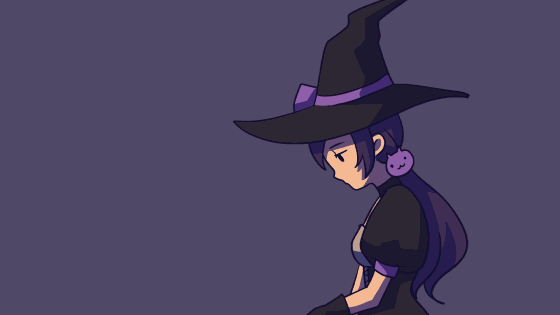
I will make it floating and rotating in the air for my scene, like this
Also shift the position a bit for making it a more dimensional look
For the animation scene, I will also add the transition to make it appear at the right timing of the timeline.
Start from making the animation scene
you can study how to make frame-by-frame animation with vector layer from the previous episode of my tutorial
Prepare the files (.clip) separately, I will use framerate at 24 frames per second here
Make sure all the files have the same frame rate
Create a new file for the scene. I will use the movie preset and set the framerate to 24 frames per second
Import all object file to the canvas
[File > Import > Create file object ]
Tips: Select the frame where the object (summon ring) suppose to appear, when you import the object, it will appear at the timeline position
Select all object, create free transform and put it in the position where it must appear at the timeline
Set the paper color to see the effect more clear when you work on it
Apply the layer effect and color to the object layers (the same as we do in the previous part of the tutorial)
Add the transition movement to the ring to make it animated with the scene, enable the layer keyframe for the summon ring objects
There is some gap where character casting to the summon effect appears.
Create a Smooth interpolation keyframe at that point for each ring, it will be the endpoint of effect transition.
Move the inner ring a bit with [Object] tool
You can copy the keyframe and paste it on another object, it will copy the position property of the keyframe. So you don’t need to carefully move it.
The inner ring will appear before, so I create another keyframe before the endpoint.
At the frame where the ring start appearing, scale it down to small size
Also adjust opacity at the point
At the timeline, you can show the timeline for opacity by clicking at the [+] icon
You can also copy and paste it
Repeat the steps with outer ring, shift the keyframe a but back for make it appear after the first ring
For the light effect, paint on the layer with add(glow) mode
Also set the opacity to match the transformation of the rings
Note : I make the light overlay separately for the outer ring and the inner ring.
Increase the opacity of light layer at the end point of the transformation as finish casting effect
Also apply the light on the character by creating a new layer with add(glow) mode above the character object
Paint the light and clip to character object
Varies the opacity level related to timing of the animation
Magic happened
Bonus part : Additional effect for transformation
Here is the final render for the scene, with the camera effect and the light transformation effect.
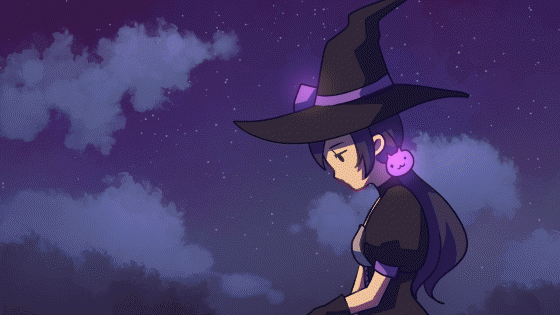
The effects are created with the frame-by-frame animation method
Create a new animation folder and blank keyframe mapping to the object keyframe (it can be mapped perfectly because the scene and object has the same framerate )
Create selection of character object
Expand the selection area
And fill color to the first keyframe in animation folder
Deselected the object [Ctrl+D] and apply blur filter
Put the layer into a folder by dragging to the folder icon
Make the selection of character again and fill the color on new layer
Then lock transparent of blur layer and fill with the light color
Repeat the steps with other keyframes
Also apply the showing frame related to the object
And enable layer keyframe and set opacity to object
Setting the folder to add(glow) mode will make it look more enchanting!
For the additional light effect : create new animation folder and draw the light effect with pen tool
Tips : I add particles with droplet airbrush
I apply the effect also on the transformation animation
You may use the auto-action method for time saving on the keyframe task, check the tutorial from Mattlamp :
You can use the animation folder to paint also the extra highlight detail on the object.
I add the camera effect to make it shaken with the effect of the summon ring
Put all the layer into 2d camera folder
Rotate the camera with object tool at the timeline point where effect happens
The keyframe will automatically appears on timeline
Rotate camera randomly on the timeline to create camera shaken
And here is the final result!!
I hope my tutorial give you some idea about working with the magic effect for your project
Have a nice day!! Happy animating!! <3
Users who liked this post


Comment