
One of the things I find interesting is that for some artists, using aids in animation is cheating, and this is the secret for beginners, is OK to use anything that helps you to improve or speed your work, like filming yourself doing the action you want to animate, or using 3D models to understand the volumes of your character… Disney! used similar-looking actors to the movie characters, to act out the most challenging scenes in almost ALL their movies. They contract artists to sculpt, IN CLAY, all the main characters of all the movies they created. So don't feel afraid of using 3D models for your work, this is a cheap alternative, especially if this help you to reduce the time of your animations.
In this youtube tutorial, I’ll explain how to create amazing walk cycle animations with camera movement, a technique that any beginner can apply to create impressive results. In my youtube channel, I teach how to create this specific example but here I’ll do a general application:
Characters from Clip or your own
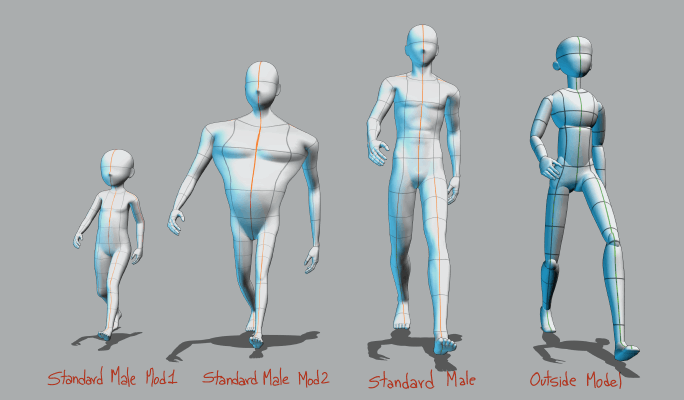
Create your own Character starting with the “3D drawing figure (Male/Female)” V1 or 2 of Clip Studio, these models can be modified a great deal, so they can be adjusted to your own needs, or you can create or buy a model and standardize the bones to work with Clip studio pose presets. Don't know how to?, Watch this https://youtu.be/Wqz96VLGwYE
Cycles with 3D models
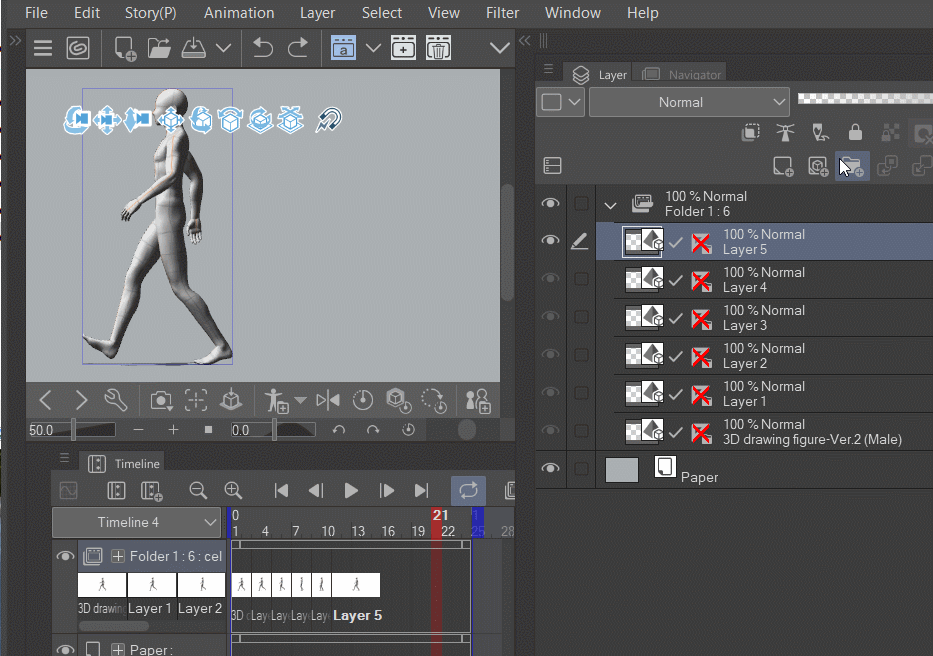
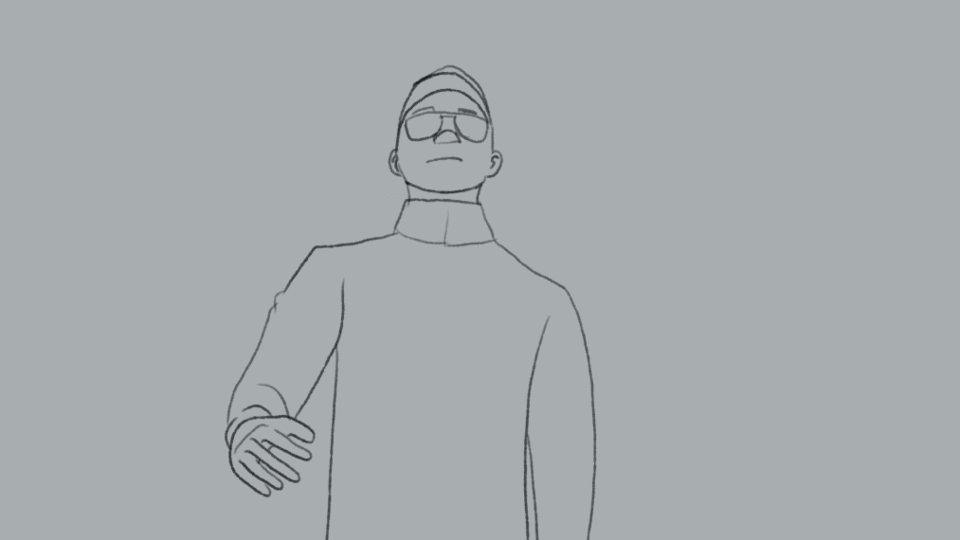
You can create a walk cycle, like the one in the next image, my advice is to place the character standard male or female on the side view, using the "Specify camera angle preset", select the second preset, and in "Display object list", in "Camera" lower the perspective to 1, this makes little camera distortion to the model. Using the manipulators pose the character, I always use as the first pose, the contact position (I follow Richard Williams process), the next image show model 01 to 06 half cycle, the second half is the reflection, the creation is straightforward, just create the poses and test the result in an animation folder, then you can adjust the positions until is what you want. Save the first half cycle, to apply the poses in the camera position next.
The creation process for the cycle is time-consuming, if you don't want to spend time on it, I create a pack called “Easy Animation (Bundle) for Clip Studio” with 14 walk cycles and 12 run cycles, plus some extras, like a horse model with walking, trotting, and galloping Cycles… so, just go and grab it!
To use the cycle you create or the pack, create an animation folder, place your model inside and duplicate the model as many times as are poses or .pep files (in this example you must create six 3D models layers) then place the 3D cels in the timeline, go to every frame and just drag the .pep over your character.

Duplicate the half-cycle, move the duplicates to the top of the folder and place the rest of the cycle in the timeline, then reflect the model using the button “Flip model pose horizontally” and the cycle is ready.
Apply rotation
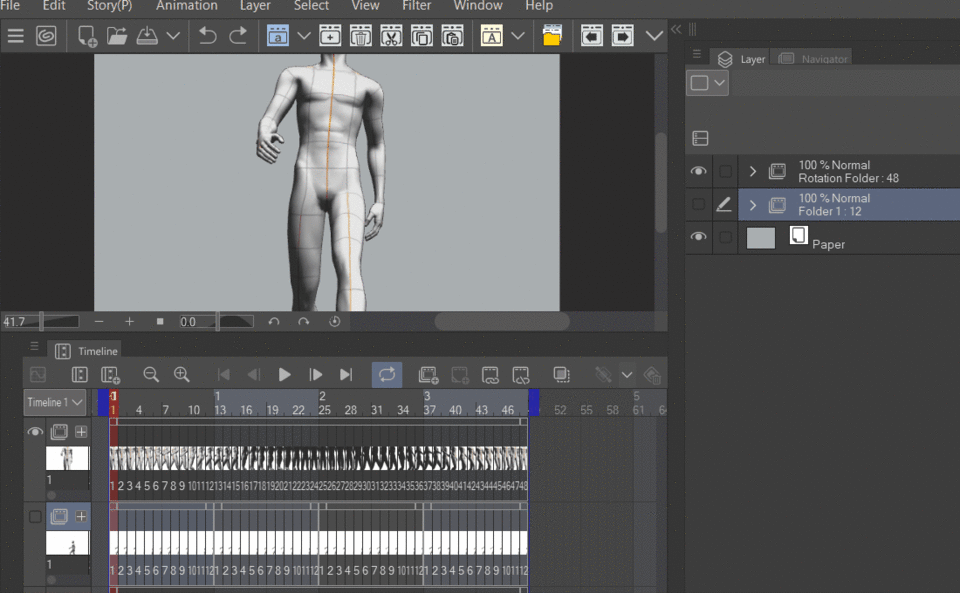
Now for the next part I’m using the material “3D Rotation Animation Material Set [48]” the price is 50 gold, but it's worth it, the effect is the matrix bullet time effect, but mixed with the 3D cycle makes the effect of a camera rotating around the walking character.
I Change my frame rate to 12 FPS and duration to 4 seconds (48 frames total), then I copy the track and paste it three times more, this is a reference to know when every cycle starts. I drag the material “3D Rotation Animation Material Set [48]” over the animation layer, then in the first frame, go to Animation/ Edit track/ Batch specify cels , chose the option “Specify name of existing animation cel” and OK, this action place all the 3D layers in the timeline, now copy the first 3D pose and paste it in the first camera position, paste it again in frame 13, 25 and 37, the same with the second pose, paste it on 2, 14, 26, 38, and continue with all the poses until you complete all the frames of the camera movement (48 camera positions), now you can play the animation.

Apply 2D Camera
You can mix a camera 2D with the 3D camera, the camera 2D can do zoom in and out, so to create one, go to Animation/New animation Layer/2D Camera folder, inset the animation folder with the 3D camera, in the first frame using the Operation tool change the scale of this layer to the starting position, in this example, I will zoom in to the face of the character and in frame 24 (The first option in the Display mode, shows what the camera sees, the second show the camera area and the path), zoom out to see the entire model, then right-click in the first keyframe and paste in the keyframe to frame 48, play, you can see there is zoom effect and pan effect at the same time. This is too simple of an example, but in the youtube video, you can see an actual application of this technique.
Edit:
I felt bad because I didn't show the end result of this example, the 3D model create the structure for the animation, but is NOT the animation, you must draw over or use as reference to your own character, with the advantage of a clear structure for your animation, then you can invest time putting as much extra thing as you want, in this example I try to keep the character as simple as I could because is just an example, the animation is quiete rough but the idea is there, I can improve over it as much as I want.
I use half of the camera pan animation and keep constant the firs part and the end part to create a more interesting animation. Several hour later this si what the result...
If you are interested in an application to a real project of this technique, pleas visit my short on youtube, is just 1 minute, there I use the character in the tutorial...
Thanks!
Users who liked this post


Comment