
Hello hello! Today I'll be teaching you a thing or two about drawing faces from various angles. This is a tutorial designed for beginners, in which I'll be addressing five essential angles: side, 3/4, down, up, and of course front.
Let's start with the basic proportions of the front-facing human face. Generally,
The eyes are in the middle of the head (length-wise).
Eyes are one eye width apart.
The sides of the nose align with the inner corners of the eyes.
The forehead, nose, and lower face are split into thirds.
The mouth is slightly above the halfway point between the nose and chin.
Each corner of the mouth is slightly further out than the corners of the eyes and sides of the nose (varies depending on expression and person).
Ears line up with the center of the eyes and the bottom of the nose.
These guidelines are great to start out with but keep in mind that they will squish and bend as we change the angle of the head.
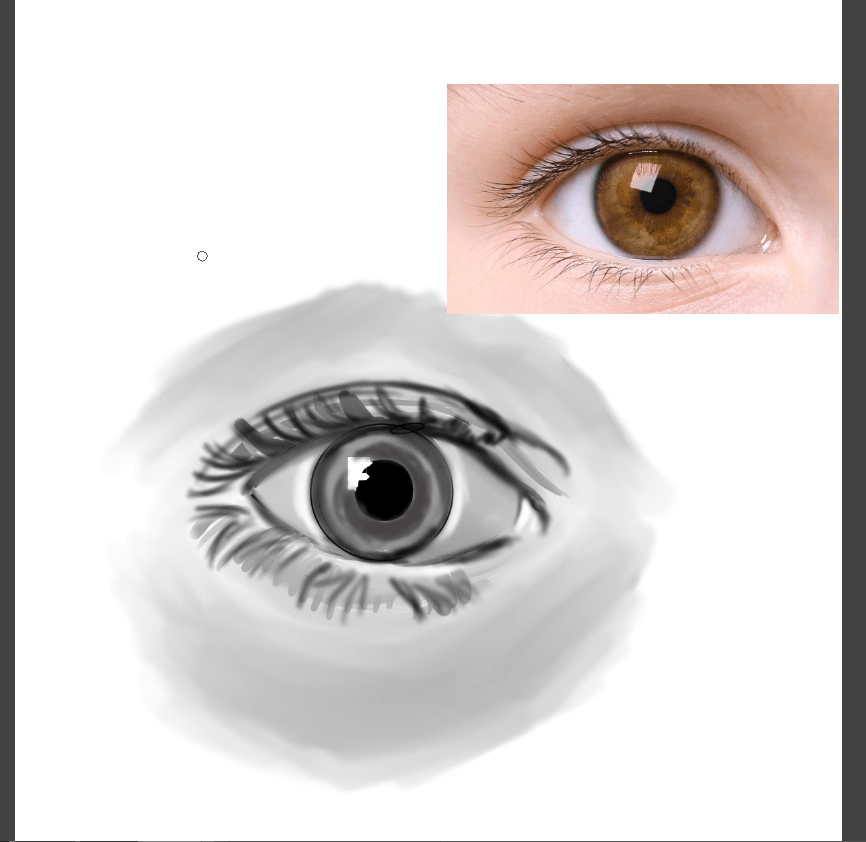
Breakdown of the eyes
Breakdown of the nose
Breakdown of the lips
Here's a (simplified) breakdown of the facial features. I'll be using these terms and color codes throughout the rest of this tutorial.
Side view
It's good to think of the facial features as triangles when drawing a side view.
Let's take a closer look at these features.
When drawing the side of an eye, it's especially important to remember to think of it as a triangle and the iris as an oval. The eyebrow also needs to be shortened to fit the length of the eye.
The nose comes down at a slope, showing the shape of the bridge in its entirety. At the top, it curves outward for the eyebrow and then back into the forehead. At the bottom, it curves in and then out into the top lip. The nostril typically angles upward, and the outer line curves under it.
The top lip is generally somewhat pointier and smaller than the bottom. Depending on the expression, the mouth will angle either upwards or downwards. Remember that the corner shouldn't stretch past the eye.
3/4 view
At a 3/4 view, the back of the head is shown. Consequently, The furthest side of the face, in this case, the right side, is squished width-wise.
In a 3/4 view, the highest/lowest point in the curve of the eyelids is moved to the right (or left if the face were looking the other way) due to the way the face is curving. The end of the eyebrow is also shortened and the iris becomes ovular for the same reason.
Like the side view, the nose bridge is shown. The top curves into the brow bone. The right nostril is foreshortened (or overlapped) by the nose tip.
The right side of the lips both curve inward to the mouth, similar to the way the nose overlaps itself. It should still align with the sides of the nose.
Downward view
Downward views cause the face to narrow at the bottom and the ears to raise.
It's important to note that in a downward angle, the neck is foreshortened, showing a muscle called the trapezius. This muscle slopes down from the neck into the shoulders.
Here's a better look at the trapezius. It's a great thing to keep in mind when drawing busts/shoulders as well!
Eyes at a downward angle can vary depending on which way the character is looking. If they're looking down, the eyelids will take up most of the space. If they're looking ahead, or especially up, the eyes will remain relatively unchanged from a front view, aside from a slight taper upward toward the ears and the iris being ovular. Also, note that the eyebrows will angle down and foreshorten the eyes as if the character is angry.
The tip of the nose curves downward, and the nostrils aren't visible.
The top lip is less visible if at all, depending on how thick the character's lips are. The corners of the mouth angle upward.
Upward view
At an upwards angle, the top of the head narrows, the ears are placed lower, and the underside of the jaw is shown.
The bottom eyelids become flattened at an upwards angle. The iris is also squished into an oval, similar to how it was in a 3/4 view. If the character is looking up, the pupil will also be moved up rather than in the center.
The bottom plane of the nose, including the nostrils, is completely visible at this angle. The bridge of the nose is foreshortened by the tip.
The top lip is shown much better than at a downward angle. The corners of the mouth curve down.
References
Always remember to use references! Especially when starting out. While learning these tips is important, references make it so much easier to learn complex poses and angles. Clip Studio provides a great resource for this: 3D models.
To get 3D models, simply go to Window > Materials > Body Type
Drag and drop a model onto the canvas.
There are loads of different poses and tutorials for 3D models in the asset store and Clip Studio TIPS respectively.
End
You've made it to the end! Thank you for reading thus far. I hope you found this tutorial useful, I sure had fun making it! I wish you luck on your future face-drawings :).
Users who liked this post


Comment