
Intro
Do you want to make a character based off something that exists, but have no idea where to start? I’m Skyribbonsteph and I can help! Let’s go through the process of turning objects, animals, and more into cool, anthropomorphic characters!
Personality and Body Type
There are two main starting points to consider when making a character: personality and body type. Let’s start with personality.
Personality
If your object was a real, living person, what kind of personality would they have? A good way to come up with a personality for your character is to think about the physical traits of your object.
Consider your five senses. What does it feel like to touch, taste, smell, hear, and see your object, if possible? Is it soft and warm, or cold and spiky? Is your object something dangerous to touch or experience? Or is it inviting and friendly?
Try making a short list of your object's traits to refer to during your designing process. I've also drawn out some example personalities that you can work off from as well.
Body Type
When coming up with the body type of your character, consider the size and shape of your object.
Is your object as big as a building, or smaller than a pebble? Is it wide or skinny? Flat or thick? Round or pointed? Do you imagine your object as a child, an adult, or an elderly person?
Here are some example body types below.
Now you can combine personality and body type to come up with a basic figure for your character! Here are some examples of some basic character figures, inspired from objects.
The character on the left, inspired from a refrigerator, is big, thick, and serious.
The character on the right, inspired from a marble, is small, round, and friendly.
Shape Language and Physical Features
Shape is one of the most significant ways that we recognize objects, so your anthropomorphized character should embody the shape of your object in one way or another.
Head Shape
One key way to create an anthropomorphized design is by having your character's head shape match the shape of your object. This works most effectively if you have an exaggerated art style with heavy shape language.
Body Parts
You could also exaggerate specific body parts of a character (such as eyelashes, fingers, etc.) to resemble the shape of your object if you want to create a more subtle design.
Hairstyles
Another very popular method artists use is making their characters' hairstyles resemble the shape of the object.
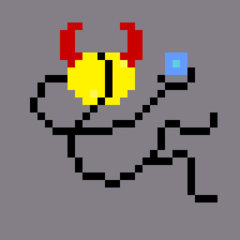
Push Your Ideas (1)!
Remember that when designing anthropomorphic characters, it can be fun to push your ideas and make them as literal as possible! Let's push these characters and make their hair literally be made of the objects they're inspired from!
Clothing
Clothing is very important in the creation of an anthropomorphic character design. It’s important to have a visual library in your head of different styles of clothes from fashion eras around the world to inspire your own outfits.
Here are examples of few of my favorite styles as a starting point (made from various references).
I’m sure you can already imagine the kinds of characters who would wear these different styles. Perhaps this sparks an idea of what kind of outfit you want your character to wear.
Outerwear
One technique I enjoy using when designing clothing is giving a character a large jacket or outerwear piece that matches the shape of my object. This gives them a readable silhouette that clearly depicts what they are based on.
Sleeves, Hems, Etc.
Another more subtle clothing option is to incorporate your object's shape into the sleeves of your character's shirt, the hems of their pants, their shoes, etc.
Patterns
If you want to be even more subtle, you can put patterns on your character's clothing that match the patterns on your object.
Give Your Character a Job!
Another alternate method of outfit creation is giving your character a job based on your object! This gives you a clear reference of what kind of outfit to design and you don't have to start directly from scratch.
Maybe if your character is based off a plant, they could be a gardener, or a football-inspired character could be a football player.
Accessorize!
Don't forget that you can also give your characters cool accessories that resemble your object as well!
Push Your Ideas (2)!
As I mentioned before, it's fun to be as literal as you want in these designs! Don't be scared to push your design and make your character literally wear your object of choice. Be as wacky as you want!
Coloring
Color is what brings everything together! I'm going to demonstrate how you can color anthropomorphic character designs using these two example characters who I've inspired from a bell and bubble wrap.
Start with a Color Palette
First, come up with a basic color palette of about three or four colors or shades. I'm going to be using primarily these shades of tan and blue for my characters (with added gray).
Contrast Test
It's important to have contrast between the variations of your colors. I'm using both light and dark shades of tan and blue for contrast.
A good way to test whether your colors have good contrast is to make a quick copy of your color layer and turn it into monochromatic black and white.
One way to do this is by going to Edit, Tonal Correction, Hue/Saturation/Luminosity, and turning the Saturation slider down to -100.
Good vs. Bad Contrast
If you can clearly distinguish between the colors of your character in black and white, your contrast is good.
Here's an example of the contrast of my flat colors versus a version with bad contrast.
Rendering
Now let's cover rendering, or adding shadows and highlights. I prefer to use cel-shading, and I start with rendering my characters' skin and hair before their clothes. My light source is above their heads.
Consider Your Clothing Materials
It's important to have a general understanding of the materials your character's clothes are made of before you begin rendering. Here are a few common types of materials:
1) Opaque
2) Translucent
3) Reflective
4) Light/Thin
5) Heavy/Thick
6) Frilly
7) Pleated
8) Tight
9) Loose
In this tutorial, we're going to cover how to render three of the most important types of materials: opaque, reflective, and translucent materials.
Rendering Opaque Materials
Let's start with rendering opaque materials, such as the bell man's outfit.
Add shadows where the fabric would fold in on itself or across your character's body, such as between their arms, or across their stomach and waist (notated in orange).
Because these materials are thick, use thick wedge-shapes for shadows.
Don't forget to also add shadows where the light does not hit your character (notated in blue).
Rendering Reflective Materials
Reflective materials, such as the bubble wrap girl's jacket bubbles, dress, and sneakers, will have practically no shadow on them. Like with opaque fabrics, render with thick, wedge shapes, but use bright colors for highlights as opposed to dark shadows. I've shown in orange where the light would hit the folds on the girl's dress and on her sneakers.
Rendering Translucent Materials
Rendering translucent, or partially see-through materials, such as the lens of the bubble wrap girl's glasses, involves toggling the opacity of your layers.
One way to do this is by making separate layers specifically for the parts of your character that you want to be translucent. Then turn down the opacity slider in your Layers panel to whatever level you like.
Bonus Tip: Clipping Layers
After you've finished with the rendering, you can elevate your character designs by adding color to your line art with clipping layers!
To add a clipping layer to your line art, create a new layer above your line art layer, and press the Clip at Layer Below button.
The colors you add on your clipping layer will automatically show on your line art layer.
A common technique artists use is to add color to the inside line art, while leaving the outer bordering line art black, as I've done here.
Here's the finished product!
Conclusion
Those are all my tips on creating anthropomorphic characters! Don't forget to use lots of references, and don't get discouraged if things don't work out on the first try! Hope this helps and happy drawing!
Users who liked this post


Comment