
Foreword
What type of artist are you when it comes to drawing hands? Do you distinguish your lack of skill and hide them from view?
Or do you instead proudly display your Animal Crossing-esque bulbs?
Maybe you did take the time to learn how to draw hands — in some particular poses — and now you draw those poses over and over again …
Whatever the case!
In this tutorial, I’ll help you get a more solid and foundational understanding of how to finally draw hands properly! PLUS; I’ll give you a concrete way to go about drawing them with a little help from our favorite, mutual art program — Clip Studio Paint. More on that later!
2 Foundational Ideas about Hands
First, it’s important to understand the basis upon which this tutorial is built. I consider hands to be all about
1. Proportions and Flow
and
2. Angular vs. “Fleshy”
This may sound a bit confusing at first; simply keep it in mind for now. It’ll make more sense as we go along :)
Basic Structure & Components of the Hand
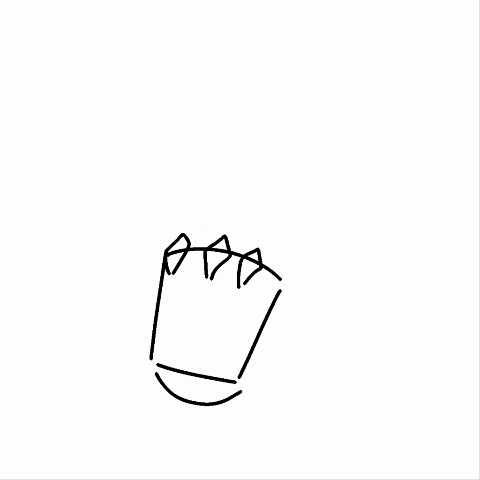
Palm
The palm has a pentagonal shape and thins out towards the wrist.
In a 3d-space, you may also think of it as a curved arch when drawing it in perspective to make things easier for yourself.
Just make sure to actually remember it because the fingers do not line up perfectly straight.
Color-block the side and inside of the palm when drawing more complex poses to help you distinguish.
The Rule of Halves
First, you need to know that the hand is approximately as long as your face.
As for the actual proportions — there’s a thing that I like to call the rule of halves. It goes as following:
Half the length of a hand is the palm —
pon which half of that length is the first joint.
Upon half of THAT length is the second joint,
and upon half of that peculiar length are the cuticles. After that come the fingertips.
Spacing
As for the actual spacing between the fingers — a reference should guide you. But should you ever find yourself in a situation without access to your own hands, a reference, or a clip studio 3d model;
it’s better to rather leave too much space,
than too little — because otherwise, the hand looks cramped and absolutely loses effect.
Joints & Knuckles
The most important thing that you need to understand about the knuckles is that they actually rest quite a bit further into the hand than you’d expect.
This is also where your actual finger really begins!
So, consider that when applying the rule of halves,
and – especially when drawing the palms up! Because then, the knuckles aren’t visible, and the webbing in-between your fingers makes them look shorter than they actually are.
If you’d like, draw the knuckles in by using diamond shapes.
Fingers
So how should we approach drawing fingers, then? Remember when I mentioned something about flow? This is where that comes in.
You can try beginning with a loose suggestion of the flow of the finger, by drawing 2 strokes originating from the knuckle. No more.
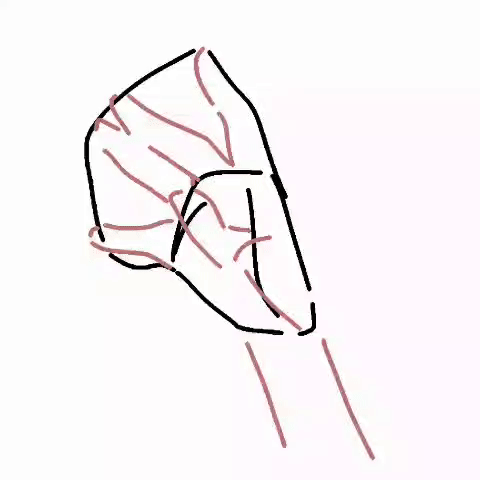
It’s best if you’re looking at a reference, your own hand, or a clip studio 3d model while you’re doing this, so you’re not just guessing fruitlessly.
Again, be loose about this and don’t worry about any details or it looking perfectly good — what’s most important right now is the foundation.
The reason hands look worse or flatter the more you edit them is because you’re covering up the foundational, basic shapes with details as you tweak.
Focus on the simple shapes first and build onto that — but don’t overcrowd them.
Another thing worth noting is that the fingers, in a natural state, always fan out a bit.
If you put your hand out just now, you’ll see that your fingers are, by default, not glued together.
You may also notice that, out of all your fingers, your pinky is the one most likely to break the flow.
As for when drawing the finger shapes themselves — try to go for lemon slices.
Fully rounded shapes don’t give you any direction or flow to work with and can begin to make the hand look kind of confusing and unclear.
Lemon slices actually point in a certain direction.
If it helps: simplified fingers are really just angular at the top and fleshy on the bottom —
so lemon slices are a suitable foundational shape to aim for!
Foreshortening
What foreshortening essentially does is mess up the hand’s and finger’s proportions; anything closer to the camera is exaggerated and bigger.
You can almost think of it as “stacking” the different sections of the fingers in a mental — or clip studio model — 3d space.
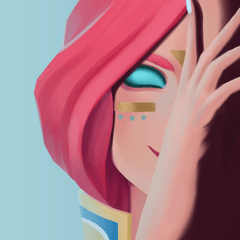
Grace
The fleshy parts of your hands — in contrast to the angular ones that provide flow and direction — is what gives the hand that certain grace.
Take a look at this picture and notice how it’s the fleshy, rounded part of the hand that makes it look so elegant and feminine.
Miscellaneous / Extra Tips
- When using a reference, don’t just exactly copy what you’re seeing. Go over it and break the structure down into understandable, simple shapes and guidelines. If you’ve drawn a hand from reference, compare and see the differences. Employ some active learning and try to learn from your previous mistakes.
- When drawing from imagination, it’s useful to start with the biggest/closest finger first and move onto drawing the smallest/furtherst finger to gauge how much space to leave for the others!
- Focus on the basics and foundation first, then add details onto that, making sure you’re leaving enough negative space.
- Some people may have an easier time copying a reference by getting the outline right first and then “filling in the details(fingers)”!
- Some people may find it helpful to draw guidelines on a plastic glove and wear it when taking pictures of their own hand for reference!
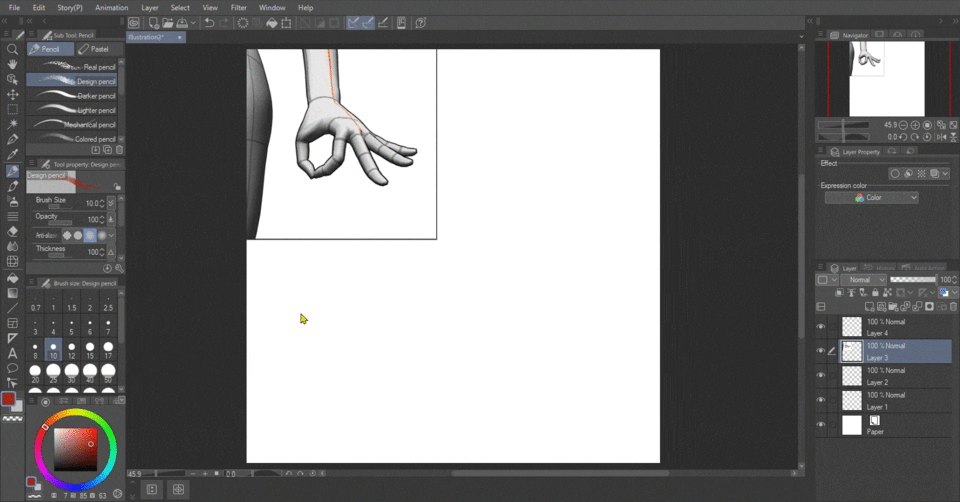
The Handy Solution (Clip Studio 3D)
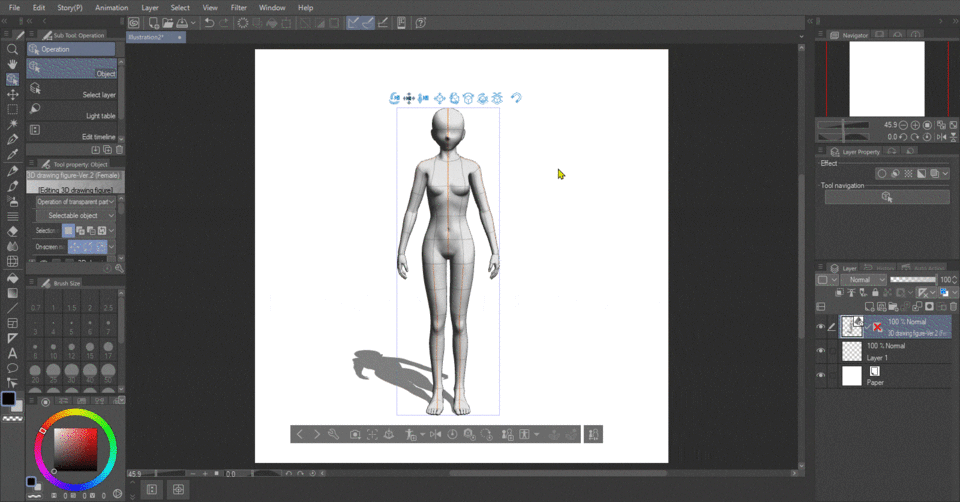
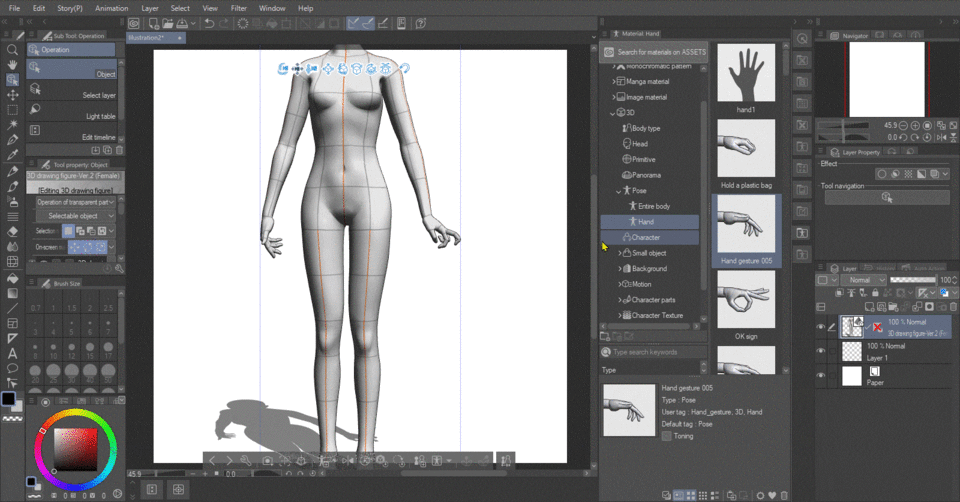
It's now time to show you how to utilize Clip Studio Paint‘s 3D Models as a (handy) solution for helping you draw hands.
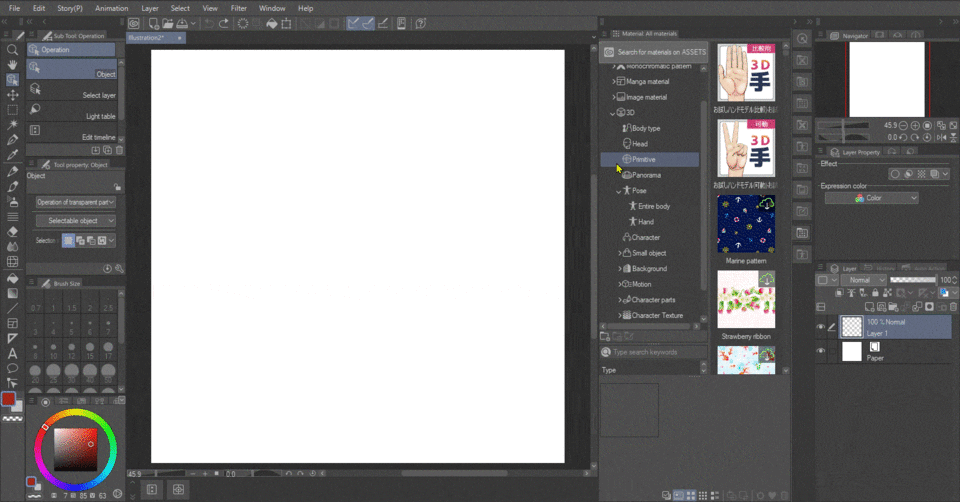
First, we‘re going to start by creating a new canvas. To do this you can click on the paper icon on the left hand side of your workspace. Alternatively, you can also go higher, to ´Fileˋ, and click ˋNew…ˋ from there.
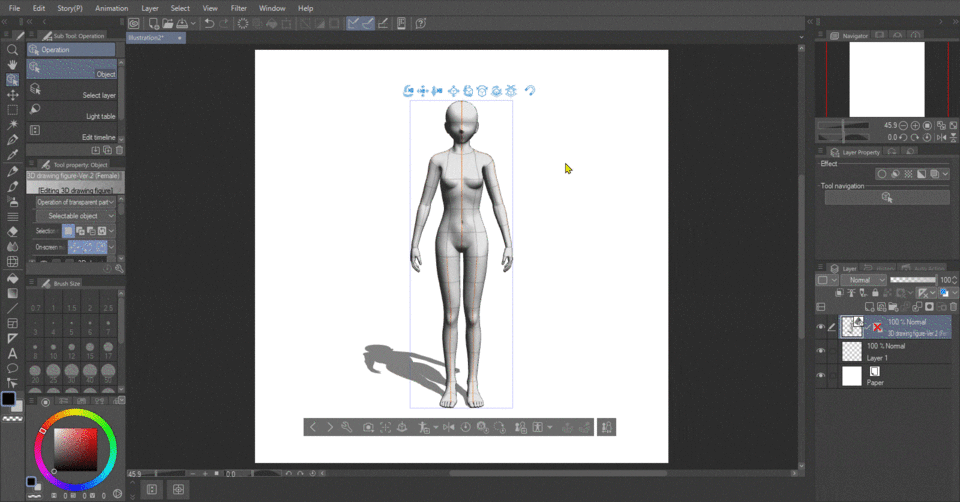
To create a 3D model, go to ˋWindow,´ at the top, and ˋMaterial.´ Then you should have an option saying ˋ3D´. You can also click the double arrow to the right of your canvas to view your materials. Under 3D you will see Body Type and Pose. Drag whichever model you prefer onto your canvas. The upper two models are more manga-oriented, with slimmer bodies, larger heads, and anime-proportions, while the bottom two models are more realistic.
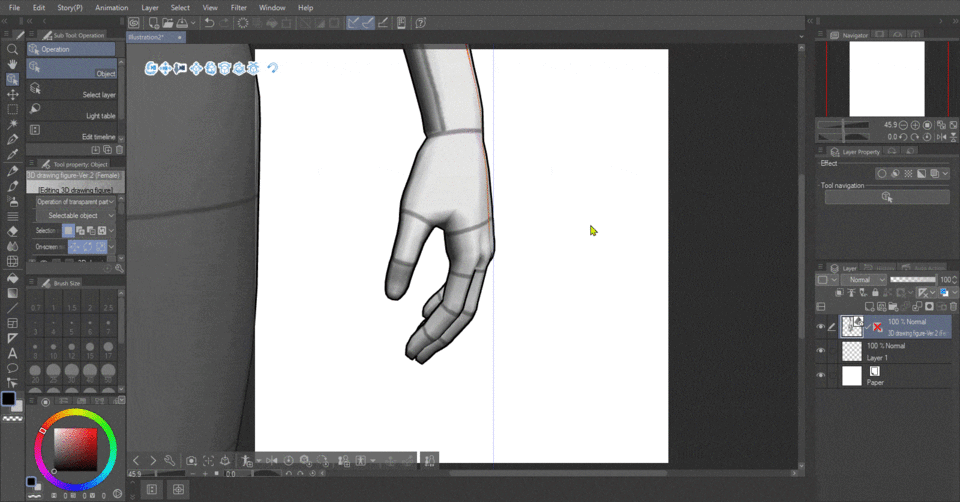
I‘m now going to teach you how to use a 3D model and its camera. You will see three camera-related tools in your toolbar upon selecting your 3D model. This first one, which you use by clicking and holding any free space as you move your mouse, changes the perspective of your camera.

The second one moves your actual camera.
And the last one helps you zoom in and out.
These other options in your toolbar are related to moving the 3D model itself — but I recommend not messing around too much with these at first — we‘re just going to keep it simple for now.
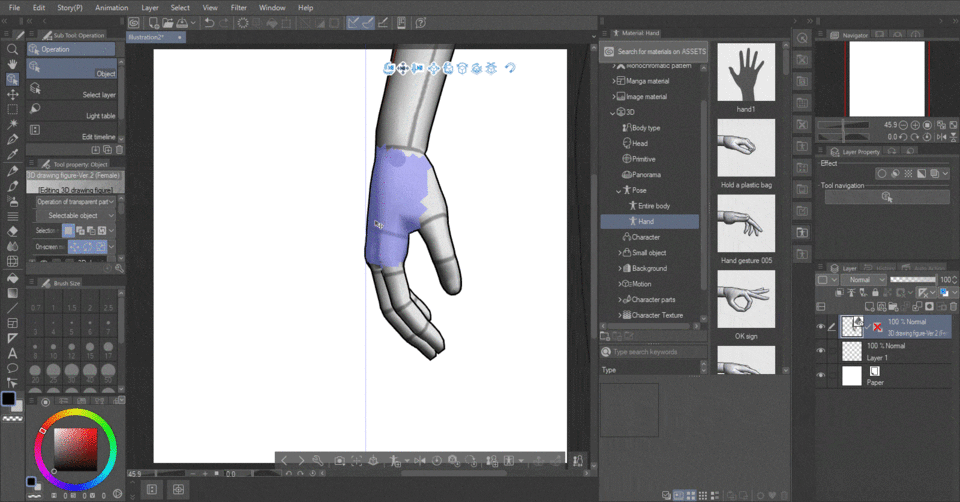
The first thing we‘re going to do is center in on the hand with the help of our camera tools and then zoom in.

Now we should be able to click on any part of the hand and see quite a few options show up on a wheel. These arrows here are there to control that part — like its rotation, lift, and direction.
You can select the palm, the thumb, any finger and its sections — they all have their own control “areas,” so to say.
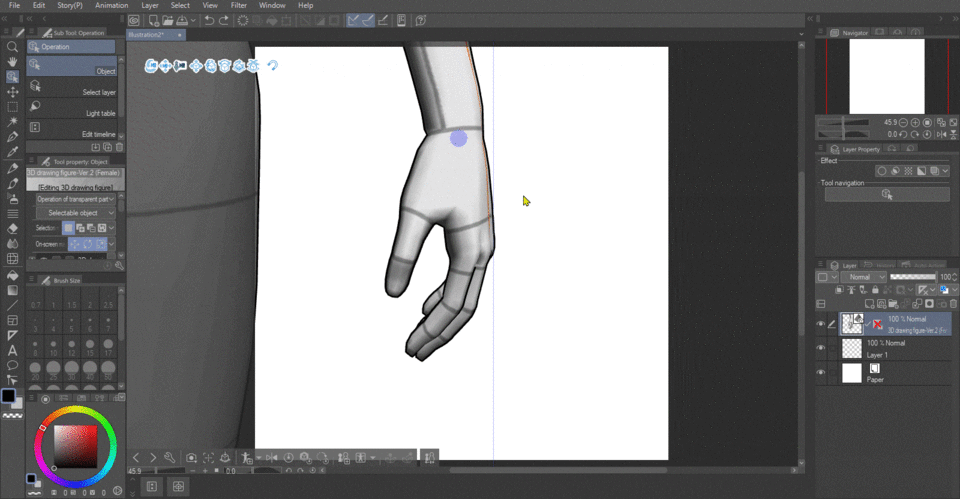
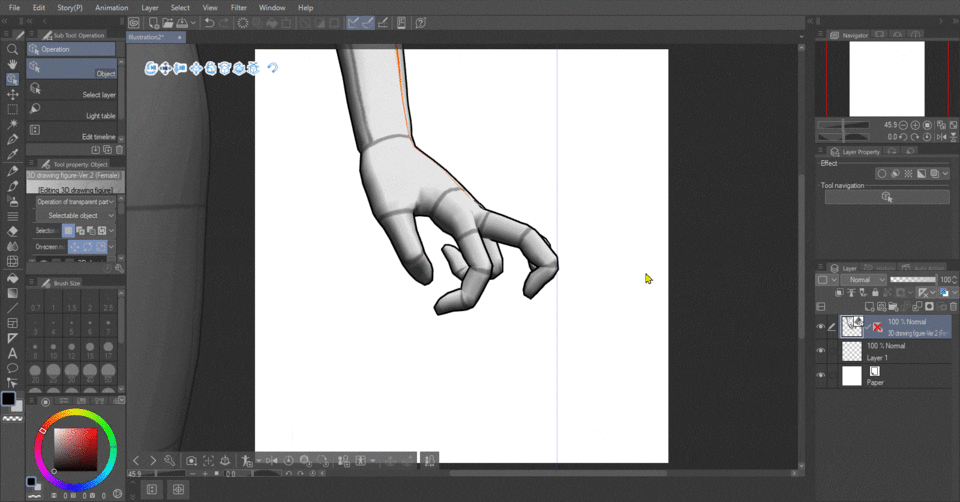
Now you can begin posing your hand!
You’ve created a hand pose that you really like and would like to save for next time? There is an option to do that! Simply click on the arrow next to the first small figure of the bottom toolbar. You should see two options; “Register right hand pose and register left hand pose as material.” Remember that the 3D model is mirrored — so while this may say “right hand,” we ourselves are actually referring to the left hand of the model.
Name the material whatever you’d like, choose a saving location, and press OK. Now anytime you'd like to apply this particular hand pose, you can easily navigate through the materials tab to your saved location and choose the saved hand pose.
If you pull it over your 3D model without having selected anything, the hand pose will be applied onto both hands.
Selecting a particular hand before, however, will apply it on just that hand specifically.
Once you’re done with your hand pose, have zoomed in and adjusted the perspective accordingly, and would now like to move onto actually drawing, I recommend you to take a screenshot of your screen and cut it to size,
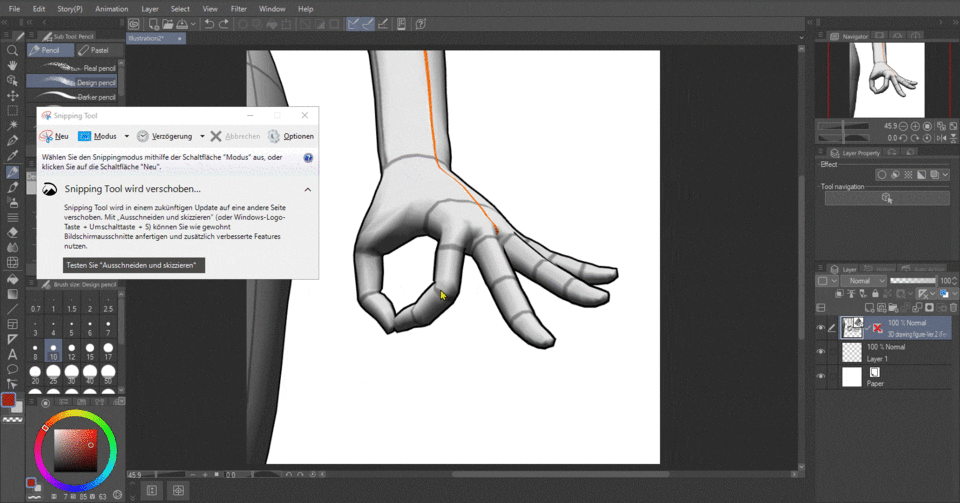
save and copy it, and paste it onto your canvas via “Edit” at the top.
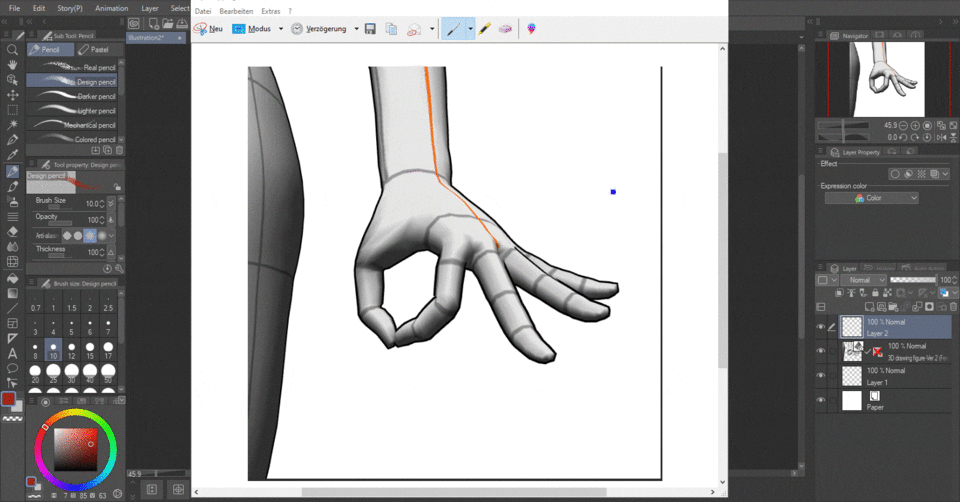
Adjust to your liking. You may drag it in the corner to use it as a reference, or you could enlargen it to the size of your canvas and begin breaking it down.
I like to get the guidelines down, hide the reference, and, with their help, draw the hand from imagination as practice. In the end, I like to compare and note the differences.
It’s completely up to you how you’d like to use 3D models. Technically you could even trace them and do nothing else — though I wouldn’t advise that since we’re here to learn hand anatomy … Still, this is a very helpful tool to at least get you started somewhere instead of trying to guess how the hand should look or trying to take a picture of your own hand and failing because you can’t get the perspective right or otherwise.
Or perhaps, for example, you need a male hand, but you’re female —
Stylization Tips
- Hands are a great target for the application of Shape Language, try breaking some rules intentionally: giving certain characters blocky, thick hands; froggy-finger tips; super rounded, fleshy hands, etc.! The sky is the limit!
- When drawing hands quickly or in a rush, I like to make them and the fingers look like triangles
- Lots of people like glue-ing the middle and ring finger together because it enhances that aforementioned “fanned-out” look of the hand or gives it a child-like appearance!
- When drawing fingers against light, a lot of subsurface scattering can show through inbetween the cracks
- Push your hand poses! Exaggerate gestures; group some fingers together; increase the spacing or foreshorten even more
- Some characters can have naturally longer thumbs as a small quirk
Final words
Drawing hands is an international struggle for many artists, so it can be really tempting to just disregard learning how to draw them or stuff them into pockets or hide them behind backs — I’ve been there myself — but if we put the effort in to really understand them, hands can become a tool for expressing our ideas to the fullest! Once we get good, we can even draw them from more interesting angles and incorporate them into a wider range of drawings! They can also really enhance our character’s pose and help convey emotion.
With these final words, I encourage you to give it a try or at least mess around with Clip Studio’s 3D models :) Do your best and reward yourself when you do end up practicing — even if just for a bit!
If this tutorial helped you, share it with whoever you think could use some help as well!
Users who liked this post


Comment