How to draw flowers and use them in illustrations
before start...
hello! It is ‘LYPS (Lips)’. Today, I’m going to do a tutorial on ‘flowers’, a subject and material I often use. Depending on what kind of work we are drawing, there are times when we need a scene with flowers blooming on tree branches, but in line with this month's theme, I will focus more on flowers and teach you my own method of depicting them and how to use them in illustration work. !
1. Collect data
Do you like flowers? The photo above is a photo I took myself and is of the ‘plum blossom’ that blooms around March every year. Usually, when I find a subject I want to draw, I take a photo and save it. This is to increase observation of things around you, draw a more realistic picture, or obtain information as data when necessary.
Q. Why should I refer to photos?
There is some difference between what we draw from data and what we don't. This is because small details affect how naturally the materials in a work blend together. To do this, it will be helpful to first know the structure of an actual flower and draw it.
In particular, flowers often appear in romantic scenes, and various flowers have various stories and meanings, so they are a good material for giving a special message to character illustrations. If you experience drawing various flowers through this tutorial, you will improve your ability to use them to make your illustrations more colorful.
2.Structure of a flower
2-1 Learn about the structure
A flower basically has a calyx that supports the flower, a pistil and stamen, and petals that surround the pistil and stamen. There are slight differences depending on the type and shape of the flower, but they generally have a similar or identical structure. If we look at the larger structure, it is as follows.
-Pistil: The main reproductive organ of the flower, located in the center of the flower.
-Ovary: The part that surrounds the ovary and belongs to the detailed organ of the pistil (not shown in the picture)
-Ovule: A seed inside an ovary. This is the part that becomes pulp later.
-Stamen: It is the reproductive organ of a flower and produces pollen.
-Petal: A thin leaf surrounding a flower. It is a nutritional organ and is characterized by its bright colors to attract pollinating insects such as butterflies and bees.
-Sepal: A flower's nutritional organ that, like petals, serves to surround the reproductive organs.
There are more detailed parts and names, but since we don't need much knowledge about flowers to draw, we simply looked at the structure. If you know the actual structure, you can adjust the deformation to suit your style or draw various flowers.
2-2 Drawing
2-1. Set the layer's opacity to 50% and draw a line on it to create a simple shape of the flower.
(At this time, you can draw on the photo or draw on another canvas.)
2-2. Figure out the number of petals of the flower in the diagram and draw a line to see in which direction each stamen extends from the center of the stamen.

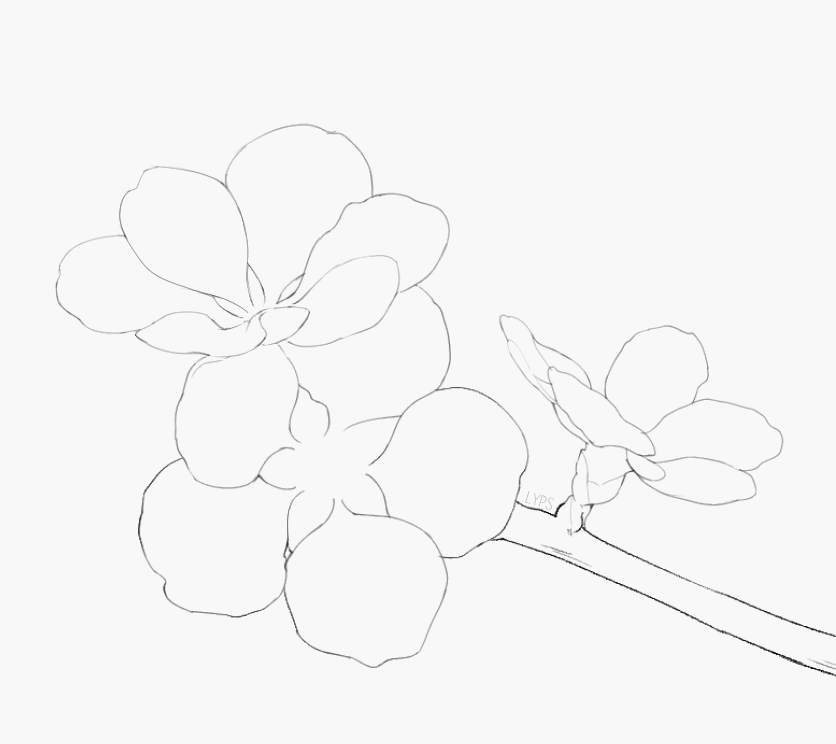
2-3. Connect with a round line along the line from the center outward, and finish by drawing long stamens and flower branches.
To reduce accessibility, we used flowers with small petals, but more complex petal structures can also be understood using this method. In addition to learning various shapes, it will be helpful to use the above method to shape other flowers as well.
3. Coloring
Now let's color it. Since I prefer a casual style, I will proceed with some exclusion of realistic depictions. The coloring process is not difficult, so follow the steps below step by step or proceed with the depiction in your original way.
3-1. Create a new layer below the line drawing layer, then select the desired color and fill it with the paint tool.
3-2. Draw the calyx and pistil visible in the center of the flower.
3-3. The light shade of the petal is also depicted with an airbrush, and the sides of the leaf veins and the thin curves of the petal are expressed to match the direction extending from the center to the outside of the petal.
3-4. Depending on the thickness of the petals, you can give them a transparent feel by adding a bit of transparency. In fact, if you see a flower on a day with strong sunlight, the light may appear to be transmitted through it. Draw a shadow on the area where the petals overlap.
3-5. It is easy to draw a stamen by first drawing the head of the stamen and then drawing a line leading to the center of the flower.
3-6. Finish by adding shadows and light or adjusting the color according to your personal preference. I increased the saturation to give it a fresh feel and added clear water droplets and sparkling splashes.
small tip
Q. Why are leaves depicted according to the direction of the veins?
A. When reproducing a picture that is close to reality, if it is depicted in the opposite direction to the direction of the leaf veins, the viewers who see it may feel a slight sense of discomfort and may lose visual stability. For example, the white line drawn on the manhole cover on the floor is not straight but slightly crooked, the intersection lines are off, only one tile is missing among the blocks of a certain shape... things like this! Since people feel calm about things they are familiar with, it is best to pay attention to this ‘visual stability’.
Type Lapse & Completion
Check out the overall process and finished product through time lapse!
4. How to draw different types of flowers
✿ Rose ✿ (Rose)
I will also introduce you to a few more ways to draw different types of flowers.
Roses grow with multiple petals that are alternately arranged and are characterized by multiple layers that surround the flower bud.
One. Draw a long water drop. I imagine it becoming the central axis of the flower. Although the rose does not have a perfectly circular shape, you can determine the direction the flower is facing by adjusting the perspective using the circle tool.

2. Add a new layer on top of the water drop layer and draw one layer at a time as if wrapping the petals, being conscious of the curved area of the petals. Roses have misaligned petals, so be careful not to overlap the flowers. The flower in the very center is narrow, and as it moves outward, it is the first part to fully bloom, so more of the upper surface of the petals is visible, and the wider the space between petals is, the more of the inner surface is exposed. This inner surface is where the deep shadows appear.

3. After filling in the base color, add a dark gradient to the petals. And since light does not reach the area where the flower and petals meet, darkness is created, so paint a shadow. The petals do not have prominent veins and are smooth flat, so it is okay not to describe them in detail.
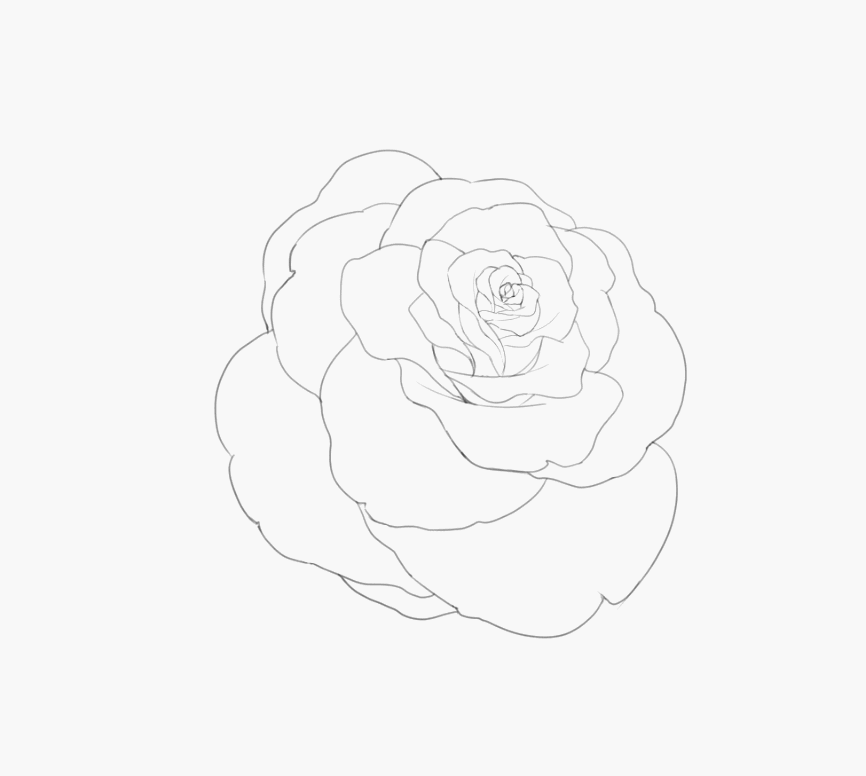
4. Depending on your personal preference, draw water droplets or use a gradient map to correct the color.

✿ morning glory ✿ (morning glory)
One. Morning glories have one petal. The center is deep in the shape of a trumpet, and there are pistils and stamens inside, but they are almost invisible. If you keep the shape simple, you can draw it as if a disk is placed on top of a long, thin cone.
2. Please sketch the morning glory referring to the simplified shape. The morning glory has a single petal, but it has a seam that makes it look like multiple petals were glued together. Please roughly draw five lines. I do line drawing based on the sketch.

3. The center is usually white, and as it extends outward, the edges are often bright blue or purple. Blend the areas where the color changes naturally so that there are no clear boundaries. Since it is not just blue but also contains a hint of purple, you can express rich colors by mixing purple with an airbrush.
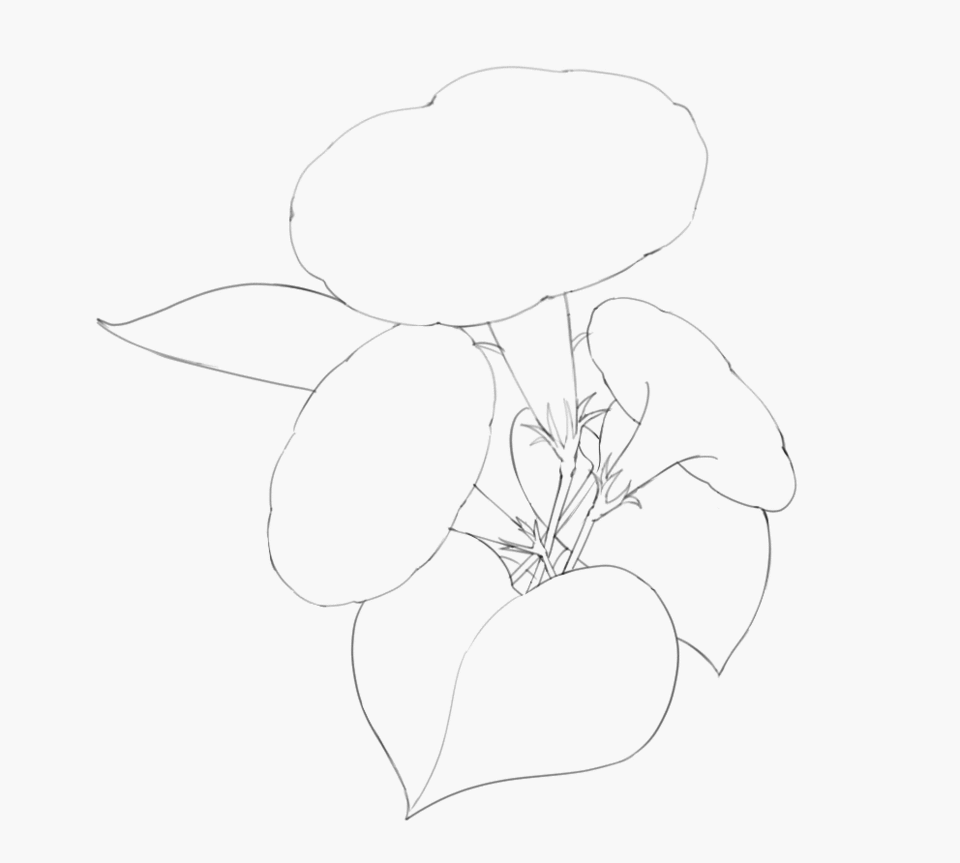
4. When coloring leaves, I fill in the color by drawing the leaf veins. You can make the leaves come alive by adding reflections to the areas receiving sunlight.
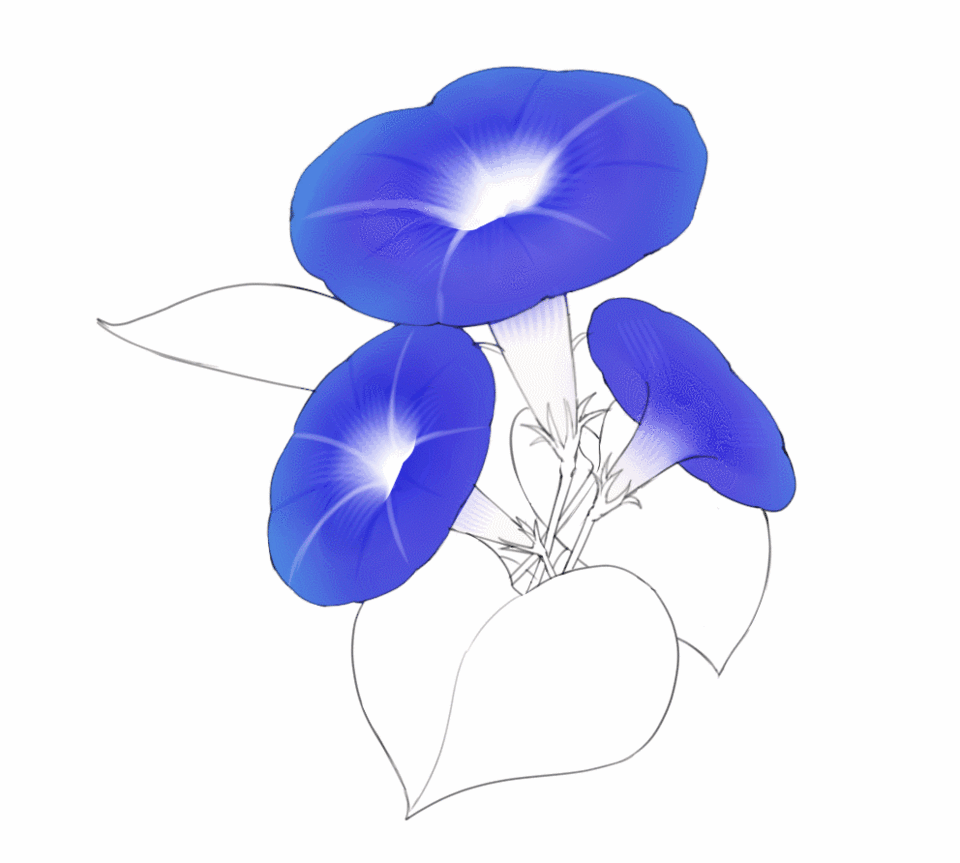
5. On a rainy day, thinking of a morning glory with water droplets, I draw the rain and water droplets and finish by editing them.

✿ Hydrangea ✿ (hydrangea)
One. Hydrangeas are characterized by thick flower stalks and a naturally round appearance as the flowers bloom from various branches. Did you know that the four or five petals of the hydrangea we know are actually ‘calyxes’? The actual hydrangea flower is said to be a very small flower located in the center connected by four leaves. Therefore, when drawing a hydrangea, don't forget the small flower in the center.
2. Make a round shape and draw it with the feeling that the flowers are piled up in layers from the top to the bottom. If you place importance on description, it can be frustrating if it looks too crowded, so organize the line drawings precisely in the area closest to the line of sight, and simplify them as you go down.

3. Hydrangea's calyxes are thin and soft. Although a large description is not necessary, express light and shade in the curved or refracted parts and color the shadows in the parts where the flowers meet and the parts where there is depth inside and where light does not reach.

4. Hydrangea leaves are round and broad, with sharp, serrated edges. The upper side, which receives sunlight, is darker green than the lower side, and the clear veins stand out.
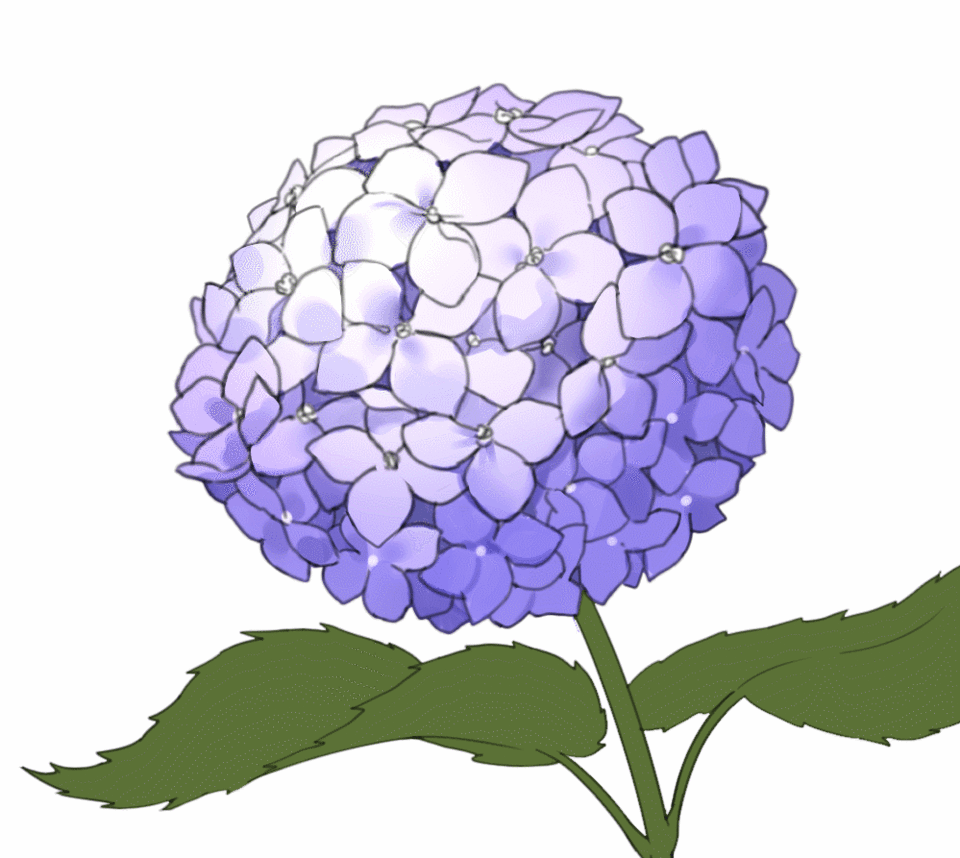
5. Change the line color naturally and then correct the color to finish.

✿ Pansy ✿ (pansy)
1.Pansies have five leaves, two on top and three on the bottom. Draw three circles touching each other like a three-leaf clover. After that, draw two semicircles, thinking of two petals. It will look natural if you express curves by considering the thickness of thin petals rather than too straight lines.

2. The three petals in front have an impressive pattern that looks like the paint is spreading and spreading. After filling the base color with the paint tool, paint a different color only on the first three leaves and use the blending tool to rub it from the inside to the outside in a wide spread effect. It's a good idea to use a textured brush to create a rough pattern.

3.Repeat step 2 with the other color on the inside. Please describe it again, thinking of the long pattern extending along the leaf veins. Lastly, I finish by depicting the pansy's pistil as yellow.

Depending on the type of flower, there are flowers with as few as 1 petal and as many as 200~300 petals, and they come in countless colors. Therefore, even if we create illustrations of new flowers that do not exist, I think that they are still mysterious flowers that have not yet been discovered somewhere. Even if the flower I drew does not exist in reality, the plants expressed with various ideas will be able to create something new and mysterious in the work and provide artistic inspiration.
5. Utilize (1)
Now I'll show you how to create fun brushes!
First, you need several pictures. Please create a time lapse and create a layer.
a. Draw a flower facing the front and color it pretty. After coloring, merge the layers into one layer.
b. Rotate the original picture at the same angle and create layers until it rotates once.
c. Move all layers to the material window and specify the brush tip shape in the settings. At this point, it is convenient to specify tags. Please set tags to make it easier to find.
d. Copy the desired brush and change the brush tip shape in the brush settings to the previously saved layers in order. At this time, be sure to check Stroke-Continuous Paint.
The continuous paint effect creates an animated, rotating flower brush.
(The speed of the brush cannot be adjusted. Please note that the more frames there are, the slower the look will be.)

[A-flower]
Content ID:2033828 ( https://assets.clip-studio.com/ko-kr/detail?id =2033828 )
The brush will be uploaded to Clip Studio Assets, so if you want, please use it!
6. Utilize (2)
Asset Recommendations
If you are involved in creative activities, you probably know how frequently flowers are used as a subject and are a topic of constant interest. Many artists' materials are also uploaded to Clip Studio Assets. Among them, I would like to introduce some of the author's materials that I often use. The quality is high and goes well with anything, making it great to use as a background or prop.
田小馨 https://assets. clip-studio.com/ko-kr/search?user=%E7%94%B0%E5%B0%8F%E9%A6%A8&order=new
meltu's wooden brush (藤ブラシ) - Content ID:1713778
Orange Rose Brush by Kimiyoto - Content ID:2023192
プーミー's Morning Glory Set - Content ID:2029910
amamzz's 菜の花 - Content ID:2028352
Lobelia by rollingcat - Content ID:2026562
rollingcat's stock - Content ID:2028733
In conclusion...
How about this? Does the method of drawing flowers that you thought was difficult now feel a little more familiar?
If you start by understanding simple shapes through observation of objects, you will be able to draw not only flowers but also other things.
Thank you for your effort Thanks for following along with the tutorial!





Comment