
Intro
So 2d animation is hard for others, but it shouldn't be.
Even though I already knew how to animate using a flipbook before, learning the application is still part of the challenge.
Before we can start drawing something, we should at least know how to hold a pencil.
But in this case, we should know how to use the application.
In this video, I should teach you how to animate using Clip Studio Paint, and also share enough knowledge and techniques in animation like a classic animators do, so you could at least make an custom emojis to your social media.
I also have a Video Tutorial for people who wants more on visual presentations.
Part 1.1 - Preparing your Workspace
First, open a Canvas. Make sure you’ve chosen the Animation preset.
My canvas size would be 128 x 128 in pixel(px), since it would be the largest recommended size for an emoji but depending on site, sizes may vary.
Though you can make it larger such as 512x512 px and it will be capable for stickers, but I’ll keep the 128px so I won’t be tempted to add more details.
This would be the visual representation for the 2 sizes.
Normally, you can leave all of the settings as it is but for me, I’ll keep the Tile-safe area so that I could have a center guide to my canvas.
I also added Blank space so that I can keep the consistency and could track whenever I draw outside the frame.
Since I’ve been using a Clip Studio Paint EX, I can have more frames on my animation, but I want this tutorial for everybody so I will follow the limitation of Clip Studio Paint PRO and set my Playback time to 24 and my Frame rate into 12 so I can have a maximum of 2 seconds animation.
Once you open up an Animation canvas, you’ll get a Timeline Window at the bottom of the application where you can do your animation.
But whenever you lost it for some reason, you can always find it in the menu bar under Windows, then Timeline.
Also under the Animation tab in menu, you can find everything you need for animation, but we’ll not gonna discuss all of them here. This is just a note for you to experiment during your free time.
I would also suggest to duplicate your window so that you’ll be able to see the actual size of the emoji while working on it.
To do that, dropdown the Window Tab in menu, select Canvas, Choose New Window.
That will give you a duplicate window on something you’re currently in.
And that new window, drag it out of the tab, resize the window and keep the zoom into 100 so you can get the actual size of the emoji.
Part 1.2 - Animation Timeline
In the Timeline, you'll be able to find all your animation layers. What's on your layer window will also be in Timeline but arranged differently to make it animation friendly workspace.
You'll be seeing animation folder by default when you open an animation preset canvas.
If you need more, you can just make an another animation folder by clicking this New Animation Folder Icon.
Animation folder is different than the ordinary folder we know.
Animation Folder is where you gotta place all of your animation cels and frames.
You can add more than 1 animation folder if you’re intended to have more layers on your animation.
If you ever wanted change to your timeline such as changing it’s frame rate.
You can easily do that by going on that 3 lines on the upper left corner of the timeline.
Select Timeline, and choose Change Frame Rate.
In this case, I put 8 frames and it will become 3 seconds animation in a total of 24 frames.
The divisions on timeline implies how many seconds of animation you’ll be able to do.
You’ll also notice that my animation timeline doesn’t have thumbnail to it. That is because I kept it that way so that I have more space to draw on canvas.
You can easily do that by still going to that 3 lines, then select Thumbnail.
Part 1.3 - Cel and Frame
To some people, Cel and Frame is confusing, or at least to me at first because of camera and computers, like hearing those 60 Frames per seconds, made me think about frame to frame stuff. But they are slightly different.
For me, it didn’t really matter if you call it cel of frame but if you’ll be communicating on animator, this may matter sometimes. Though if you’ll be talking to a client, it may not, unless they are willing to know the proper terminology.
To explain it in a simpler logic, cel are just layers in animation.
Cels can be use repeatedly on different frames on the timeline like this sample animation I made. 1 cel can be just 1 drawing than can be recycled on other time.
In this animation, I use the Cel #4 to the frame 11 and 15 so that it would save me some time by not drawing it again.
Now, since you already know the terminology, you will now understand the use of the other 3 icons beside New Animation Folder.
The first one is New Animation Cel.
Basically, you’ll just gonna add an empty cel in the frame to draw on.
And the next icon beside that is Assign Cel to Frame.
Which means, you’ll assign an existing cel to the frame.
Or you can just right click on the specific frame spot and select the cel you wanted to add.
Part 2 - Animation
So now let's proceed to the fun part, the animation.
There are principles of animation, but of course I won't discuss each of it here because I don't want you to be bombarded with information.
But, I am here to tell you that it is important so you might wanna search it up a little in free time.
+ **Principlesofanimation**isbasicallyjust**LifeArt**.
If you observe enough in life, you'll get an intuition on what to add next to your animation.
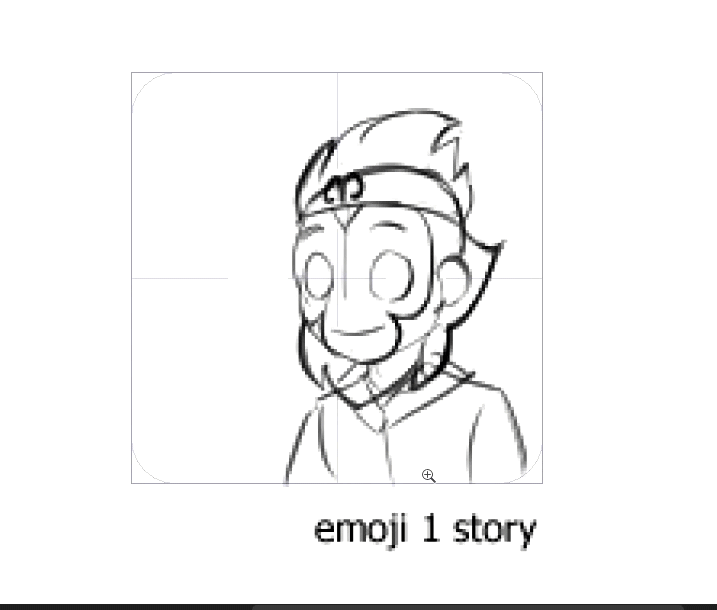
Now, for the design of my character emoji would be a monkey king, since I am a year of a monkey, and a zodiac of a Leo, so that should make sense.
And make it simple as possible, less detail so less things to look at, and less lines to animate.
More lines to animate = More time consuming.
Part 2.1 - Keyframe Poses
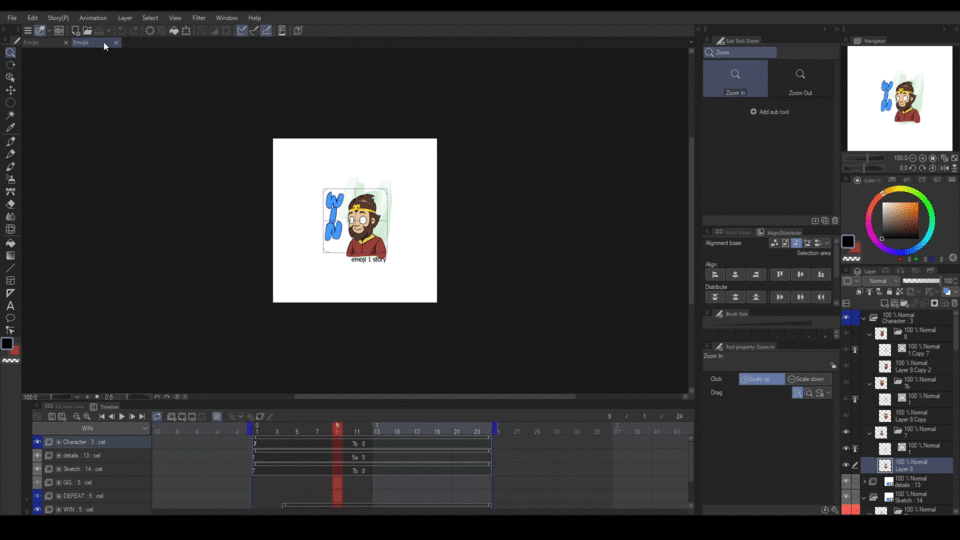
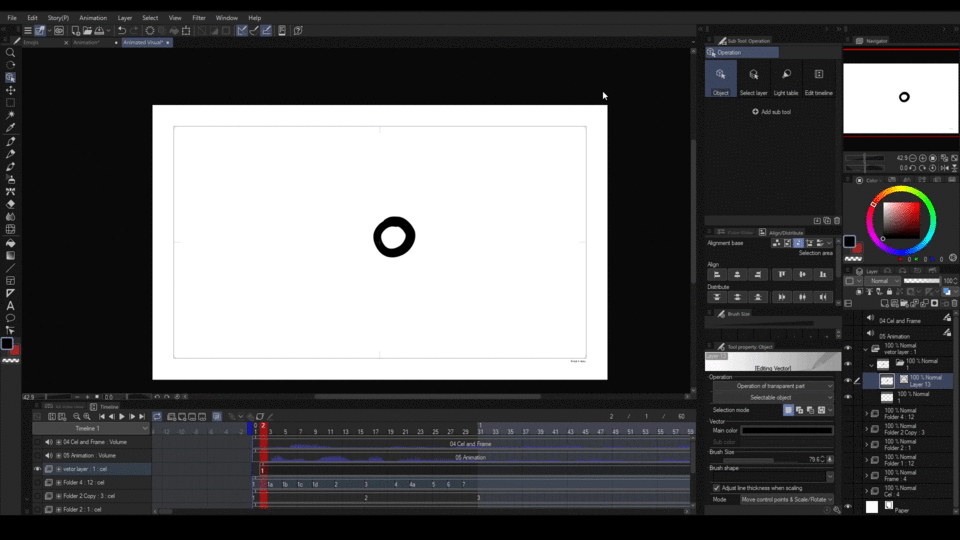
So the first thing you have to do in doing animation is drawing the keyframes poses.
Keyframe Poses is just basically a starting pose of any action to happen, a start of the change in action, and the end pose.
The goal is, even just the keyframe poses, you could still read the action of the character.

Enabling the Onion skin helps you to see the next and previous cel you made.
You can change its settings by going to the Animation Tab > Show Animation Cels > Onion Skin Settings.
You can change how many cels to be shown so you can see further actions of your animation.
and you can change its color and opacity. This will be very helpful in later process.
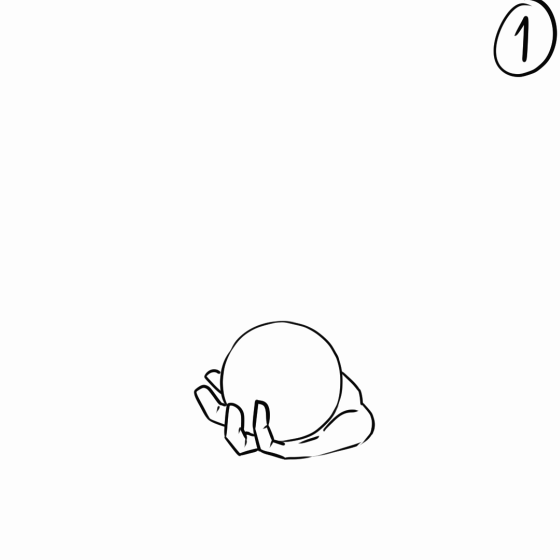
Part 2.2 - Inbetweens
The animation won't be completed without filling the gaps.
This is the time you needed in-betweens.
In-betweens is basically drawing between the gaps, to have a smooth motion to your animation.
To see the changes, this is BEFORE

And this is AFTER

The more frames the smoother animation would become.
Doubling the frame would make the animation so much better but takes lot of time to animate.
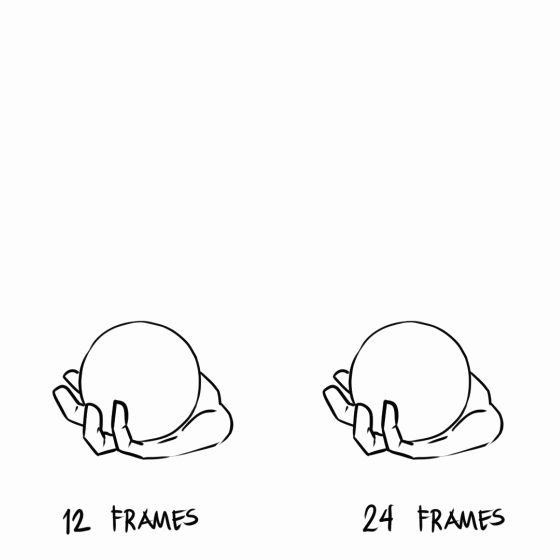
Part 2.3 - Smearing and Motion Blur
with 12 frames per second animation, there's no way we can make it smoother.
Just like what we did here. It doesn't look fast enough so there's no sense of speed on his movement.
This the part we're going to add the smearing, to create an illusion of fast motion.
In reality, when we move too fast, there should be motion blur. But since we're working on hardlines, adding smearing will do the trick.
So this is the changes when added.
Part 2.4 - Squash and Stretch
Now I'll be adding text to my emoji so there's a squash and stretch technique we could use for it.
This is a little similar to smearing, but the difference is, it will make the object stretch when moving in fast motion. This works perfectly on soft objects.
It will stretch as it goes in, and squashes when it reaches its destination before it become its original form.
This will show how bouncy it would look like.

Part 3 - Finalize your Emoji
Finalize your work by adding extra movement such as hair motion after you move the character.
extra frame before your character stops moving. This subtle detail makes your animation looks more natural.

Then when everything is done, you can start with the line art.
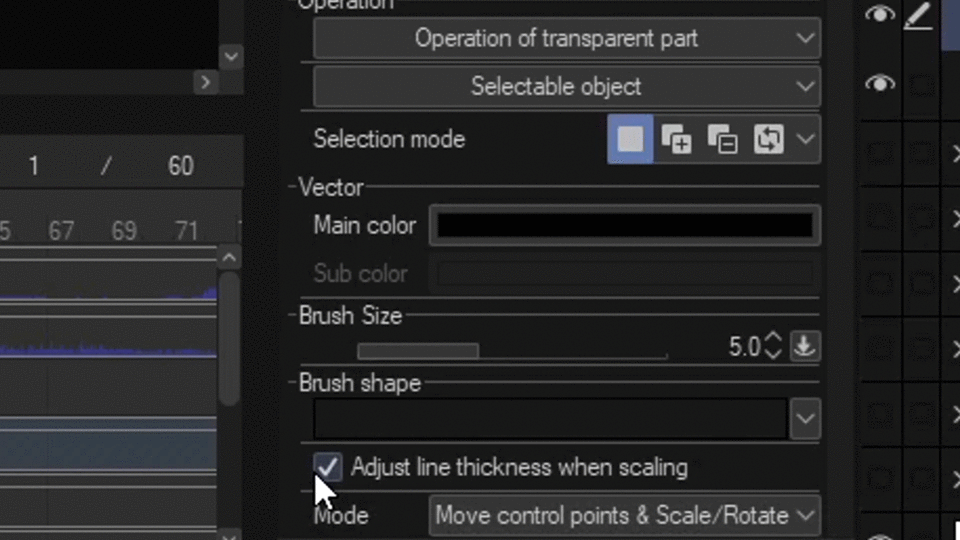
If doing a line art, I'll suggest to use a vector layer.
The good thing about vector layers is you can resize it to any size you want while keeping its sharpness.
Make sure to use the operation tool to resize it. Highlight everything and adjust.
and check the box on Adjust line thickness when scaling. This will keep the proportion of the line when resizing
uncheck if you want your line art maintains the same thickness by pixels
And you can also change the thickness of the Line Art anytime you want.
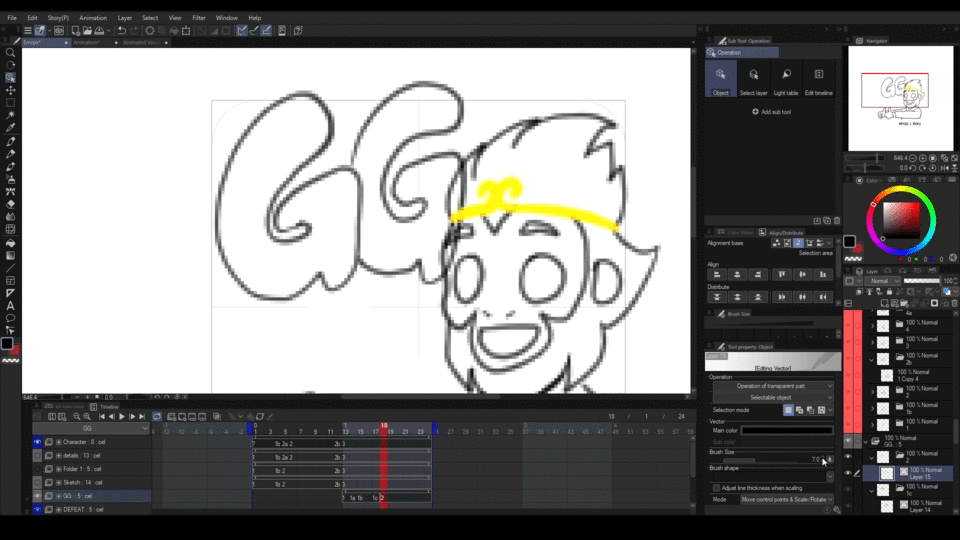
And the rest thing you need to do is color.
Adding of highlights and shadows also requires animation sketches, but for our case, the motion are minimal, you can do guesses on every frame.
And that is all for this tutorial, thank you and hope you learned something here.
Anything you learn here can be useful to any animation in general so this is very informative.
THANKS AGAIN!
Users who liked this post


Comment