
Hello, in this tutorial I will teach the fundamentals of visual storytelling with Clip Studio, from text plot to a final result video. From the Major Animation update (1.8.4 / Nov 2018), we need no additional softwares to create videos with sounds. Which is very comfortable for completing short animations.
Visual story is storytelling with images. It almost looks like an animatic, but with voice or text explaining what’s going on in the story. Which makes storytelling more interesting and reduces the time to make compared to an animation.
Here is the overall process.
Step 1 : Text script
The beginning and most important process of a visual story is the complete text story. Arrange it in any text editor.
Use the line to separate scenes that occurred in the story for easy management of the storyboard.
Step 2 : Storyboard arrange
I split the passage into storyboard panels. Then draw the scenes.
This is the same process used when making an animation, but instead of the continuous movement, split into like comic panels. One image per frame
Step 3 : Asset preparation
Instead of drawing out all the scenes, asset preparation will help save a lot of time if there are drawings that reoccur.
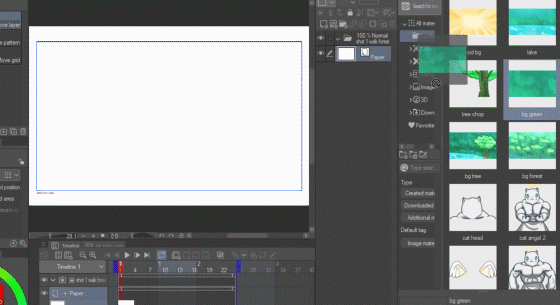
For easy use, I registered the image assets to the material library.
On the Material panel, right click on the folder, and click [New Folder]
(or click on new folder icon on material panel)
Give the folder a name
(new folder will make it easy to manage assets for project)
To register image to library
Click on the folder or layer of assets you drew
Then go to menu Edit> Register Material > image material
Set the name and select the saved folder and it's done.
The image will appear in the library folder
Note : if you register the folder, when you bring the material back to the canvas it also comes as a folder. You can store the vector layer in the folder to adjust later too.
To use the image, just drag it to canvas area or layer panel
(if drag directly to the canvas, the object will be new layer above current layer)
Note: For some images that appear only 1 or 2 times, I simply draw it directly on the screen
Step 4 : Arrange composition
Create the canvas for the project with this setting
[Preset] Can be set to custom and your preferred size depends on the platform for your video.
[Timeline] option, I set the framerate to 8 and playback time to 24, for visual stories you don’t need a high frame rate for smooth movement. Low frame rates make it easier to work with.
However, the low frame rate is optional, if you’re making a smooth transformation, a higher frame rate may be more suited to your work.
You will get a canvas with a pre-set timeline with safe border.
Create camera folder for a shot,
right click on timeline panel and New animation layer > 2d Camera folder
(or at the menu bar : Animation > New animation layer > 2d Camera folder)
Rename the camera folder to the shot number in the storyboard
(you can remove the animation folder that the new canvas auto generated for you)
Arrange the objects in the order of the storyboard.
By putting it inside the camera folder.
Then hide the shot (click the eyes icon on the layer)
create a new camera folder for the next shot and repeat the steps until the last shot.
Tips: put keywords in the camera folders to easily find it again
Note : If you wanna make a frame by frame animation(Animation folder) for smooth movements in the scene, simply add the keyframes as layers.
(we’re doing nothing about character movement in this step)
Voice Record
Use a recording software or a phone to record the story in one file. This process is separate from the main process because it can be done as soon as the text script is done.
There is 2 ways for the audio preparation which has their own benefits
1. Long file : whole story in one audio file
Easier to make
Non flexible : Must have a good timing on story already to save time editing it in Clip Studio
2. Split files : 1 file per one storyboard panel
Takes time to split the file/ record
Flexible : Timing can be easily adjusted later in clip studio
You can choose what is suitable for your own working style. This tutorial will show both ways of working with audio files.
Step 5 : Timing with sound
For this project I prepared 3 types of sound.
1. Voice record from the script
2. Sound effects : such as the chopping wood, pop sound, crack sound, etc
3. Background music
(If you make a more realistic story theme, you may also add ambient sound.)
>> Timing with voice record
Import the sound, File > Import > Audio
Import the voice record first.
(if you make one file the timeline will look like this)
(if you make multiple voice files and import multiple files together, it will appear like this)
You can zoom into the timeline with the zoom icons
Adjust the playback time to the sound by inserting keyframes
Right click on the last keyframe of any camera folder > insert frame
Add number of frames to coverage the voice timing
(with this method you can add keyframes for all camera folders at once)
If you use multiple voice files, the new frame action will create gap between voice files like this
Right click on blank area and delete frame
Check on [Select layer only] then put the frame number to remove
Check on [Preview] to see the result timeline in real time
(you can also click on Number of frame and it push up or down button to adjust value)
Adjust the shot to match the sound
• For the single voice file, you have to listen to find the timing of the shot
• For the multiple voice files will make it easier to see where the voice ends of each shot
Right now, all the camera shows from frame 1 to final frame.
To show it on the canvas in order, set the keyframe to match the voice record,
Right click on the timeline and set the first and last displayed frame
by the menus : [Set at first displayed frame] and [Set at last displayed frame]
Set the first and last display frame of each camera folder (the timeline will look like this).
When you are finished syncing with the sound, you can add animation details to the layers inside the folder with the layer keyframes.
( the shot will only appear where camera folder show on the timeline)

You can also create animation folder later inside the camera folder
(Create new animation folder and put the keyframe layers we prepared inside)

And the camera keyframe to zoom (adjust the blue frame to make camera effect)

For the animation technique, check my sushi cat tutorial that explains the how to make animations in clip studio
>>Apply sound effects
You can also Import sound effects related to the keyframe by importing the audio file in the camera folder.
Drag the bar to match the animation on the timeline.
(chop sound will play at the frame the axe hits the tree)
Note: you can duplicate sounds in case of the repetition by select the bar in the timeline
Then [right click > copy] and [right click > paste] to duplicate
(click on small header of the bar to select)
If the sound effect is too long for the animation you can easily trim it
Right click on the keyframe where you want to cut and select menu [Split clip]
Now you can delete the part you don’t want.
You can also use split clip method to cut unwanted part of audio
>>Add background music
You can also add background music to the project by importing audio at keyframe 1
If the volume of the music is too high, adjust it by using the object tool
Select the voice layer, the volume option will appear on the tool property
You can also adjust the volume to create volume effect(such as fade out) with graph editor
Here is an example of graph adjustment, this creates a fade-in effect at 0 to 2 seconds
(the graph starts at volume 0 percent at second 0 and rise to 3 percent at second 2)
(the percent depends on the quality of the sound, it will be easier to work if all the sound in the video comes in same quality)
Create keyframes on the graph line by selecting the frame you want, then add keyframe.
This will lower the volume of the sound (will be silent if lowered to 0),
This is useful for focusing on other sounds
Click on the graph icon again to close the graph editor, the keyframe will also be shown on the timeline.
Step 6: Export Video
To export the movie, go to file > Export animation > movie
Clipstudio will let you export the movie file in 2 format you can choose in save panel
.avi for larger, high quality video that’s good in case you want to process it in other software
.mp4 for compressed size that suits the web player.
In export setting, don’t forget to apply 2d camera effect
And now the video is ready!!
Bonus part : Additional scene (Title+Credits)
When you have done the video, you may want to add title or ending credit, you can do it all in clip studio by just shifting the timeline boundary to a bit front.
Then add a 2d camera folder and make the title
When it’s done, just set the last display frame for the folder
It only uses 6 simple backgrounds and around 6 images of characters to create a 1:30 minute visual story video. I hope this gives you some ideas on making your own visual story.
Have a good day :) see you in the next tutorial. :3
Users who liked this post


Comment