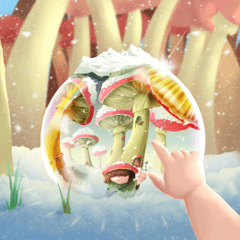
How to draw : Selection Tool + Speedpainting Fanart
Let's talk about selection tool
⭐If you choose Rectangle or Elipse you can make a free-hand shape
⭐If you press Shift key while making the shape, you will get an equal hight and length
⭐ In the Tool property screen -
- choose the second option (add to selection) to make different shapes on the same layer
- choose the third option (remove from selection) to cut shapes from the selected area
- choose the forth option if you want to cut everything else,except the new selection you are doing
⭐Use polyline to make sharp edge selection
⭐ Use the Lasso tool to make a freehand selection
⭐ Use Lasso fill to make colored free hand selection ( you can find this one down below in the Figure Option screen or by pressing U)
⭐ Use the Selection pen to free draw the shape you need
⭐ Press the small button next to the Brush Size, to add or adjust pen pressure
⭐ Don’t forget to increase the last option called Stabilization in case you want straighter lines
⭐ Pen Selection and Erase Selection are similar have the same options
⭐ Use Shrink selection on a Layer that already has something drawn on it. Hide any other visible layers , except that one that you are doing the selection (otherwise nothing will happen)
⭐ Use the Anti-aliasing panel to have a hard outline/edge or a softer line
⭐ Let’s talk about the second panel
- use the first button to deselect the selection
- use the second button to crop the selection (!it will crop the canvas)
* use the third button to select outside the selected are
⭐ Moving on to the next options
- click on expand selected area and choose by how many pixels you woud like to make it bigger
- click on shrink selected area and choose by how many pixels you woud like to make it smaller
- delete selected area will delete anything on the selected layer
- delete outside selection will delete anything you have on that particular layer, outside the selection
⭐ next ones
- cut and paste ( or ctrl+x / ctrl+v) will cut whatever you have on that layer and paste it on a new layer above
- copy and paste ( or ctrl+x / ctrl+v) will copy whatever you have on that layer and paste it on a new layer above
- by pressing scale and rotate you can rotate the object or make it smaller or larger
⭐ By pressing scale/rotate and RIGHT CLICK on the mouse, you get extra panel
- in the extra panel you can Free transform (move each point wherever you want
- Distort option, similar to free transform
- Skew moving 2 connected lines at the same time
- Perspective transform - it will automatically snap to a certain default perspective
⭐ continuation: ⭐ By pressing scale/rotate and RIGHT CLICK on the mouse, you get extra panel
- Flip horizontally the selected area
- Flip vertically the selected area
- You can switch them as many times as you want
⭐ continuation: ⭐ By pressing scale/rotate and RIGHT CLICK on the mouse, you get an extra panel - now ignore this extra panel and go to EDIT - Transform - Mesh Transform
- here you can move each point or add extra points ~ good to know
⭐Last buttons to go
- press fill to instantly fill up the selected area with the first color you have chosen
- Press New tone to add a pattern to the selected area
- go to Object and play around with different settings in the panel, for example, here you can add a gradient.
- check the layer property panel as well to change the pattern, size, color and others
That about all ⭐
Video Process
Here I’m posting the video where I challenge myself to do a full drawing only with selection tools
Thank you for watching
Bye bye~
⭐


Comment