Drawing Perfect Lines for Beginners
Hi! Qilin here. In this TIPS I’ll be sharing some advice on how improve your lineart, teaching topics about line confidence, line weight, as well as vector layers that will help any beginner looking to draw digitally!
VIDEO
LINE CONFIDENCE
Drawing great lines means expressing something clearly. And to draw something clearly, there needs to be confidence.
When you make line art, it is important to avoid making hairy or wobbly lines.
This means your hand might feel unused to the sensation of drawing digitally, and a lack of confidence will lead to these kinds of lines. Compare this with lines that are more confident: it is clearer and more pleasing to look at.
Don’t be afraid if you find yourself drawing wobbly or hairy lines at first. Better line art comes with practice. Though, CSP also allows you to ‘cheat’ a bit using stabilization settings, which greatly decreases the amount of wobble you have when drawing lines.

These freehand exercises help to train your hand-eye coordination and muscle memory. You can use any pen tool at this stage.
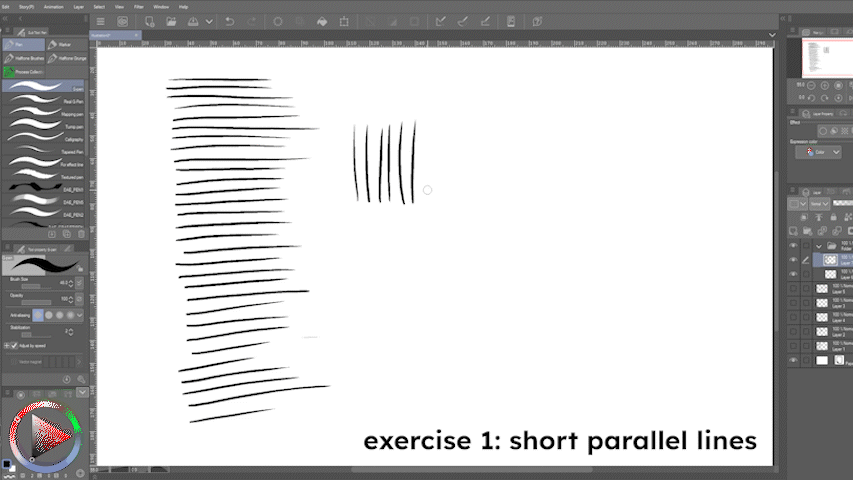
Exercise 1: Drawing many short parallel lines. Draw then in a line horizontally, vertically, and diagonally. Try to make the lines as similar as possible, and space them out evenly.
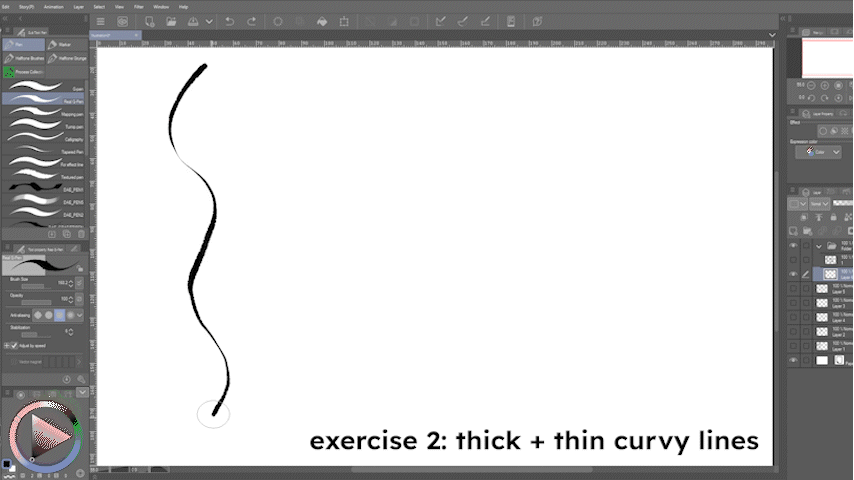
Exercise 2: Start to practice controlling your pen pressure with a bigger brush size. Draw this curvy line in the canvas, while alternating between thick and thin. Fill the whole canvas with this repeating shape.
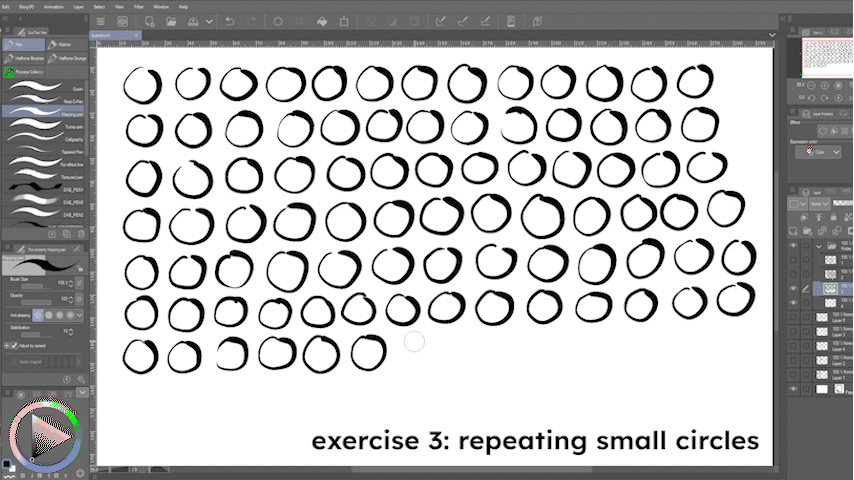
Exercise 3: Repeating small circles. It’s just about repeating the same small shape and trying to keep the size consistent. If you want to practice pen pressure, you can make one part of the line lighter, and the other side darker.
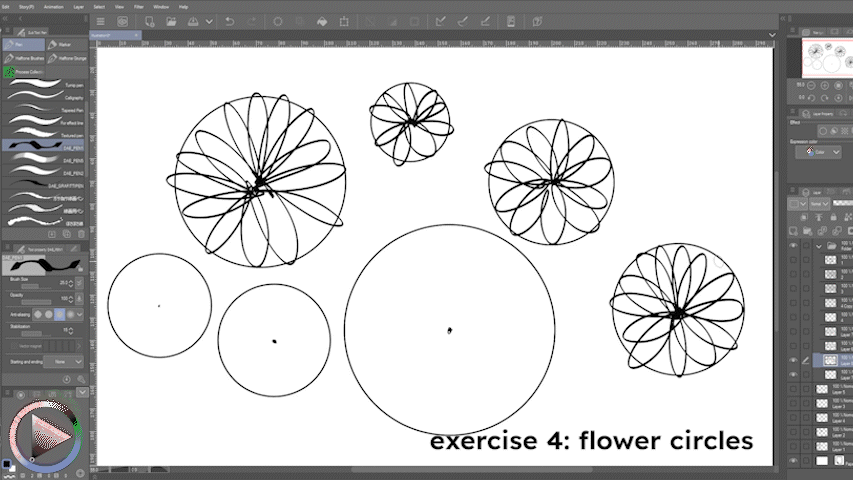
Exercise 4: Circle flowers. First use the shape drawing tool, hold [SHIFT] to draw some circles. Then, draw a dot in the middle of the circles, and draw petals coming out from that dot until it becomes a flower. Try not to lift your pen here, and put your focus on your wrist movement.
Overall, when it comes to line art, be patient, take your time, and remember that [CTRL]+Z is your best friend!
I do want to add one more thing: confidence comes much easier when you know what you’re doing. In order to do that, it’s incredibly important for beginners not to rush the sketching stage. Out of these two sketches, which would you feel more confident drawing line art on top of?
It’s much easier to add line art to a clean sketch as opposed to a rough sketch, especially if you’re inexperienced. Don’t rush sketching!
LINE WEIGHT
Line weight refers to how thick or thin a line is. This can be controlled by brush size, or pen pressure. It’s important to note that line weight also plays a role in a variety of expressions.
The thicker the line is, the closer things will appear to be.
Thinner lines give more of an impression of light, whereas thicker lines give an impression of shadow.
Now let’s talk about intersecting lines. If you grab some stuff in your room and pile them together, you can see how many of the intersecting areas will stand out.
When you want your drawing to be more dynamic or grounded, you can add a heavier line weight to the intersecting points and overlapping areas to give a sense of depth and shadow.
Thicker lines can also be used to bring focus to certain areas.
For example, on a character drawing, drawing a contour of the whole character brings focus to the silhouette.
Or you can bring focus to parts of the character’s clothes.
Or make separations between the character an an object they’re holding.
VECTOR LAYERS
Vector layers are a Clip Studio Paint-specific thing that I’ve found to be extremely useful and time-saving tools that can help beginners quickly refine their lines!
First, make a vector layer over your sketch. Make sure you can see the cube icon in the layer that you’ve selected.

If you find that no matter what, your lines still have a shaky quality, you can use the [SIMPLIFY VECTOR LINE] tool to smooth your lines. Going over it multiple times increases the smoothness.
It isn’t always perfect, but it is most helpful when you need a big curve or straight line.

Overshooting lines are helpful when you draw, but don’t look as polished. Using the [VECTOR ERASER], you can erase between intersections to clean up lines.
I find this especially useful for drawing elements like hair. Its also helpful overall when you just want to clean up some lines, or want to redraw a line.


My favorite is the [ADJUST LINE WIDTH] tool.
You can select the [THICKEN] option to add line weight on your drawing.


Or you can select [NARROW] to reduce the line weight on your drawing.

This tool really helps if you find that your lines lack variety in line weight. You can easily add weight on line intersections to increase a sense of depth, or if you find you were too heavy-handed in some areas, you can add balance back to the drawing by decreasing like weight.
Final Words
In the end, nothing will beat practice. Having awareness and direction of what you really want in a drawing is the key. I hope these tips were helpful, and happy practicing!




Comment