
Hiya everybody! I go by N or Ann! =)
I'm going to do my best to show you how I draw and illustrate eyes for pretty much 95% of my artworks ^ ^
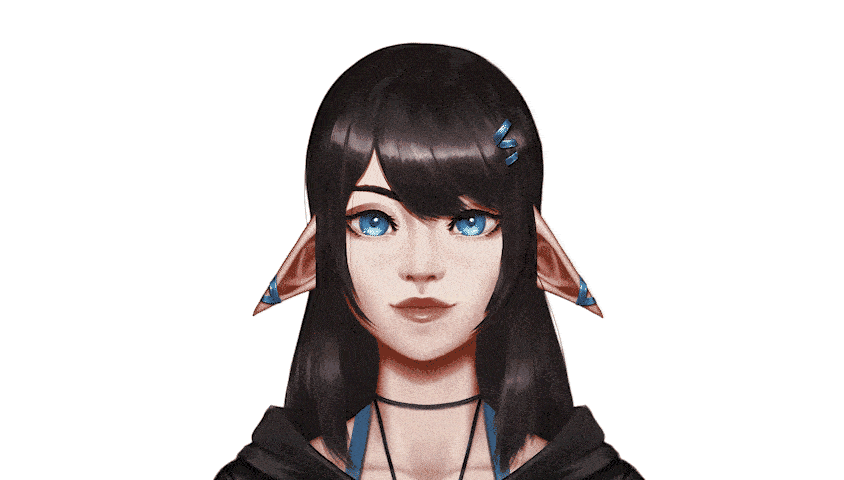
I will show you how I draw stylized eyes using Clip Studio Paint, the same type of eyes I've used in my recent artworks.

The Video Tutorial can be found here:
I’ll be going over multiple different subjects for drawing the eyes.
                             ‣     Shapes and anatomy of the eyes.

                             ‣    Personalities of eye shapes.

                             ‣    Constructing the Eyes.

                             ‣     Painting and rendering the Eyes.
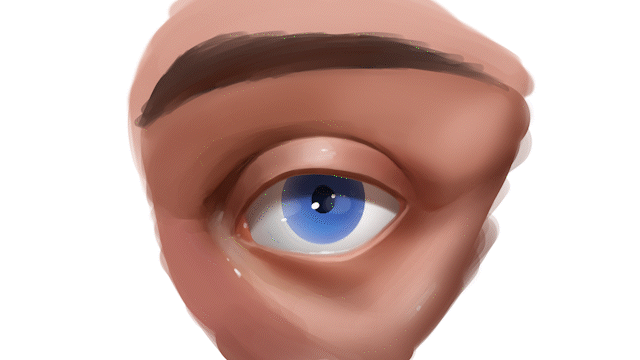
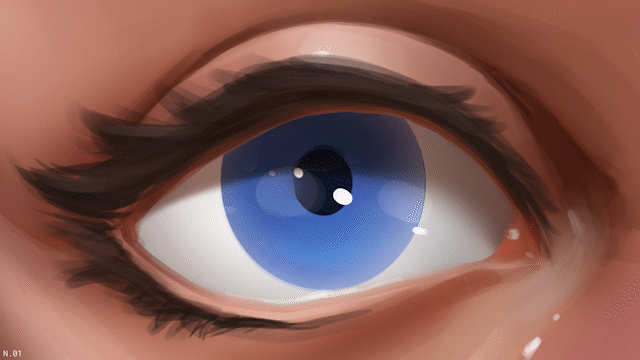
Shapes and Anatomy of the Eyes
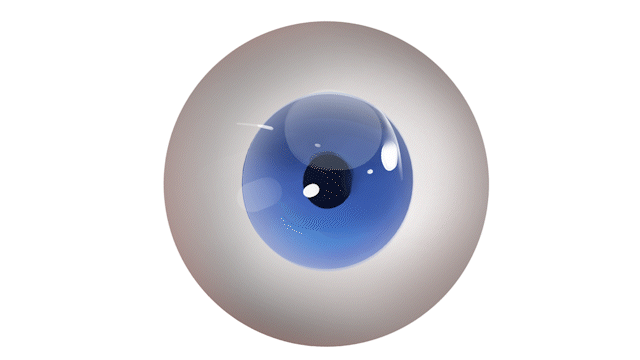
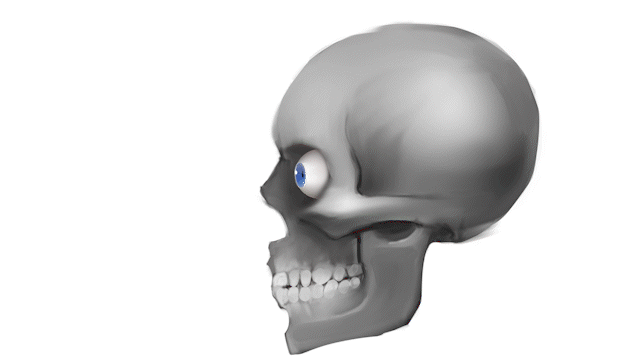
Eyes are constructed from multiple forms built on top of each other, to simplify.
You have the big white sphere called the ‘sclera.’
On top of it sits the ‘Iris,’ the colored circular part that surrounds our ‘pupil,’ a small dark circle we need for eyesight.
The pupil and the iris are concave to the inside of the Sclera.
And wrapping them all together over the ‘Iris’ as a transparent protective shell is the ‘Cornea’ which is convex from the Sclera. And also is the part that reflects the highlights.

It's important to remember the shapes of the eye because when you start moving the eyes around, you can see how the pupil becomes thinner as we move to the side view, and the Cornea becomes visible.
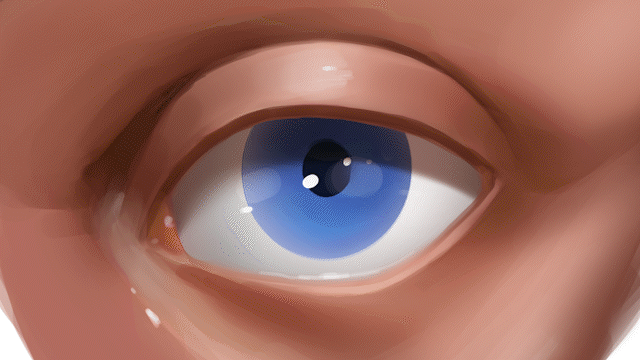
Adding in the skin around the eye, we have the tear duct. The shape of the tear duct tends to change based on the character's ethnicity. However, a good rule of thumb is to make it shaped similar to a smoothed edge triangle.

Also, keep in mind that the eyelids cast a shadow over the eye. And since there is shadow there, we cant really have highlights there so I have moved them around to fit the structure of the skin around the eye.

The skin around the Sclera covers about ⅓ from both the top and bottom in a rested position.
Changing that ratio can create different expressions, such as opening them wide, revealing more of the eyeball conveys surprise, especially if paired with a raised eyebrow.

I also did it myself and recorded it, so you can see it on me in a more animated form:
While hiding more, the eye can create squinting that can convey anything from suspicion to simply difficulty reading.

Adding in the eyelashes, we should keep in mind that there are both eyelashes on the top and bottom of the eyelid’s edge.
Men tend to have more sparse and short eyelashes, while women have long and fuller eyelashes.
On top of our upper Eyelid, we also have the crease fold of the eye that depends on the character’s ethnicity.
Different crease shapes depend on the character's ancestry, so I’d recommend looking up the corresponding ethnicity to get it right.
Personalities of Eyeshapes
Different characters have different types of eyes. For example, when game developers, movie casters, and 3d modelers create a character design, they tend to give extra thought to the shapes of the eye because that is what people tend to focus on.
And different shapes of eyes convey different feelings and emotions about a character, along with their energy or lack thereof.

Sharp angular eyes - Sharp and angular eye shapes might convey a more perceptive feeling for the character, menacing, or perhaps just energized and active.
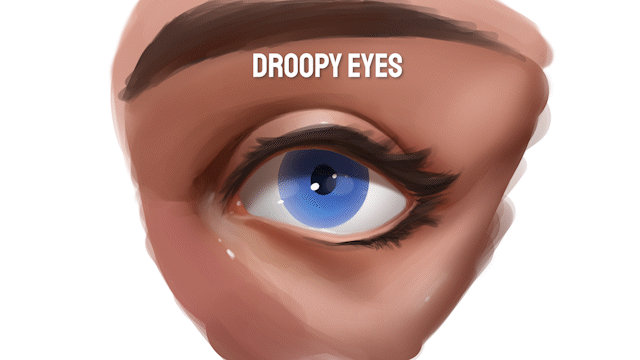
While Droopy eyes - Can convey either a docile, low energy nature for a character or perhaps innocence, they could also convey an undertone of not caring, being jaded.
And Round eye shape might convey a more alert yet caring and juvenile look, a young and bubbly personality.
Square sharp eyes - tend to convey a more down-to-earth and seasoned expression, like a mature, reliable man or a stubborn unmoving lady.
Of course, pairing any type of eye with a head shape, eyebrow shape, and general tone of the character is essential to achieve the desired expression to convey.
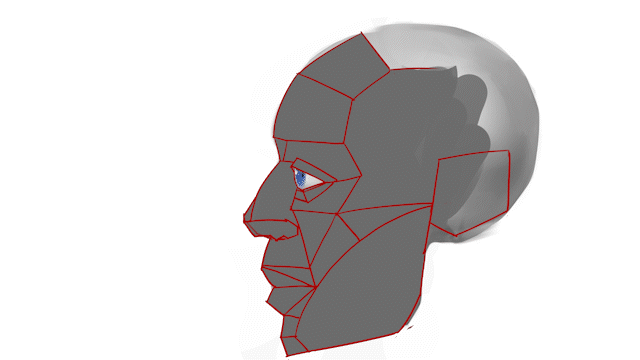
Constructing the Eyes in Perspective
As an artist, it's usually enough for us to know the visual shapes of the eye and its surrounding bones and muscles to create a believable image.

The eyeball is an orb that sits within the socket of our skull, so we only see the visible part of the eye in the front. We don't usually need to bother ourselves with how the entire orb of the eye looks.

So we will primarily focus on the planes of the face around the eyes, as we can see the eyes usually concave in as the brow juts out, casting a shadow on our eye sockets.
As the eye sits within the sockets, it pushes out the skin from the socket, creating a convex plane.
The areas of the face covering the eye and its surroundings can be defined as planes facing different directions, where our eyelids face downwards and upwards, respectively, and then inward towards the fold.
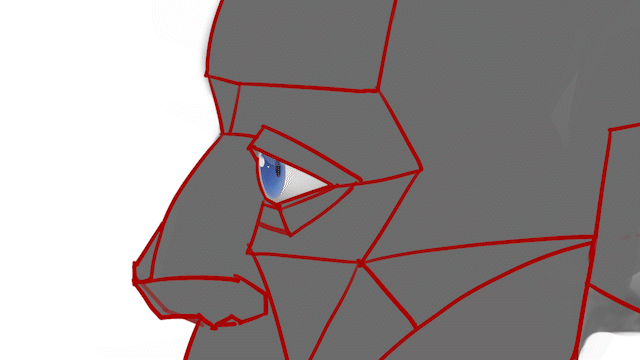
You have a slight concave, as mentioned before, towards the brow, and the same in the opposite direction towards the cheekbones.

These planes stay the same regardless of where the head might look, and are illuminated according to where the light is from.
For example, if we had our light hit from the bottom, we would shade the eyes in such a way, that each of the planes facing towards the bottom are being illuminated and those facing up, are shaded.
Drawing and Painting the Eyes
First, I’ll be using these Clip Studio brushes to paint and draw everything that you see me do,
a simple hard brush which will be the G-Pen,
then I’ll be using a Soft brush from the Airbrush section, and lastly,
a blending brush from the blending section.
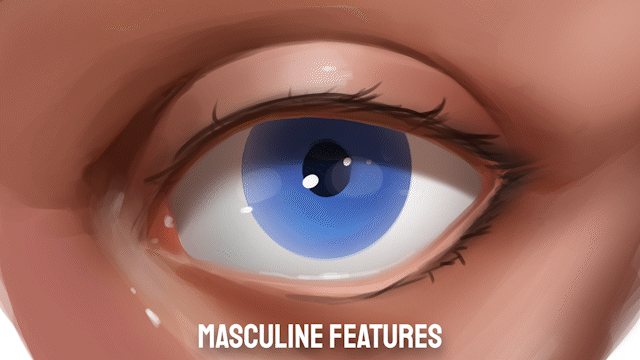
The first step of creating eyes is choosing what type of character we have, where it looks, and whether it's masculine or feminine in features.
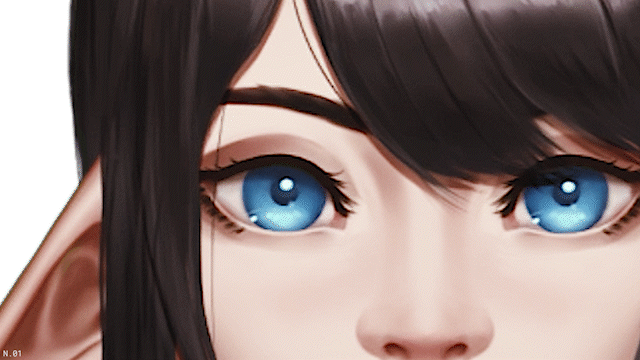
For this example, I’ll be choosing Sharp Angular eyes with feminine features,
so I’ll start by sketching the Sclera, then the folds of the skin on top, and the eyelashes on the eyelids that are more full because we are drawing feminine features.
On top of the upper eyelid, I’ll add the crease fold for the eye, which changes the character’s ethnicity.
We can then start painting the skin surrounding the Eyeball,
And an a layer on top after merging paint in the sclera (I always copy the sketch layer so I can remember the side of the iris I want later ♥)
choosing the skin color and the color of our Sclera, as it is essential to note that the Sclera isn't white but a desaturated warm gray that usually corresponds to the value of the surrounding skin.
and since the eyeball(Sclera) bulges out, it pushes our eyelids forward, creating shading around it.
I like using a soft brush to paint the skin and slowly go over it to blend it in the right places. However, don't be shy to use a hard brush to create sharper shadows and tone shifts.
It's usually better to have more sharp edges than soft ones.
Its also good to remember to use not make the lower and top eyelids pixel thing, a bit of thickness adds a looooot to the form.
Drawing the tear duct I usually take the skin color and warm it up and hue it towards the red a bit.
And I’d recommend going over the planes of the face to understand how to shade each area surrounding the eye as we mentioned earlier in how to draw eyes in perspective in the section before.
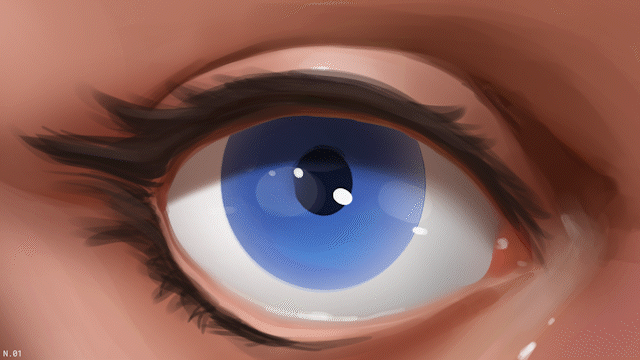
And since, like everything, the Sclera is a three-dimensional object, it has a shadow cast on it from both the top and bottom eyelids depending on the light in the scene. and keep in mind it has spherical shading as it is not a flat plane facing forward.
On a separate layer above the Sclera, I’ll use a hard brush to create a perfect circle to be used as our Iris. We can then use transformation tools to skew it into the proper perspective if needed.
I then delete the parts that are supposed to be under the eyelids.
I use the same technique to draw a pupil to!
And then use a soft brush to draw a gradient of darker color to a lighter color.
As light comes from a light source and hits the Cornea and iris, it passes through, leaving a highlight on the cornea and shading the area where the light hits the iris.
And because the light inside the iris bounces around, it tends to warm the light inside, making the colors more saturated and vibrant.
I also like blurring the iris a bit at the edges to give it a more painterly feeling so it doesnt look too perfect or digital
I have used the blur tool to blur these edges:
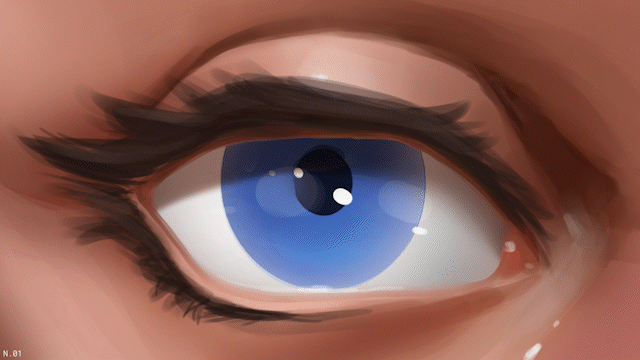
We will lightly shade above our crease fold as it leads up to our eyebrows, which I will draw by first choosing a shape that fits our eye shape, angular and sharp.
And then start drawing strands of hair using a hard brush to where the hairs grow from.
Then I'll start drawing the eyelashes, trying to mimic the shape of the eye in the lashes themselves.
As I slowly build up the shape of the eyelashes with thick strands and then small ones.
Personally, I also like using the same color as I did for the eyelashes which is usually the same color of the hair but a lot darker to keep harmony of colors on the canvas, as a bit of eyeshadow color around the crease of the eye.
There is also a technique I like to use to boost up the colors a bit and introduce a variety of colors, I add an overlay layer on top, and on it, I use a dark red and brown below the lower eyelid near the brow. Then, around the sclera, I’ll mark them to try and make it clearer.
I also like to add a bit of general highlights and play with them to make it look appealing, it doesn't always have to look realistic =)
Closing notes
I hope you found this tutorial helpful!
I didn't make a lot of gifs for the last section as I went mid-way through and realized that its harder to realize what is happening with gif when I show the painting process.
If you have any questions please feel free to ask, also here is an unused image of all the eyeballs looking at different sides! =D
Users who liked this post


Comment