
Introduction
Hi, Qilin here!
Animation is one of the most advanced forms of art because it is a combination of so many skills - it shows an understanding of space, movement, acting – not to mention it is INCREDIBLY difficult, since you need to draw every single frame. That could mean 24 full drawings for a single second of animation. Despite this, the result of the hard work that goes into a hand drawn animation gives such satisfying results, and is incredibly inspiring.
What if I told you that I made the following animation in Clip Studio Paint with only ONE drawing?
In this tutorial, I’ll share my process and techniques of how I created it!
Please check out my video below, as the animation process is overall much more clearer in video format.
Video
✱ Drawing to Prepare for Animation
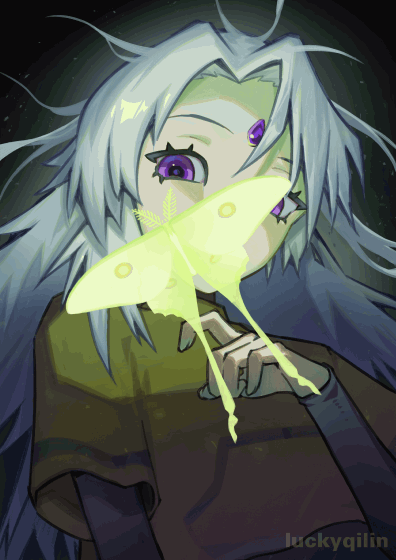
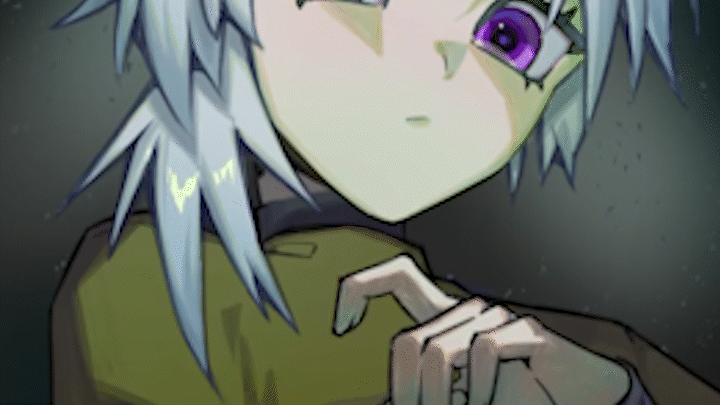
I’m starting with my initial sketch idea, of my character with a moth on her face. My first step involves simply looking at my sketch, and figuring out what kinds of animated elements I want to include in the final illustration.
Here’s what I’m thinking about animating:
► Moth flapping wings
► Some eye movement
► Some hair movement
► Some arm movement
► Pulsing light
All these imagined movements means that there will likely be a lot of moving parts. And this is the key! When drawing your illustration, don’t be afraid of using lots of layers.
This allows you to separate and group illustration elements, which will make preparing your illustration for animation much easier.
Just for reference, I’ll show you how I’m organizing and grouping my layers during the drawing process.
For example, with the arm - while drawing, I had it separated into line, flat color, and shadow layers. These components will be combined into one layer, which will be used for animation.
Each of these “parts” that can be used for animation are split up into their own layers. You can see how I separated all the character’s parts with the image below.
Areas that will have a lot more moving parts include the eyes and hair, and areas that won’t be animated include the head and body.
Overall, I have layer folders for each big group, with main ones like “moth”, “character” and “background”, and within those layer groups are smaller subgroups, like “head”, “hair top”, “hair bottom”, etc.
Grouping layers accordingly before animating will help declutter the timeline workspace a lot, and make things easier to find. You don’t have to rename all your layers, but it does help a lot to track them!
This stage is very much all about organization, but also don’t be too pressured to make things “perfect”, or feel like you need to organize the same way I do. It’s likely that you’ll have to adjust things or overcome unexpected obstacles during the animation process, which is exactly what happened to me, so draw and group layers according to what you think is right, and what will help you!
✱ Setting Up the Animation Timeline
Let’s set up the animation workspace. Open up the animation timeline under “Window” → “Timeline”.
From there, let’s make a new timeline.
1 ► Create a new timeline.
2 ► For frame rate, 12 or 24 are standards in animation, but I’ll pick 12 for simplicity. Note: if you want to export the animation as a GIF, the maximum is 12 frames.
3 ► You can toggle how long you want your animation to be. If your frame rate is 12, then 12 frames = 1 second. If you haven’t decided yet, I recommend setting it as a longer number, since it’s easier to cut down your total frames in the timeline using the blue toggles seen in the image below.
4 ►I’ll leave everything else as default.
1, 2 ► Once the timeline is created, you can see that all the layers are ordered the same as in the layer window!
3 ► There are two blue toggles on either side of the timeline that you can use to adjust the length of your animation as mentioned previously.
Now everything is set up and ready!
Animating the Moth (+Introduction to Keyframe Animation)
I’m going to start by animating the moth. In this section, I’ll be introducing the main animation technique that I’ll be using for the rest of the tutorial – keyframe animation.
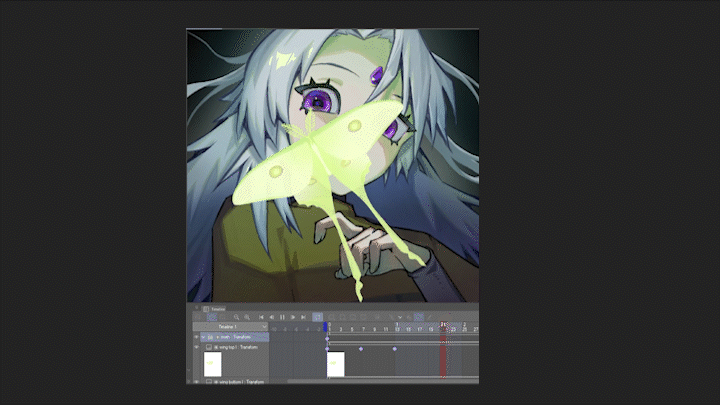
I have a total of 7 moth layers - 4 layers for each part of the wing, 2 for the antennae, and 1 for the body.
I’m going to first prepare my moth layers by rotating and repositioning them within the keyframes.
1 ► On my first wing layer, I’m going to click “Enable keyframes on this layer”.
2 ►Then, I’m going to select the beginning point (frame 1), indicated by the red marker in the timeline.
3 ► I’m going to click “add keyframe”.
4 ► You should see a diamond appear on the timeline - that’s your keyframe!
1 ► I’m going to use the “Object” tool (O), and make sure I have the right layer selected.
2 ► You should see a blue box will pop up around your canvas with transform controls.
3 ► Note how the “Tool Properties” window changes so you can toggle all kinds of transform controls.
Since I want to rotate the moth, I’m going to key in (-30) under the “Rotation angle” parameter in the “Tool Properties” window.
Now the layer is rotated at the angle I want, and I’m going to do the exact same for every moth layer: Enable keyframes, add keyframe, and rotate (-30). It’s important to keep the value consistent.
When all 7 moth layers are rotated at the angle I want, I’m simply going to select the layer group, and use the “Move layer” tool (K) to adjust its positioning.
The moth was repositioned to be around the edge of the character’s face.
Before doing anything else, I went back to each layer and adjusted the anchor points for the wing and antennae layers. The anchor points will indicate where any transform adjustments will be centered to, and are indicated by a little ‘+’ sign.
The 4 “wing” layer anchor points are repositioned to be in the center of the moth’s body, whereas the 2 “antennae” layer anchor points are repositioned to be in the center of the moth’s head.
You might be wondering why I didn’t rotate the entire layer group, and instead rotated each individual layer. It might seem tedious since I have 7 moth layers, but I found it to be a necessary step. This is because weird things happen when rotating a group of layers that use scale adjustments (which I will be using later), and I found this to be the best way to get the result that I need.
This is what happens when you rotate a group of layers that use scale adjustments, which are used to animate the folding wings explained in the next part.
THE WINGS
Now that all the layers are prepared, I’ll start actually animating the wings now. I have 4 wing layers, split into top right, top left, bottom right, and bottom left.
On the top left wing layer, I’m going to click ahead in the timeline and add another keyframe. In “Tool Properties”, I’ll uncheck “Keep aspect ratio”, and change the width to (2). When I click play, the wing looks like it’s folding up!
1 ► Click ahead in timeline.
2 ► Add a new keyframe.
3 ► Uncheck “Keep aspect ratio” in tool properties.
4 ► Change the width to “2”.
To make it complete the movement, I’ll simply select the first keyframe. When you see it highlighted in red, left-click and hold the [ALT] key which allows you to duplicate and drag the keyframe. Simply drag this forward in the timeline.
Now the wing has completed its flapping movement!

I’m going to do the exact same thing for each of the wing layers: create new keyframe, and change the width to (2).
The reason why I split the wings up into 4 layers instead of just 2, was so I could adjust the timing of the animation so there’s a bit of delay in the lower half of the wings for a more natural look. You can easily adjust the timing by clicking and dragging the key frames.
Some keyframes for “bottom l wing” are delayed compared to “top left wing”.
Here’s the final wing animation!

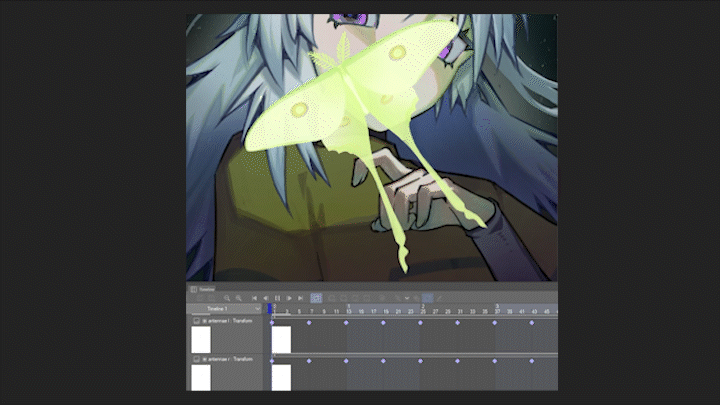
THE ANTENNAE
I want movement in the moth’s antennae too, so I’m using the same technique. I have two antennae layers, one for the left and one for the right.
This time, instead of adjusting width, I’m going to the “Rotation Angle” parameter, and adjusting the value so that both antennae move downwards.
I’m duplicating the two keyframes I have to fill the whole timeline, making sure that my last keyframe is the same as the first keyframe so the movements will connect.
In frame 7, “antennae l” (left) has the rotation angle at (-40), whereas “antennae r” (right) has the rotation angle at (-20).
Here’s how the antennae animation looks with the wings!
THE DUST
I wanted to try make some effects animation, where some shiny dust falls when the moth flaps its wings.
I’m first this effects brush to draw some shiny dust on a new layer. Check it out!
Then, I’m using the lasso tool to pick parts from the stamp and making 4 dust layers. This is so I can animate different dust particles falling at different timings to look more natural.
This time, I’m using keyframes to make changes to the “Position” parameter by dragging the dust downwards to make it look like it’s falling.
To enhance the effect, I’m making the dust disappear as it falls, so I’m also manipulating the “Opacity” parameter. Be aware that you have to click on the [+] sign on your layers in the timeline to view opacity keyframes!
Here is how the finished dust animation looks:
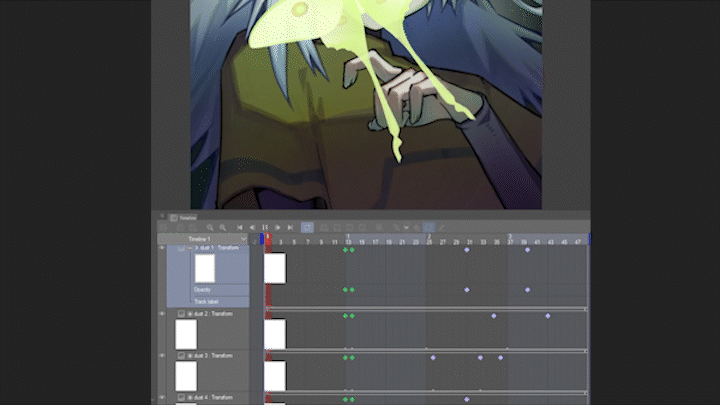
You might notice that there is a new keyframe color here. The green diamonds indicate a “Linear interpolation” keyframe. You can change the type of keyframe you use, by clicking the arrow next to the “create new keyframe” button.
Essentially what it changes is the way the dust falls. When using the default “smooth interpolation”, the speed begins slowly, then quickly, then slowly again. When using “linear interpolation”, it moves at a constant speed.
Smooth interpolation keyframes are great to use for all my character animation, but in the case of something falling it would be more natural for it to fall at a constant speed.

Notice how “smooth” shows more of a pause at the beginning of the animation, making it look more unnatural for a falling motion.
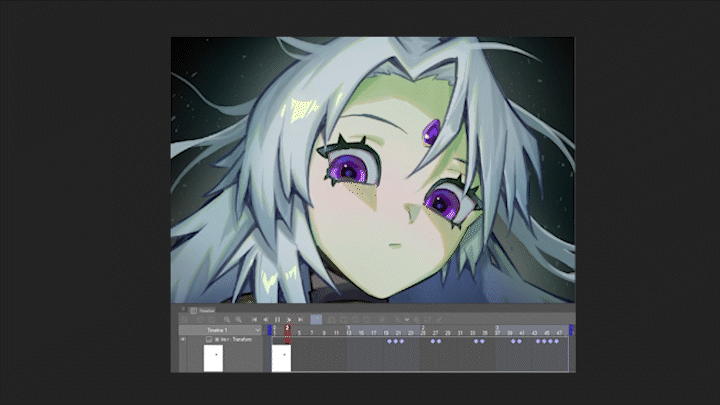
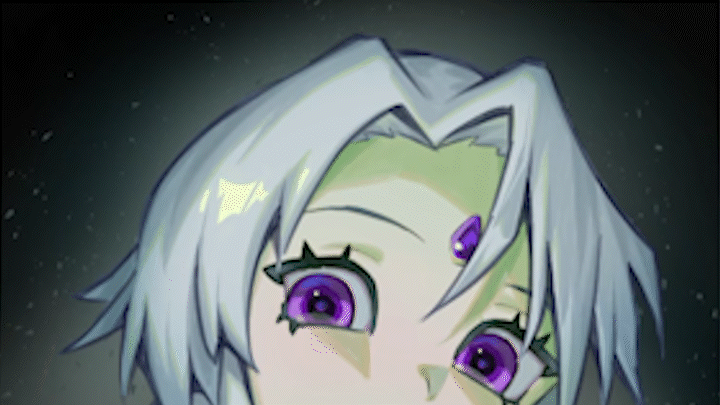
Animating the Eyes
Animating eyes is the easiest way to give life to a character, so these come next. I wanted to make her look around, and change between a relaxed expression and a surprised expression.
THE IRISES
When you observe a person’s eyes, the irises move quick and choppy. Conversely, it would be strange if they moved at a slow arc. With this in mind, I’m being very careful about the exact positioning of the irises in my keyframes to imitate that “choppy” look.
When keyframes are right next to each other (i.e. keyframe 1 → 2), there’s no room for CSP to automatically add in-between movements. This helps me get “choppy” movement. I’m being careful not to make the movement too abrupt, as it goes back into unnatural territory.
When the iris settles in one position of no movement, I’m making sure to duplicate the same keyframe and allow space between them so the iris can hold its position.
I’m also putting most of the iris animation during the parts where the moth isn’t moving its wings, so it gives the impression that the eyes are reacting to the moth’s movements.
To keep the irises in the correct boundary, the iris layer is set as a clipping mask so that it is restrained within the “eye white” layer.
Here’s how the irises look!
THE REST OF THE EYES
I’m going to create two eye “positions”, one where she has wide eyes, and another where she has relaxed eyes.
I have four eyelash layers, two for the top lashes, and two for the bottom lashes, and I’m animating the two eyes separately since her face is not at a straight ahead angle.
Same as before, starting with the top eyelashes, I’m enabling keyframes, setting the anchor points to be in the center of the eye, and manipulating the positioning and scaling of the eyelashes using the transform box, making sure that the keyframes are aligned in the timeline.
Changing position by adjusting the outer transform box.
To make the wide eye movement look more natural, I’m using a technique in animation called overshooting. In this case, I’m simply allowing the eyes to widen slightly before relaxing, which helps exaggerate movement and give the animation more snap. You can see the comparison here.
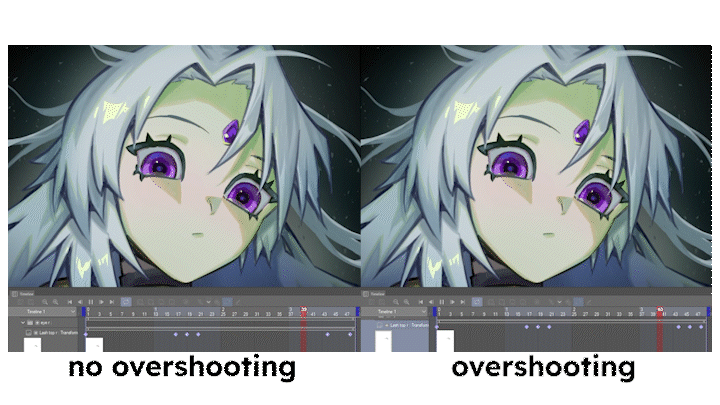
It’s a small addition that only takes one extra keyframe.
Once I’m done with the eyelashes/eyelids, I’m using the same keyframe transform technique to align the eye whites so there’s no overlap.
Here’s how the finished eye animation looks!

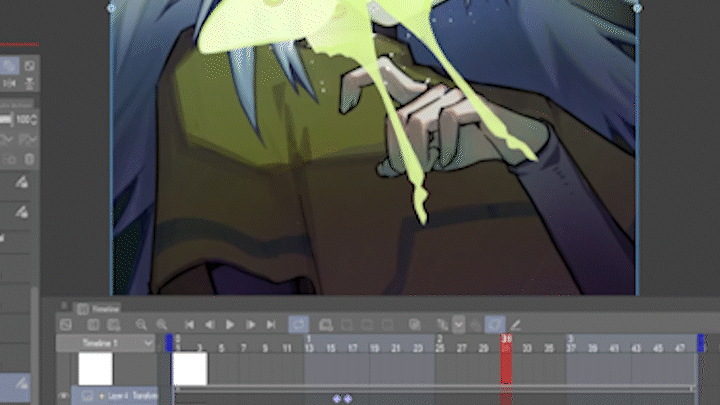
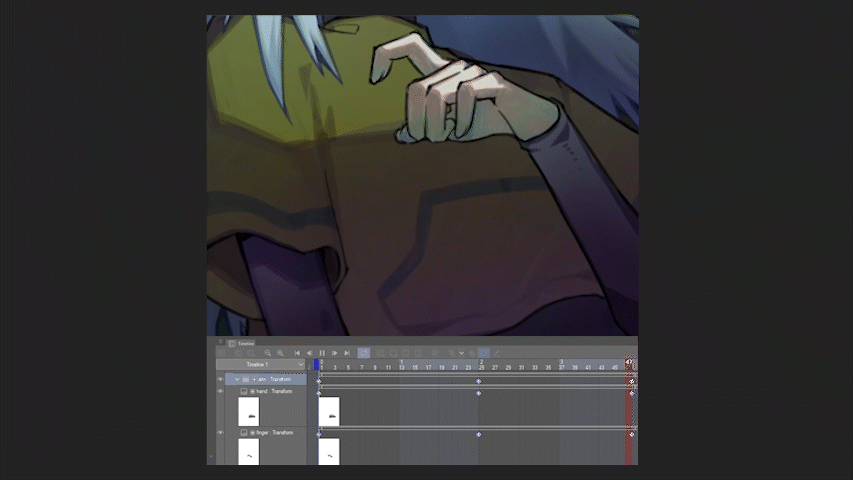
Animating the Arm
More and more small animations are being added to my illustration. I had an idea just to have her arm, hand, and index finger to move slightly.
Unfortunately, I didn’t plan this far ahead when drawing, so I’ll need to separate the arm into three pieces. I did this by using the lasso tool and splitting up the arm layer. To prevent possible gaps in the animation, I added extra blocks of color to the arm and finger, and have them hide behind the hand layer.
Selecting and separating hand from arm into two layers, and filling in arm hole to prevent gaps.
Selecting and separating the finger from the hand into two layers, and extending the finger to prevent gaps.
Now I can repeat the same keyframe animation technique as before: enabling keyframes, adjusting anchor points (imagine the joints of a ball-jointed doll), and adjusting the rotation parameter.
I don’t want the movement to be too erratic, so I’m only changing the position and angle very slightly, and spreading the keyframes across the whole timeline so the movement is slow and not too distracting. In reality, I’m only making 2 new keyframes here – the start position and the end position. The last keyframe is just a duplicate of the start so the animation repeats smoothly.
Finally, I’m applying the same keyframe rotation animation onto the entire layer group, so that the hand animation I’ve already done will follow the whole arm’s rotation. All in all, animating the entire arm, including cutting up the pieces took less than 10 minutes!
Animating the Hair
I left the hair mostly to the last, since it has the most parts on my character. I split up the bigger layer groups into the crown, the midsections, the back, and those floaty strands – half of which are behind the entire character, and the other half at the very top of all the hair layers.
Similarly to the arm, I realized I needed to cut up and create more parts. I want the movement for the hair to be floating, like there’s a gentle breeze.

HAIR MIDSECTIONS
I’m starting with the midsections. I split the layer up into two parts, which is easily done by selecting and cut/pasting.
Before starting any animation, I’m doing some additional drawing to fill in gaps, and rearranging the layer order so the right side hair was hidden behind the head.
I’m doing the same keyframe animation technique as before: enabling keyframes, adjusting anchor point, and using rotation keyframes so the hair has a swaying movement.
The middle keyframe indicates where I’m adjusting the rotation. They aren’t aligned so there can be some off timing in the animation.
I’m going back and forth between adjusting the timing of the animation and redrawing to make sure all gaps are filled and checking that I’m satisfied with everything.
HAIR TOP
I found it best to split up all the strands into individual layers, and the top of the hair into three parts – the left side, the right side, and the “top”. This would make it easier to animate each part.
Same as before, I'm enabling keyframes, adjusting the anchor points, and using rotation keyframes, checking that all gaps are filled and connected. Again, I’m making sure to adjust the keyframe positions so there’s some off timing for visual interest.
Keyframes for the 4 hair strand layers. I gave all of them different timings, and gave the bottom one a faster movement speed by adding more keyframes.
Keyframes for the top of the hair. The last one doesn’t need any keyframes since it will be staying still.
Any gaps that showed during the animating process were really easy to fix simply by using the liquify tool!
HAIR BACK
Like before, I split up the back of the hair into two parts, and separated each strand of hair into its own layer.
The back was more of the same - I split up the hair into two, and used rotation animation. If this is sounding repetitive, that’s because it is!
If you have a group of parts that will be animated in the same way like the hair strands, you can also vary your parameter numbers so there’s a range of smaller and bigger movements.
Keyframes for all the back hair pieces.
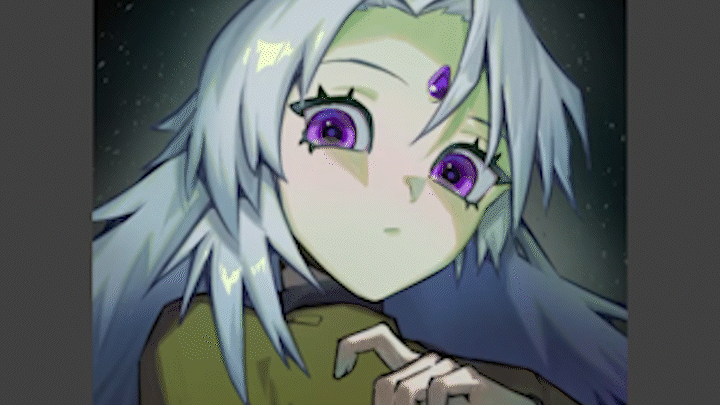
Now the whole character and moth is done being animated!

Extra Effects + Finish
Whew! My clip file is getting bigger and bigger. But I just want to do one last addition – a pulsing light coming from the moth. I don’t think my computer could handle the increasing size of my .clip file much more, so I had to make it simple.
I’m using a big airbrush at a low opacity to draw some light.
Then, using a harder brush, drawing some more exact shapes in her face, hair and shoulder.
As a final touch, I’m using the same effects brush from when I animated the falling moth dust, and generously drawing it onto the illustration.
To animate the light so that it looked like it was pulsing, I changed the opacity in my keyframes, then repeated the keyframes across the whole timeline.
Now the whole animation is finished, this time with light!

This tutorial turned out so much longer than I expected, so I appreciate anyone who stayed for this long!
Remember to check out my tutorial video on Youtube, and let me know what you thought of the tutorial, whether you tried out these techniques for yourself, and thanks for looking!
Users who liked this post


Comment