
Hi there!
As 'posing' is a topic for August's 2021 TIPS contest themes, I wanted to share a super-cool technique with my fellow Clip Studio Tips users.
I've come to call this technique the 'Silhouette Technique/Method'. Simple, yet effective.
It DEFINITELY helped me (personally) when coming up with poses and avoiding the frustration I find myself suffering from when trying to properly draw out gestures.
So let's get started!
UPDATE: It's February 24, 2022 and I was trying to explain this technique to someone and immediately whiplashed remembering I wrote this. Then I reread and realized I was harsh in a few areas that I need to clarify some stuff in. So I've done just that!
Part 1 - Preface: Priorities and Personal Growth
I'll start this tutorial off by saying I'm not going to (harshly) lecture you on the importance of gesture or learning how to properly utilize and learn 'gesture drawing' as a technique/s.
That being said, gesture drawing is important, and a necessary fundamental you should learn if you want to become a better artist. While most masters will say it's so that you can properly understand and relay motion, rhythm and flow in your poses and artwork, (and while that IS true) there are more than one ways to do gesture drawings than /just/ drawing gestures the way most teachers instruct you to.
So, here's the trick- gesture drawing does NOT have to be the whole 'drawing gestures' concept and nothing else. Gesture, in a genuine sense, is meant to relay only one piece of information - how whatever you're drawing is moving, the rhythm, and the flow of it.
Those are all, unfortunately, fancy words that are flowery and overcomplicated, especially to beginners.
Sometimes, the more simple something is, the better it reads. If you can get a read with three lines, then those three lines are all you need. Don't overcomplicate things unnecessarily, whether it be in relation to art, or even life itself.
For example, the images below I did in 2017-2018, so a few years ago. The first is very detailed and anatomy-orientated.
While the second is nothing but flowing lines that are simplified to the core movement/flow/rhythm the models I used for reference displayed in their original pose.
Both get the job done but in different ways.
The thing is, it's a lot like handwriting. If you write something down for your own personal use, but can't read it, what good is it to you? If you write something down for your own personal use, but no one else can read it- yet you can, then you've reached your objective.
Part 2 - How to Organize your Process for an Easier Workflow
Now that I've chewed your ear off with the whole 'don't beat yourself up about not being where you want to be' and that 'fundamentals are important but be smart about HOW you go about utilizing them', let's ACTUALLY get started.
I'm going to say this outright and elaborate on it later, but let's start with this very, very mandatory fact:
You're likely going to need references for coming up with a pose that doesn't look like you pulled it out of thin air and smacked it onto your canvas. If you choose to for-go it, that's cool, but ultimately even looking at poses gives the inspiration to really hone in on what you want and are trying to convey.
I personally write notes about everything. Mainly because I get easily distracted, and also because I have the memory of an enthusiastic goldfish.
So, if I want to have certain features in my pose or need specific references (or even ideas for a pose, what I might like to use as a reference, etc.) I write it down in a word document, usually included briefly in bullet-points.
Example: The image above is a very, VERY brief list of things I wanted to note for an image I was working on.
All I did was open Wordpad on my desktop and type a couple of key features I definitely needed reference for. I then scoured a couple of search engines for reference images referring to my notes.
Also, I screenshot (I use a program called Greenshot) my word document because it helps keep my desktop orderly. You can do this with pictures online that you can't SAVE directly. (Sometimes Pinterest is fickle when it comes to images, it seems to be based around items (usually clothes) that are both an image and a link)
(Note, please make sure you have your SafeSearch filter 'activated' if using Google)
The piece I was working on was initially just some kimono practice, but I decided to make a piece of my original character, Mu, considering she wears a kimono and works as a waitress in an Edo-Period-themed story I'm working on.
So, at this point, I was officially in need of references, which I listed in my prior notes shown above.
You can also see that I utilized Clip Studio Paint's 3d Modeling tool to start with. Considering initially, I just needed a body to draw a kimono onto, (and it wasn't going to be a full-on art piece) Clip Studio's 3D model worked perfectly to start with.
I'm going to segway to our next part about using 3d models for reference, because there's a lot of noxious stigma in the art community about 'art cheat-codes'.
Part 2-1 - Utilizing Digital Toolsets - Is it (Technically) Cheating?
I utilize Clip Studio's 3D tools A LOT. I know a lot of people consider this 'cheating' but in truth, it's JUST a tool to make art, it doesn't make the art for you.
There's a difference between posing a 3D model and drawing everything, including the clothing, anatomy, face, etc. vs. taking finished artwork from Pinterest and tracing over it and copying every detail of ANOTHER ARTISTS' original work and claiming you made it.
That being said, if you utilize one tool too much, it becomes a crutch.
Keep on top of all of your skills and artistic dynamics- drawing from photo reference and imagination, etc. But remember that tools only make the process faster.
For example, a screwdriver will help you properly hold a bolt in place so that it doesn't slip from your grasp as well as help ease the tension while turning it.
But, in the end, YOU'RE still the one that has to turn it and use your strength to tighten it.
Part 3 - A Quick Mention about Reference (And Why it's Important.)
Okay, considering I'm updating this guide, this the one part that I reread and knew I needed to revise ASAP.
Reference is fantastic. Use reference when and if you can. Is it mandatory? No, but your art improves when you are guided by something. For beginner artists, this is the ultimate gift you can offer yourself.
Now, there are several outdated mentalities and thought processes around 'reference' and utilizing it. I'm going to list them off below.
1.] It's cheating!
It really is not. Nor is tracing over photos to get a gist of the flow or feel or even under-structure of what you're trying to draw. I do this with anatomical details, take actual photos and trace over them, try and break them down to their smallest, least complex components. If I'm trying to figure out a gesture, I'll trace the lines of movement in an active figure.
Using reference is not cheating. Tracing over photos of actual items and bodies is not cheating. Tracing art that someone else made to sense what they were trying to convey- that's also not cheating.
Tracing art and then saying you made it- that's what one would assume 'cheating' to be.
Every master artist, every professional artist, every artist of relevancy, uses reference, in some way or another. It is not a crutch or a cheat-code, it's a translation and transmutation.
2.] Lack & "Laziness"
I will be the first to come out and say I do not use reference as much as I ought to.
I am very, very guilty of this one. There are some days I don't want to go searching for reference, and DEFINITELY don't want to Google Search my way into oblivion.
Not everyone has great internet access, if at all. Not everyone knows how to find good reference. Not everyone has a lot of what many artists have at their disposal. It is what it is.
To revise this guide from its prior, aggressive stance about using reference: Reference is necessary if you don't know how to portray a certain thing. It is not mandatory. No one will brute-force you into utilizing it, and I'm hardly one to talk.
A wise friend once said, "Don't get attached to things, you'll go down an infinite amount of rabbit holes seeking answers." And she was right. What I failed to realize was that you can and will get attached to things, and you can get attached to not getting attached.
And that's okay.
Use reference if it betters your craft, but like any toolset, reference can be a crutch. And vice versa. Not using it can ALSO be a hindrance, but don't let outdated opinions like it being a cheat-code, etc. stunt you from utilizing it.
Part 4 - The 'Silhouette' Technique - A Bare-Bones Basic Approach to Gesture Drawing
First off, what do I mean by the 'silhouette technique'? Well, it's a pretty literal technique.
I didn't create it, and I don't coin it as my own. I use it though, and I wish I had started using it a long time ago because it's an awesome technique. As a perfectionist, the frustration of doodling a pose and not getting it EXACTLY how it NEEDS to grinds my gears to dust.
If you need a definition of a silhouette, I'll show you!
On the left, we have a very goofy cat drawing and, on the right, the cat's 'silhouette'. You now know exactly what a silhouette is! :D
Now how does this become a 'technique' you can use for drawing poses, specifically?
You might be thinking that this would actually end up being a lot more work. Mainly because you now have to draw something (lineart) and then fill it in to get a proper silhouette; 2X more work than you would have done otherwise. Nope!
Luckily that is not how you go about this technique! Think of a sculptor, the kind that builds things from clay. Then, when you get the base of this 'technique' down, you carve it as if marble.
That's what this technique is all about!
Now, with this technique, you can see I used just one tone, black. You can use any color, but I would suggest that if you have any parts of the pose that overlap (say an arm that crosses the chest, or a hand that covers the mouth) you do it in a lighter (or darker, depending on what color you initially chose) color/tone. It helps keep things organized! You can keep repeating this if you have an overlapping part that overlaps something else.
The last thing you may wonder is how I go about making the silhouette. And for the answer- No, I do not take an enlarged brush and paint in the silhouette. You could do that, if it suits your fancy, it will work just as well, I imagine, but I much prefer utilizing the selection tools.
Specifically, the 'Lasso' Tool.
Part 5 - The Process of the 'Silhouette' Technique
Oof, we're in the final stretch!
In the last part of this tutorial, I will offer you two examples of my full process, including what I do after I finish my silhouette.
These examples were done with Clip Studio's new 'Record Timelapse' feature.
A quick note, if I wanted to slice off anything (say I lassoed the arm too wide) I would just lasso the part I wanted to get rid of and hit delete. Delete will erase your entire selection, which is a HUGE time-saver. You can see me do this in both recordings.
EXAMPLE TIMELAPSES
Part 5-1 - A Written Step-by-Step of My Process
Because sometimes it's easier to have both visual and written guides, I'm going to note my steps for the two example processes I posted above, as well as few notes about my finishing touches.
1.] More often than not, it takes time and effort to really get a solid silhouette. You're not likely to get it right on the first try. I also have references (whether it be a 3D model or photo reference) hidden in my sub-view to the side of my canvas.
Once I get the basic silhouette down the way I want it (or close enough, it does NOT have to be perfect, as there is a lot of editing I do later on) I go onto drawing the base sketch.
2.] I try to keep my base sketches simple and very loose. I use a lot of blunt angles (especially for limbs that are bent) and rarely make everything hyper-accurate. The exception to that rule is hands/fingers. Those I try to get down-pat right away, simply because I don't like fighting with them later. I usually do, but I attempt to get something solid as quickly as possible.
3.] I then lower the opacity of my sketch layer (which I usually draw on one layer because it makes things easier to erase.) I don't have a specific percentage I lower the opacity to, just low enough I have enough clearance to draw over the initial lines while still having the structure BARELY visible to reference from. Then, I usually draw the clothes and important details. Sometimes I use multiple layers, depending on the complexity.
4.] I refine. Then refine. Then refine some more. Sometimes I do extra clean up, but I use a rough-textured pen, so there's always some residue left over. More times than not, I use the lasso tool and delete certain parts (usually larger areas) that need to be redrawn, then redraw them. Or, just to clean up little chunks of messy linework that I don't want to erase by hand.
Depending on whether I plan on coloring my work (and how) I may take the finished lineart layer (99% of the time all of my linework gets merged so it's all on one layer at the end) and blur it using Clip Studio's 'Blur' filter. I then resharpen the blurred lines with the 'Sharpen' Feature. I usually only do this if I'm not planning on fully painting a piece and instead decide to do a more anime/manga-coloring rendition.
5.] When I have decided that I want to color a piece, depending on whether I'm going to fully paint it or just utilize my shoddy soft cell-painting skills I use the lasso tool and lasso the parts of the drawing that are going to be a certain color. As of late, I've started filling in with values rather than colors, that way my colors are on point when I do actually switch over from the value stage.
NOTE: Clip Studio has some fantastic fill tools, and I used them all the time. But they don't work as well with textured brushes, which is primarily what I use nowadays. So, it's better just to use the lasso tool because I won't get gritty edges to my filled spaces.
It's more accurate this way anyways, even if it's a bit more work. I do have my lasso tool set up so that it's super stabilized and easy to control. Once I've lasso'd my chosen portion, I hit 'ALT Delete' which is my shortcut for 'Fill'.
6.] Once I have my values looking right, I then use the Auto-Select Tool (Refer to All Layers) to click on each portion that I want to change into color and then simply fill that selection with the color of my choosing. I do this being VERY mindful of how the colors correlate with the original values I've chosen.
If things aren't looking right after I've finished getting down my flats (base colors) I adjust until they're right. Sometimes I just outright pick a different color and fill, and sometimes I shift hues with Clip Studio's 'Tonal Correction' adjustments.
NOTE: Although I have not put it to use or experimented with it (YET), I do know that it is plausible to make a specific color palette and utilize the gradient map adjustment tool to turn all of your values to those colors. It's more of an advanced technique though, because you have to understand and be able to match values with the colors you pick for your palette for it to work correctly.
7.] If I'm feeling up to painting/rendering I will then change the color of my lineart and begin the painting process. My painting process varies depending on how much time and effort I want to put into it, but all in all, after I've finished, I do a combination of refining, editing, and cleanup.
I try to make sure that my colors are on point, so sometimes it's necessary to have a last-minute color adjustment, and I always end with adding an overlay of texture/s. I also usually change the opacity and color of my texture to make sure my colors are still good and proper!
And that's my basic process.
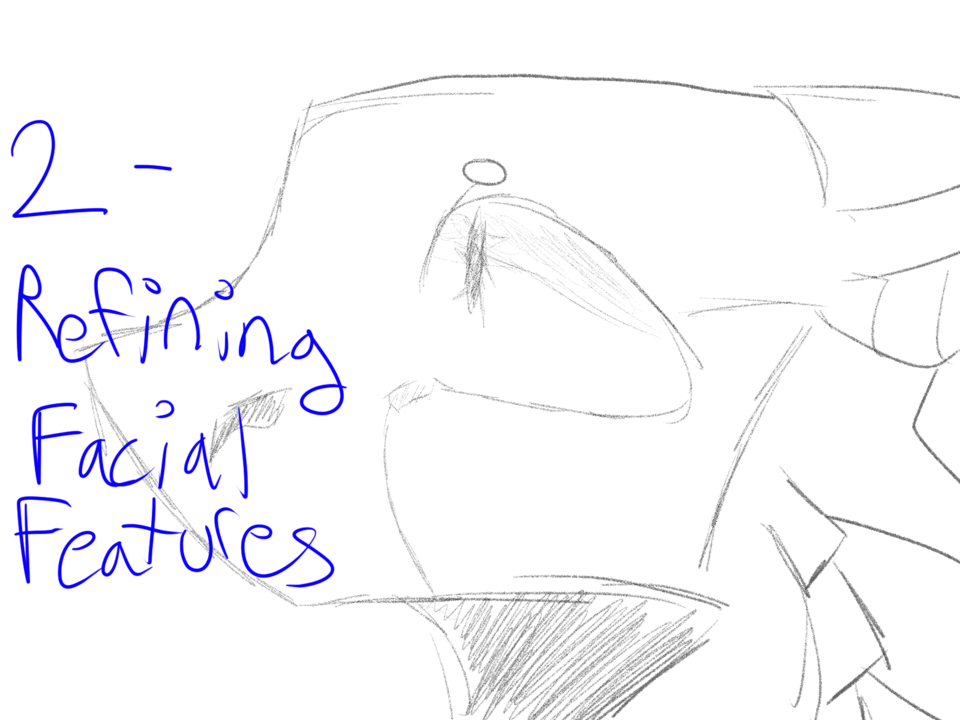
A Side-Note on Abstraction
I thought I'd add this in the revision. I wanted to throw in a sidenote about 'abstraction' and why this technique plays so well into that term.
Human being see faces in a lot of things. The man in the moon, for example. Some people say there's a man in the moon, or a face. People cloud-gaze and see shapes. Human beings enjoy seeing things within other things. I have a fat foot in my bathroom tiles, there's always little figures in my stucco walls.
I use the term 'abstraction' loosely. When you create something very simple, that has no defining features, you can then pick out defining features within its base format. You don't have to 'know' what things will be until you pick or point them out within the basic shape you're working with.
The silhouette technique utilizes this in a way that it often takes off a great deal of stress (for me, personally, at least.) from trying to get a gesture or figure, or any part of that figure's anatomy down 'accurately' right off the bat.
Nothing starts out 'perfect' or 'accurate'. That is a huge misconception had. I rarely get anything done 'right' the first time around the bend, IF EVER.
Final Notes
Ahh, that was a doozy! I'm glad you made it all the way to the end! Congrats if you did!
Thank you for reading through my tutorial. Hopefully, this helped you a bit, or at the very least, taught you something new! I wish you luck and happiness on whatever artistic journey or venture you take on, but please remember to take care of yourself and your wellbeing on the way!
Take care!
Les utilisateurs qui ont aimé cette publication


Commentaire