How to create winter landscape.
Hello there,
Do you find it create winter landscape due to the Lack able ability to choose the basecolors for your Winter landscapes Or maybe you find it difficult to arrange the verious objects on the scene.
In today's tutorial titled
How to create winter landscape.
_______🎄🌟
I will be showing you how you as an artist can easily tackle those issues and standardly create a winter scene be it a city landscape all a casual landscape with the aid of clips studio paint. As you go along in this tutorial I will get to see how we can use the different features available in clips studio paint (such as blend mode, filter effect tools and among many...) to create a nostalgia winter landscape.
Firstly before anything we need to first what we want to want to create before we can create, So let's start by looking at the various things noticeable on the on a winter landscape.
🔹 Notable things on a winter landscape.
As an artist who haven't experience winter season or create any winter landscape before may feel it will be very difficult creating it, but I'm here to help you as an artist kill those negative thoughts in your head for when we want to creating a winter landscape, we should have this at the back of our mind that the winter landscape is not one exaggerated landscape with it's own objects or items, but that it is an environment with which winter season is blow through and leaving snow on every look an turn of the land.
So in order to create a winter landscape, we can just simply use our everyday objects around us (such as rock, trees, house and cars),
_______
And creating this set of objects is now that aspects we you need to look into, which I will be showing now.
🔹How I paint objects for my winter landscape
When trying to create a landscape, the most common issue which we as artists often face is as follows;
- how do I paint the various winter objects - what color does a snow appear as - how do I arrange the various winter scene objects on the landscape.
Now in this tutorial, I would like for us to briefly see how we can overcome those common issues artist may faced, so I will be break down those above issues we may face when painting landscape scene using a method I like to call,
"the 3 step rules of painting objects”
This method is a simple breakdown of objects structure into three steps which help may help artist easily understand that object fundamentals and it can be easily understood and simple to practice.
And I will be using this method to paint the below following common objects likely to be seen on a Landscape;
• Vehicle
As we do know a vehicle is a common object seen on a landscape image, I would like us to to start the use of the three-step rule on how to paint a [taxe] vehicle.
And
Do note: that I will be using this following sets of CSP brushes,
- [chalk] pastel - [soft] airbrush - [hard] airbrush - [painterly] blender sub tool
_______
for us I do know that that is often think those painting use some kind of magical brushes to create their work but I would like to tell you that you can easily use your common brushes and get a good result with these (3 step rules).
Step 1: Structuring
Start by selecting a color palette for your vehicle using the [chalk] pastel sub tool, create a flat color of the vehicle adding every basic structure of the [taxe] vehicle.
_______
Step 2: Defining of general form
This aspects just involves we using the [chalk] pastel sub tool and the rest of the other sub tool brushes listed above to add the shadows and the halftone effect to the object various parts so as to make the object look more 3 dimensional. And also know that in this aspect, we are likely to show the viewers where the direction of the light source is and where they light is position toward the object which in this sense is coming from the right top corner onto the object.
_______
Step 3: Refining and add of final details
In this aspect, we are to just add finishing touches and detailed touches to the work making it look more refined and well painted, also I use the soft airbrush sub tool brush on a Layer which blending mode is set to [Overlay], I add soft glow effect on the vehicle giving it a POP experience.
_______
Hence will now have our [taxi] cab vehicle now created, now isn't this creation process easy to do for sure.
_______
No as we do know this up vehicle is a vehicle with no indication of which season it is in but when we add something like some snow on top of it and around it I believe it will tell a different story right, let's try this out.
• snow
Now let's not forget our three step rules,
Step 1:
We first start by picking our color for our color palette and using the [chalk] pastel sub tool add in a dark blue color to structure out the snow on top of the vehicle.
_______
Step 2:
In this aspect using the [soft] sub tool brush, we just only need to define the direction of the light areas using the [yellow] color and Shadow areas using the [purple] color on the color palette to make the objects look 3 dimensional as previously stated above.
_______
Step 3:
We simply just set the layer blending mode to [Overlay], using the [soft] sub tool brush we then add some finishing details to the snow making it appear like it's night time and a light with a yellow is being shined on the snow.
_______
And with this aspect properly understood, we can easily give the snow different colors expression base on the time (be it morning, noon or night time) the snow is be observed by the winter landscape that we are liking to show the viewers.
_______
Now, another common thing we may see on the landscape of a winter season environment is the [tree].
• trees (Ponderosa pine)
This set of three are regularly seen on winter landscape images. Painting this trees are often use a simple asset material called [Ponderosa pine] I downloaded below link;
🔗 🔗 🔗
Now, Using the 3 step rules, I then bent in the Ponderosa pine tree.
Step 1:
Lay out the General structure of the Ponderosa pine tree using the [Ponderosa pine] sub tool, giving it a dark green color,
_______
Step 2:
Using the [chalk] sub tool brush, add some white snow cone on the top of the leaves while also trying to follow the silhouette (arrangement) of the various leaves.
_______
Step 3:
Add some refining details like setting the layer blending mode to [Overlay] and using the [soft] sub tool brush, add some color variants to the tree to make it appear unique and dynamic.
_______
And with that we are done with the creation of our Ponderosa pine tree.
_______
Now don't know that this last step the refining stage which involves the using of blending mode to give the [Ponderosa pine] tree different color variant. And the change of the blending mode to different modes (such as color, exclusion amongst other) can be implemented to give the trees a different and unique appearance.
_______
• Rocks and ice glacier up creation process
Ones again using the 3 step rules, start by doing the following;
Step 1:
First block out the general form of the Rock using the second color of the color palette, meanwhile for the ice glacier, I simply use the third color on the designated color palette and also block outs the general form of the ice glacier using the pastel sub tool called the [chalk].
_______
Next, for the
Step 2:
Simply use the same sub 2 which is the [chalk sub tool] to paint in the lighter color which is the first color on the chosen above pallet on the rock showing the direction of the light source. Whereas for that of the ice glacier, using the above mention brush again, I simply added the second color on the color palette to the above part of the block out pointy rocks showing the area where the snows how to be which is on top of the pointy rocks.
_______
And with that said and done we can now move to the next step.
Step 3:
This step only involve we indicating the shadow and light areas of the objects which for the rock only just need us adding a darker color to right side of the rock representing the shadow area and the left side already indicating the light area.
Whereas for the ice glacier, we simply use a whitish color on the left side of the color palette to add some bright color to the top areas of the snow on the pointy rock meanwhile using the other saturated color on the right side of the color palette to add some bounce and absorb light of the atmosphere onto the rock indicating the areas where the snow has solidified and taking the form of and ice block.
_______
Using those above mentioned common things around us, we can easily lay out how the winter landscape of our scene should look like.
With the above said we can now move on to the next point.
🔹 Simple study of objects arrangement
Oftentimes as a young artists, we tend to find arranging of objects on a landscape very complicated and difficult aspect of creating a landscape scene, But do you know that you can effortlessly layouts your object on your scenes without stress due to the aid of clips studio paint handy feature [?]
Yes you heard me right, let's me explain; they are some few features to which you as a CSP user can use can use to your advantage to help in the arranging of your objects on your Winter landscape or landscape in general.
CLIP STUDIO PAINT (CSP) over the year has added to their software which tends to make the life of an artist far more easier and amongst those features are [ the Material function and Layer function, ] which will be using for today's tutorial.
Now,
• for the [Material] function
Say we have a winter landscape in sense of a hill and a valley,
_______
Using the [Ponderosa pine] sub tool brush, we can simply add some trees to the top and bottom part of the Hill and valley.
_______
And using the material called [] material which can be located in the material box that I downloaded from the asset store, we can simply add some houses in-between the the hills and valley,
_______
And also we can use another aspect I'd like to use which is the importing of save image on the winter landscape,
_______
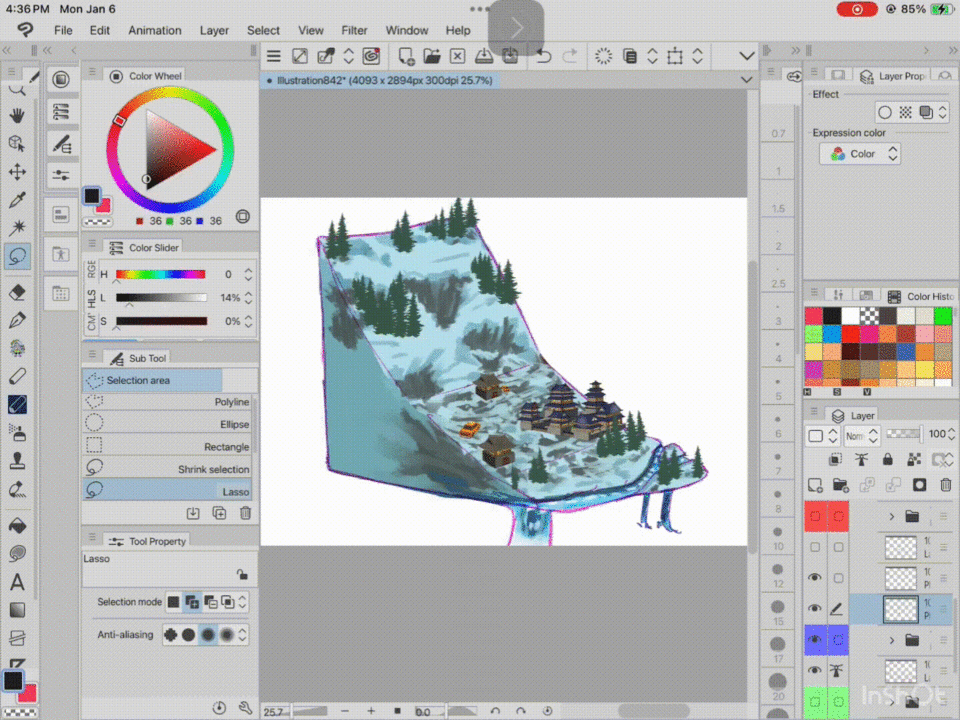
Which day proper understanding of composition, we can now see that our objects are basically layout on the various [elements] of the composition which are (known as the background, midground and foreground).
_______
Now with this prototype in mind or create it as a template, we can easily make our viewers believe the objects are placed accordingly,
_______
With the houses in-between and the Ponderosa pine trees at the back and front of the winter landscape.
The next feature which often call me handy when designing a landscape is called the the [Layer].
• use of [Layer] to your advantage
Some people see the Layer are just a common tool, but I see it as a very important feature of a digital software which help us artist to easily detail our work especially when you have so much on your mind and you forgot to do some necessary things you can still be able to go back to those segregated work and then put your detail touches to it.
I take for example the thumbnail we did above of our landscape, if you can notice you can see that the landscape has three sections which is the background, midground and foreground which when I'm painting I do divide them into different layers which I named Layer 1,2 and 3, to help me better understand and no the positions of my landscape elements.
_______
And if I forgot to add something like take for example a [fog effect] showing distance between the various object on the various elements of the winter landscape due to that I was able to place the various elements in different layer, I can effortlessly go back and add those refined details to the peace.
_______
Making my work look unique and realistic as we can see in my before and after rendering of the winter landscape.
_______
Now for the climax of the today's tutorial next look at the following aspect.
🔹 Re-configuring of a casual summer city landscape into a winter city landscape.
At this point of the tutorial, I would like for us to see how to create a winter city landscape from our already existing summer city landscape, showing how to add a detailed twinkling holiday light and also glow effect to the winter city landscape.
And as we continue in this aspect of the tutorial we are going to see some other csp handy features which are used to better add a detail lighting to my work to give it a nostalgic expression.
Now, the image I will be changing is my painting of the two female friend sitted on the edge of their rooftop on the summer time.
_______
And in today's tutorial, I will be transforming the piece to having the two girls sitting on the rooftop watching the fireworks go off.
So without further though let's get started.
Firstly, I select the grass valley on the left hand side, I then go to click on the [Edit]>[Tonal correction]>[Hue/saturation/luminosity], then I start to tinkle with the various settings and when I get the appealing expression of my grassland covered with snow which I want to be in a pealed whitish blue color, I then click on the [OK] button to save it.
_______
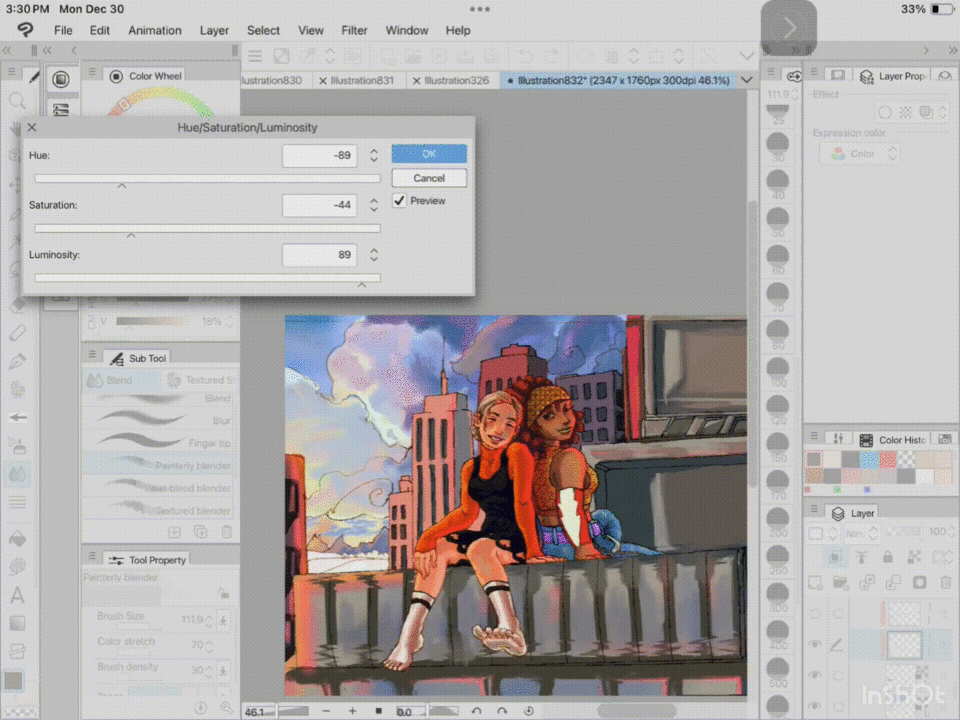
Afterwards I select that same layer, I then go to the [Edit]>[Tonal correction]>[color match] and using it I then match it with one of my blue colored imported image to make it look like a winter scene.
_______
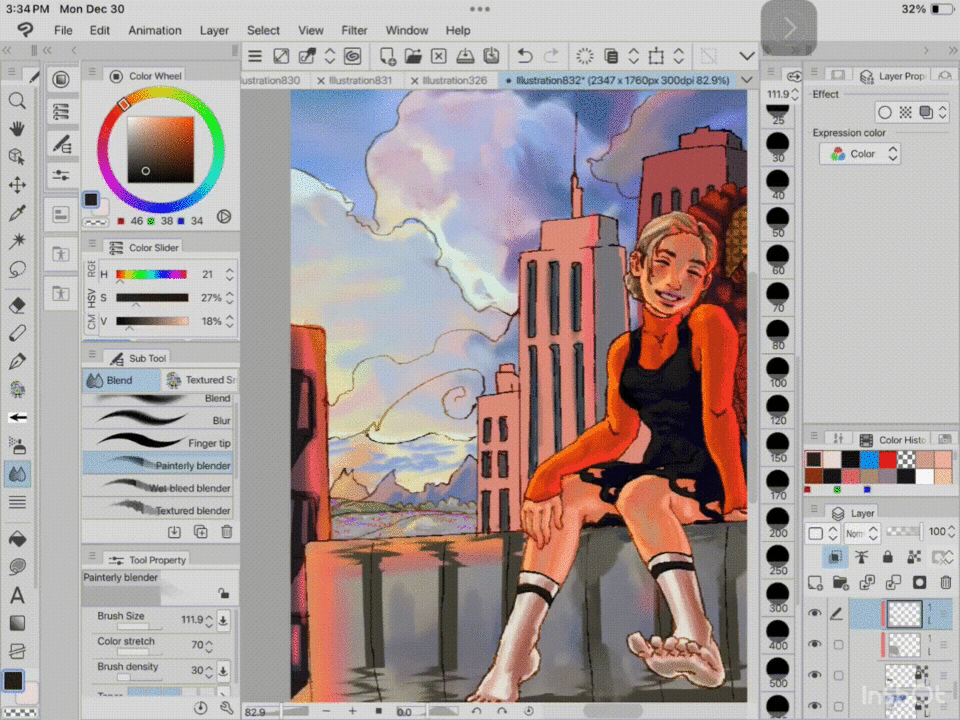
Next, using the same above mentioned method, I repeat it on the two sets of city skyscrapers located on the midground of which is behind the two characters and the foreground to which the two characters are settled on top.
_______
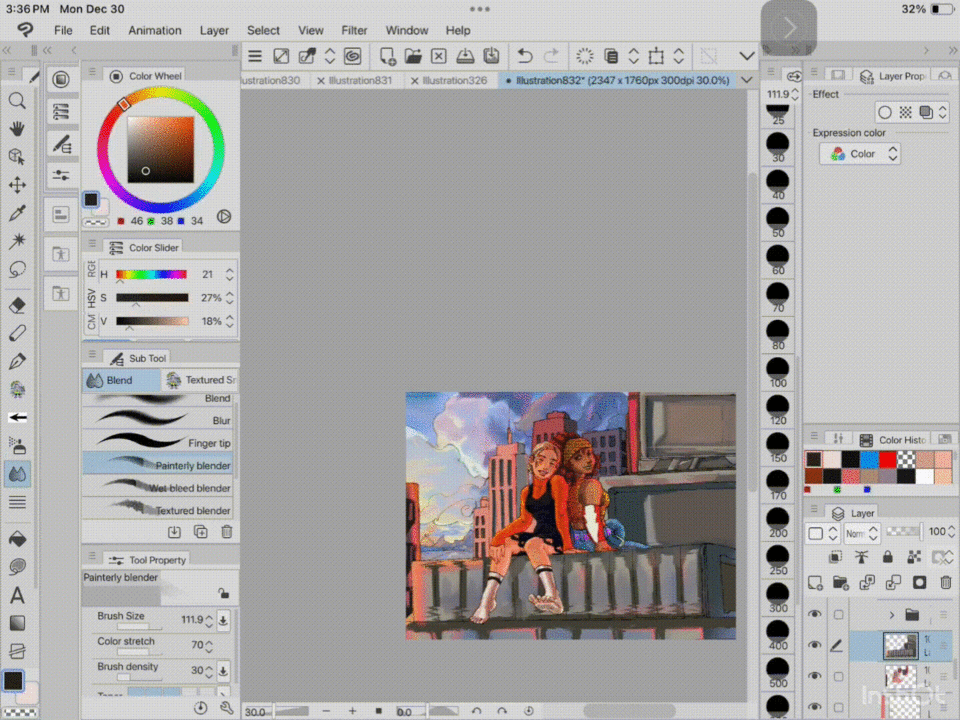
I then create another layer,
set the layer blending mode to [glow dodge],
_______
After I was using the soft airbrush sub tool, I then added some colorful glow effect representing holiday celebration to the midground of the composition,
_______
Using a sub tool I downloaded from the asset store website which is for adding of holiday twinkling fireworks light,
I also add it on a new layer above the above previous layer,
also making sure that the blending mood is also set to [glow dodge].
_______
Next, I moved to using the [soft] sub tool brush to adding the same Glow effect to the city skyscraper on the foreground elements,
and using the noise subtle I added some stroke of colors representing the short out firework that hasn't exploded.
_______
Alongside I then added another set of scattered firework on the foreground of the landscape piece.
_______
Anto conclude this piece, I then went along to import a winter snowfall effect material from the material dashboard unto the painting.
_______
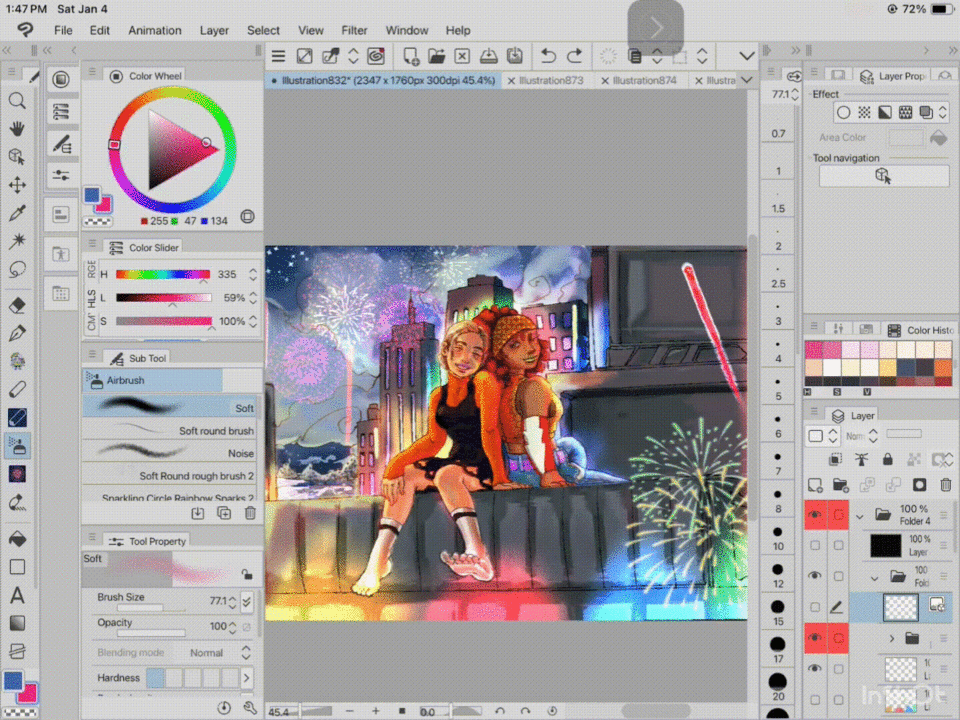
With the above said and done, we have successfully transform the previous summer city landscape painting into a winter city landscape.
_______
Moving on to the next aspect,
🔹The creation process for a wintery landscape with the aid of different asset materials
In this part of the tutorial I would like to just show how as a csp user can use their asset material to your advantage.
First I go today asset material and download some background effect which link I'll be leaving below,
🔗🔗🔗
Open your canvas, go to the material dashboard import the downloaded material onto the canvas you will notice that the size is not seen as your canvas if you are using a landscape size of canvas, but that is not an issue as I have learned over the years that you can manipulate the size and add more numbers of your imported image materials to better give your background a suitable expression as what you want.
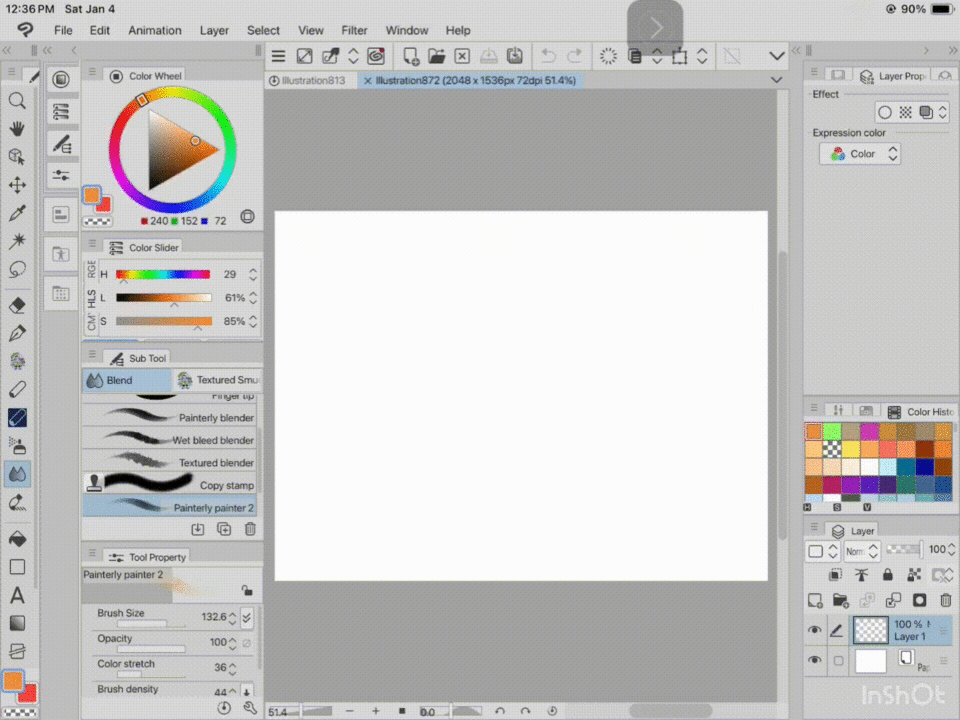
Next using another handy csp sub tool called the [ice texture] sub tool, I use it to create a ground which was one to water turned to ice at the bottom part of the winter landscape, also setting that layer blending mode to [Darken] for it to blend with the bottom created snow.
_______
After that is done, I created a [folder] which I named fox and I paint a [flat color Fox] into the landscape to better give the viewers draw their gaze,
_______
I then move on to adding a [ponderosa pine tree] to the foreground element of the composition, and I go to the [filter]>[blur]>[Motion blur] and added a blow effect onto the [ponderosa pine tree] on the foreground element.
_______
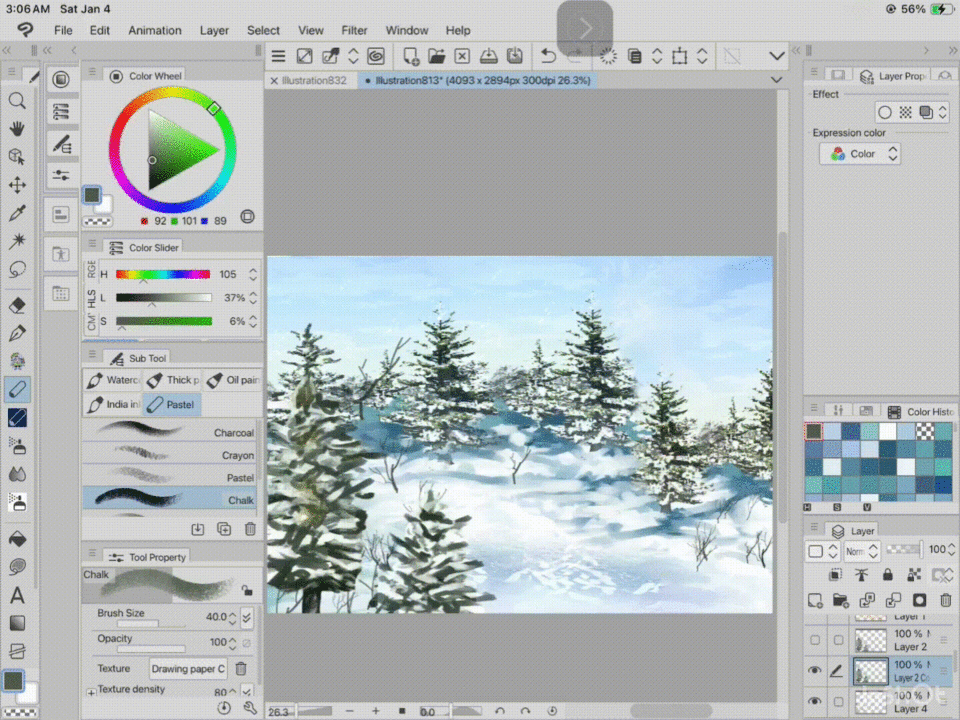
Next, I move on to adding the [Aurora Polaris effects] at the top part of the winter landscape scene, for as we do know that during the noon time in the winter season there tend to be a sort of flash of light in the sky at most regions that experience winter season.
_______
Now, I first create a new layer above all the layer previously mentioned and I set the layer blending mode to [Overlay], then using the soft airbrush sub tool I didn't rendered in some Warmer color expression showing due to the reflection of the aurora polaris light show.
_______
And to finish this piece, I then added a [snowflake effect] to the winter piece from the asset material, then tilted the snow flake material to the side to make it look dynamic and expressive.
_______
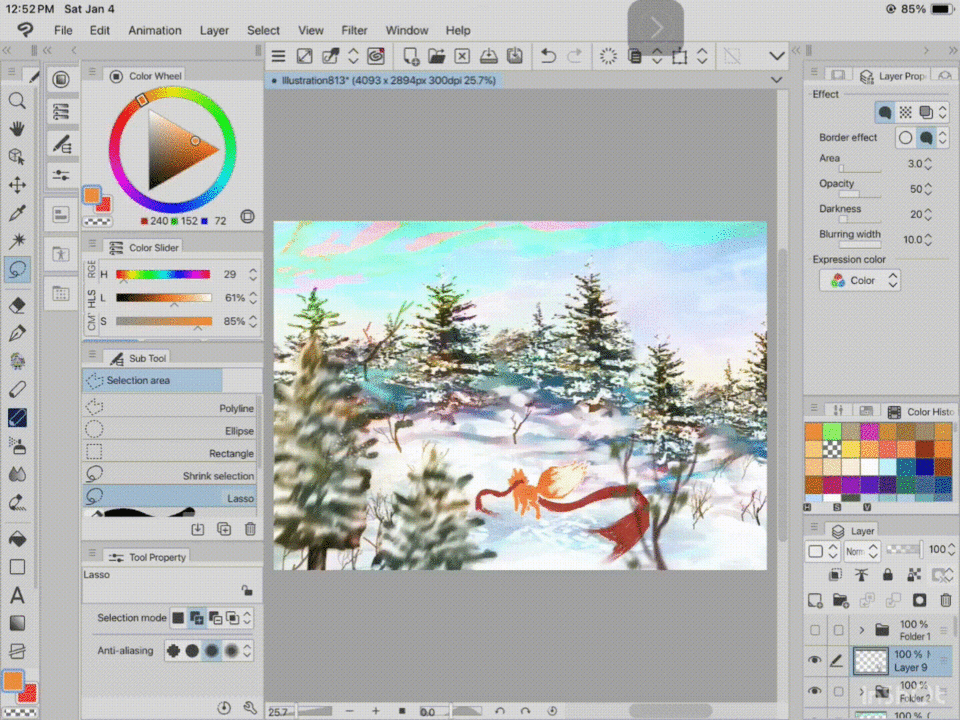
Whereas with that done we now have a noontime winter landscape.
_______
Conclusion
Thanks to everyone who was able to go through this tutorial article, I do really appreciate, Also I hope to see you on my next one, thanks one again and bye for now.




댓글