
Introduction
Hello! This post will contain the basics of setting up files for webcomic making - specifically for Webtoon Canvas - as well as how webcomic tools differ between Clip Studio Paint Pro and Clip Studio Paint EX and an introduction to character creation. Thank you for reading!
Clip Studio Pro vs EX
I've used Clip Studio Paint Pro for virtually all of my art since 2016, and over time have grown very familiar with the tools this version of the program offers for webcomic artists. After recently acquiring a license for Clip Studio Paint EX, I've had the pleasure of exploring how the programs differ and where their differences lie with regards to webcomic-making. While both base programs offer access to things such as the frame border tool, panel dividers, speech bubbles, various effect lines, and the View On-Screen Area function - they do differ in terms of document setup/exporting. Below I'll describe each of the above tools as well as how to set up a document in both Pro and EX and how your workflow may differ based on the license you use.
Setting Up a Canvas for Webtoon (Pro)
When uploading your comic to Webtoon Canvas, the maximum size for an individual image is 800 pixels wide by 1280 pixels tall. This is absolutely a size you can work with, though if you plan to incorporate smaller details into your art or intend to move your work to print in the future, I recommend doubling the canvas size to 1600x2560 pixels.
I personally prefer to set my canvases at a resolution of 600dpi - I've found that it captures the amount of fine detail I tend to work with while still maintaining a reasonable file size, and it scales well for printing. Realistically, anything at 350dpi or higher should be more than enough for digital upload.
You can absolutely do one long canvas - either using New Illustration or New Comic - instead of using the 800x1280 guideline. Webtoon will resize it and split it into separate canvases when you upload it, but I usually use smaller canvases and stitch them together later.
Frame Border Tool
The Frame Border Tool is a very quick and easy way to add comic panels to your document. Aside from adding the actual visual border, it creates its own folder in the Layers section, and drawing within that folder allows you to keep all your art contained to the confines of that panel.
There also exists the Cut Frame Border tool. This lets you divide the frame by either creating two separate folders for the same panel, or splitting the panel itself with each part having its own folder.
Speech Bubbles
The speech bubbles, when clicked and dragged over top of a text box, combine the two elements into one layer while still maintaining the ability to edit the text inside of it. Clip Studio offers several different shapes of speech bubbles whose properties can be changed to fit your needs, as well as tails that automatically merge with the larger bubble shape.
Effect Lines
The available effect lines vary from motion effects, to sunbursts, to rain. They are easy to add to a canvas and can add a lot of character and movement to your comic.
On-Screen Area
While I’m working on a taller canvas, one thing I like to do is go to View, and select On-Screen Area for Webtoon. This gives me an idea of what the reader will see as they scroll down the comic, and I can change the art to better fit the screen if necessary. You can also adjust the size of the preview area in On-Screen Area Settings.
Exporting for Webtoon (Pro)
When the time comes to export, you can export as an image like you would any other drawing and resize it later, or you can use the “Export Webtoon” function in the File tab. You can specify whether or not you want to divide the image into smaller sections and choose how tall you want those sections to be, the type of image you want (JPEG or PNG), and how wide you want the final image to be – again, Webtoon’s size limit is 800 pixels wide by 1280 pixels tall. You can easily resize your work in this panel to fit Webtoon's restrictions.
As stated before, if you upload a larger image, Webtoon will automatically resize it for you. But this runs the risk of losing some image quality, so I recommend adjusting the settings here where you have more control over the output.
Setting Up a Canvas for Webtoon (EX)
Until I got EX, I had been making 10-15 files of varying heights for each webcomic episode. I’d have multiple projects open at once to make sure everything was looking cohesive, but having a bunch of canvases open would slow down my iPad and risk crashing the app. EX has the option to contain multiple canvases within one file, so you can access all of them without cluttering your workspace. You can adjust the size of each canvas individually, and they auto-save when you switch between them.
So the way I usually set up files using this option is very similar to how I would in Pro, but I start with 10 artboards at 1600 by 2560 pixels each. You can resize the canvases later if you need to, and you can add or delete pages after the file’s been made.
Exporting for Webtoon (EX)
There’s also a bit more customization in EX when it comes to exporting. Like Pro, I can choose the output’s width, height, and image type, but in EX I can also choose which pages I want to export.
Personal Tips
First of all, one thing that I use a lot is the Color Set window – I keep the base colors for each of my characters all in one place so I’m not jumping between files and eyedropping them. If there’s a color I consistently use for the line art or background, I like to store them here too. This kind of seems like it would be common sense, but I forgot exactly how useful it was until I incorporated it into my daily workflow.
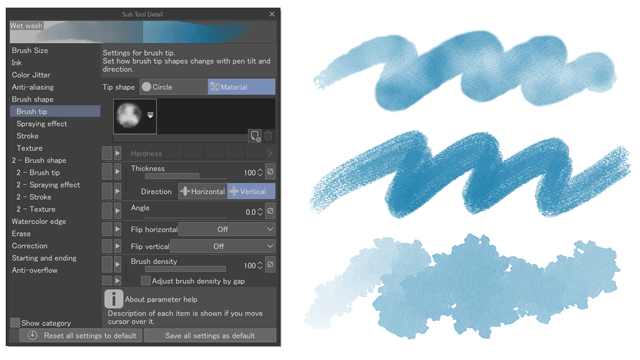
Another thing that has made things significantly easier for me is the use of vector layers. They can be a little finicky – the line correction can look strange after erasing part of it, and you can’t use the paint bucket or liquefy tools – but it allows you to resize your line art without making it blurry or pixelated. This can be a game-changer when working on a small canvas where you're a lot more prone to pixilation. While you can’t use liquefy, you can still use the different transform options like warp or free transform, or you can edit the path directly with the vector tools, so you do still have some versatility.
Overall, my #1 tip is to use the space to your advantage! The scrolling webcomic format can be used in some really creative ways that you can't achieve as easily with more traditional comic layouts.
Using an example from my comic - as the reader scrolls down, more of the scenery is revealed with a majority of the lines sloping downwards. This lets the reader's eye travel with the scrolling rather than bouncing all over the place trying to take in each detail. Towards the bottom, I use converging lines to form a funnel - directing attention to the center of the canvas where the next scene begins.
If you’re comfortable trying it out, be adventurous with layout, and use the space in creative ways.
Intro to Character Creation: My Four Points of Consideration
When I create characters for my webcomic, there are four main things I consider when developing their character traits and mannerisms. Mapping out these ideas helps me better prepare for the characters' personal journeys and what events need to happen in order for them to grow from static to dynamic.
The four points are:
1. TRAITS
2. REASONS
3. OUTCOME
4. PROCESS
Point One: Traits
For Traits, I like to identify the main personality traits that I want my characters to exhibit and how they they can be viewed as both a positive or a negative thing. This creates both positive traits as well as flaws. For example, I can create a character who is fiercely independent, but they refuse to ask for help. Or they're very kind and gentle, but they tend to get ignored or walked all over.
Point Two: Reasons
For Reasons, I come up with justifications for the traits I previously assigned this character. If my character tends to have an overly grandiose or cocky personality, it could be the result of feeling a need to cover up flaws. They may overcompensate for feelings of inferiority by drawing others' attention away from their insecurities.
It's important to give characters a personality, but they can be very two-dimensional and hard to develop if these traits have no reason to exist.
Point Three: Outcome
With Outcome, I try to brainstorm what type of person I want my character to become. For example, if they have that cocky personality as a result of deep-rooted insecurities, I may want them to learn that they can be vulnerable with their flaws, or reveal that they simply have an overly-critical perception of self. Identifying the people I want my characters to become helps me better map out the next step: the Process.
Point Four: Process
Finally, I identify the Process of how the previously determined Outcome will come to be. To get an over-confident but insecure character to learn how to be vulnerable, they may need to be put in a situation where they are forced to trust the other characters in the story. By showing the character that they can rely on the people around them, they may be more inclined to show their insecurities without feeling the need to mask them.
There is no concrete way to write a character, and if these tips don't work for you, that's okay! All that matters is that you find a method that works best with your creative process. These are simply some of the things that I personally consider while drafting each episode.
Conclusion
I hope these tips helped any beginner webcomic artists out there! The technical aspects of webcomic-making were one of my biggest hurdles to tackle, and it took a lot of trial and error to find methods that worked for me - hopefully these tips may spare you some of that same trial and error!
Thank you so much for reading (both this post and perhaps my webcomic The Lady of Gollerus if you feel so inclined hehe)!
이 게시물에 '좋아요!'를 누른 사용자


댓글