5 tips to improve your drawing with 3D assets!
NOTE: The previews and images in these tips are based on iPad version of Clip Studio Paint PRO (v3.0). The user interface may differ from the PC version.
Whether you're new to digital art or a seasoned pro, utilizing 3D assets can greatly enhance your workflow and elevate your illustrations. In this article, I'll share my top five tips to help you make the most out of 3D assets in Clip Studio Paint! :D
Before we get started, please note that I may not cover all the basics, such as explaining basic 3D controls and how to move them. If you're not familiar with these yet, make sure to check the articles that I've linked in each section. Now, let's begin!
1. Posemaniacs
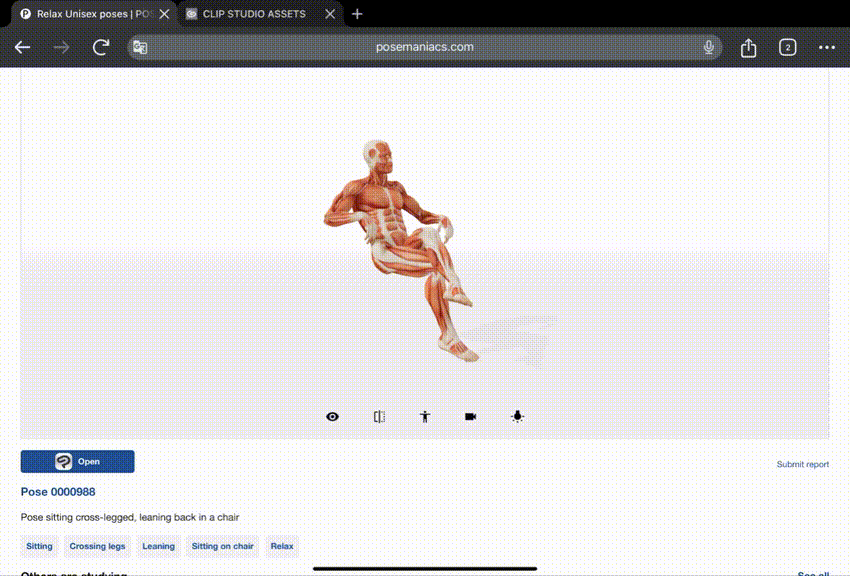
Many beginners want to start drawing right away without looking at references. The truth is, having a good reference is crucial for artists to draw smoothly and accurately. It will also improve the quality of your drawing. This is where Posemaniacs comes into play!
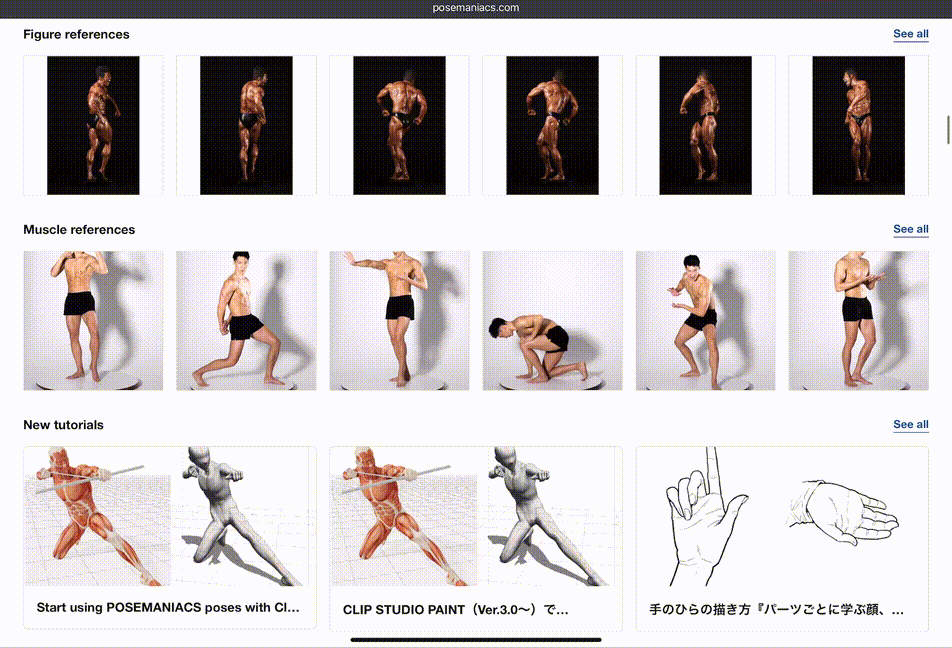
Posemaniacs is an awesome website that offers a wide range of pose, facial, and body references. It's a popular choice among artists, and best of all, it's completely free! Whether you're sketching a dynamic action scene or a specific facial expression, Posemaniacs has everything you need.
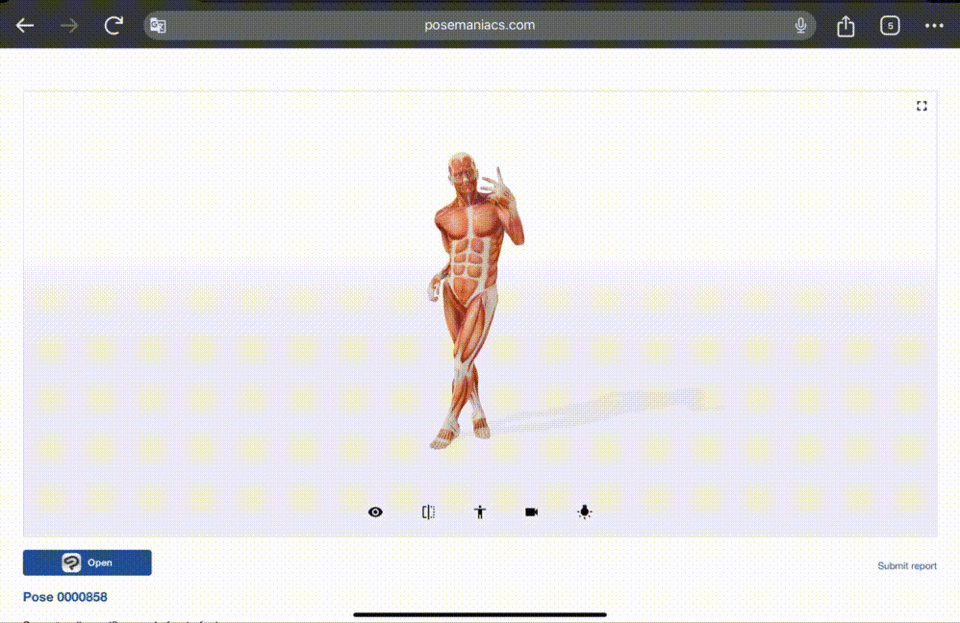
Since all the models are in 3D, you can rotate, change angles, and even adjust the lighting to get the perfect reference you want. It's like having a virtual model right on your fingertips, making it so much easier to bring your artistic visions to life!
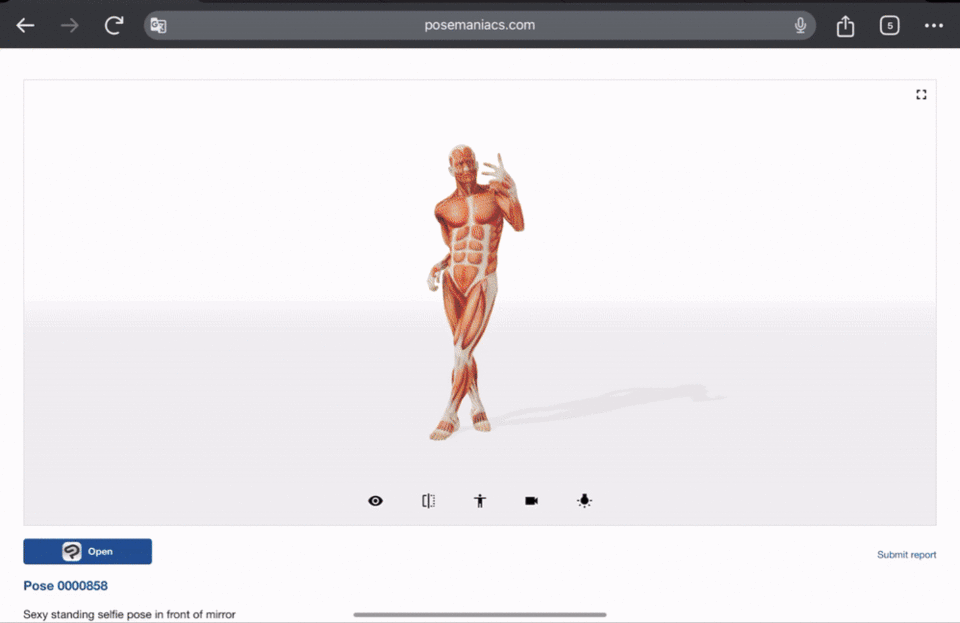
and If you have Clip Studio Paint v3.0, you can directly transfer poses from Posemaniacs to your canvas!
2. Customize your own 3D Materials (Body and Head)
If you find yourself drawing the same character over and over again, especially for a comic or webtoon, I highly recommend creating your own 3D base model in Clip Studio Paint. A personalized reference would save time by reducing the need to look at multiple references repeatedly!
• Custom Body Shape
Here I will show you a quick way to customize your own 3D model and how to save it. If you want to learn more about the details, you can check this article from Clip Studio Paint official!
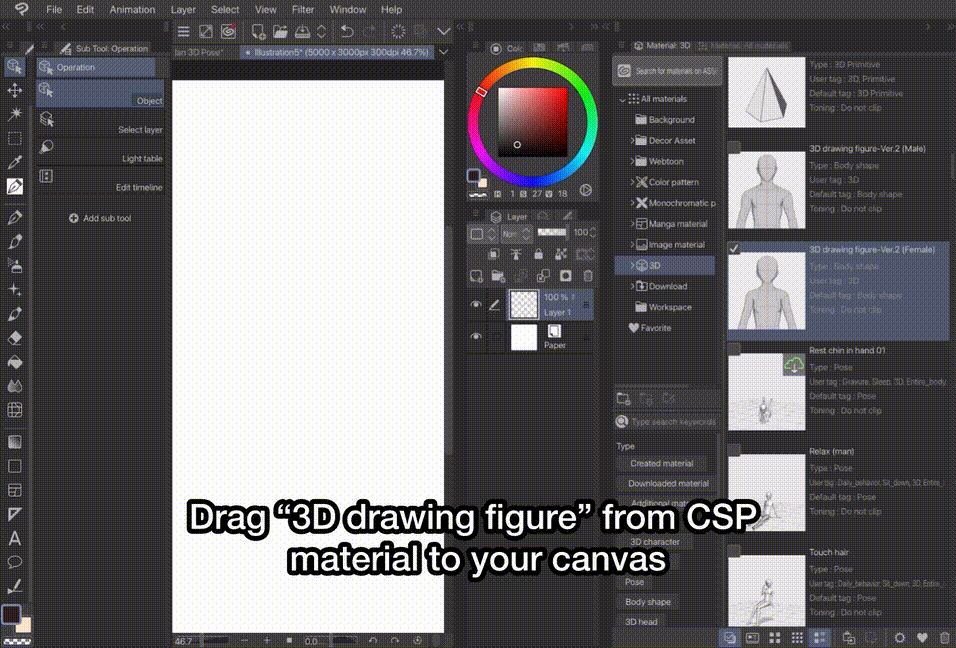
To save the 3D model:
Select 3D Object > Open Sub Tool Detail > 3D Drawing Figure > Register Material > Rename Material > Choose Save Location > Ok
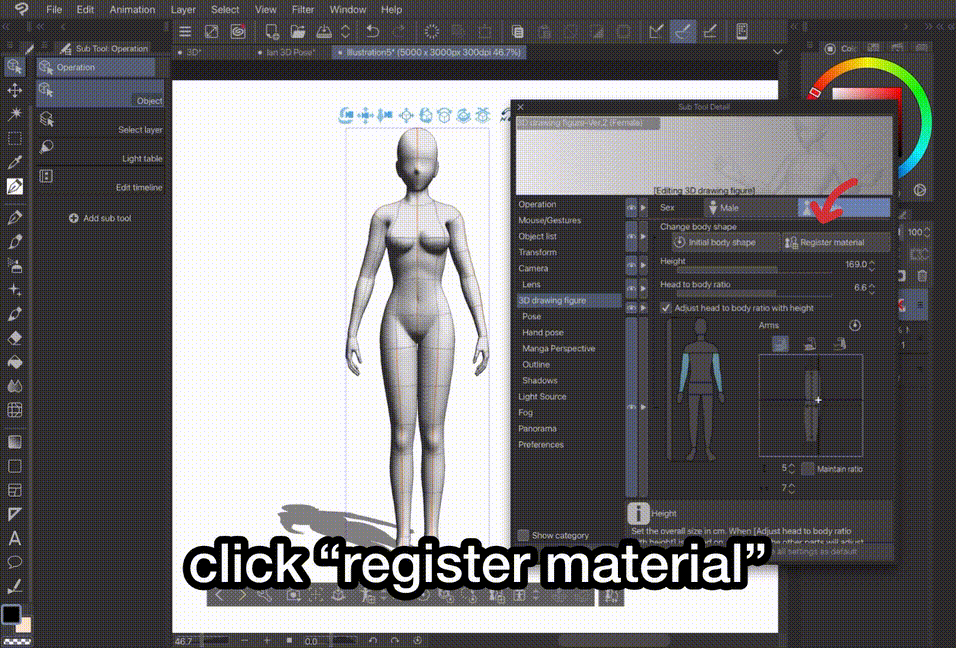
Alternatively you can use existing body materials from Clip Studio Assets too!
• Custom 3D Head
Custom 3D Head is only available in Clip Studio Paint v2.0 and newer versions. Creating your own customized 3D head model can be incredibly useful especially when you need to draw head from difficult angles
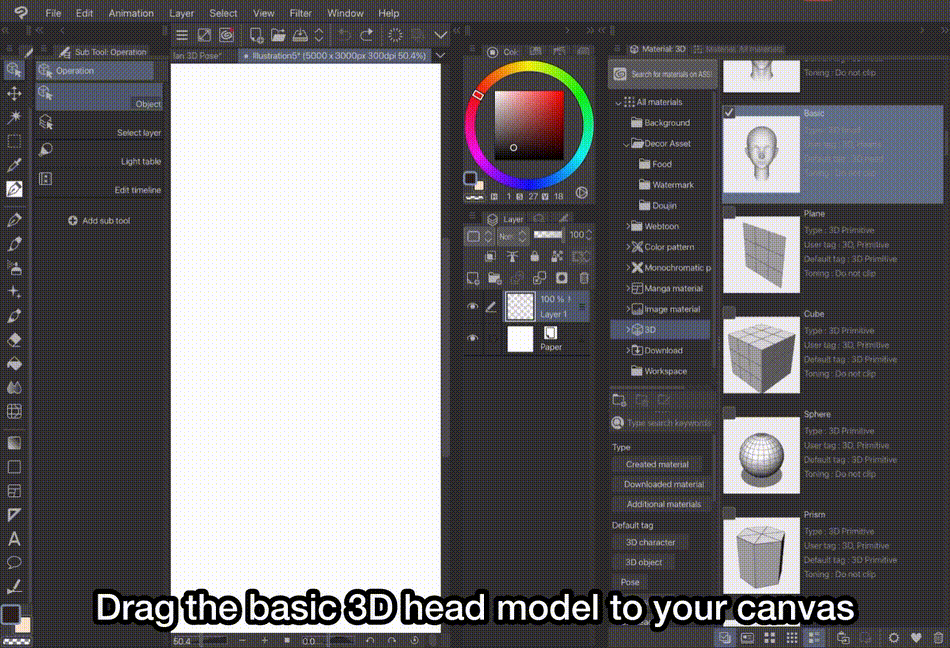
To save 3D head asset:
Select 3D Object > Open Sub Tool Detail > Head model > Register material > Rename Material > Choose Save Location > Ok
To understand more about each settings, you can read the full guide from clip studio official here:
If you find it hard to design your own 3D model you can also download customized assets available in Clip Studio Paint, here’s mine for example~
and If you’re still using Clip Studio Paint v1.0 here’s another 3D head alternatives for you!
3. Handscanner
This is one of my favorite features in Clip Studio Paint! Available in Clip Studio Paint v2.0 and newer versions, this tool scans your hand gestures and applies them directly to the 3D model
To use it:
Select a 3D body model > Pose Dropdown > Handscanner (Camera)
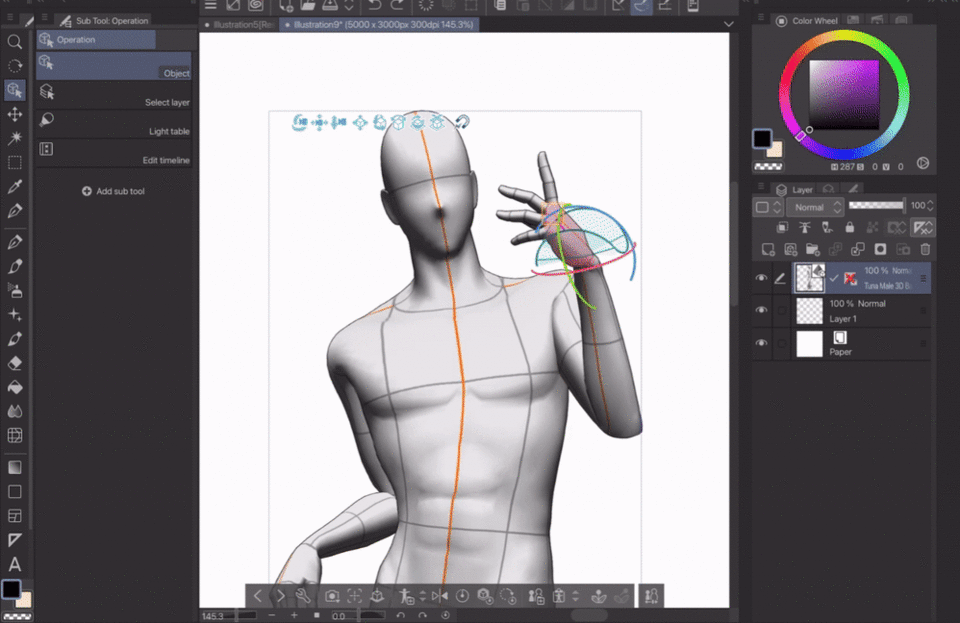
Let’s take a quick break and see how it all comes together when you combine the tips you've learned so far. I started looking for a pose from Posemaniacs, transferred it to my canvas using my customized 3D body shape and lastly I used the hand scanner to adjust the hand position. Now, I have a perfect 3D model to use as a guide for my drawing!
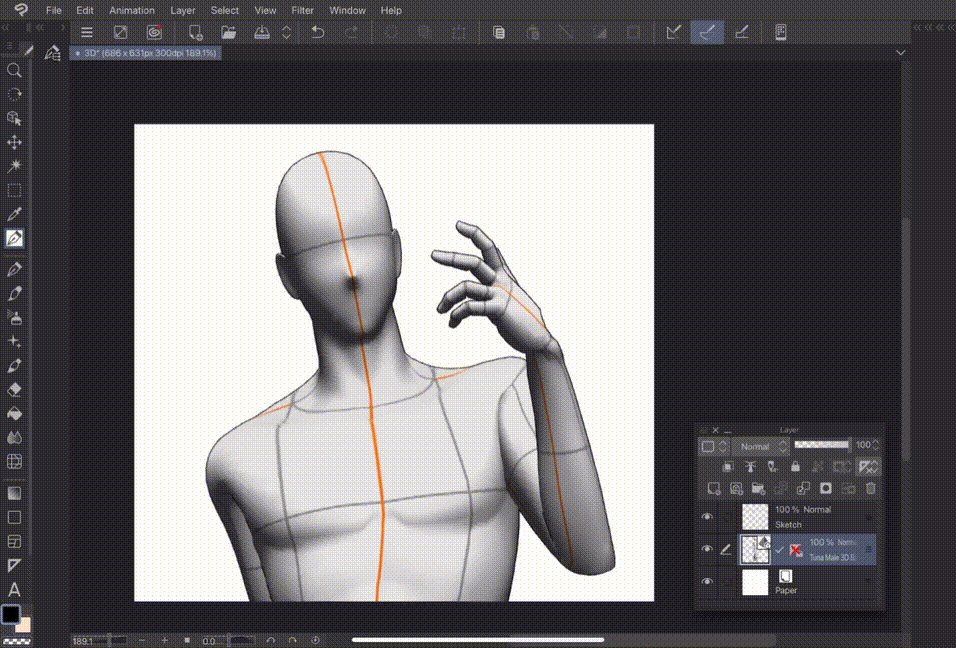
If you take a closer look, you might notice that I’m not perfectly following the 3D model shape, I use it as a drawing guide instead. 3D models are not perfect, tracing it 100% is a recipe for awkward and stiff drawings so you may want to avoid that
4. Using 3D Hand and 3D Shoes
Combining 3D assets with your 2D drawings can actually speed up your workflow, and there's no harm in doing it! Many webtoon artists use this method to meet their tight deadlines. It's a great way to save time while maintaining quality in your work.
All materials posted onto Clip Studio Assets can be used for both personal and commercial purposes. But make sure to double-check the license and terms for the asset before you use it!
• 3D Hand Asset
If you're tired of constantly taking photos of your hand for references and importing them into the drawing app, then this tip is for you!
I use 3D hand model for my hand reference and just like how I showed you before, it will be faster to adjust the pose if you use it with handscanner~ here’s the list of assets I recommend using and a quick example on how I use them!
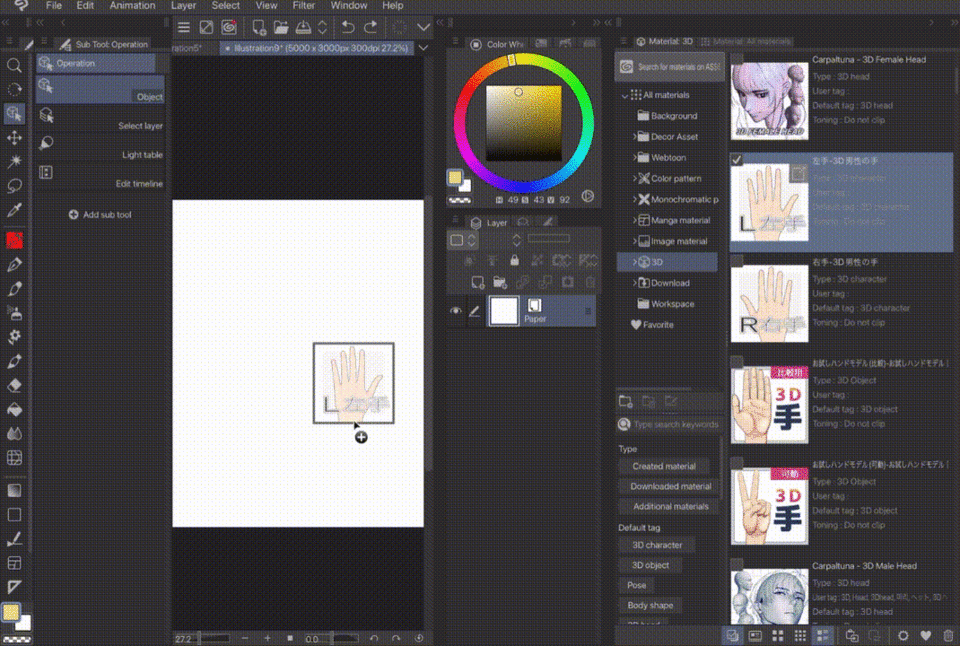
Quick Tip: The hand assets costs 10cp (clippy points) each, you can get free clippy points if you participate in clip studio login bonus event! so make sure to pay attention to their events and don’t forget to claim the clippy everyday :D
Here’s one of a free asset you can use, the downside is you can’t use the handscanner feature and you have to adjust the hand manually. This is a great option if you’re still using Clip Studio Paint v1.0 too!
• 3D Shoes
Drawing detailed shoes can be time-consuming, especially when you can't find the exact reference and angles you need. This is where 3D shoes can be incredibly helpful! You can easily find them in Clip Studio Assets.
• 3 ways to use 3D Assets
1. Use 3D asset as a reference to get an idea of how things are shaped from a specific angle
2. Tracing is a quick option too! But please be aware that you should not randomly trace any assets you come across on the internet. Depending on your drawing style and usage, tracing may result in making your drawing appear stiff and awkward at times. So use it wisely!
3. You can directly use and edit 3D assets for your needs. This is the fastest method, just make sure it is blends well with your drawing
You can use any method depending on your needs!
Using 3D objects can be really handy for speeding up your drawing process and tracing can be done under certain terms, tracing is a good learning tool but don’t depend on it too much. Take some time to practice drawing and challenge yourself to draw freehand as well, this way you’ll develop a strong foundation and avoid becoming dependent on tracing!
5. Color 3D objects with Gradient Map
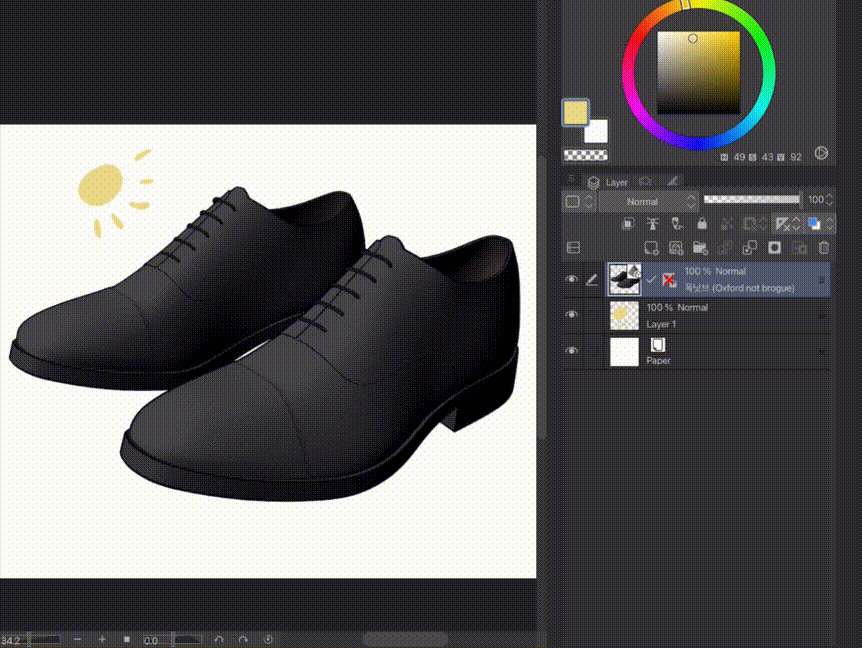
Most 3D objects are colored in grayscale and you can easily color them with gradient maps!
• Set up the lightsource
To make 3D objects blend more seamlessly with your drawing, you need to adjust the lighting to match the environment of your 2D drawing. You can change and set the lighting like this:
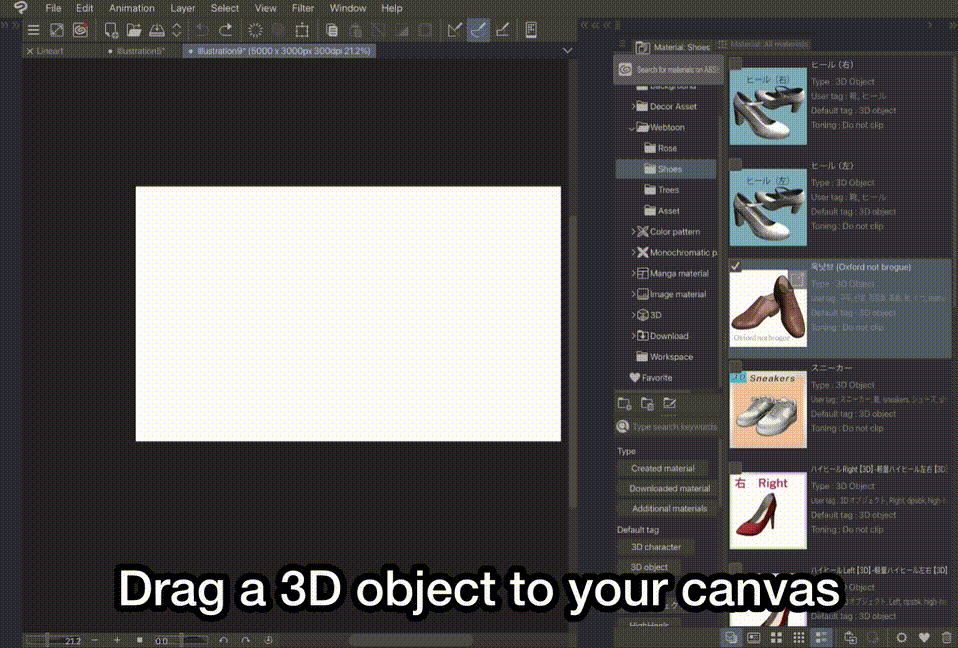
• Gradient map
Gradient map is an easy way to change the colors in your artwork. It applies a gradient that alters the colors based on the value (darkness or lightness) of your drawing. With gradient map you can harmonize your color palette effortlessly
To create a gradient map layer:
iPad: Hold pencil on layer area > New Correction Layer > Gradient Map
PC: Right click on layer area > New Correction Layer > Gradient Map
All layers below the gradient map or correction layer will be affected by it. If you want the gradient map to affect only certain layers, try placing those layers inside the same folder or use layer clip to clip the gradient map layer.
Here’s another example how I use gradient map to color a 3D chair:
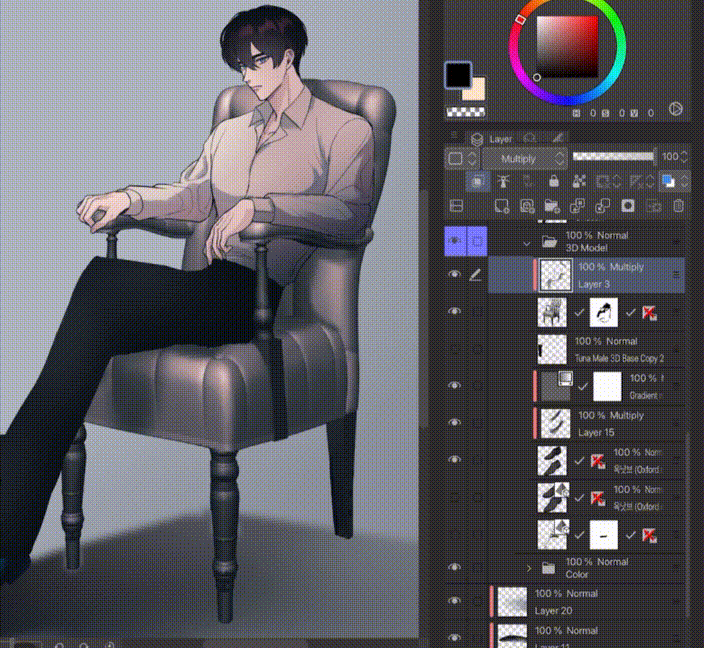
You can move the nodes horizontally to change the color applied to the percentage of value you want. Here I changed the darkest value to black and moved bluish dark color node slightly to the right side for the shadow part of the drawing. Then, I moved the red gradient nodes mostly to the lighter side of the gradient map to color the chair surface.
• Transforming/adjusting 3D object shape
In order to make the shoes look slimmer and sharper, I duplicated the object and rasterized the layer to modify it using liquify and transform tools. I duplicated the layer just in case I wasn't satisfied with the result, so that I could go back and edit the original 3D object layer again.
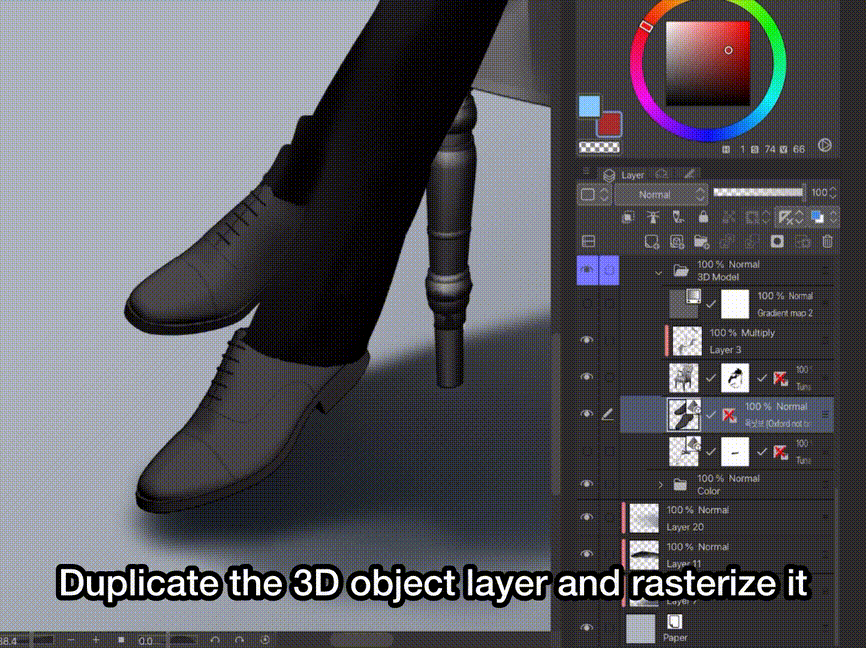
Rasterize will turn an object/layer to a regular pixel/2D image
Putting it all together
Here's a quick timelapse showing how I use these tips for a character drawing!
Clip Studio Paint can feel a bit intimidating for beginners, and it's easy to feel overwhelmed by all the features. But always remember these tools are designed to help you draw more efficiently. Once you get the hang of them, everything will become a lot easier!
English is not my first language, so if any part of this article is unclear or confusing, please do not hesitate to let me know! I hope these tips help you on your drawing journey! :D


댓글