Transform Functions | Where to use them
Hi! This is Mana!
Let’s talk about Transform Functions, what they are, where they are located and some possible uses of them. These are how I use them, you don’t have to do exactly what I’m doing, this is just to give you an idea on how they work.
The video is right here:
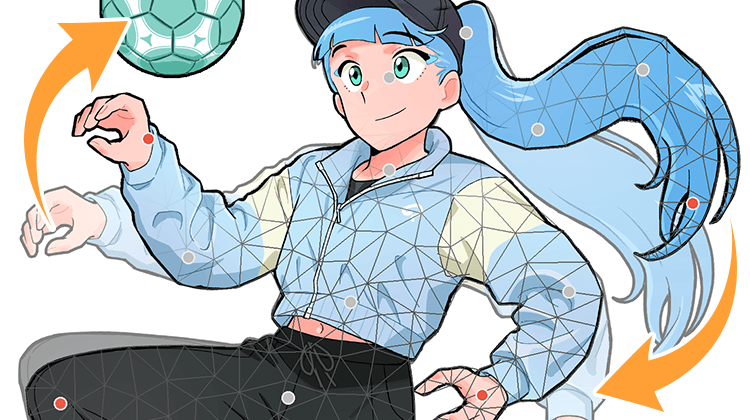
The image above is a small preview of this topic.
• How I use Transform Functions for fixing finished illustrations.
• Warping Animations
• Using Flip Horizontal and Vertical to draw and animate faster
• Making Textures
and much more~ (◕‿◕✿)
I’ll be using Clip Studio Paint Pro, this is exactly the same with the Ex version.
Transform Functions: What | Where | How
• WHAT IS TRANSFORM FUNCTIONS?
Transform Functions are part of the Editing section of CSP. Whatever layer or a selection of an image you have, this will move and/or will transform your selection using your preferred function. The different Transform Functions are Scale/Rotate, a separate Scale and a separate Rotate, Free Transform, Skew, Distort, Perspective, Flip Horizontal, Flip Vertical and lastly is Mesh Transform.
• WHERE CAN YOU SEE THESE?
You can see this at [Edit] > [Transform] > and the types of transform functions are there.
Or you can click the icon above the canvas; it’s the shortcut for Scale/Rotate Transformation but when you look at the side; at the [Tool Property] > on [Mode] > the other Transform Functions are there.
• HOW TO USE TRANSFORM FUNCTIONS?
You can use this by two ways.
First; select your layer, then go to [Edit] > [Transform] > for example, let’s choose [Scale/Rotate]. And now the whole image available to be transformed.
Second way is to get your Selection Tool, for example, with Lasso and just grab an area and go to [Edit] > [Transform] > [Scale/Rotate]. And only that part will be available for transformation.
Transform Functions: Settings | History | Bounding Box
Okay! Now that we’ve tackle the What, Where and How; let’s now talk about the Settings, History and Bounding Box that makes Transform Function an editing tool.
• Transformation Setting
Once you’ve chosen a Transform Function, your Tool Property on the side will change to a Transformation Setting.
1. MODE; you can find here the different Scale, Rotation and Perspective Transformations
2. Flip Horizontal and Flip Vertical
3. Interpolation method; you can pick if you want the transformation outcome to be smooth or sharp.
4. Confirm Changes or Cancel
You can change the Transform Function here, change the Image Interpolation, or basically just do any image editing on here without going through the Edit tab above.
• History
Your History Tab will change to that specific Transform Function that you will choose. Every transformation or edit you made on an Image using that Transform Function will be recorded on that History Tab.
Once you’ve click OK or hit Enter on your Keyboard, the History record of that Transform Function will disappear.
• Bounding Box
When you’ve selected a Transform Function, the image is now available for Transformation – regardless whether that’s a whole layer or just an image selection, you will get a Bounding Box.
A Bounding Box is like a Transformation Box; whatever is the shape of your selection, you will get a Bounding BOX.
It has eight handles or points that you can click and drag to transform your image selection.
Now we have these parts covered, let’s go now to the different Transform Functions
Scale/Rotate | Scale | Rotate
These three are self-explanatory. You can Scale and Rotate using these functions.
• Remember that you can use the [Transformation Setting] on the Side to change the value of Scale and Rotate
• But using the handles of the Bounding Box is more ideal and easier to manage.
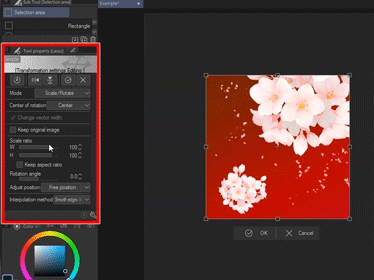
Let’s go to SCALE first
• Grabbing one of the handles of the Bounding Box will change you mouse to a straight double ended arrow; then just click and drag to resize your image.
• If you want to Scale while maintaining the original shape, deselect Keep Aspect Ratio on the Transformation Settings
• If you want to Scale freely, deselect the Keep Aspect Ratio on the Transformation Setting.
• Even when Keep Aspect Ratio is unchecked; holding onto [SHIFT] will still keep the original shape or aspect ratio
• Hold ALT and drag a handle and it will scale up or down depending on the position of the Anchor Point.
• If your Keep Aspect is not checked and you want to scale while maintaining the original shape, Hold on to ALT + Shift or check the Keep Aspect Ration then Hold ALT and just scale up or down.
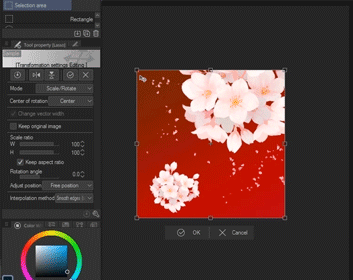
Now let’s go to ROTATE
• Get out of the Bounding Box and you will get this curved arrow that you can click and drag to rotate your image selection.
• Hold Shift and Rotate at 45 degrees
• You can change the pivot or the anchor point to change the center of rotation.
• Ex. Moving the Anchor point at the upper left corner.
• If we rotate that, it rotates from that point because that point becomes its joint or center of rotation.
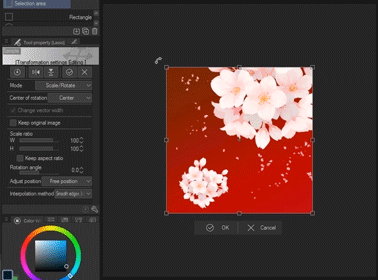
Regardless if you’re on Scale or Rotate, you hold CTRL and grab one of these handle, you can freely transform the image
🌟 WHERE I USE THESE?
I use these mainly for two reasons, one for adjusting sketches and the second is for adjusting final images.
• FOR SKETCHES
I use Scale/Rotate for adjusting while I’m sketching. Rather than redrawing a thing that I messed up in size, I just use Scale/Rotate to resize and adjust the mistake – saves me time and work!

• FOR FINISHED ILLUSTRATIONS
Sometimes I use these for resizing certain parts of a finished illustrations. I can’t see any mistakes during sketches and line arts because I’m partially blind -- I just notice them after some time.
The issue here is that the body is quite small.
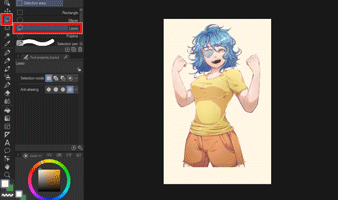
1. And so, what I do is I grab a selection of the part I want to be resize using a [Lasso] and just hit on [Scale/Rotate], resize the area that I want to be change and just click OK.
*You can [CUT and PASTE] the selection then that's when you [SCALE/ROTATE] so you can transform more freely without worrying about hitting other areas.
2. There are times where I will be needing to recolor some parts rather that kept on stretching – because that will ruin a lot of pixels.
So make a New Raster Layer or CTRL Shift N below your character and paint there.
*You can click on [Keep Transparent Pixels] so you can color freely.
And here's before [left] and after [right].
GIF Version of how I did this example is right here:
DISTORT
Technically, we should have been on Free Transform but let’s tackle that later on.
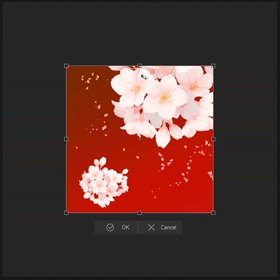
Distort, like the word itself, this Transformation distorts an image by clicking and dragging one of the handles.
• The transformation is strictly within the guideline or the bounding box.
Meaning: You cannot freely transform. Dragging or stretching a handle is strictly within the line of the bounding box
• If you Hold CTRL when moving the handles, you can Scale the selection. CTRL + SHIFT if you want to Scale while keeping the original shape or Aspect Ratio.
🌟 WHERE I USE DISTORT?!
I usually combine this with Perspective, so let’s talk there!
SKEW
Skew Transformation moves the selection based on the alignment of the guideline or the bounding box.
• This transformation doesn’t just move the handle of choice, it grabs and moves the other handles that are within the guideline.
• The main idea is that the transformation will look skew or tilted.

🌟 WHERE I USE SKEW?
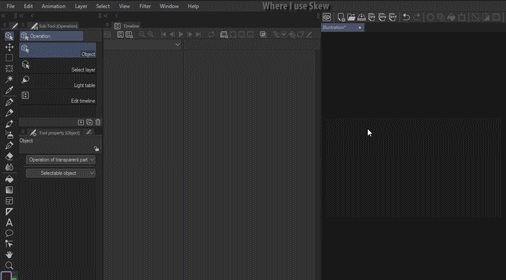
I use this when I do Animation Warping.
This is just a summary; not a full tutorial – that will probably be a separate topic
1. Get your scene ready
2. Insert the animation; File > Import > Create File Object > Get your Animation Clip File
3. Make a New timeline that matches with the Imported animation's FPS
4. Warp it on [Operation] Tool > Under [Object] Sub tool > on the [Tool Property] > look for [Mode]. Change the Mode to [Skew] and just warp your animation using the handles of the Bounding Box.
GIF version of this part is here below, so you can see how I transformed it.
PERSPECTIVE
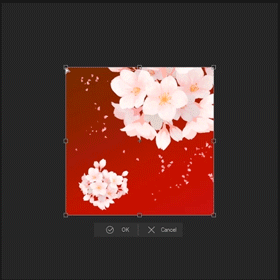
Perspective Transformation lets you transform or move even the opposite side of the selection and dragging that to the opposite side.
• To use this Transform Function, just grab a handle and it automatically moves the opposite handle to the other direction creating a perspective-like image.
🌟WHERE I USE PERSPECTIVE?
I usually combine this with Distort, this creates a much more distorted vibe for me if I want to keep everything at proportioned size.
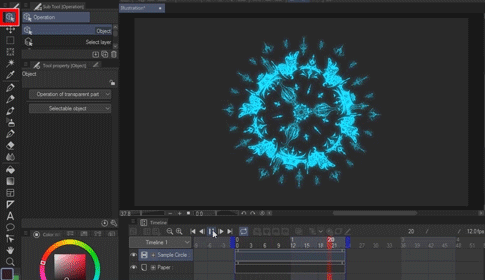
I use this for warping animation CLIP files.
- This is the same steps with Skew!
1. Get you Scene or just make a new Canvas
2. Import the CLIP animation; [File] > [Import] > [Create File Object]
3. Make a New Timeline that matches with the FPS of the CLIP animation
4. To warp the animation; Make sure you’re on [Operation] Tool > Under [Object] Sub Tool > on the [Tool Property] > look for [Mode]
5. And just transform the animation using Distort and Perspective
6. Click the PLAY button on the Timeline Tab. And it still moves
FREE TRANSFORM
Now we go back here.
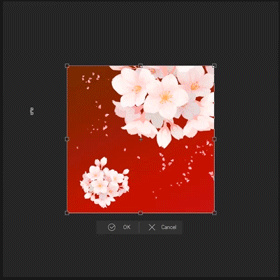
This is my most used Transform Function because on Free Transform, you can do everything here.
You can Scale, Rotate, Distort, Skew, make Perspectives, you can even Flip Horizontal and Vertical.
🌟 WHERE I USE FREE TRANSFORM?
I commonly use these for two things; Drop Shadows and Specific Animation Warping.
• MAKING DROP SHADOWS
1. Get your already finished drawing; character and BG separated
2. Duplicate the Character Layer
3. Click on the BOTTOM Character Layer. Click on [Keep Transparent Pixels]
4. Hide the Top Duplicate
Color the Bottom Character Layer with a shadow color (Grey if you want)
We can now unhide the Top Duplicate
5. Now go to [Edit] > [Transform] > [Free Transform] or Click [Scale/Rotate] icon above your canvas > on the [Transformation Settings] on the side > look for [Mode] > change that to [Free Transform]
6. And just drag the top middle handle to the ground. Adjust the lower handles if necessary.
7. Do some cleanup. Erase some overlapping areas on the foot.
Gaussian Blur if the shadows are too sharp
8. And it’s done!
------------------------------------------------------
• SPECIFIC ANIMATION WARPING
It’s exactly the same steps with Distort, Skew and Perspective examples.
1. Get your scene ready.
2. Import the animation file on [File] > [Import] > [Create File Object]
3. Make sure you have a Timeline that matches your animation's FPS
4. Transform your animation file on [Operation] Tool > under [Object] sub tool > on the [Tool Property] > look for [Mode] > change that to [Free Transform]
Free Transform is more flexible than the three Transform Functions I mentioned above.
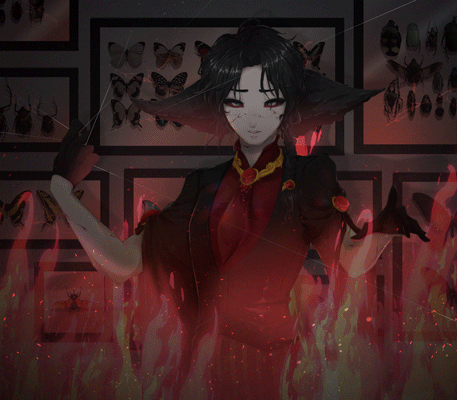
What I did here is that using ONE FIRE Animation, I duplicated that and made some of them big, some are small. Basically just randomize it so that it won't look identical
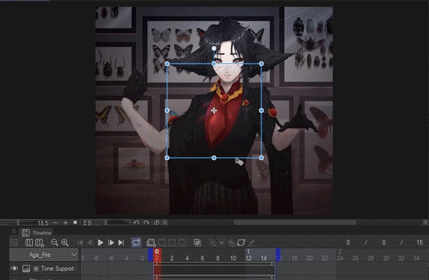
If you want to see the summary of this example, please check the video at the top of the article.
If you want to know how I made the fire, please click here:
The final animation looks like this:
FLIP HORIZONTAL | FLIP VERTICAL
These two are self-explanatory.
Flip Horizontal, literally flips it horizontally or side to side.
Flip Vertical, flips the image vertically or up to down.
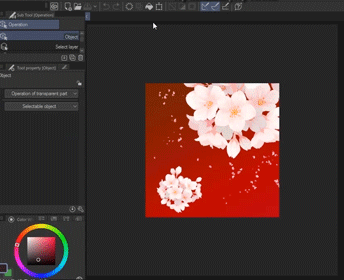
• On the [Transform Settings]; you won’t find these at the [Mode]; these two icons above that.
[show screenshot]
• You can change the Center of Rotation or the Anchor Point to change the flipping center.
🌟 WHERE I USE THESE TWO?
I mainly use these two for making eye duplicates. One for drawing and one for blinking animation.
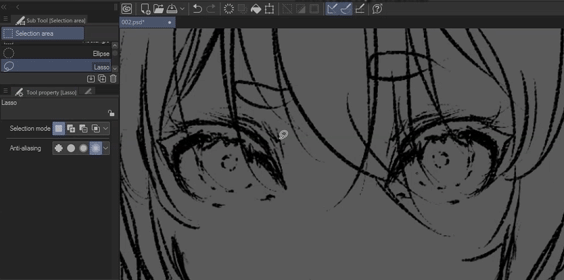
• FLIP HORIZONTAL | DRAWING
I use this when duplicating eyes for straight forward or straight ahead poses. The other eye is the same so I just
1. Get a [Selection Tool] > for example [Lasso] > select the eye
2. CTRL C [Copy] then CTRL V [Paste]
3. Then I just go to [Edit] > [Transform] > [Flip Horizontal] or [Scale/Rotate] shortcut on the canvas > look for [Mode] on Transformation Setting > [Flip Horizontal]
4. And just move the duplicated Horizontal one on the other eye location
------------------------------------------------------------------
• FLIP VERTICAL | ANIMATION PREPARATION
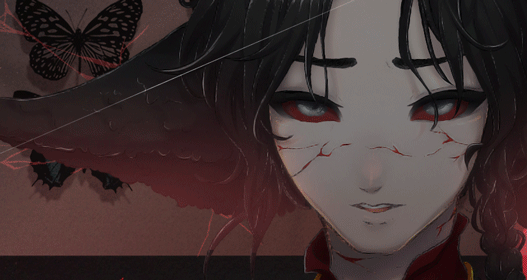
I use Flip Vertical for making a Close Eye / Blink for my Eye animations
This saves me time, rather than drawing or making a separate Close Eye frame, I just do this.
1. I make a copy/duplicate of my Open Eye Layer
2. Get a [Selection Tool] > [Lasso] > Select the eyelid part of that eye]
3. CTRL X [Cut] then CTRL V [Paste]
This will automatically move the selection into a New Raster Layer
4. Then I just go to [Edit] > [Transform] > [Flip Vertical] or [Scale/Rotate] shortcut on the canvas > look for [Mode] on Transformation Setting > [Flip Vertical]
5. And I just adjust the vertically flipped duplicate to create an eyelid. Sometimes I even erase, just to clean up some curved edges or maybe some white spots
And that's it! I now have a Close Eye that I can use for my animation
When I animate that, it really looks like a Close Eye.
MESH TRANSFORM
This is the final Transform Function.
You cannot see it on the Mode inside the Transformation Setting.
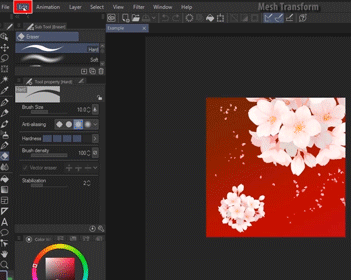
It’s directly on [Edit] > [Transform] > [Mesh Transform]
• You will still get a Transformation Setting here on the side exclusively for Mesh Transform.
• You can change the Interpolation and the amount of Lattice Points both Horizontal and Vertical.
• Mesh Transformation gives you the ability to transform your image using this lattice points. Just click and drag a point and that part gets warp and doesn’t affect the other lattice points.
🌟 WHERE I USE MESH TRANSFORM?
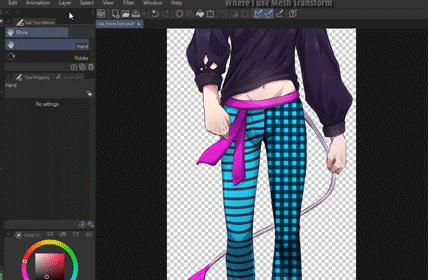
I mainly use this for placing textures for clothes
1. Get your character drawing file
2. Open your [Materials Tab] > Get your Texture > Click and drag it to the Canvas
3. Make sure it’s Clipped to the part that should have a Texture
4. Now look at your [Tool Property] > [Image Settings Editing].
Change the Scale Ratio with the amount you want.
The lower the amount, the smaller the texture gets
5. When satisfied with the texture size, Go to the Texture Layer > Right Click > Rasterize
6. I just clean up this part, because the checkered texture is only for the other half of the pants.
Change the Blending Mode of that Texture to match the drawing
[Multiply] or [Linear Burn] works best for greyscale textures
7. Now we transform. Go to [Edit] > [Transform] > [Mesh Transform]
8. On the [Transformation Settings], increase the amount of lattice points according to your preference. The more lattice points, the more detailed area to work with.
9. And just start moving the lattice points depending on the shape of the object, on here, it’s the thigh and lower leg.
THIGH AREA is a bit fleshy, so make the lattice points bumpy or like a ramp.
LOWER LEG is thin, so make the lattice points close to each other.
10. Click OK or hit ENTER on your Keyboard when you’re done
The GIF Process of this is right here below:
It's quite big though
…..
OKAY! That’s it! That’s all the Transform Functions on Clip Studio Paint and where I basically use them. But my main uses for them is that I mix them. I love mixing Free Transform with Perspective, that butters my eggroll so much!
Please try them out yourself
Find the ones that will make your work more efficient!
You can see most of my works on
----------------
*EDIT:
• Updated the video | Updated preview image
• Updated example 2 on Scale/Rotate - explained it properly.
• Removed corrupted images
• Explained somethings more clearly




留言