Simple Fire Animation | Stock Footage Tutorial
Not really a stock footage tutorial. But kinda works the same
Alt. Title; SMOL FIRE TUTORIAL USING BRUSHES (ง ͠° ͟ل͜ ͡°)ง
Hi! This Mana!
This is just a really short topic of how to make a quick ‘frame by frame’ fire animation using brushes. You can save this animation as a .CLIP file and re-use or import them on your animation scenes; basically like we’re making a stock footage but CLIP file.
We're also gonna talk about a small topic on warping animations
I used Clip Studio Paint PRO for this, you can use EX version, much better.
Video version is right here:
I used Bryan and Ivy for the voice because I got sick
This is kind-of connected to my other tutorial; about transformation functions.
I liked this part so I wanted to elaborate it even more.
The TRANSFORMATION FUNCTIONS tutorial is right here:
Okay! Let’s start! ♪~ ᕕ(ᐛ)ᕗ
DOWNLOADING ASSETS
We will be making a really quick and simple ‘frame by frame’ fire animation, so we will be using a Brush set.
I will be using this Fire Brush Set for this tutorial:
The brush set are free and easy to use.
Now open your Clip Studio Paint.
You can see the brushes that we downloaded on the [Materials] tab.
To transfer the brushes to your Decorations BRUSHES;
Click and Drag them to your preferred Decorations Shelf.
PREPARE YOUR ANIMATION
Now let’s make our canvas or our animation sequence.
[CTRL + N] on your Keyboard; You can choose Illustration or Animation; it doesn’t matter.
• SIZE: 1000 px x 1000 px
• RESOLUTION: 200 DPI
• PAPER COLOR: Dark Grey
*Paper color is just for background color, not really necessary and we’ll delete this once we’re done with the animation.
This size is for example only, you can make a larger or smaller one if you want.
Also, delete the Layer 1 that comes with making a Canvas, we don’ need that.
Now let’s go to our Timeline.
If you can’t see your Timeline, go to [Window] > [Timeline]
Now on the Timeline, click the icon [New Timeline]
• TIMELINE NAME: Fire Anim_12FPS
• FRAME RATE: 12
• PLAYBACK TIME: 16
• Frame number starting from 0
• Image Interpolation; Smooth Edges or Bilinear
Click OK when Done.
Frame number starting and Image Interpolations are flexible
You can change them according to your preference.
FIRE BASE
Okay! Let’s start animating!
On the Timeline; click on [NEW ANIMATION FOLDER] > Rename that as FIRE BASE.
Make sure you’re at the very first frame of the FIRE BASE folder > click on [NEW ANIMATION CELL]
A number 1 text will appear on the Timeline of the FIRE BASE Animation Folder.
That’s your First Cell
Now choose your Foreground color as ORANGE; pick the same color for the Background.
Now choose a Fire Brush Set; example 4.
Adjust the size of the brush according to your preference and just make a simple brush stroke going up.
And now we have our First Animation Cell.
Now move to the next frame; click on [NEW ANIMATION CELL] > a number 2 will appear, that’s our Second Cell.
We can’t see our previous animation cell when we’re on 2 so let’s click [ENABLE ONION SKIN] so that we can see the position of the previous cell.
Now just get a different Fire Brush this time and again, brush it going upwards.
Continue on repeating these steps until you finish all this 16 cells.
SUMMARY:
• Make a New Animation Cell each frame each time.
• Always change the brushes each time, rotate the usage with these four brushes.
• Remember you can combine the brushes.
• Make sure to match the bottom position of the flames
• Remember that you can tilt you brushes so that you can get waves of strokes.
When you’re done, just press PLAY to check the animation.

INNER GLOW
Now let’s make an Inner Glow.
Make a [NEW ANIMATION FOLDER]; make sure it’s on top of the FIRE BASE.
Rename the New Animation Folder as INNER GLOW.
Now go to the very first frame > Click on [NEW ANIMATION CELL]
Before we do anything, click again on the INNER GLOW Folder > Change the Blending Mode from [Normal] to [Add Glow].
Now we start animating, go back to the First Cell of INNER GLOW Folder.
Get your Fire Brush of choice > Lower the size; make sure it’s smaller that FIRE BASE
Do NOT change your Foreground Color > and just make a simple stroke going up at the middle of the FIRE BASE.
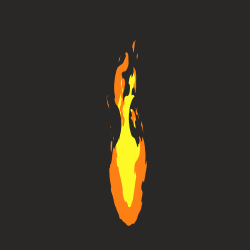
You can see that the INNER GLOW is overlapping the FIRE.
So let’s fix that, click the INNER GLOW Folder again and click on [Clip to Layer Below].
And now all of the contents of INNER GLOW will be inside the FIRE BASE.
Now we continue on adding more Animation Cells until we complete the 16 Cells.
SUMMARY:
• Make a [NEW ANIMATION CELL] each frame, each time
• You can Enable Onion Skin if you want a reference for the previous position.
• Make sure you change you Fire Brush each Animation Cell.
•• Again! At the center > Stroke up using a SMALL Brush size.
Now when you play that.
OUTER GLOW
Now let’s make an OUTER GLOW to complete this fire.
Click on your FIRE BASE Animation Folder;
Go to [Layer] > [Duplicate Layer]
Rename the Duplicated Folder as OUTER GLOW.
Now go to the very first Animation Cell of OUTER GLOW Folder.
Go to [Filter] > [Blur] > [Gaussian Blur]
Blur it around 40% or higher.
Remember to do this for the other 15 Animation Cells of OUTER GLOW Folder.
Now we click the OUTER GLOW Folder;
Click and Drag it to the top of your hierarchy.
Change the Blending Mode to whatever Lighten Blending Mode you want; I went Add Glow.
Lower the Opacity to around 60%.
When you play that, it now has OUTER GLOW.

*SPARKLES
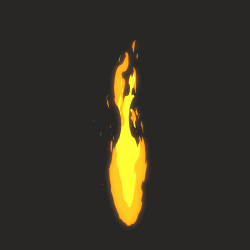
This part is optional. But fire has this tiny sparks on them and we got lucky with our Fire Brush Sets, because the set have some sparkles on them.
So, make a NEW ANIMATION FOLDER; Rename that as SPARKLES.
You can put this new Folder at the very bottom of your animation or above INNER GLOW.
Now go to the starting frame > Click on [NEW ANIMATION CELL]
Click your Sparkle Brushes.
Adjust the size if you want.
Make a stroke from the bottom going up.
Continue doing that for the next 15 Cells.
✦ TIP: Try not to make too much sparkles on one Animation Cell.
When you’re done, you can change the Blending Mode of the SPARKLES Folder; I went Screen.
I also lowered down the Opacity to 50%
And when we play that;
---------------------------------------✦ YOU CAN USE LITERAL STOCK FOOTAGE AS WELL.
Like, you can use movie files.
You can export the animation into a MOVIE or GIF
I just wanted to use CLIP on this tutorial.
Example of Usage: Importing on Scene
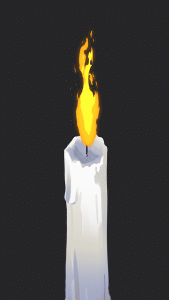
For example, we have a scene of this Candle and there should be a fire on it.
To put our Fire Animation;
Go to [File] > [Import] > [Create File Object]
Go look for our Fire Animation CLIP File.
When we have our FIRE Animation on the scene.
You can adjust the Fire by using the [Operation Tool] or [MOVE TOOL]
We can start fixing our Timeline.
Make a [New Timeline] > Set the FPS the same with the Fire Animation; which is 12 FPS.
And when we play that, it still moves!
Example of Usage: Transform | Editing
If you want to edit the size or the angle of this Fire Animation CLIP file, we can do that as well.
Make sure you’re on [Operation Tool] > [Object Sub Tool] > on the [Tool Property]
Look for [MODE] and change that to either Free Transform or Scale/Rotate.
And on [Adjust position]; make sure you're on Free Position
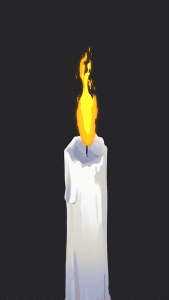
And then just grab the handles of the Bounding Box or the Transformation Box and your fire will be warp
And when we hit Play, it still moves.
Example of Usage: Coloring | Changing Shade
You can change the Blending Mode of the Fire Animation; I’m going Lighten because of the blending it does at the bottom.
Since we’re using a Candle for an example, candle flames are blue at the bottom – so we need to make the lower end of this Fire Blue
So first, make a New Raster Layer or CTRL SHIFT N on your keyboard; rename that as BLUE
- Make sure this BLUE Layer is ABOVE your Fire Animation CLIP File
Now get your coloring tool; either a brush or gradient tool; I went gradient.
Choose Foreground to Transparency; change the Foreground color to Blue
And just make a small gradient stroke at the bottom of the Fire until to the half
Make sure you Clip the BLUE Layer to the Layer below which is the Fire CLIP File
You can change the Blending mode of the BLUE layer if you want, I’m staying on NORMAL.
I did however lowered down the Opacity to 90%
I ended up going to Hue and Saturation or CTRL U so I can get a deeper shade of blue because I’m bad at choosing colors
And when you play that, it still moves but now – there’s a BLUE color at the bottom!
- If the color is too strong, use a Blending Tool or Blur to lessen the sharpness of the edge color.
You can add a few more colors if you want as well.
- I added a small pink at the top
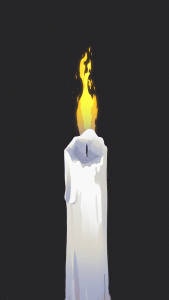
✦ TIP: You can also use a Correction Layers if you don’t want a Raster Layer to recolor or edit your Fire Color.
Example of Usage: Blending it to Environment
You might be wondering what I meant by this since there’s no environment on this example – what I meant here is adding BACKGROUND GLOW or in this case, a Fire Glow.
I’ll teach you a simple light flickering keyframe animation.
At the bottom of your Fire Animation CLIP File; make a New Raster Layer or CTRL Shift N on your keyboard, rename that as Fire Glow
Choose your color or the same color as your fire
Get your Gradient Tool and just make a Round Gradient at the back of the Fire Animation
Get your Blending Tool or Blur and spread out the Fire Glow
*this is just for example only, you can use a brush to make Background Glows so that you can make complicated shapes as well.
Remember that you can use Hue and Saturation or CTRL U to change the fire color
NOW WE ANIMATE!
Make sure you’re at your Timeline now!
Make sure that Fire Glow Layer is selected.
Go to the very first frame.
Hit ENABLE KEYFRAME ON THIS LAYER
- ‘Transform’ will appear on the Layer name
Now we go to [Operation Tool] > [Object Sub Tool]
On the [Tool Property] > Look for [Layer Opacity]
Put a Keyframe on the Layer Opacity (leave it at 100%) for Frame 0, 4, 8, 12, and 15
Grab the last keyframe and drag it at the end of the timeline, making a half diamond
Now we make inbetween keyframes.
On Frame 14, add a Keyframe on the Layer Opacity – change the value to 80%
Do the same with Frame 10, 6 and 2nd frame.
And now we hit PLAY. The Light is now flickering.
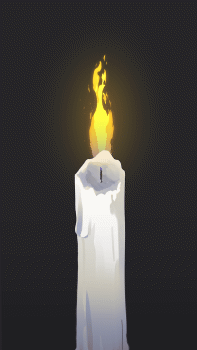
✦ TIP:
When doing background colors or atmosphere, the darker tone the better
So that the Fire is more visible.
Still that will depends on your scene
Example: On a Complicated Scene
This is just an example of the same Fire Animation CLIP file
Using the same Example Usage steps above.
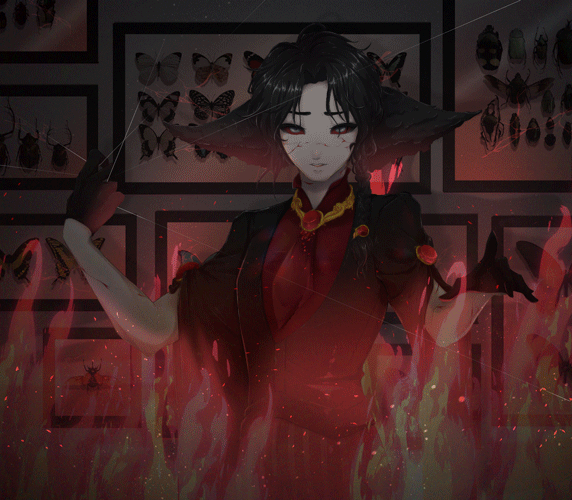
I used:
• Transform; made the fire bigger
• Colored the fire; made it red/pink (i can't tell, sorry)
• Add background glows; on the frames, clothes and the cracks.
Just a small thing by the way.
IF YOU WANT TO RANDOMIZE THE ANIMATION ON THE SAME FIRE ANIMATION.
Right Click on the Fire Animation Timeline > Split Clip.
Split that as many times as you want
Then rearrange them randomly
✦ TIP: Keep your Animation size or sequence at 1920 x 1080 at maximum
......
And that’s it.
I hope that’s helpful!
I used Bryan and Ivy for the voice because I got sick. ( ゚ヮ゚)
I can’t give any CLIP files for example for you guys to follow, mainly because the animation CLIP file are brushes that aren’t mine and I don’t want to get into trouble.
I do hope the steps are understandable.
My works are at
- Most of my drawings are there
Except for the animations
Stay Safe, Wear Mask, Wash your Hands!
Cheers!


留言