The Science behind HAIR Highlight and TIPS on drawing hair
Video Tips
So before we get into a tutorial, I just wanna let you know that this also has video tutorial if you're a visual type of person!
Intro
On this tutorial, I wanna share something some of us didn't know. And also will include some tips on how to understand and paint your hair drawing with some useful thoughts that it can also be useful on different things like 3D.
1-1. Use Plains
It is simplier for us to draw a hair without color and highlights, but when we start coloring it, we started to get confuse, like where to add shadows, especially on some complicated hair style.
So to make it easier to undertstand. Think of it as a bunch of hair plains.
Direction of the hair may vary based on the crown hair of your head.
Now try to add some multiple hairlines around the head starting from the center of the crown hair to decide where we should start adding the hair.
We can start adding plains from there.
Doesn't really need to be very accurate since this is only a guide for the shadowing later.
And it can also be applied on different type of hairstyles.
The good thing is this method can be applied on different type of hair styles.
So when we're going to add a line art on it. It has to look like a normal hair by not including those unnecessary lines. Adding some love doing it will make it look better.
1-2. Adding Shadow
Add some shadows basing from those plains
and correct it if it feels off.
Doing this method would be less confusing for us when doing it on a hair in motion.
Showing you this to see how it looks like on the top view.
And this is how it looks like when being highlighted on different light angles.
Though this lighting on the center can make us wonder why the highlight looks like it circles around the head.
Some might not care on why is this happening and just do it because that's what we see, but it is also important to know because it can also be useful on different material.
but before I'm gonna explain that, we should understand first how the lighting works.
2-1. Specular Lighting
So let's make the sphere as our sample object.
then we set the lighting, positioned 90 degree on the side.
So we have a shadow on the left and illuminated area on the right.
Now there are some common mistakes going around where when artist added some highlights in this kind of lighting. They applied it on the edge of the sphere, which is actually incorrect.
and it should be somewhere inside the sphere.
I can explain these things but I'll also gonna show you how it looks like on 3D
We actually called this part "Specular".
A reflection of the light itself to the object, and can be seen on glossy materials like what I've shown you right now.
though, it can be possible that some of us might be thinking that this happened because of the glossy material of the subject.
What about on rough objects, will it still occur?
The answer is yes, it is very subtle, but it's there.
The thing is, once you see a subtle effect of specular, that just means the object has a little application of glossy on it. Like having a little moisture, or sweat of the skin.
A very matte texture doesn't really absorb too much light, but it can still appear if the light is too bright.
2-2. Specular Location Explanation (Ricochet Effect)
Now why does the specular appears in this area and not on the edge?
I called it "Ricochet Effect"
It wasn't the official name of it but I called it this way because I thought about ricochet when the time I was able to understand it.
We probably know that the bounce or ricochet will depends on the angle of the wall.
if we throw the object and hits the wall.
After it bounces, if it didn't travel enough speed, it will fall to the ground because of gravity.
But the speed of light is so fast (299,792,458 miles per second) that it will just travel straight after it bounces without worrying the gravity.
So why did I mentioned it?
That is because it acts the same.
So I also have some little demonstration, similar on how these reflection works.
In this example, you will be Miss Red, and you want to see Miss blue behind those walls, with the use of this mirror.
At this point, the mirror is facing on you, where you can see yourself in it.
We could estimate it by rotating, but the exact answer is 45 degree.
If the mirror rotates to 45 degree, you would be able to see Miss Blue

So therefore, you will be able to see anything within the 90 degree angle location with a 45 degree reflection, the same thing goes to ricochet and light.
Remember that, if you can see something, there is light.
But how does it connects to the sphere.
It might be harder for us to imagine on a smooth sphere because sphere a has curved edge.
This is how the light travel and bounces towards our eyes.
You can see that light still bounces everywhere, but one specific angle bounces directly to our eyes.
So this should be the area where the specular displays in our point of view.
It can be more easier for us to understand if we convert the sphere into lower polygonal sphere.
Do not be confuse with the image above. Specular highlight constantly changes its location depending which side you are facing
In this case, I uses hexadecagon, a 16 sides polygon, just to get the exact 45 degree angle, a perfect example for this demonstration.
Now this made it much more easier for us to understand where to apply specular highlights.
But after all of this lighting studies
How does it even connects to the highlight around the hair?
Isn't it supposed to be like how we added a specular on the sphere, but why is it showing halo instead?
This is what we called anisotropic specular.
3. Anisotropic Specular
Not only on hair, You can also find it on some objects like, silk, disk, metal.
Because of the micro structures existed on the material, like the strands of hair.
If you are far from it, it won't be visible. But when you get too close, we will be able to see it.
This is the reason why it creates some halo highlight on our hair and this depends of the angle of those strands.
To explain it further, to make it even more easier to understand. Treat each strands of the hair as individual.
Each individual strands is a cylindrical and has specular highlight on it.
and imagine thousands of it being together in one place.
So all of them together creates a large highlight on all the directions of the head.
Even how tiny it is, it can still be visible if there are thousands of it.
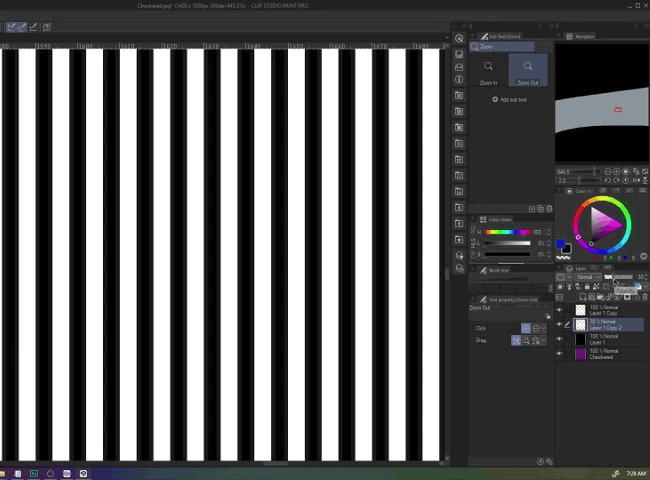
Think how tiny two colored checkered works when being far enough.
It seems, you'll be seeing purple, but if you're too close, it's appears to be red and blue because it blends together.

Same thing as black and white stripe.
and to think, specular highlight glows.
and a thousands of little glows creates a fair amount of visibility.
Subtle difference when too close, huge difference when far enough.

Silk is no different. Silk was made out shiny threads, so more likely it will absorb lights.
Any object that consist an anisotropic specular highlights, has a tiny texture on the surface.
Outro
So that's about it! Be aware on texture that object can have because even how small things can be, it can make a difference.
That's all and enjoy learning!


留言