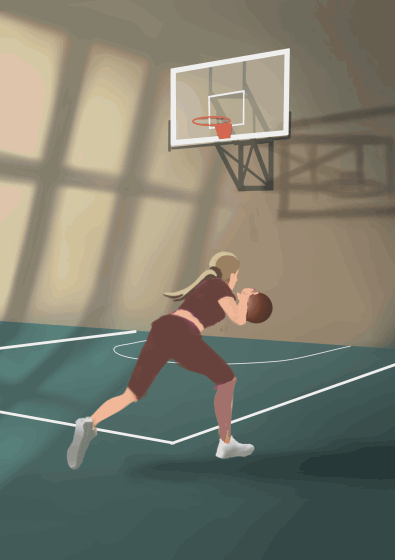
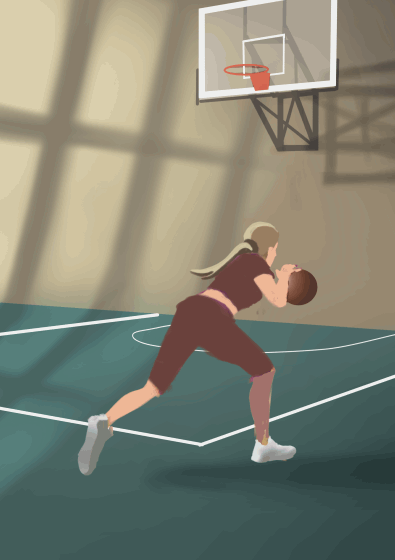
Animate Basketball Drill with Character, prop and Camera!
Animation loop with camera move

Animation loop

These are the keyframes.
Workflow
This is the first time I create an animation clip with clip studio. So for lot of you out there, you would probably have alot more to share than me. However, I just thought it may be beneficial to share my way to animate and may help some of you along the way.
Animation needs lots of work so to begin I need to have a clear mind how to achieve my goal and how its going to look . in this tutorial.. I would like to create a basketball dribble shooting loop in a realistic style. so to achieve that.. here are the points I try to address.
With that in mind, I also try to minimze layers as animation is overwhelming enough, adding multiple layers would multiply the complexity, One major step I skip for this tutorial is the line art step. I asked myself, in my recent paintings, I don't use line to portrait realism, why do I need to do that in animation? There are definitely advantages in using lineart to create animation but there is also advantages in starting off with flat color. .. you can still use construction lines to keep the proportion of and define the character , but once that's done.. you can paint your flat on the same layer.
First thing first, you want to create a new file.. then, we need to specify the file as an animation file (1) as supposed to ilustration, comic etc (2) is the dimension of the animation, how many pixels do u want the animation to be
Reference
It's very important to get reference.. The 2 things I use reference for is 1. Timing. Without reference, you would either need to try and error and in the end the result still may not be as believable as reference. 2. the pose. .. I know how we like to animate from imagination. But still if that's something custom, I would act it out and get a recording of that. In this tutorial, I base mine off a dribble clip from my reference collection. you can either import the clip directly from Clip studio paint Or you capture the frames then import them to Clip studio. I prefer the former, as you have less files to deal with you can capture frames from there..
After you have found your reference. I wont just copy or trace over it. I would do somthing called Motion analysis. I try to understand how the character moves, and makes sense out of the motion. In the dribble example. She drives the ball and the arrows represent how her arm swing, how her body twist and when is her feet plant, and when does it lift up and takes off. Next, you would design / decide what details you would keep and what would be filter out .
Timeline
Timeline is what u need to work with most in an animation. So it's a good idea get your way around it as soon as you want to start animating. So in this animation, I know pretty much know the timing of the keyframe(1, 9, 11, 14....)These represent at which frame these poses would be played. I would scrub to the frame of the reference and rough in the character motion then, I would specify the cell(please see the capture below), then scrub to the frame I want, insert in. (3) Number (1)represent keyframe. in this case is the keys for the camera. Number (2) and (4) represents the key frames for the BasketBall.
Create key frames
When u have a video clip, you want to identify the keyframe.. Keyframes are the Key pose of the the actions. Another way to look at it is the extreme of the pose. in the dribble for example. where do the hands go furthest. and where did it go lowest. Where do the feet plant and where did it go in the air. If the body goes up, where is the highest point of it and where is the lowest.. Keep track of those and those are very likely key frames. Once you identify where are the key frames. you can create your own.. change the outfit, style, or even proportion!
In this case, I would change her outfit.
I wasn't sure how i want to create the ball animation. On one hand, to keep it simple, keeping in on the same layer may just be fine. But after i roughed in all the pose., i found that it goes against the workflow. As keeping it on a separate layer gives me alot more power to modify and adjust it. This saves me time from drawing the same shape many many times and not getting the result I want. Animating the Ball by itself allows me to 1. color it once and you can have for the entire animation, 2. you can keyframe it to define how it moves, and what size u want it to be. in this case it's super useful and the ball goes in and out in perspective so as it's size
To change the timing of animation after you specify the cells, first you select the cell u want to change the timing, then u should see a thin red line. See (1) below. Moves the line instead of the frame. Otherwise , you won't be able to .
Here is the wip ver. of the keyframes. In this animation, I try to skip the line art stage and get to coloring and any construction line i have would be using the the base color. This allows to to take advantage of the clip layer feature .

Consistency (color and size)
One of the more advanced feature in Clip Studio paint is the Onion skin feature. This allows the animator to track the motion of character, may it the shoulder, the body, the feet or the hand. This way you can see if the spacing between each keys or in between is working . To do that go to Animation> Show animation cels>Enable onion skin (1)
1. The color of previous frame, you can specify more frames and each frame would continue to fade to a lighter blue. 2. is the next frame 3. is enable onion skin in timeline.
Background
I would like to keep this indoor and have the main outdoor light coming in from the left. The wall and the ground is one layer. The light on the left is on another layer so I can make adjustment as needed. the basketball rim and backboard is on another layer . The light on the left created some strong shadows on the character. I will keep the shadows on a different layer.. an easy to create that is to duplicate > transform> free transform then I will put a flat grey color on it as overlay .Then I would blend it .
Camera Move
Done! the animation key frame are done! (well. .in this tutorial, I would only cover up to the keyframes, in between would be done on another pass). I found the action is all there and it's a loop
Wait, we can adjust, animate the camera so as viewers we can see the action clearer and can have a better feel of action. To create a camera, please see Animation>New Animation Layer>2D camera folder (1)
Hold frames, This type of keys are particularly useful when we are in blocking stage or even keyframes stage. This would avoid unnecessary blend/ unintended motion between keys.
Below is the graph editor, noted that all the keys look like steps that's 90 degree angle to the next key. That's why some animation software also calls this step mode as it looks like a step.
Another thing to keep in mind is in order to have the Camera be fucntional.. ALL the layers need to be in the folder. so all the animation cells, background, basketball and shadow would be in the folder.. As u can see in the picture below
So for the animation, I have 2 balls created.. One is when it is behind the character.. another one is in front of the charcter.. Then I use keyframe to animate the ball when it should be. Also to match up with the character, the type of keys I use is hold frame.. so the key color would shows up yellow. as u can see in the picture below(1) So what happened to the other ball when it's not in use or shouldn't appear, hide it ! There is button(2) below, layer opacity, I set it to 0 when the ball is not in use.
Final Thoughts
I hope in this short tips session, u can pick up some tips in creating your own animation. This is a 10 sec long animation and the keys are done. Next, I would start on doing the inbetween and hope when I am doing that, I would discover more time saving tips and ways to do things. I would be more than happy to share in the process. Till then, see u guys next time


留言