
Hey guys in this tutorial I'm gonna talk about 10 clip studio features that i wish I knew or used when I first started my webtoon. For context, I created my first webtoon in 2020 which I discontinued very quickly and my latest webtoon is called havoc nights which i made for the webtoon contest 2022. So through the years, I have learned a lot about comic making and certain features in CSP that I wish I had used on my very first comic. This video is for newcomers to creating webtoons so that you don't miss out on these amazing features and use them while creating your own webtoon.
USING VECTOR LAYER
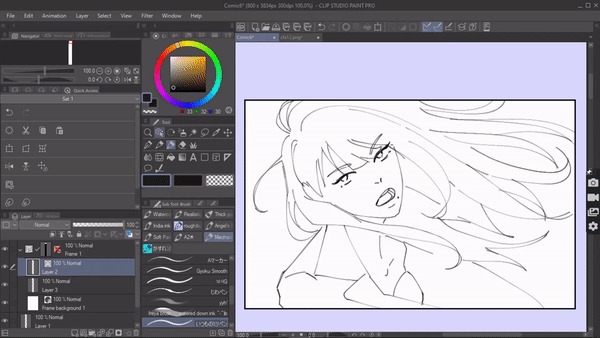
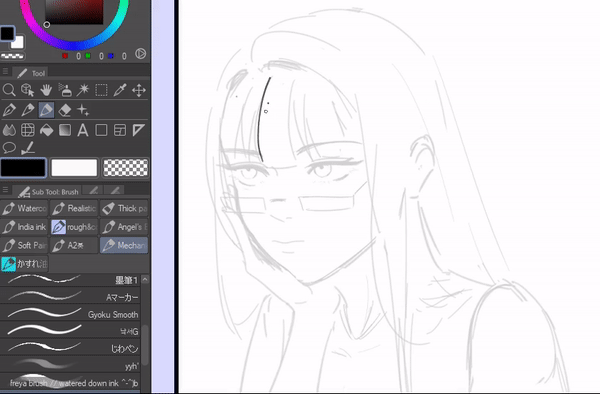
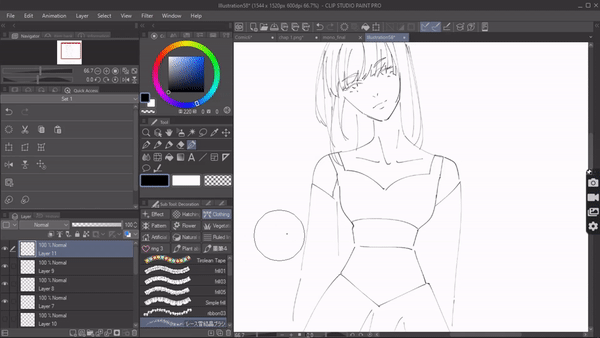
When I first started my webtoon I used to draw all of my lineart in a raster layer which looked neat don’t get me wrong but the moment I make any kind of changes towards the lineart like scaling it up the line instantly loses its quality. Which is why I wish I used a vector layer because when we draw lineart on a vector layer [which is made of paths] we can make any changes like scaling it up or down the line art doesn't lose any quality , making it the best kind of layer for lineart.
Not only that, but we can also change the width of the lineart even after drawing it. For that make sure you’re on the vector layer then click on operation > object, under tool property. We have an option called brush size, adjust it to change the width of the line. This is really amazing because sometimes after coloring you might feel like the lineart is too thin or thick and now you can just adjust it.
And lets not forget about the vector eraser which can erase the intersection in a line which is very convenient when drawing hair , background etc.
You can change the settings of vector eraser to how you want to erase.
1> touched area works like a regular eraser.
2> Intersection to eraser to erase the intersecting line.
3>whole line to erase the entire line.
These are just a few main benefits of using a vector layer for lineart. As a beginner you will make a lot of mistakes and if you use the vector layer it's never too late to correct them. Especially if you plan to print your webtoon in the future you might have make some changes in the panels and scale it up & down , move them around so it's better to use vector layer to maintain the quality of your comic. Don't make the mistake I made and use vector layers for your comic.
AUTO ACTION
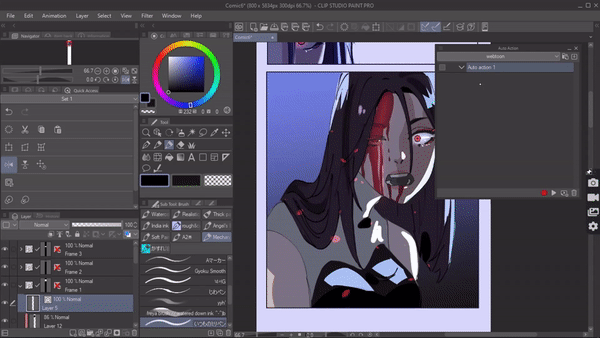
This is a feature I wish I really knew starting a webtoon because I would save a lot of time .When creating comics there are certain actions that are repetitive in the workspace for example: In the last steps of my comic creating process I use certain filter like tone curve and overlay to add finishing touches to my webtoon, this is like a 5 step process that I have to repeat in every single panel and it is very hard to remember the exact values i use in the filters every time.
Instead of repeating this 5-step process on top of every panel using auto action it will be one click away.Auto action lets us record and run these actions. Once we record the operation in auto action we can run those operations in a click.
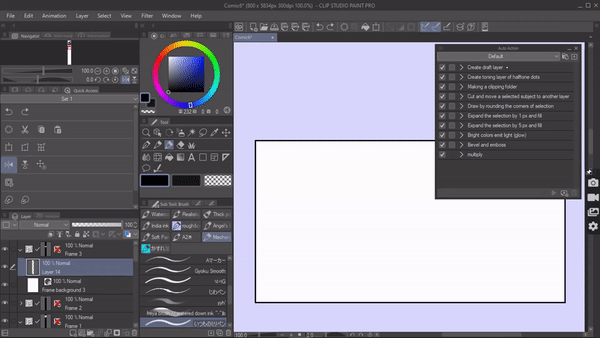
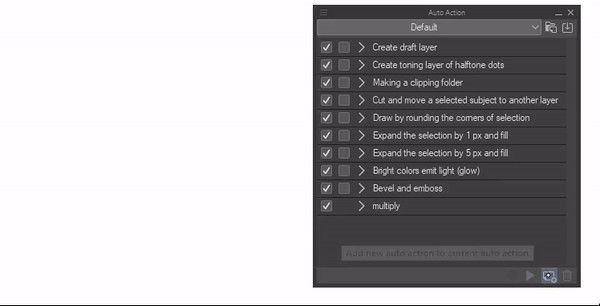
If auto action is not shown on your screen go to window > select auto action.
In the auto action palette csp has already provided us with default auto actions
if you click on [ downward arrow ] you can see what steps the auto action will execute.
To give an example on how auto action works ,
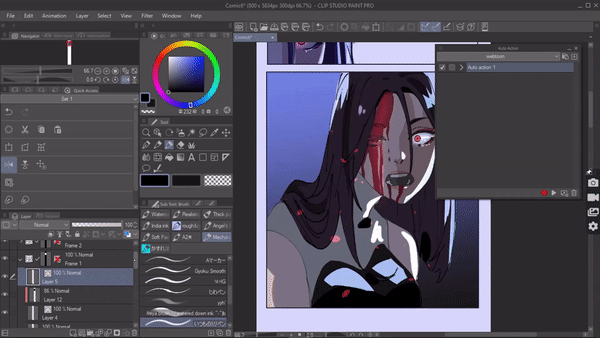
I'm currently on layer one and I'm gonna double click on “ create draft layer” auto action to run it .
As u can see below , Within just a click the auto action implemented a three step process for me
it created a new raster layer change the layer color to blue set is as draft layer
This is auto action . So if there are certain steps that you often do, you can now simply record it and auto action will do that for you in a single click .
What I showed above are default available auto actions but Here's how you can create your own auto action so that you can record and run the operations that you want.
For example : As I said earlier I use certain filters like tone curves on every panel. I will record that as an example.
click on create new set , name it and click on ok . Now click on “ add new auto action “ name the file then select “ record “ and start doing the process.
I will go to layer > new correction layer > tone curve and adjust it to my preference and click on ok . Then again I'll select layer > new layer> fill and choose a blue color and select ok .Then change the layers mode to overlay and lower its opacity.
Once I'm done , stop the recording.
All the steps are recorded and saved , click on the downward arrow to check it . it even recorded the values of my filter
so now whenever I need it I can just click this auto action to perform the operation. So try creating your own auto action to save a ton of time
PREVIEW MODE:
When I first started my comic I always used to worry about the pacing of the panel and readability of the text bubbles in the mobile view because most audiences use their phones to read the webtoon. we create comic in bigger screen so text bubble that look readable in your desktop screen will not look the same in your smartphone. So, it's necessary to check how your webtoon will look in mobile before posting it. But If I had to preview my webtoon in phone format, I had to first save and send the file to my phone . and if i find any mistake like two panels being too close I would have to correct it and send it again to my phone which was exhausting.
But now you don't have to follow my stupidity because of the clip studio webtoon preview mode.
The preview window is one of the features that comes in the companion mode. preview window shows a preview of whatever file that is open in your main Clip Studio Paint window onto your mobile, using which you can see how your webtoon will look on a smartphone.
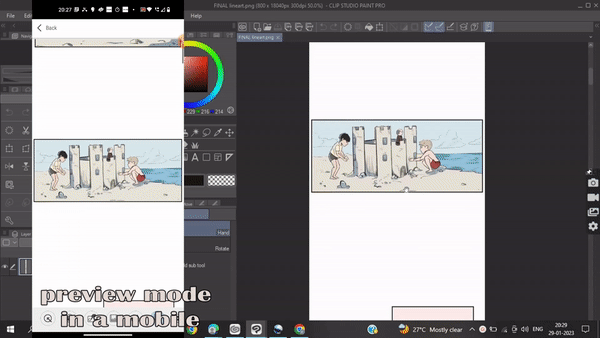
If you make any change in the main device it will reflect on your smartphone too. Now you can easily see how your webtoon will look in the mobile format and correct any panel pacing and text size easily.

As I said, the preview window comes under companion mode. If you already know how to activate and access the companion mode skip the following.
To use the companion mode we have to first connect our mobile with computer/main device
For that ,
>All you have to do is download the clip studio app on your phone. >then Open the app , select get started . >click on menu and select companion mode > and select scan qr.
At the same time on your desktop/main device, make sure you have your clip studio paint open.
[ NOTE : ensure both your phone and desktop are connected to the same wi-fi/internet router. ]
>On the top of your main device/computer window you will find the same " companion mode " icon in the Command Bar . >click on it to generate a QR code, which you're gonna scan with your phone.
>Once you have scanned the QR code , finally your desktop and phone are now connected. >you can now see the different modes available below on your phone
The 6th one is the webtoon preview using which you can see how your webtoon will look on a smartphone. If you make any change in the main device it will reflect on your smartphone too.
USING 3D MODELS:
Starting my first webtoon I was one of those people who refused to use 3d models which I highly regret but on the contrary I used a lot of 3d materials on my latest comic and here’s why you should use them too.
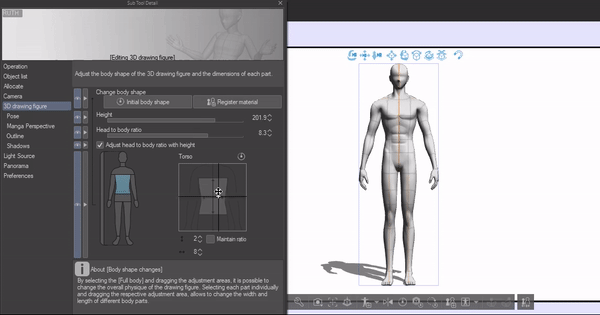
3d models are the best tools, especially when drawing a difficult pose in a difficult perspective. Remember that comics are rather very time consuming. It is in the artist's best interest to get the job done quickly so instead of struggling with that one pose you can't get it right use the 3d models. It's flexible, you just have to drag and drop them onto your canvas, adjust the pose , lower the opacity and you’re good to sketch.
We can even change the body proportions of the 3d model to make it look similar to our oc.
And if you’re creating an action webtoon there's an amazing perspective setting that you can use . you might have noticed some crazy perspectives the authors use in their drawing . Using the “manga perspective” setting we can create something similar to that .
You can find the manga perspective setting under “ display object list “ > manga perspective or in the tool property .
Enable the manga perspective ,
Once we enable it , whatever body part is closer to the camera will get bigger in perspective . Look how cool the pose already looks .
Using the slider we can adjust how intense we want the perspective to be .

—-------------
Another thing I wish I did in my early comics is to use 3d objects on my characters . For example: If we look at my latest comic , the shoes my character is wearing is a 3d shoe that I downloaded from csp asset store.
All I did was drop the shoes onto the canvas , adjust its size according to the character and then I would rasterize it so that I can render shadows and light so that the shoes don't look odd and goes well with the whole character .
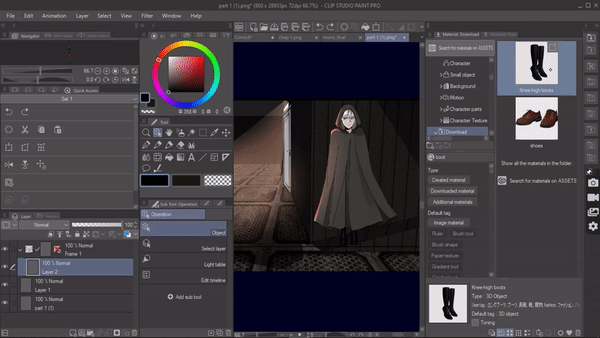
So my tip is that you guy should consider using 3d materials like shoes , bags, specs, etc to make your comic process easier.
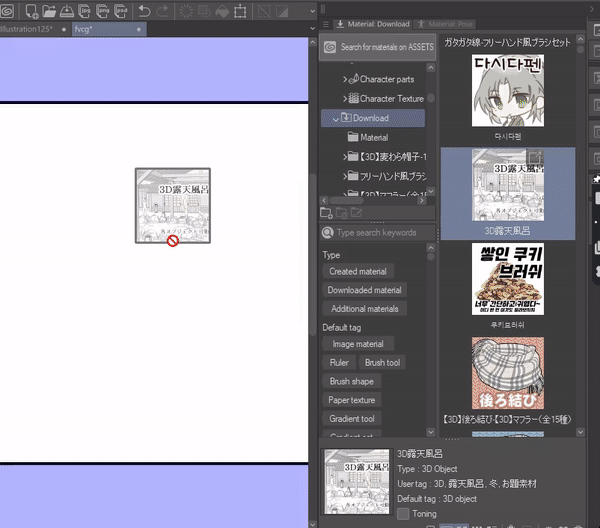
One more thing about the 3d model that I wish I used in my earlier is the 3d backgrounds.Making my first comic I made the ultimate mistake of drawing every background with hands and I didnt even had the knowledge of perspective.Instead I wish I just used d backgrounds. There are tons of amazing 3d backgrounds available in clip studio paint . Take a quick browse on the asset store to find them.
Using a 3d bg is same as 3d model . Drag and drop them onto the canvas. Adjust them according to your preference.
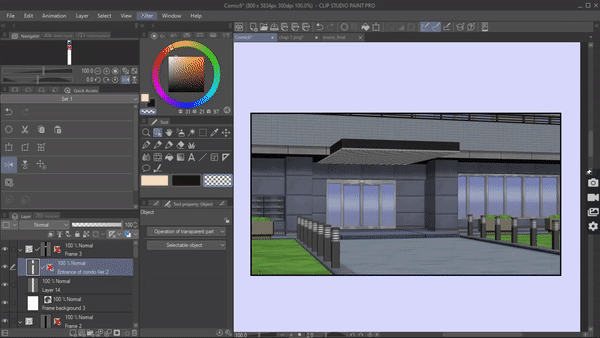
Sometimes your artstyle may not go well with the 3d models but if it fits your art style that is great, go with it .But if it doesn't, here's what we can do. We can convert the 3d bg into lineart and color it ourselves.
For that, drop your 3d model onto the canvas, adjust it according to your preference once done. right click on the 3d layer and select rasterize .
Then go to filter> artistic > and under process select “only line” and adjust line thickness and density and click on ok.
Now we have only the lineart of the 3d model which we can color according to our artsyle.
SELECT LAYER
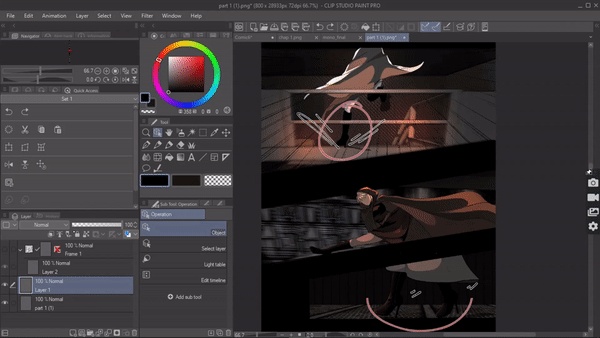
Another feature I WISH I knew when I first started my webtoon is the select layer. When creating comics usually you’re gonna deal with 100s of layers which makes it harder to find a particular layer that you’re looking for . For example if you find any mistake or any unwanted line or dots in your comic like this one , you will want to remove it but how will you know which layer does that dot belong to in these 100s of layers? This is where the select layer comes in handy. Select layer will basically lead to that layer
To access select layer go to “operation > search layer” and using the cursor click on the dot and now if you look at your layer palette you have been automatically led to the layer where the dot belongs and we can easily erase it
This feature is really helpful in navigating layers , you don't know in which layer you drew the base color ? easy. use this feature to navigate it . I hope You will use this and not suffer like me.
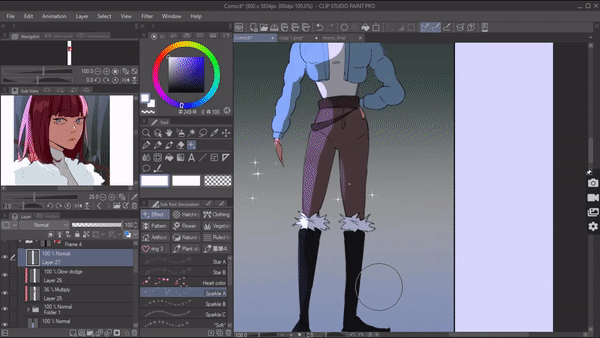
DECORATIVE BRUSH:
Using a decorative brush is one the easiest way to make your comic look better and more professional .As an amateur artist, when I saw professional webtoon artist’s comics I was pretty amazed by how they had so many details in their characters' clothes like laces , ribbons , knots , belts and jewelries . At that time I thought wow maybe these artists are so fast that they can draw all of these things . But right now I know that's not the case, they just used decorative brushes.
Decorative brushes are these brushes that have continuous decorative patterns. You can find decoration brushes in the toolbar or download more from csp assest store. CSP has provided us with so many default available brushes which we can use to enhance our comics
Like for example I have a character here using this lace brush im gonna decorate her clothes it's that easy.
Not only that using these brushes we can also represent a certain mode and atmosphere. For example using the sparkle brush I can represent that the character is wearing new clothes
or some sparkle near the face of the character can represent that character is good looking.
These cherry petal brushes can be used to add more drama in the panels where the characters confess their love.
Or using the plant decorative brushes we can even create a simple backgrounds for our webcomic

BLUR
I have probably talked too much about the blur feature at this point but it is a game changer. It can instantly add more depth , motion and drama to your comic.If you’re a newcomer to creating webtoon using blur tool you can instantly level up your comic. One of the most used blur in creating comics is probably the motion blur . Motion blur is when you purposefully streak or blur an object in motion . We can use motion blur on anything where we want to create an action .
For example; I have a character running in this panel using a motionblur let's make it more dramatic
Make sure we’re on the background layer . Now go to [menu] Filter> blur>motion blur

A motion blur dialogue box will appear.
Using the strength, we are able to adjust the strength of the blur .
Using angle , we can change the angle of the motion .
And I’m gonna set the direction as forward .
And thats it
—----
Another type of blur I wish I used in my webtoon is the gaussian blur, Gaussian blur is basically a normal type of blur which we can use to highlight which character is talking For example : If we have two people in the same.
And the character A is talking then we can use gaussian blur here to direct more attention towards the character who is talking by blurring out the surrounding .
For that [menu] filter > blur > gaussian blur . A gaussian blur dialogue box will appear where we can adjust the strength of the blur and then click on okay .
RESULT :
By doing this we have much more clear imagine on which character is talking
Small changes like these is what gives a comic more life and intensity. Remember that these are just few examples there a lot more we can do with blur tool.
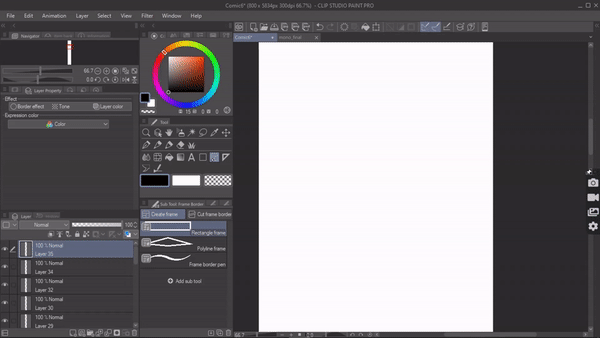
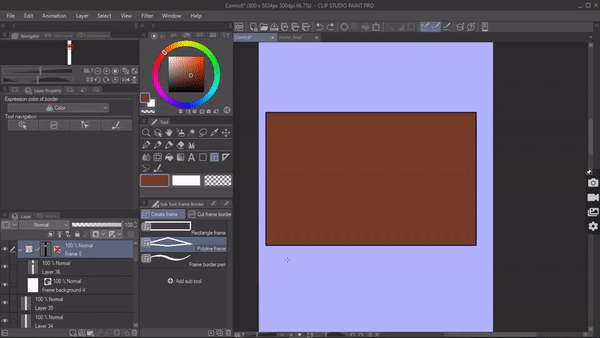
BORDER FRAME :
Border frame can be used to create panel frame for comics.This is something I wish I used in my earlier comics because in my earlier comics i just used the rectangle figure tool to create my panel frame which works but when i draw my sketch the lines would go out of the panel and if i try to fill the panel with a color i have to take extra measures to make sure the color doesnt bleed out of the panel just too much inconvenience instead i could have just used the frame border. The major benefit of using a border frame folder is that you concentrate on a single panel without worrying about any effects , filter , line , color going out of the border. Frame border folders allow you to manage layers separately for each comic frame.
To create a border frame go to the frame border tool under” create frame” select rectangle frame. Now on the canvas click and drag to create the frame once you release, on the layer palette you can see a new frame border folder with raster layer and frame background has been created under which we can now draw our comic without worrying about anything bleeding out of the frame .
If you dont want the raster layer or the frame bg everytime you create frame border You can disable it by going to the tool property and disabling it .
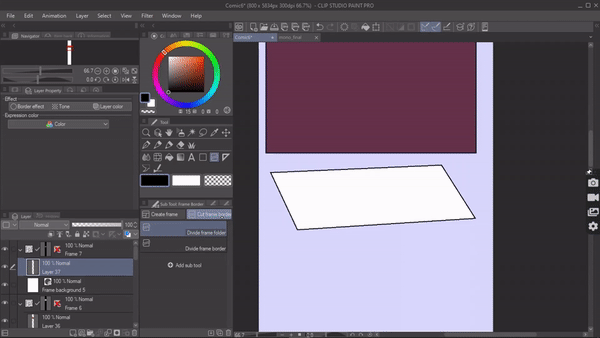
We also have polyline frame which is more of a customizable frame border .
Then we have the divide frame folder which is used to cut in between any particular border frame . we can adjust the gutter in the tool property
EXPORT:
Let's finish this tutorial with the export setting I wish I knew when I first created my webtoon . If we look into the webtoon uploading page we can only upload pages that are 800x1280px. Or lesser. But if you look at my webtoon page length exceeds the limit set by webtoon. before I would just save my webtoon as png and cut the page using a website . Until I realized clip studio can do the same while exporting.
Here's how: once you’re done with your comic and is ready to export. Go to file > export webtoon . Export webtoon dialogue box will appear where select file format i’m choosing .png then under file export settings select “ divide vertically” enter 1280 in the box and click on ok.
Now your webcomic will be exported cutted in proper px size that you can just now upload to your webtoon.
This is one way of exporting.
The another way is to go to the webtoon uploading page .
Click on ' upload from clip studio " . It will direct you to your clip studio saved files .
Choose your .CSP file and that file will be automatically split and uploaded onto the webtoon page.
----------------------------------THANKYOU FOR READING.
-
對此投稿按「讚!」的用戶


留言