How to Draw Reflections
Introduction
Every object that comes into contact with light has the ability to both reflect and absorb it. The difference between a matte and shiny object lies in the angle they reflect light. Smooth surfaces reflect light back in the same direction, delivering a denser light concentration to our eyes. In contrast, a textured or uneven surface takes light and scatters it in various directions, which leads to less concentrated light arriving at our eyes.
While rough surfaces have a matte look, smooth surfaces look shiny.
Since all materials reflect light, it’s crucial to understand which category they fall on to draw them realistically.
Most objects are more matte than shiny but that doesn’t mean they don’t reflect the colors around them. Creating a realistic surface requires understanding how surrounding colors affect each other. This effect is called bounce light
Bounce light
Different from direct light, bounce light forms when light bounces from one surface to another before reaching its subject. This way the color of the reflecting surface will be delivered onto the subject.
Mirror Reflections
Mirror reflections in 2D
Mirrors reflect objects perfectly. In a 2D surface, a mirror reflection is quite easy to draw.
Duplicating and then flipping the layer in the direction of the mirror is a practical way to create a symmetrical image. Alternatively, you could also use the symmetrical ruler to create a reflection
Perspective drawings with mirrors
To show the reflection in the mirror we need to use perspective. The easiest way to achieve this is by using 3D models
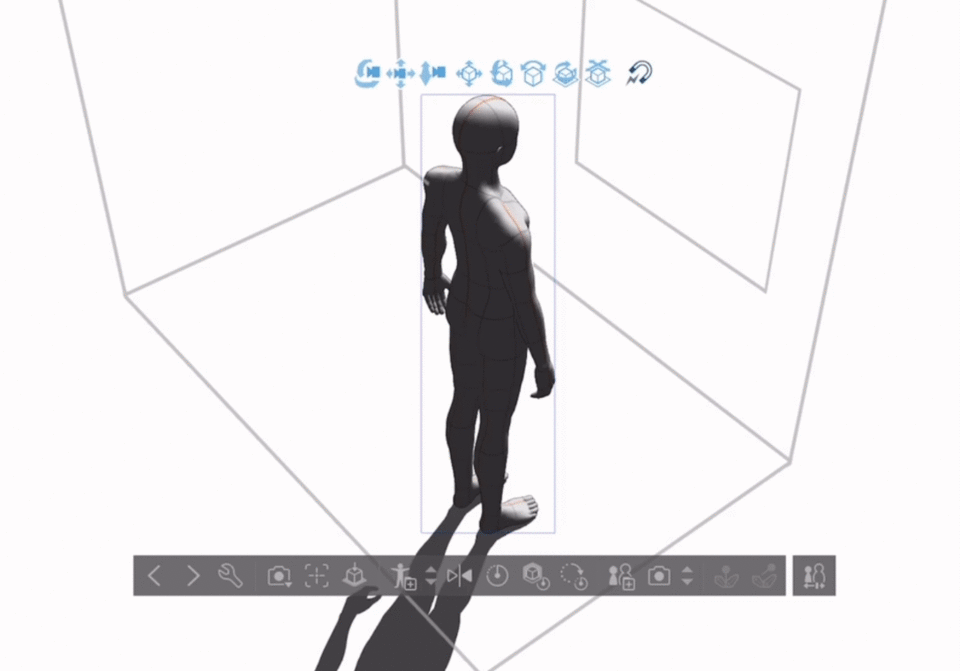
First, place the 3D model. For this example, I used a male human model. There are a variety of options from human figures to objects such as trees or buildings for your different needs.

3D models have built in perspective grids. We will use these grid lines to set the environment around our figure .To make perspective grids visible click on the red cross on the layer.
After you click once this time right click the same icon. A small panel will appear. Click the “Link guide to ruler”. This way we can use the grid of the 3D model in other layers within the same folder.
Now you can draw the mirror and the environment in the same folder on a different layer.
To create the reflection duplicate the 3D model layer by simply right-clicking and selecting “duplicate layer”. Later turn the 3D model 180 degrees towards the mirror

In another layer, we need to draw our own guidelines for the reflection since just moving it towards the mirror won’t work. We also need to adjust its size.
We can now adjust the duplicated model to fit the guidelines by moving and shrinking it.
Finally, I can draw the line art for the model using the 3D models as the reference.
Convex Mirrors
Mirrors are not always perfectly straight and a convex mirror makes for a more entertaining look. Draw a circle. Go to layer-ruler/frame-create perspective rule. We will choose fisheye perspective with 3-point perspective.
This will be a guideline for the x and y axis. We still need a grid for the z axis so we create another grid, this time 1-point perspective with no fisheye perspective. After adjusting the grids (shrinking fisheye perspective) We can start drawing.
3D models ease the challenging process of creating art. Sometimes more complicated pieces may require us to work relying less on these simplifying tools
Let's do an example and also talk about the coloring of reflections.
I advise you to use references if you can’t use a 3D model. It is way easier to draw objects in shapes so try to simplify and turn your models into organic shapes.
I draw the line art carefully considering my guidelines.
Coloring: now we can talk about how we can color the reflection to make it look like a mirror reflection.
We simply achieve the mirror look by putting a layer of white paint and setting the opacity to 24%.
We can’t forget the shadow. In another layer, below the white layer, I add a multiply layer and paint the shadow in with a bright brown color. And it's done
Water reflections
Water different from mirror doesn’t reflect perfectly but compared to other objects its still highly shiny due to its smooth surface. Still water can be used in sceneries to really enhance the beauty of the painting.
Let’s do an example.
I duplicate every element that will be reflected by the water and I flip them vertically. To do this select the object go to Edit-Transform-Flip vertically.
To give the wave effect use the liquify tool and draw horizontal lines on the water.
Now go to Filter-Blur-Motion blur. Set the strength to 8 and the angle to 90.
Go to Blur again and this time pick Gaussian blur. Set the strength to 6.
Decrease the opacity of the layer 80%.
To give the ocean effect I use a material from the assets store. I clip this layer to the water.
Later lower the opacity of this layer to 15%.
I will use another material from the asset store, this time a brush by drawing horizontal lines on the water.
Finally on top of all layers I add an overlay layer and spray a bright blue color on the tree reflection.
Conclusion
Thank you for reading! I hope I was able to help.


留言