Animate snow, light, flame for wintery scene [Tab ver]
Prologue
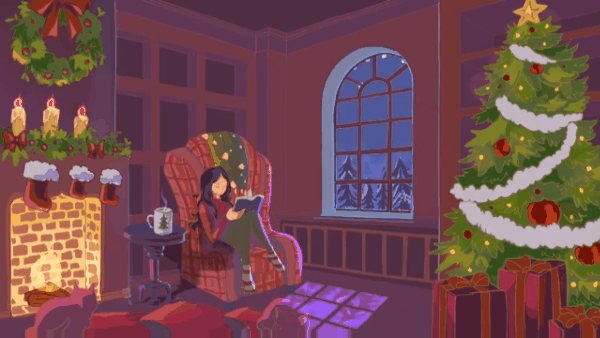
When it comes to wintery scene, there are lot of ways you can approach it, not only adding more dying plants and a lot of snow, but also playing around with the colors that influenced by season.
Preparation
During winter, while everything is very dark and blur outside cause of snow and almost plants are dying, someone [ maybe you or me] is enjoying reading time at cozy home with some little pals.
By saying that, I will show you how to pop up that vibe not only by decorating but also coloring and adding few movements here and there.
Let’s start !
Video process
Composition
Design an interior with any stuffs that you like.
Starting with some casual objects on Christmas time such as:
- Fireplace
- Christmas tree
- Sofa
- Candles
- Window with curtains and some cookies
…
As long as you follow the rule of thirds, like this.
Planning for animation
When the design is done, using different color to sketch parts will be animated.
[I used red to mark them]
Create background [Using rulers to fix perspective]
Hand-drawn perspectives are quite difficult to be accurated. So using ruler in Clip Studio Paint will correct everything easily.
There is a toolbar on the left.
1. Click [Ruler]
2. Open [Sub tool]
3. Choose [Perspective ruler]
Click on [Tool Property]
Choose [ Add vanishing point]
Then drag the line fit into above and below edges.
To create 1 vanishing point outside the canvas.
Replicate steps with other wall, we will have another vanishing point.
Check this to active ruler in all layer. Cause we will draw at different layer.
Ruler = 1 layer
Sketch = 1 layer
Remember to turn it on to draw follow the ruler.
To create the window, we use
[Figure ruler] - to draw the above curve
[Symmetrical ruler] - to make both sides of window are the same
Make sure to turn [SHIFT] on to draw circle and straight ruler.
Use [Free transform] tool to fit the window into perspective.
Then use any brush you like to trace along the sketch.
1 - Contrast in color
To prove that colors could bring the winter vibe, let's start with this empty room.
So when it comes to choosing colors for winter scenery, even for something as simple as empty room, there are 2 things.
Warm tone <=> Cool tone
[Inside] [Outside]
Light <=> Shadow
[Warm] [Cool]
[Cool] [Warm]
For example, in this drawing, I wanted to heat the interior beside the cold outside, so when I first drew this piece, I envisioned there are 2 light sources
1 came from fireplace. [Warm light]
2 came from window. [Cool light]
However, I don't want my illustration is too saturated so I choose colors in this area instead the right corner. Also, I ended up preferring it to be set like this because colors complement each other better with the orange and blue.
Then using these colors to make a color sketch.
Continue choosing colors that have a same tone with the main colors to add more depth. The light colors will present distant objects and darker colors will present near things.
Adding more colors with same tone to various the depth here.
After done with the rough color, let's separate inside and outside into 2 layers.
Make sure to [Lock transparent pixels] so that colors won't spread out the shape.
Add the color sketch into [Subview] tab as reference.
After coloring 2 parts of background, export them as transparent images by turn this off.
2 - Adding decor stuffs
The key is:
“Each detail will be separated into layers”
Which means there will have layer for
Casual objects
Logs
Christmas tree
A mug of hot chocolate
A few candles
Gifts
Wreath
Some stockings
Garland
Reading pose.
Then we will have a folder for each object.
A folder will include
- 1 layer for line art.
- 1 layer for color.
[Both of them will be LOCK TRANSPARENT PIXELS]
Turn on/off the background to make sure colors are fit.
After done with coloring, turn off the layer [PAPER] to invisible the background.
Then finish them all and save separately as transparent images.
[Cat poses] will be exported as [Transparent line art] only. [No color]
3 - Animate snow, flame, steam...
I will animate on Clip Studio Paint (Pro)
Which means I have maximum of 24 PLAYBACK TIME, any more that that won’t be possible. If you want a longer playback time, I recommend going with the EX version.
Frame rates
The number of images per second.
Playback time
The total images you need to finish for a full animation.
Formula
I have only 24 images[Playback time] and 8 images[Frame rate] = 1 second
[Playback time/Frame Rate = Seconds]
=> 24 / 8 = 3
So
To last an animation within 3 seconds, I need to draw 24 images total. (8 each second)
The higher the frame rate, the smoother the animation will be.
After create new file, I have to open [Timeline] tab manually cause of using Tablet version.
Then import transparent images by
- [File] => [Import] => [Image]
- Open Storage.
Then we will have total 12 vector layers for 12 objects.
Make sure they stay outside the animation folder.
Like this.
I will use [KEYFRAME] to animate a lot of elements here, so let's talk about that.
[KEYFRAME] in Clip Studio Paint is a tool help us fulfill [IN-BETWEEN] frames automatically.
1. Enable [KEYFRAME]
2. Add [KEYFRAME]
3. Choose type of interpolation [ There are 3 of them, you should try out to know better]
Falling snow
The obvious thing appears during winter is snow.
So let's make some.
Create [new animation folder]
At the 1st frame, click [ENABLE KEYFRAME]
Click [ADD KEYFRAME]
Choose [Linear Interpolation]
To make snow more realistic, DO NOT draw them as circle.
Let's create a random shape like this.
At the last frame, use this tool to drag the snow down.
And new keyframe will be added automatically.
New keyframe will be added.
Also adjusting the graphic to make them falling more natural and random.
Then duplicate [Snow animation folder] and adjust the graphic to make difference in falling paths.
Twinkle lights
1. Choose a warm color to present lights.
2. Click to create new [Animation folder]
3. Turn the folder into [Color Dogde]
We still use [KEYFRAME] to animate the lights, but choose [SMOOTH INTERPOLATION] instead Linear.
- At the 1st frame, opacity is 100%
- To make them blink, skip some frames, then adjust opacity to 47%[new keyframe will be added automatically]
- Replicate steps above until the last frame.
Replicate the process to create halo of the lights with any kind of Air brush.
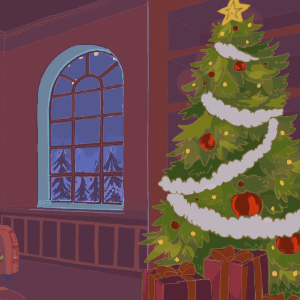
And here is the result for snow and lights.
Flame [fireplace and candles]
I'm using [straight ahead] method to animate flame.
But still follow this structure.
Create [New Animation Folder]
Click [New animation cel] until fulfill 24 frames.
Click and hold to change name folder
Draw flame shape follow above structure 24 times.
Turn the folder into [Color dodge] mode
Use [LASSO fill] to color the flame directly frame by frame.
Choose a darker color [Red] to fill the part inside flame.
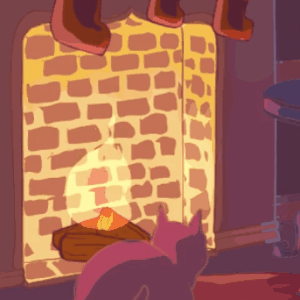
Here is the flame in fireplace.
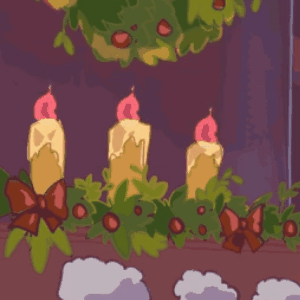
You don't need to create new animation folder or draw again the flame for candles.
Use [LASSO TOOL] to choose the shape
[COPY AND PASTE]
Click [Scale and rotate] to move the flame to candles.
Adjust the size then click OK
Replicate process to other candles in other frames.
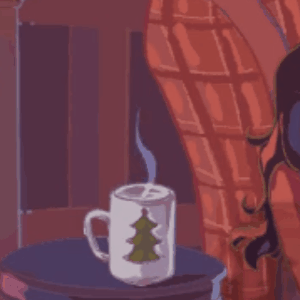
Hot steam
The structure of hot steam movements are the same as flame.
So we also have a new folder with 24 cels for steam.
Then color directly on the rough.
Turn the folder into [Color Dodge] mode and adjust opacity to 54%.
Here is the result.
Final touch
Bonus details
Using any textured brush => adjsut the size and opacity to blend colors on the walls.
Color the line by [Lock transparent pixels] the line layer.
Change lines into colors instead of black.
Fixing the evergreen trees silhouette by textured brush for more realistic.
Adjust the brush size to add textures into the sky.
Bonus movements
To make the scene more lively, I added few movements into sleeping cats and make the shadows and lights jitter.
Shadow and light jitter
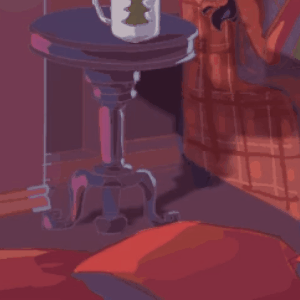
By separating objects, I can duplicate the table then turn it into [Multiply] mode to create shadow easily.
Using free transform to adjust the shadows.
Also using blur effects for edges.
Then drag the [Shadow] layer into a blank[Animation folder].
Enable [KEYFRAME]
Add [KEYFRAME]
Choose [Smooth interpolation]
Use [Object tool] to move the shadow along directions.
We will have a rhythm like this.
The same process with light, but instead of [Multiply] mode, turn it into [Color Dodge] mode.
Drag the [cat] layer into a blank [Animation folder]
Click and hold to choose [Duplicate layer] 23 times.
Waving tail
Now we will erase the tail each frame to fit it into this structure.
Sleeping breaths
Continue with the another cat, we will fix the back line each frame.
Their back will move up and down slightly along with breaths.
Inhale =Up
Exhale = down
Thank you for reading til here ♡
I saved this art piece as Mp4/GIF files that you could download for free through the link below.




Comment