General Eye Tutorial
Index
Introduction:
Hello everyone! My name is Wiz and this is my first time creating a tutorial on eyes. This is my way of how I draw and color eyes in my artwork. The tips I can provide to you are
Creating different types of eyes in characters
Creating emotion within the eyes
Coloring the eyes
1. Designing different styles
When create new characters, it's best to avoid drawing the same eye design to avoid the same face syndrome. Drawing eyes with personality help shapes on what kind of person/feeling the character has. Building the eye shape also helps give diversity within your characters. It's okay to draw inconsistent with eyes since its an everyday process when we practice or not satisfied in how we draw it.
You can also change/draw how the character eyelashes, eyebrows, or wrinkles to make the design of the eyes more interesting.
2. Drawing details within the eyes
When it comes to drawing emotions of the character eyes, I need to make sure that the emotion is accurate as possible. It also helps in practicing how you think the characters feels in different scenarios.
Examples of displaying emotions
Top: The first row of eyes is shown with an expression of shock/fright. Dilating the eyes and eyebrows help illustrate the emotion that character is displaying.
Middle: The second row of eyes is shown with an expression of sadness/numbness. Adding details such as tears is a great way to illustrate how upset the character is feeling.
Bottom: The third row of eyes is shown with an expression of anger. Arching eyebrows and detailed wrinkles around the eyes helps illustrate how angry the character is.
3. Coloring eyes
When it comes to coloring the eyes, I like to think of what color suits the character's personality/color scheme work best. I will provide an example on how I color eyes in my artwork.
1. Base Color
First I ink in the first color that will be the first base color. This helps me figure out the darker and lighter tones of color next.
2. Adding dark colors as shadows
After when I pick the base color, I go look for 1 or 2 darker tones of that color. I also like to mess around with the color slider to pick the right dark color. I like to use the Airbrush tool to create a gradient effect with the colors. I use the first dark color and then the darkest later.
3. Highlights
When I'm done with the dark colors, I now look for the lightest color to use as a highlight or "shine" of the eye. When I pick the color I think is fine, I change my blending layer mode to Overlay. Sometimes I like to adjust the opacity if the color is too much or pick another lighter color.
4: Eye Shine
After I finish with the highlight, it's on to the eye shine! I like to add in the eye shine so that the eyes don't appear to look dull unless done it with purpose. I pick the color white and then using any of the Pen tools or the Eclipse shape tool to add the shine in.
5: Adding more details in the eyes (optional):
While normally I don't do this often, I think adding a little more detail wouldn't hurt much. There are many ways to add in details such as drawing little stars, diamond, and heart shapes to anyone preference.
And there you have it!
This is the end of my first tutorial. I sincerely hope that this will be useful for anyone who is looking for help. There are plenty of resources out there on the internet so don't feel discouraged to not look for them. This is a great way to look for anything that you want to learn more or practice on!
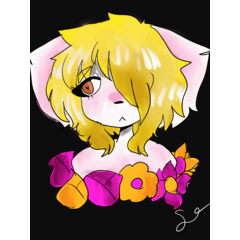
Here are some examples of how I draw eyes from my previous works.


Comment