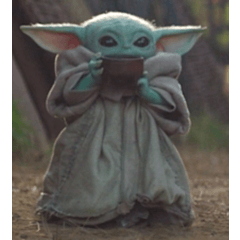
Let's make a cute sticker!
Welcome!
In this tutorial, I'll be showing you how I make stickers and how you can use these same techniques to make your very own. After this you'll be able to express yourself with all the cute little characters you want, like this guy.
Step 1 blocking out
In this first step I used the default [Gouache] brush in the [oil paint] section of brushes and just blocked out silhouettes and shapes that I thought would be interesting, generally for cute guys (or girls) you're gonna wanna use squished and soft shapes like ovals and circles or things with soft corners if you end up using squares, triangles, ect. Don't be afraid to get creative in this step.
Step 2 Sketching and details
Next up, I pick the form I like the most and lowered the opacity down from 100% to 25%, using the slider on the right of the selection box labeled [Normal] in the layer window, you'll find this in the bottom right hand corner with the default setup in CSP (Clip Studio Paint)
Then I began to sketch out my characters design, I used the [Mechanical pencil] tool. this is where we block out the basic details for our characters.
Step 3 Decisions
I didn’t like the way the first one came out so I moved him over, made a new [raster layer] and drew up a couple other sketches first to see if I could do better.
After I sketched the other two out they still weren't quite what I was looking for, but the one on the left was close enough. I lowered the opacity down then I inked over him with the [Dense watercolor] brush in the watercolor section with default settings, this is where I changed some of his design. I thought he was quite cute by the end of it.
I then make a copy of my lineart and lowered the opacity down to 50% to help make my lineart bolder.
Part 4 Color Flats
In this one I laid the flats with my [turnip pen] default in my pen tools. I picked colors I liked and that I thought would help convey his light and airy personality then laid them down, these next few steps go by pretty fast.
Step 5 Shading
Make sure that your flat color layers are underneath your line art, then make a [new raster layer] and change the layer setting from [normal] to [multiply] (Pink circle), make sure you turn on [clipping] (Orange circle), this makes it so what you draw doesn't show up past the layer below it, next, I pick my color and use the default [turnip pen] to lay down my shadows then I lower my opacity using the slider(Red Circle), I lowered it down to 40%, the darker the shadow the more intense the scene becomes.
As a side note, when picking shadow colors we wanna always go onto or closer to the opposite side of the color wheel. With blue colored light we use red or pinkish-purple shadows, with red light vice versa.
TA DA!! you have yourself a cute flipping sticker!! Good luck in your creations, I hoped this helped you and have a nice day, thanks for reading!


Comment