
Hello everyone, this is wwonli again^3^~
This is a new tutorial for CLIP STUDIO PAINT, I will show you how to draw the sky. And I want to say that using CSP it is very easy to do this. I will show you several ways.
Thanks to this tutorial you will 100% start drawing beautiful skies for your art.
Where to begin?
I think you all know, about such a wonderful thing in a CSP, this is a ASSETS. Where we can find everything we need, all the most useful, brushes, materials, and whatever.
So, of course, we will start by finding the brushes we need. Since when you represent the sky, I'm sure you are thinking about clouds, lightning, stars, rainbows. And so we will of course start with the easiest way. This is using the same ready-made brushes.
Therefore, quickly go to assets, and now in the search, just enter the desired name of the brush or something else.
As you can see, there are a lot of brushes, quickly choose which ones you like. Of course, there are free and paid brushes. If you're not ready to spend your money, don't worry, there are a wide variety of free brushes here. It will be enough for you.
Just click on the brush you like and find this button
Maybe you don't know how to add the downloaded brush to the Clip Studio? Then I'll show you. Open the CSP and drag the desired brush from the materials to the panel you want
After you've added all the brushes. Let's move on to the most interesting.
Basic palettes
I have prepared several palettes for you. Which will be helpful. I used my own photos, but for some I had to change the colors a little. I hope you will like it.
1st Pallete: SUNNY
First, let's take a closer look at these photos. I think the sky is noticeably darker at the top. The closer to space, the darker the sky. Our sky is a gradient, from dark to light or from light to dark as you like.
Light also plays an important role, you can notice the bright light of the sun, look at the clouds. Clouds have different densities, so the sun shines brighter through the more transparent parts of the clouds, and in denser places you may notice shadows.
2nd Palette: SUNRISE
The first thing that catches your eye is the rising sun and the gradient in the sky. You don't have to follow my palettes exactly, play with colors.
3rd Palette: FADED SUN
The shadow and light on the clouds tell us which side the sun sets. Clouds that are closer to the sun take on its color.
4th Palette: SUNSET
Again, the main focus is on the sun.
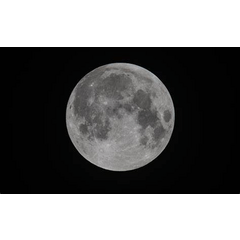
5th Palette: NIGHT
Photos of a dark night are simply impossible to take. But that's not bad either.
6th Palette: THUNDERSTORM
A very different phenomenon. Even from the photos it is noticeable that everything is always different. Definitely this type of sky will have a dark color palette.
7th Palette: Pink
Quite an unusual type of sunset. Looks very beautiful
I have shown you all the palettes that I will be using. Now I will explain how to use them.
Gradient for sky
As I said before, our sky is a gradient. Actually in the palettes that I showed you, the first column of colors is used for the gradient.
I'll show you two easy ways to create a gradient.
The first way:
Go to the Gradient tool, choose a rainbow or any other tool.
And copy it as a new gradient. Then you can set the desired point colors by following the first column of my palettes
And just use the prepared gradient on the canvas
The second way is to draw the gradient yourself.
Using any brush, draw lines on the canvas following the palette
Then use the Blend tool to blend the colors for a nice gradient.
Brushes that I use
1.
2.
3. My Favorite Brush Set
How to draw clouds
----The first way you can paint the cloud is using the second column of my palette, starting with the darkest color.
1. Draw the base
2.Then gradually add the rest of the colors. Experiment
----The second method is almost the same, but start with light colors.
Add darker colors gradually
Remember, the shape of the clouds has no formula, you don't have to follow certain shapes. Just enjoy when you paint
---Third way. If you still find it difficult to draw something shapeless, you can also start with a sketch.
Color in a convenient way. You can leave the sketch if you want, just paint it white
Let's see what I did
Of course, in the sky we see not only clouds. What about lightning?
How to draw lightning?
Using any lightning brush you downloaded, paint where you need it. For color, I recommend using white.
After that, let's make our lightning glow.
How do I do it?
Create a new layer and use Airbrush the same color as the lightning and paint it
And use the Blending Mod - Overlay. And duplicate this layer for a brighter glow
You can also draw a lightning yourself. Just draw a free form without hesitation and repeat with a glow
My results
1. Sunny
2. Faded Sun
3. Sunset
4. Sunrise
5. Night
6. Thunderstorm
7. Pink
Thank you very much for reading and watching all this. I hope you enjoyed it and learned something new for yourself!
Be happy, success in drawing, I know you are all excellent artists, the main thing is not to give up and keep drawing!
I give you all my love! <3
Users who liked this post


Comment