
Fundamentals:
We all know the two essential steps to drawing:
First is a sketch and lastly the line art.
Line art is a representation of reality, depending on the style of the artist. However, it is necessary to have knowledge about anatomy, perspective, and general knowledge of the line to be able to make a good line art (regardless of the style of your drawing).
Let's focus on the sketch first. (The first step)
What is a sketch?
Basically it is the map that you make to know where you will put the final lines.
Example:
Sketches
How to make a good sketch?
IMPORTANT: The first strokes should not be refined, nor do you have to worry about the details.
1.- You must get a first form.
2.- Continue with the planes of the face (or whatever) and its structure.
How to get a good look of the face?
We must study the shape of what we want to draw, in this case the face. Plans of the face, anatomy and proportions.
Important tips
Tips for a first sketch: Trust your lines.
You must make lines with confidence. You must make it fast and thin.
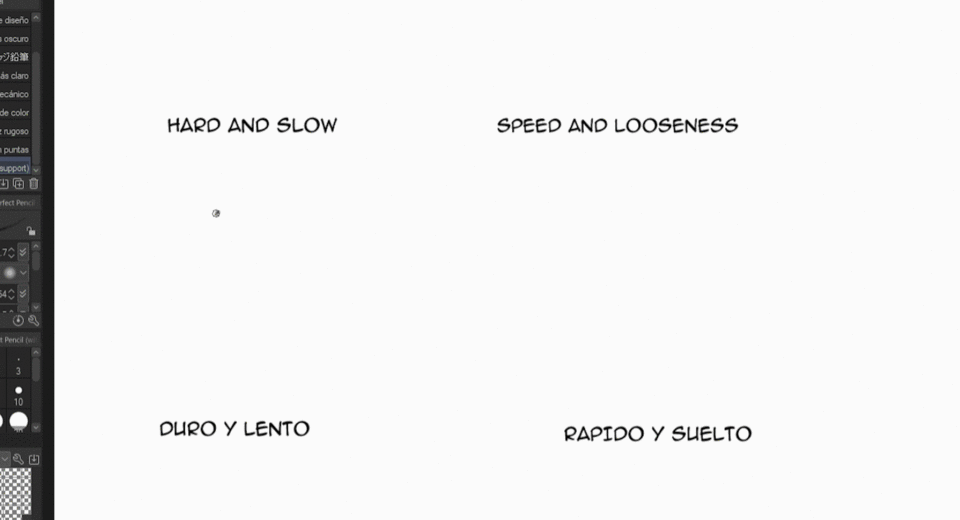
TIPS: Slim, light and fast.
- Always draw with thin lines (Avoid using very thick) and light (Without much pressure).
- Speed = Stability and good drawing
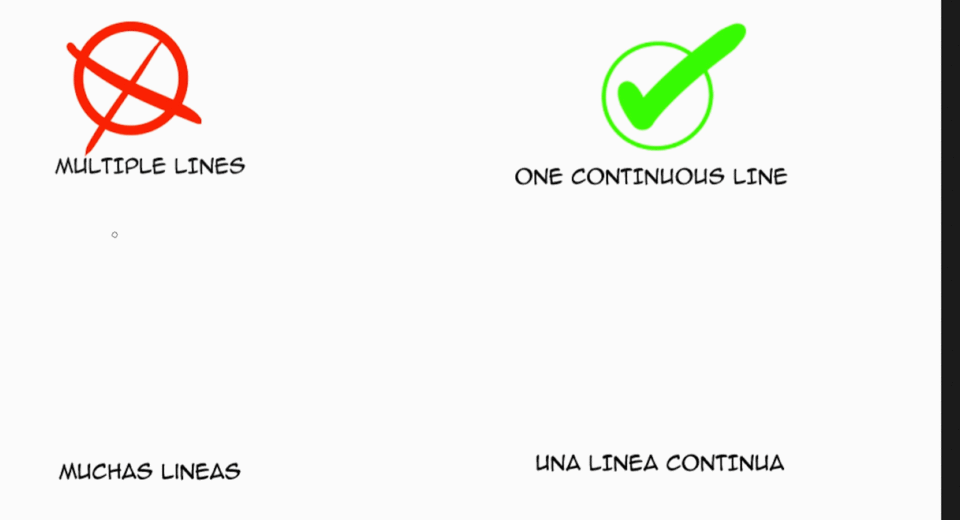
Gold tip:
Try to make a single continuous line. Never make linear too short.
IMPORTANT TYPE!
Do not draw with your wrist or fingers.
When we need to make small details we can try to use them, however for continuous and stylized lines, the most advisable thing would be to do it with the shoulder.
Representation:
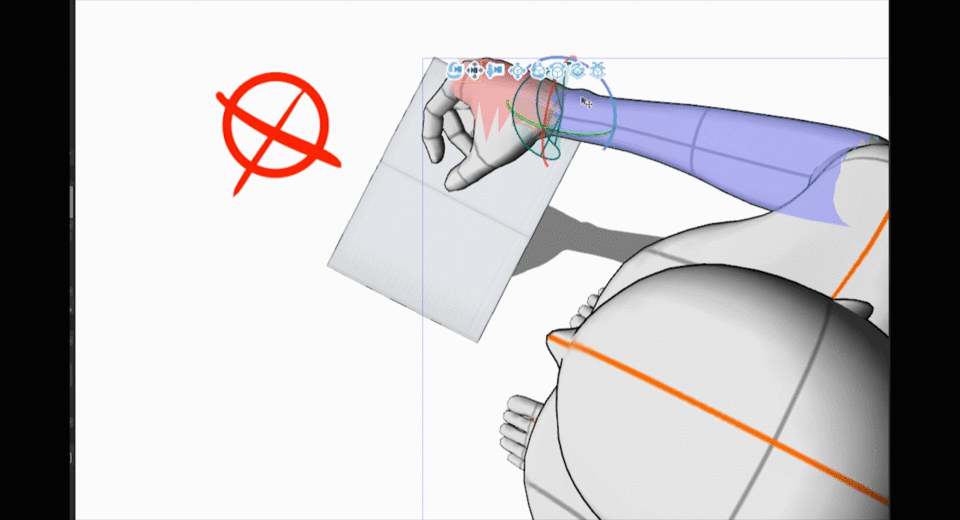
We must block the wrist and make strokes from the shoulder.

Last advice, we must flip the image.
If this is the first time you listen to it you might think it is weird, but it really helps you see the errors in your sketches, for example, if you thought my first sketch was correct, you will change your mind when you flip it.
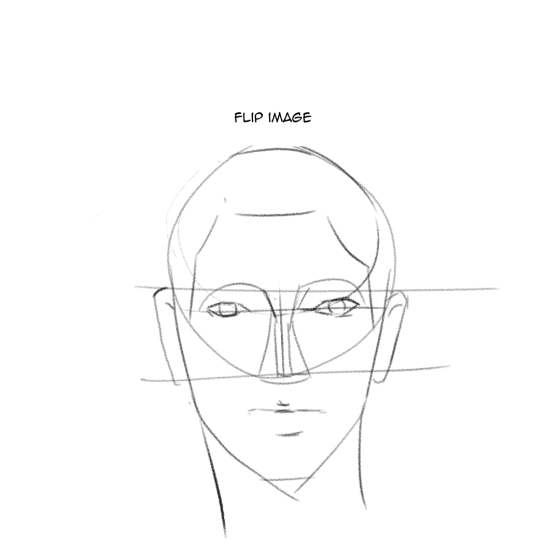
As you can see, it has many flaws. This correction process must be before line art.
Inked (Line art)
When you have all the finished sketch, (Plans, structures and proportions) it is time to start with the inking.
For this we can lower the opacity of the sketch layer.
And we can change it to blue to distinguish between the sketch layer and the inking layer.
Now let's create a raster layer above the sketch horse
We changed the name to line art and started inking based on what we learned previously.

Until finishing with the line art.
Finally we erase the sketch layer.
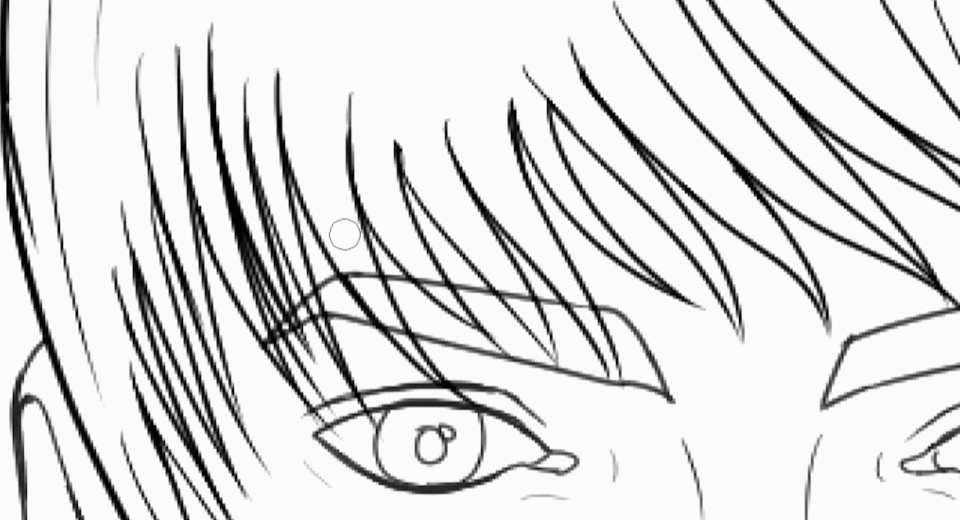
Advanced inking tips.
Line weight / Line thickness.
The drawing is a representation of reality. Therefore the objects that are on top of others or closer in a plane, must be represented with the thickness of the line.
Also the lines inside must be thinner than those outside.
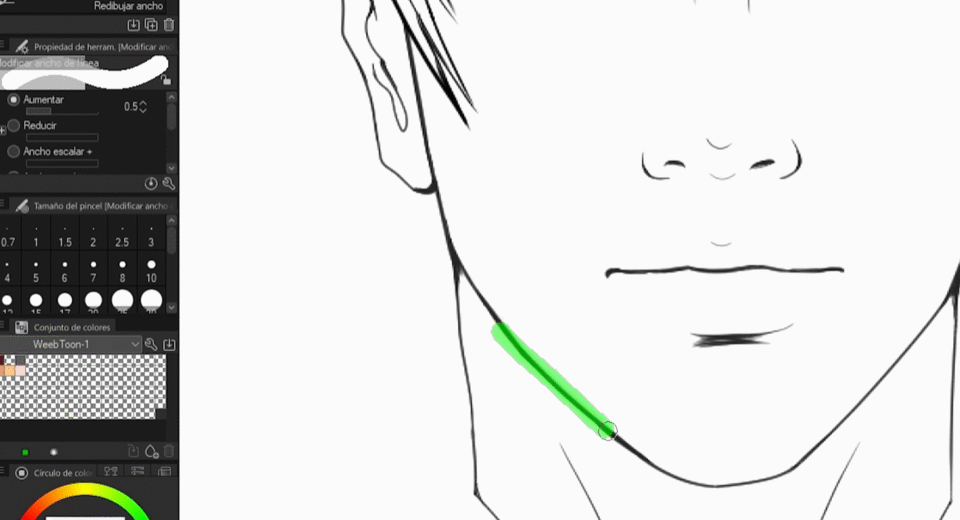
Bonus tip: Increase the size at tangents.
Example:
We add the aforementioned to the line art.
- Adding shadow to the inking in this way will improve the line art.
Add blur effect (Optional).
Optional effect:
Add blur to the line.
Steps:
1) Make a copy of the line art
2) Select the layer and go to Filters / Blur / Gaussian Blur ...
3) Set to number 10.
4) We accept and lower the blur layer down.
5) We lower the opacity to 60%
And finally it will be as follows:
Inking with vectors
Inking with vectors can save us time and many people consider it better than doing it in raster layers like we did before.
Advantages: We can delete when the line ends.
To add them we must click on this icon.
You can do the following with the vectors you ink: (Select vector eraser to be able to erase in this way)
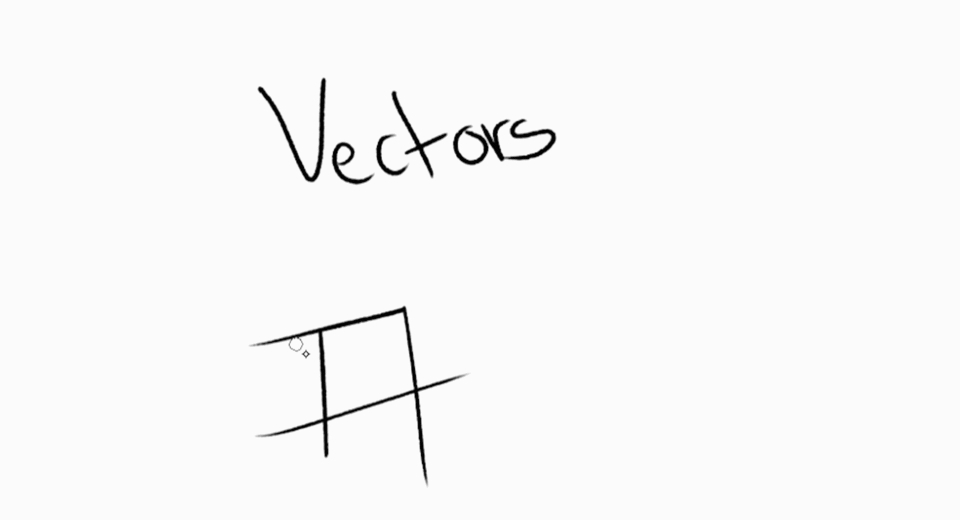
This tool is very good for this type of erasure.
We can also set the width of the line to our liking with the Line Correction tool (y). It is very useful to correct the width of the line and the weight.
Steps to do it:
1) Select the Line Correction tool:
2) Select the option to modify the year of the line.
3) Select reduce or increase.
Brushes, stability and pencil pressure.
Brushes that I recommend for the sketch:
Brushes I recommend for inking:
G-PEN (Clip studio default)
I recommend this pressure for beginners, but you can try a softer setting (Clip studio does this on automatic) when doing it by hand. In file / pen pressure settings ...
Ejersicios finals.
You can train your line art by doing 10-15 minutes of exercise a day.
1.- Circles of different sizes. (Remember you have to do it with your shoulder)
2.- Ellipses at different angles.
3.- Straight lines with the shoulder.
4.- Join the points. It consists of drawing random points and joining them with straight lines and continuous curves, if you do it every day before drawing, your level will increase and you will be better in line art.
Thanks for your attention. Hope this can help you improve!
Follow me on my social networks:
IG: Kevinhdezr_
Twitter:
Discover the best Tips here:
Users who liked this post


Comment