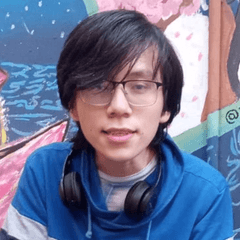
Let's do the portraits with the Grisaille method (Grayscale)
References:
When making a portrait, we normally copy the photograph of the person to be portrayed, however, to improve the portrait and not only repaint the same photograph we have, we can use different methods to make the portrait more interesting.
First of all, the photograph must meet minimum requirements for it to be a decent reference:
1) Decent resolution.
You should be able to see the details (You don't need an expensive camera for this). This is obvious but nevertheless we can make the mistake of choosing a poor quality reference.
2) Good composition.
It is preferable that you take the photo to make sure that the composition is correct.
How do you know if it is a good composition?
You can rely on the rule of thirds. This will help you focus the viewer's attention where you want. You can also search online for references of portraits that you like and apply them to your illustrations.
3) Decent lighting: As we mentioned before, it is preferable that you take the photo because that way you will dominate the shadow and your portrait will have good contrast if you are looking for that.
For example, you can learn the different lights that are in photographic portraits, such as chopped light, low light, or Rembrandt contrast light. It's all about your artistic taste. However, this is not a photography class, but having the basics will help you have a decent illustration.
With these principles in mind, we can choose a decent reference and start working.
The grisaille method
I use this method when I have some control over composition and shadows.
This method first uses values then the color is added. It can also help you if you have trouble coloring.
Note:
This method in its first steps uses the grisaille method, but the later step requires more advanced knowledge of color.
We will use the first method for this reference, although the composition could be better, we can improve it in the final illustration to our liking.
This method consists of the following:
1) Make an initial sketch.
Here we focus on the basic shapes of the face, the proportions and measurements of the model to be portrayed.
Sketch & line art
To do this we must do it on a canvas with a good resolution. This is the resolution I use:
To begin we must put the reference to one side of our canvas: File / Open (We open the file and drag it next to the bottom) So we will have the reference at hand. I do not recommend drawing on the photograph, because we do not want to copy it, we must try to capture the essence of the model.
Pencils that I use to make the initial sketch:
Don't you know how to make a good line art? My other tutorial can help you:
Add values
1) Observe the values:
To correctly add values to the sketch we must convert our reference to black and white.
We can do it as follows: Right click on the layer where the reference is located / New correction layer (j) / Gradient map.
We make sure that it is in black and white and we accept it.
important: Now in the gradient map layer we choose the mode: Color.
This way we will have our portrait simplified in values (In black and white) and so we can draw it more easily.
2) Add shadow and light.
Once you have made the first sketch, we must add value to the sketch. (Shadows and lights)
To be able to put the shadows correctly it is important to know the types of shadows, where and how to put them.
After studying the shadows and practicing, it is time to add value to the sketch always based on the reference.
We can do this with the following brushes that I recommend for this type of painting:
3) Refine the work:
To be able to observe in a better way, let's lower the opacity of the line art layer.
As you can see, when lowering the opacity of the line art we must detail the painting more.
In order to further detail the portrait, we must work on the types of borders:
4) We apply this type of detailing to the shadows in this way:
5) Hard work:
After a few hours detailing (Hair, skin, lights and shadows) it could look like this:
This takes time and it is important to be patient - never give up and practice every day!
Add color
Now we must change the color for a warmer one, for this:
Right click on the portrait layer / new color correction / balance layer ...
We adjust the balance to a warmer color, this will depend on the values of your portrait, in general this configuration worked for me in this case:
Now the image will be as follows:
Now we make a palette by selecting the color with the Eyedropper tool (i)
Tips: Always get pale colors to copy the fidelity of these, or if you have more experience, you can make your own palette.
Now we make a new raster layer and select the color mode:
And we add color from the palette to the portrait.
We do the same with the eyes, lips and hair.
After a few hours it will look like this:
Now we add different layers of adjustments such as: Color balance and tone curve.
We add a background, and after hours of detailing we would end this way:
You can also do different poses with this method.
Thanks for everything! I hope I have helped you better understand this fun method.


Comment