
Introduction
Hi,
In this video tutorial, I talk about transparent materials. I cover some basic physics describing how light interacts with transparent materials, go through a few techniques in Clip Studio Paint, and walk through my thinking process when doing studies and full on creative paintings from imagination related to transparent material.
Once you have a deeper understanding of how the light works, it will be much more easy to understand and paint your own transparent objects, ranging from glass to water!
Quick Tips on Lighting Transparent Materials
To understand how to paint transparent materials, we need to know how light behaves with them.
All transparent materials reflect some light and refract (transmit) some light. For example, you can see through a glass display, but you also see some bright reflections of the light source, and maybe even see yourself reflected in the glass!
Let's turn a basic relatively matte sphere into a transparent one, take a look at the following differences.
The most obvious difference is that we can see through the transparent sphere, but there are more subtle differences too.
Because of refraction, the image that we see through the sphere often gets distorted by varying levels, it is also usually less clear through a transparent object, with softer and even lost edges, you can distort the image inside the sphere using a filter such as Filter -> Distort -> Strong Blur.
Notice that the highlight is still in the same spot as a regular sphere. This stays the same, even if the object is transparent.
However there can sometimes be what's called a caustic effect. You can notice this on the cast shadow, the transparent object can concentrate the light onto another surface -- even on it's own shadow!
One way to break down a transparent object, such as a glass sphere is into three sections.
1. A regular sphere, with the centre erased out so that we can see "through" the glass
2. A layer of dark value surrounding the object, because the glass is usually thicker on the edges, it is harder for light to go through the object.
3. A layer of light reflections (not as light as the main highlight), these are fresnel reflections which we will talk about.
The main takeaway for art for the Fresnel equations is that light coming in at a grazing angle, (think of the light just grazing the surface of the object) will product more reflections. On the flip side light coming in at a more direct angle, will produce more transmission, the light is more likely to go through the object and refract.
Take a look at this illustration I did for this tutorial. Notice that at point A we can see through the surface of the water and see the fish below.
This is because the light is coming in at a more direct angle when we are close to an object - this is explained much more in-depth in the video.
Meanwhile, light hitting point B, further back from our view, we see reflections of the rocks by the shore. Here, the light comes in at a larger angle, a grazing angle, before reaching our eyes. This is why the reflections dominate.
This is a rule that can be applied in general when painting scenes of bodies of water from a low vantage point. The further away towards the horizon, the more reflections dominate, the closer towards us - we can see more through the water.
Here's a painting study of a photo I took of a transparent tea pot. You can see how these lighting effects apply to everyday transparent objects.
Note the top edge of the teapot has that prominent blue reflection, a result of Fresnel reflections. Also notice the caustic effect in the cast shadow. Again, you can see refraction in BOTH looking through the glass part of the pot AND the glass + water part of the pot.
Quick Painting Technique Tips for Clip Studio Paint
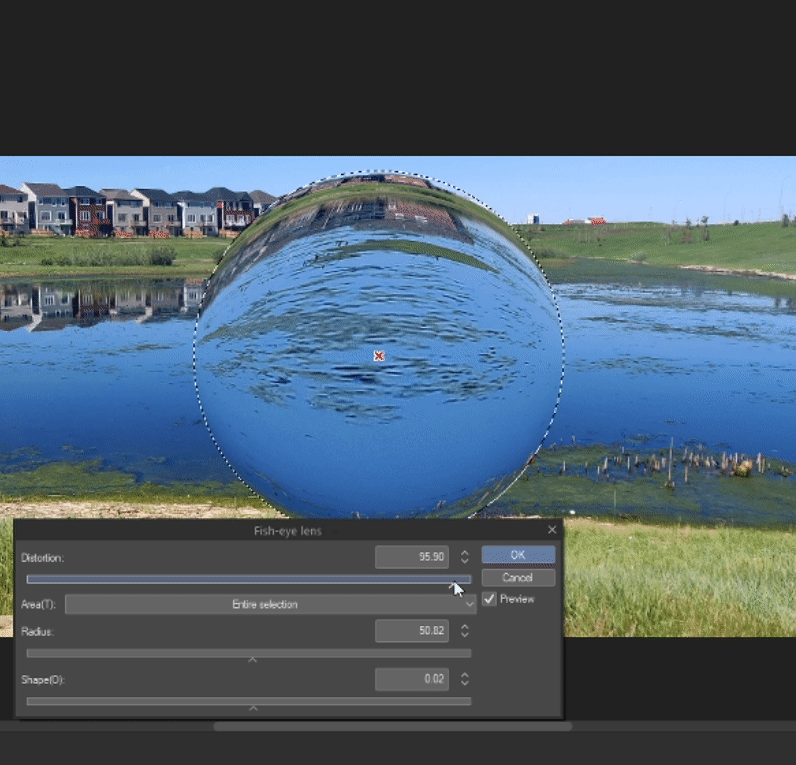
One cool way to get the refraction affect is to utilize the Fish-eye Lens filter in Clip Studio Paint, you can access it by going into
Filter -> Distort -> Fish-eye Lens. Here I am applying it to a circular selection with the lasso tool.
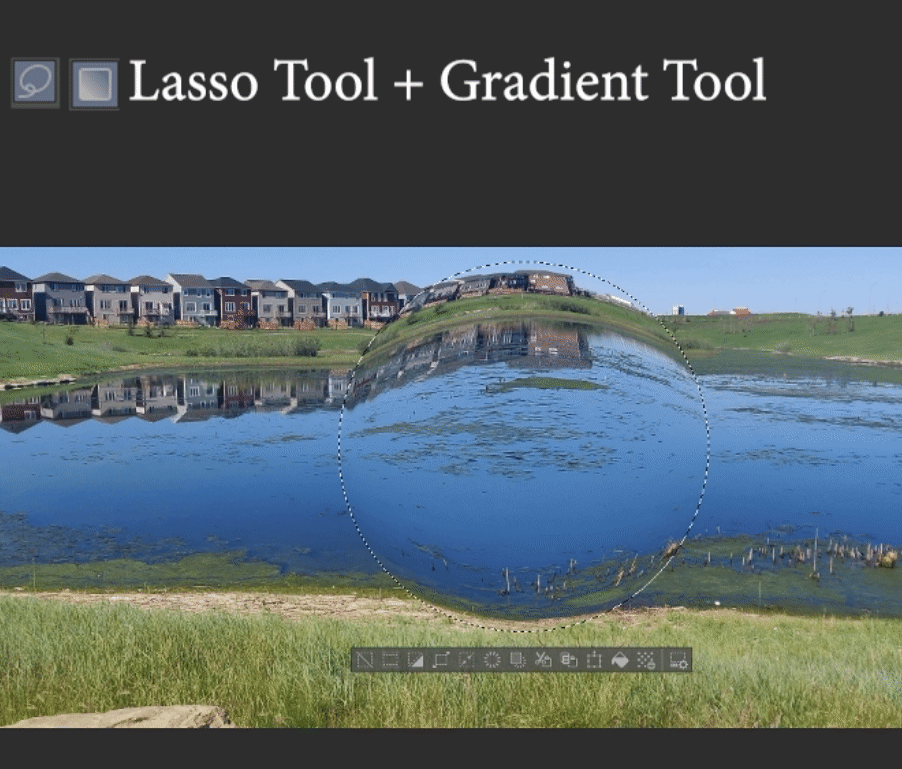
For transparent objects like the glass pot above, it is very crucial that you get hard edges to define the outline of your object! My favourite way of doing this is utilizing the lasso tool with brushes or with the lasso tool and the gradient tool. This can be used to get the dark edge around a transparent sphere for example, before adding on more reflections.
Just by knowing a little bit more and having a deeper understanding of light - you can very quickly create a giant crystal ball and place it in a scene!
With the right tools in Clip Studio Paint, this can also be done very quickly and efficiently!
Watch the Video for More Indepth Information!
Here I summarized some of the contents of the video. In the video, I go more indepth explaining the basic physics behind the light with plenty more examples, a painting process timelapse video of the title illustration, and more general tips in Clip Studio Paint!
Thanks for reading!
Linco
Users who liked this post


Comment