BLENDING MODES | Merger modes Practical guide
Hello everyone! In this tutorial I am going to explain the blending modes in clip studio paint ex. Starting with a brief technical explanation about the different modes and which are the most commonly used. Then I am going to share a series of practical examples.
This year I decided to do tutorials in Spanish, since there are not as many as in English and thus contribute a little to the Spanish speaking community. I have my version of Clip studio in English, so I will name some terms of the interface in that language, I hope it is not difficult to understand. I will also subtitle my videos and some images in English.
Video tutorial [Eng Subs]
To see my process and a more advanced explanation watch the video tutorial. If you need, activate the English subtitles ▼
1. Introduction to blending modes | Blending Modes
Blending modes are one of the most versatile tools in digital work. In the video I give an explanation of the different modes, how we can classify them to make your choice easier, and which are the modes that I consider most useful.
You can read this article for more information
We divide them according to the result that is obtained.
Darken: results in darker colors
Lighten: opposite of darken
Contrast: Combine complementary modes such as multiply and screen, to darken or lighten as needed by increasing contrast. Usually 50% gray disappears
Difference: They use the differences between the base layer and the blend layer to apply the effect, it can be used for a specific effect, I don't use them much.
Component: Allows us to change the hue, saturation and brightness.
An interesting technique is to use a curve adjustment layer and place it in brightness mode, in this way we do not modify the saturation of the colors and we only correct the lighting.
After experimenting with the blending modes we narrowed down the list to the ones most useful for our work.
It is always a good idea to experiment with which blending mode gives the best results in each situation, but with a reduced list we will improve our performance.
These are my favorite modes.
I especially use, Multiply, add glitter and overlap.
2. Basic operations
In order to work correctly with the blending modes I use some basic functions.
Layer and clipping masks, opacity control and selections.
In this way it is very easy for example to paint shadows revealing the light instead of trying to add the shadow by painting it.
3. Simple comic coloring
Using the basic operations and blending modes like multiply and superimpose it is very easy to get good results in a simple comic style. This process can easily be transferred to other more detailed styles without any problem.
We create a layer on top of the base colors and use a clipping mask. In this case create a fill layer to show the possibilities, using a fill layer it is easy to change the color of the shadow.
I place this layer in multiply and lower the opacity.
Then I create a layer mask and painting with transparent I begin to sculpt the shadows.
We can use hard edges like cel shading or blend with blurred edges.
One of the advantages of using multiply mode is that we can change the base colors and the structure of the shadows are perfectly maintained in most cases :)
Once satisfied with the shadows, I create a layer in the overlay mode and paint gently to add highlights, details in the hair etc.
Finally create a layer in multiply to give color to the cheeks and other details, and then a layer in Add shine to give the last details such as the shine in the eyes or the hair.
The other panel did it with a very similar process.
We can use this process in other styles too, you just have to know how the blending modes interact and experiment.
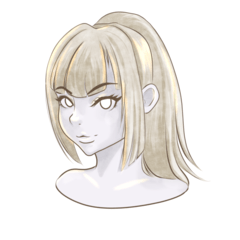
In this case, take an anime-style sketch quickly to a simple finish.
2. Textures
One of the most common, simple, and useful uses for blending modes is adding textures.
The modes I usually use for this are Multiply, Color Burn, Screen, and Overlay.
The result depends on the texture we have.
In this case I liked the color burn mode as it gives contrast and saturation to the simple sketch.
3. Simple materials
We can use photographic textures to easily add materials to our concepts.
This time quickly make 3 shields of different materials. First I did a simple render as a base, then each texture was placed in place with a layer mask. The correct blending mode and basic color settings result in clear and detailed materials.
We can follow the same steps and experiment with other materials, in this case 2 species of magic spheres.
4. GLOW Effects | Magic glitters.
We can use the basic techniques that we have been using to make interesting effects.
In this case I combine layers with filters to achieve 3 concepts of magic swords.
Final thoughts
Blending modes are a very versatile tool, I just gave a few examples that I found useful, but I had many more use cases that I did not include for personal reasons.
I hope you experience, discover and share amazing uses for CLIP STUDIO PAINT tools.
May this year bring good things to all of us.
Blessings. Until next time!


Comment