
Hi! This is Mana
On this topic, let’s talk about the basic of Walk Cycle using Keyframes on Clip Studio Paint.
We will be using a single image here and we will be animating using Keyframes. This process is doable on Pro, Debut and Ex version of CSP. The .CLIP is also available at the end of the article so that you can follow along or you can animate that yourself.
The video process is here:
The audio got messy (my audio is always messy but this time, it got really messy), but I hope it’s understandable.
I will try to make this article the same as the video so you can follow along using this written version as well.
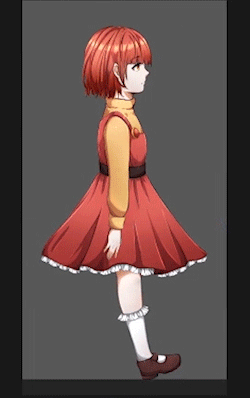
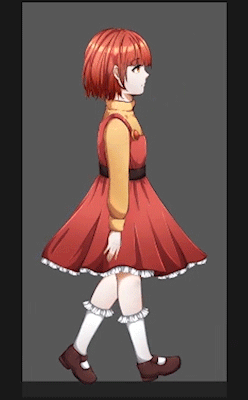
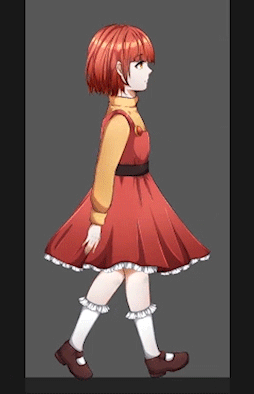
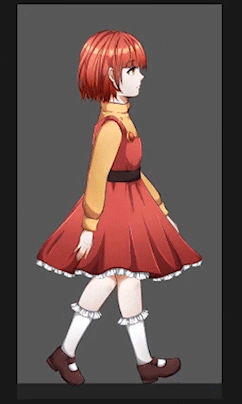
This GIF below is 310x600 ; the original file is 1700x3286 (above 10 MB)

Animation on Clip Studio
Just a quick note on Animation on Clip Studio.
• CLIP STUDIO PAINT PRO
- This can only animate at a maximum of 24 Playback Time. (3 seconds if you’re on 8 FPS)
• CLIP STUDIO PAINT EX
- Can animate for an unlimited Playback time.
THIS TUTORIAL IS DOABLE ON PRO VERSION!
WHAT IS KEYFRAME ANIMATION
Keyframe Animation is an animation method in which you animate the graphic itself – meaning you are not drawing frame by frame.
Keyframes is from the word; Key meaning movement, Frames which is the image/shot per second. Frame is the measurement of Time in Animation.
And so the most accurate description of this is “We move (animating) ‘something’ on a particular time”
Again, please take note; WE ARE MOVING SOMETHING
We are not drawing frame by frame, we don’t even need to redraw any inbetweens – we move the object itself.
Preparation
If you want to animate a single image, we need to cut that drawing into parts; it will take awhile but keep in mind that the results will be worth it.
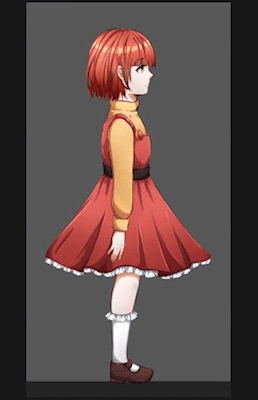
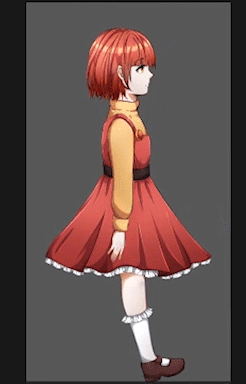
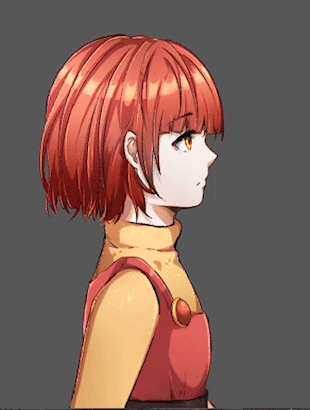
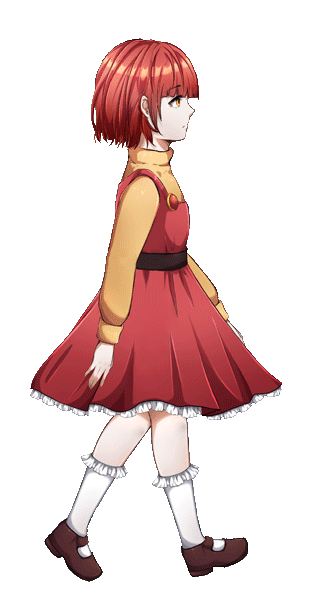
I will be using this drawing of mine; her name is Monica.
I use the [Selection Area] Tool > [Lasso] Sub Tool
You can use whatever Selection tool that you want.
The way I Cut it is I select the part first where there’s no collision, for example the ARM.
Using the Lasso Tool; select the whole area of the ARM; that’s the arm itself, the forearm up to the hand. Once selected, press CTRL + X to Cut and the selected area will now be at another layer.
Now we have to paint the hole that was left; use whatever coloring method that you want. I always go G-Pen first > the Blending Brushes (Air Brush)
Continue cutting until you have all the parts that you need
All of the parts that I’ve cut were:
• We have a Hand; which is the Forearm and the Hand itself.
• The Arm; which is the shoulder and arm itself.
• The BackHair; like the name itself, it's the back hair.
• The Body; or this is like the area that has no animation, this is the bangs, head, neck, and upper torso.
• We also have the Skirt; like the skirt itself
• We have a FOOT; not FEET. We need this for Ankle Rotation
• We have this Lower Leg; which is the knee to the ankle
•Upper leg; which is supposed to be the thigh but since the animation doesn't call for this area to be visible, we don't need to draw the entire upper leg.
Parenting
Parenting is where we connect multiple layers (children) to one layer (Parent) and when we make the Parent move, the Children follows.
Clip Studio Paint doesn’t have Parenting, but we can Group layers into a Folder and that Folder will act as the Parent.
We will be using a Regular Folder, not an Animation Folder.
• Let's start, grab the HAND and ARM > Right Click > Create Folder and Insert Layer > rename this as ARM
• Then click the BODY > up to the EyeClose > Right Click > Create Folder and Insert Layer > rename this as UPPER
• Then let's choose the FOOT and LOWER LEG > Right Click > Create Folder and Insert Layer > rename this as LOWER LEG
•Then click LOWER LEG and UPPERLEG > Right Click > Create Folder and Insert Layer > rename this as LEG
*Why'd we separate the Lower leg to the Upper -- because we're going to animate the KNEE, it needs to bend and the FOOT needs to follow this leg area.
The LEG Folder is the whole leg.
The LOWER LEG is the knee downwards.
• Then click every folder and layer (except for the BG) > Right Click > Create Folder and Insert Layer > rename this as GLOBAL_Monica
TIMELINE
We start animating this now.
Get your Window > Timeline
On the Timeline Toolbar; select Make a New Timeline
Timeline name: Monica_Walk
Frame rate; 15
Frame number, starts at 1
Playback time; 17
Image Interpolation, this is a personal preference, but I prefer Nearest Neighbor so that it looks sharp, you can choose whatever interpolation that you want
Click Ok when done.
Before anything else, change your Playback settings according to mine, so we get the same results.
Go to ANIMATION > Playback Settings > Make sure you check the following
• Play in real time
• Loop Play
• Render Before starting playback
• Prefer Quality
ADDING KEYFRAMES
DO NOT USE THE "ADD KEYFRAME' ON THE TIMELINE PANEL.
I don't recommend that. If you use that, you'll add Keyframes on to the areas that doesn't need animation.
Example; you only need to change Scale, but if you click that button, you'll also add Keyframes on Position and Rotation.
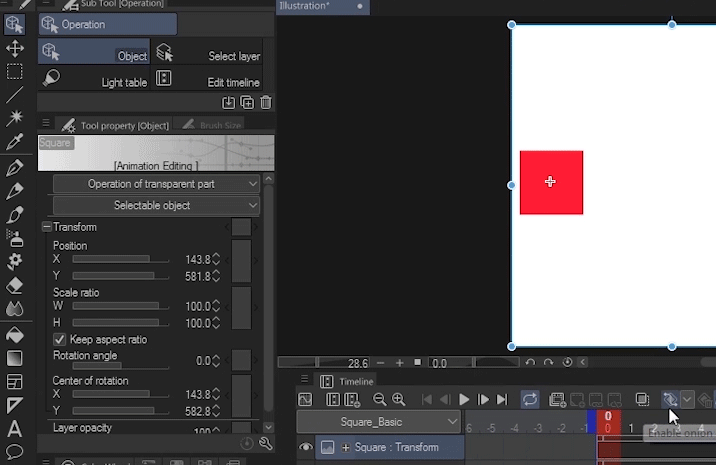
Please use the Transformation Box under [Operation] Tool > [Object] Sub Tool.
Put a Keyframe using the box near the Transformation
-- Sadly, on CSP, if you use that, it will also add keyframes on the area that you didn't click or animated. For organization sake, click the boxes again to remove the Keyframes you don't need.

PREFERRED WAY OF ADDING KEYFRAMES
• Choose the layer that you want to animate on your Timeline Panel
• Click the + icon
• Click the > icon to expand the Transformation Options
• Click the Transformation that you want and add the value using the Transformation Panel at your [Operation] Tool -- [Object] Sub Tool
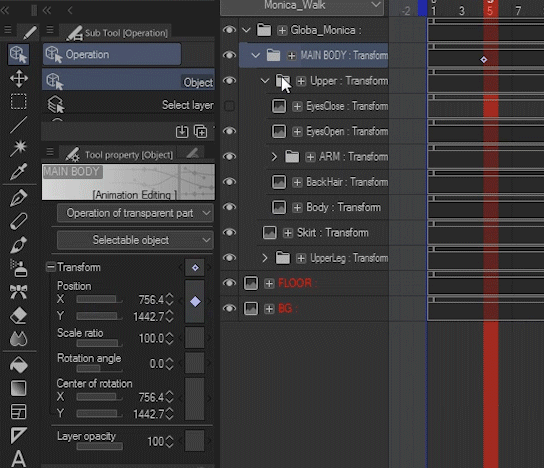
Animation | MAIN BODY
Two things I forgot to mentioned:
ONE you will be changing Anchor Points a lot here, if you don't want that, you can Convert your Layers into an Image Material
TWO; I forgot to Parent something. Under GLOBAL folder; Grab all of the character layer, and Right Click > Create Folder and Insert Layer > Let’s call this MAIN BODY.
*my Global is wrong spelling, sorry!
Let’s start animating here at the MAIN BODY Folder > Enable Keyframe on this Layer
Make sure you’re on Operation > Object Sub Tool
Change the Anchor Point of the MAIN BODY FOLDER and put it on the torso.
*Hover your mouse at the center of the selection; your pointer will change. Click and Drag the Anchor Point to the desired location
WHEN YOU CHANGE AN ANCHOR POINT, A KEYFRAME WILL AUTOMATICALLY BE MADE.
-------------- You can delete that. Since there's no animation inside that Keyframe
TIP: When making an animation; ALWAYS START WITH THE BIGGEST MOVEMENT.
The biggest movement when you’re doing a Walk Cycle is not the legs, it’s the whole body. The body goes up and down as you take steps.
So, we will animate the body going up and down using the POSITION Transformation.
Okay. So we’re going to follow an animation reference.
This is the same animation reference that I use for my 3D animations and just tweak them a bit.
Let’s start here at the. Again, we are going to animate the POSITION Transformation
Make sure you have MAIN BODY Folder selected:
● Frame 5, this is our REST, the normal height position. Just put a Keyframe there.
● Frame 3 – body goes down a lot, so let’s go Position Y; 1480
● Frame 1 – is less than Frame 3 so we go Position Y; 1450
● Frame 7 – body goes up so Position Y is, let’s say 1390
● Frame 9 is same as First frame.
So go to the First keyframe > Right Click > Copy
Go back to Frame 9 > Right Click > Paste.
● Okay, so let’s just copy the 2nd to 5th Keyframe > Right Click> COPY > Let’s go to Frame 11 > Right Click > Paste
When we Play that:
The Body goes up and down
Animation | LEG
Let’s start animating the Leg
Let’s go to the LEG Folder.
Since MAIN BODY Folder is already Keyframe Enabled, the folders and contents inside are also already enabled so let’s just choose our [Operation] Tool; [Object] Sub Tool.
Change the Anchor Point of the LEG Folder.
Hide the skirt, so we can place the LEG Folder Anchor Point at the top of the Leg.
Now let’s go here to the LOWERLEG Folder; let’s change this name to KNEE.
Let’s hide the Skirt and the UpperLeg Layer > Place the Anchor Point of the KNEE on it's top center
Let’s move to the FOOT. Place the Anchor Point on the center shading of the sock, so when we rotate this, we won’t get any black spaces.
-----------------------------------------
Now let’s go to the KNEE
Let’s Key it first using the LEG Folder as Keyframe reference; we will use the ROTATION ANGLE here.
• So First frame, there’s no movement but we still need to Key so that this holds this position. Key on Rotation Angle.
• Fifth frame, no movement, let’s still key again on Rotation so the pose holds.
• Nine, no movement, but let's key it at 2.6, just to add some bend..
• 13, there’s a movement, but let’s key the end first.
• End Movement, Let’s Key on rotation; 0.0 > Drag the Keyframe to the very end of the timeline to loop.
• Let’s go back at 13, what’s happening on 13th frame? the leg folds.
So we need to rotate this Knee around 95 degrees.
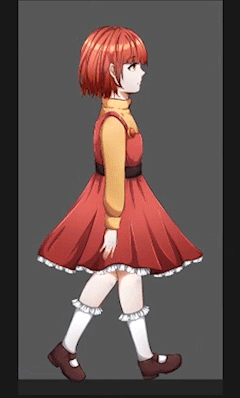
And if we play that:
Animation | FEET
The animation still looks stiff
So let’s animate now the FEET to add details.
Again, we will key the ROTATION ANGLE
And we will Key the FEET using same Keyframe formation as the other two above.
• First Keyframe > twist this up, -4 looks okay.
• Second Keyframe – This is flat on the floor, so this is fine. Just leave the original Resting key.
• Third Keyframe – let’s twist this a bit so that the tip of the shoe is pointing at the ground.
20 degrees looks okay.
• Fourth Keyframe – or frame 13, Feet is pointing to the ground, so we need to rotate this – 20 looks okay too.
• Last Key, let’s just copy the first one keyframe and paste it here.
When we play this:
This looks okay, but it looks weird because we’re only seeing one leg, so let’s make the other leg.
Animation | LEG DUPLICATE
• Click the LEG Folder > Right Click > Duplicate Layer
• Now Click on the Duplicate Leg > Drag drag it under the LEG Folder > rename the duplicate as BACKLEG
• Let’s expand the contents of the duplicated folder and select the first two Keyframes of the BACKLEG folder > Delete Keyframe
• Now select all the remaining Keys and Drag them to the beginning of the timeline.
Let's add now the other Keyframes.
Hide the first LEG Folder cause it’s gonna get confusing.
• So 13th frame of the BACKLEG. Leg is at rest at 13th frame, so just turn everything into 0.0
• And on the Last key, just copy the first keyframe. Make sure to drag the PASTED Key at the end of the timeline so we can get a loop.
Now let’s unhide the first LEG.
Let’s play this
Animation | LEG SPACING
If you feel like the legs are too close to each other, we could give them some space.
Let’s go to the First LEG Folder; again FOLDER.
• First Frame; Key POSITION
• 9th frame; Key POSITION
• Last frame; Key POSITION
First and Last POSITION Key [X Axis] frame will be 900.
Middle POSITION Key [X Axis] frame will be 800.
Do the same with the BACKLEG but
First and Last POSITION Keys [X Axis] are 800;
While middle POSITION Key [X Axis] is 900.
Animation | ARM
Ok, let’s animate now some extra details or the accessories.
Let’s start with the arm, ARM Anchor Point put it on the shoulder. Rotate it to check.
The Hand; this is the hand to the elbow; change the Anchor Point to the elbow
-----------------------------------------------------------
Ok, now we start here on the ARM Folder; Key the ROTATION ANGLE;
Add a Keyframe on the 1st frame, 9th and last frame
• First keyframe, let’s pull this back, so we got a 20.
• Middle keyframe; let’s go -20
• For the last Keyframe, Copy the first one > Right Click > Paste > Drag it to the last keyframe so it overwrite.
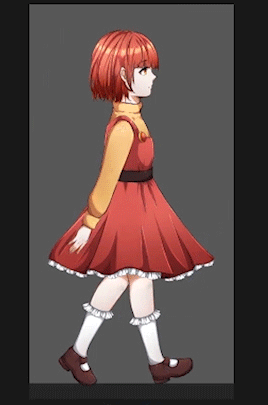
Let’s play this,
This looks ok. So let’s animate the hand or the Elbow area now.
Again, we Key on the Key Movements.
So Rotation Angle on 1st frame, 9th and last frame.
• So on first Keyframe; let’s bend the arm a bit – 14 looks okay.
• Second Keyframe - -20 looks good.
• For the last Keyframe, Copy the First One > Go to the end of the timeline > Right Click > Paste > Click and Drag to the End of the timeline.
And we play this, this looks good~!
Let’s add another arm.
• So again, like before > Right Click the ARM Folder > Duplicate Layer
• Drag this Duplicated Folder under the SKIRT > rename as BACKARM
• Okay, Select the FIRST Keyframes on the BACKARM FOLDER; both on the Folder and the layer itself > Delete those.
• Now Move the remaining Keyframes to the beginning of the timeline and Copy the now first keyframe to the end of the timeline > Remember to drag the last keyframe to the end of the timeline
When we play that:
Animation | Back Hair
Ok, what else can we animate. Let’s go to the BackHair.
Change the Anchor Point, put it on the top of the head.
• Frame 5 and 13 are REST position so we Key the Rotation Angle as is, and animate every other Key Movements.
We don’t need to do something hardcore,
• just animate the First Key; on Rotation Angle, let’s say 2 degrees.
So Copy and Paste the first key to the 9th and last frame.
*Animation | Skirt | Upper Body
These next parts are optional, you can animate these if you want.
We can also animate the SKIRT,
Put the Anchor Point here at the top of the skirt itself;
---------------------------------------------------
Let’s also animate the Upper Body; again this is OPTIONAL
We will animate this the same way we did with the BACKHAIR; basically two keyframes and just copy pasted each time.
Change the Anchor Point on the same location we did with the skirt.
We will key the Rotation Angle again.
• First frame – first Key – change the value to 0.8
• 5th Frame – second Key – change the value to -0.4
• Now select both Keyframes > Right Click > Copy > Go to Frame 9 > Right Click > Paste
• So we’re missing a Key at the end > Go to the first Key frame > Right Click > Copy > Go to the Last frame > Right Click > Paste > Click and Drag to the End of the timeline so we get a loop.
Now when we play this, it’s gonna render for a bit.
Export | Image Sequence
Okay, we are done, now let’s export this.
Hide the backgrounds
Go to File > export Animation >
My favorite way of exporting is Image Sequence.
Image Sequence will render the animation frame by frame so you can composite this yourself. You can turn this into a GIF or an video file if you want to.
--------------------------------------------------------
I prefer Image Sequence because I have the raw files and I can do whatever I want with them.
Like, this export file has been used on my video tutorial; I used Premiere Pro for that.
and I turned this into a GIF with Transparency; used Adobe Photoshop to make a GIF
.CLIP File - DOWNLOAD + Final Thoughts
You can get the .CLIP file of this so you can try it out yourself.
Again, this is just the basic animation. Feel free to exaggerate more movements if you want. Extend the time, or just try out the project yourself.
Also, please ignore the Outro Preview of the video. I was supposed to make two videos, but I got sick and some files got corrupted.
I will still post that preview someday, I'm still trying to recover the raw files for that.
Anyway, I hope this was helpful!
Cheers! ;u; )///
Users who liked this post


Comment