
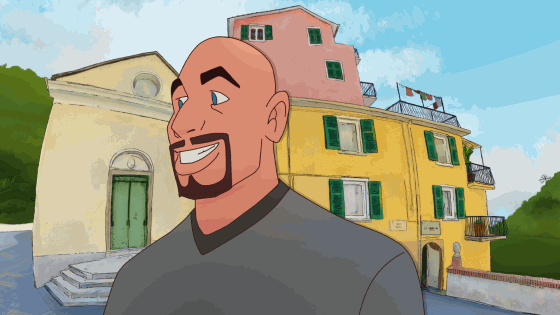
In this tutorial, I want to explain how to create a moving 360 spherical background. I animated a character looking around a small Italian village, to make the scene more interesting. I used a 3D sphere with a spherical painting for the animated background. The video on YouTube is this one:
To create the background that goes around your character, you can make a long painting, this is simple but the disadvantage is that there is no movement of any elements of the painting when it goes around, so the image looks flat and doesn’t feel real, but if you use a 3D sphere the movement you get, distorts the edges of the image, this happened typically in photographic lenses, and this gives the animation a more realistic and three-dimensional look.
The spherical pictures are easy to create, you can use your cellphone, or with a digital camera and software like Affinity Photo, Photoshop, and many others, you can stich images and generate the spherical file. Another option is to download pictures from google maps, which is explained on this website.
https://svd360.istreetview.com/
After you get your image, the idea is to trace it, to generate a drawing of the landscape. This is the best option because the five-point perspective, or spherical perspective, is very difficult to achieve by hand.
For the illustrated effect, there are some auto actions that generate a simulated painting result, but I don't find them convincing... I tried to use them but the result always looks very bad.
I create a Modeler file (Modeler is a free software from Celsys the same company as Clip Studio) that contain a sphere, and you can download it for free in:
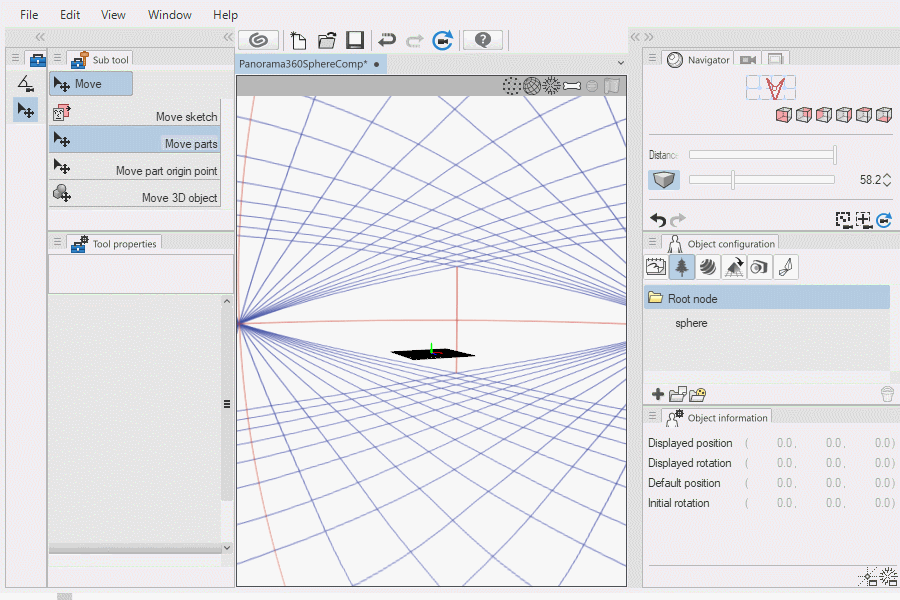
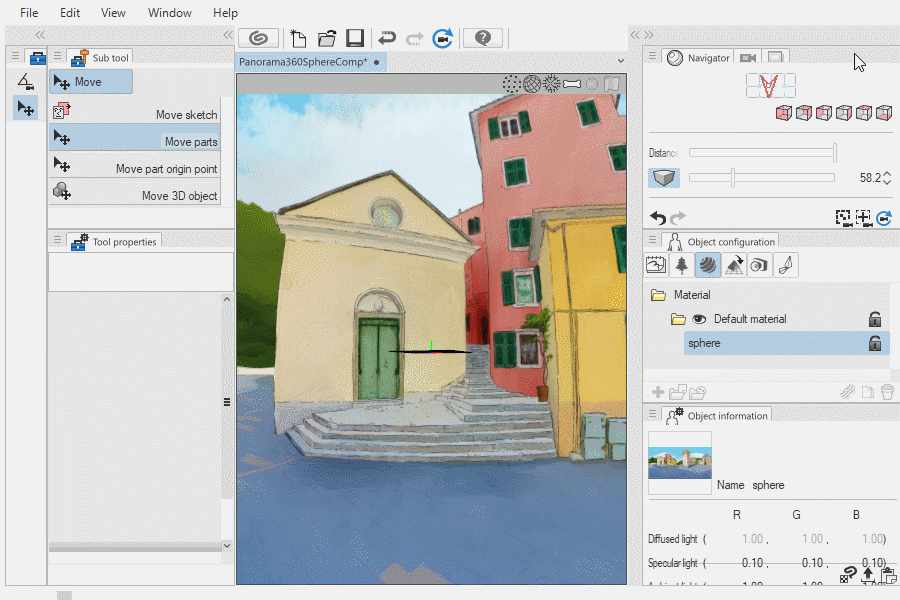
This file has a sphere with a 5 point perspective guide, but the idea is to replace the texture for the background of the spherical perspective previously created. To do this, using the move path tool, go to the material tab and enter the <Material folder>, then to the <Default material folder> and click to the <Sphere material>, in the object information tab, select “Edit in PINT” the icon of the square checker with clip studio logo over it, this will open the image texture in Clip studio, where you can edit the image. Just replace the image opened, for the one you created previously.
Now you can save the new material, go to File/Register as a new material, name the material and select a folder where to save it.
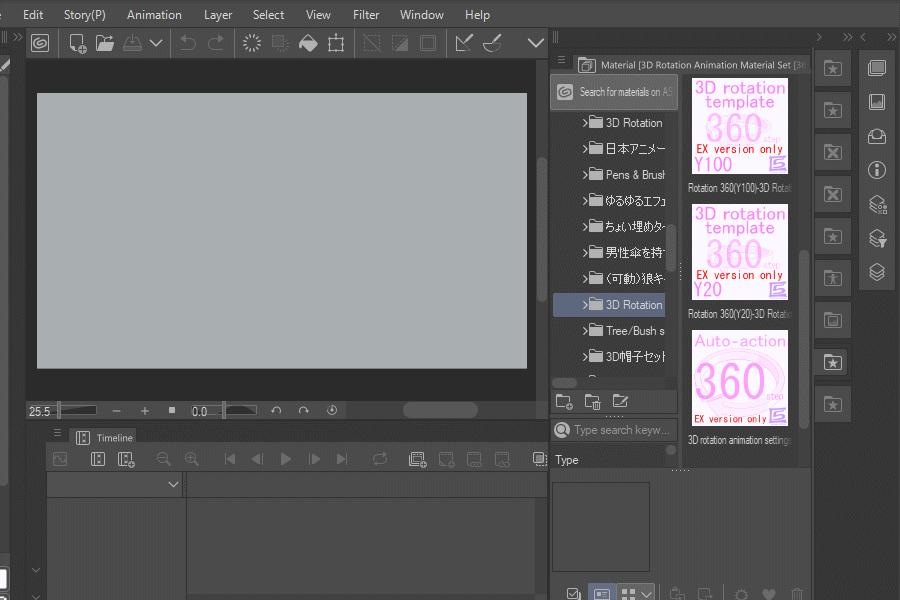
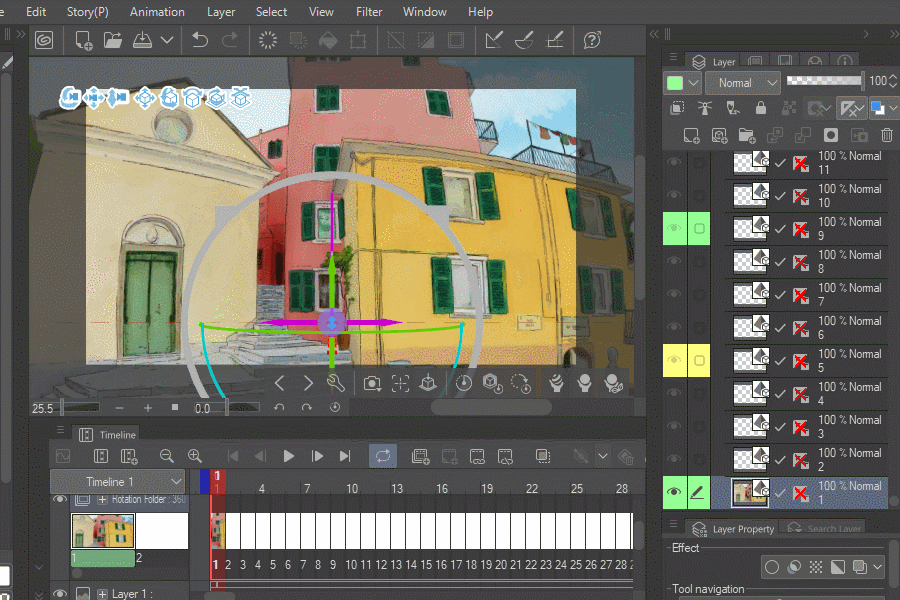
In this tutorial, I used a material from the asset store called <3D Rotation Animation Material Set>
This material allows you to make 3D layer, to turn around in the timeline, so to used it, first go to the material folder, drag the file you are going to use, this file contains an animation folder with 360 cels, the Y20 means the height of the camera, I used the lower angle possible. Then you can find the sphere material and drag it on the canvas.
Using the Operation tool, copy the 3D Sphere and paste in the first frame, to make the animation visible, go to Animation/Edit track/Batch specific cel, in the menu change the <Specific value (N)> to <Specify name of existing animation cel> and OK. Now you can paste the Sphere in cel one, adjust the size, changing the scale until you are satisfied.
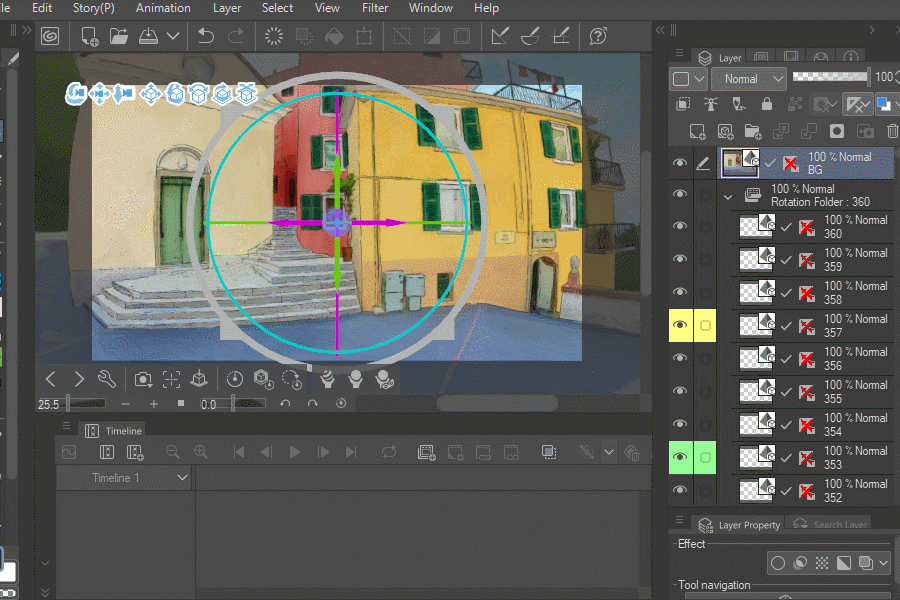
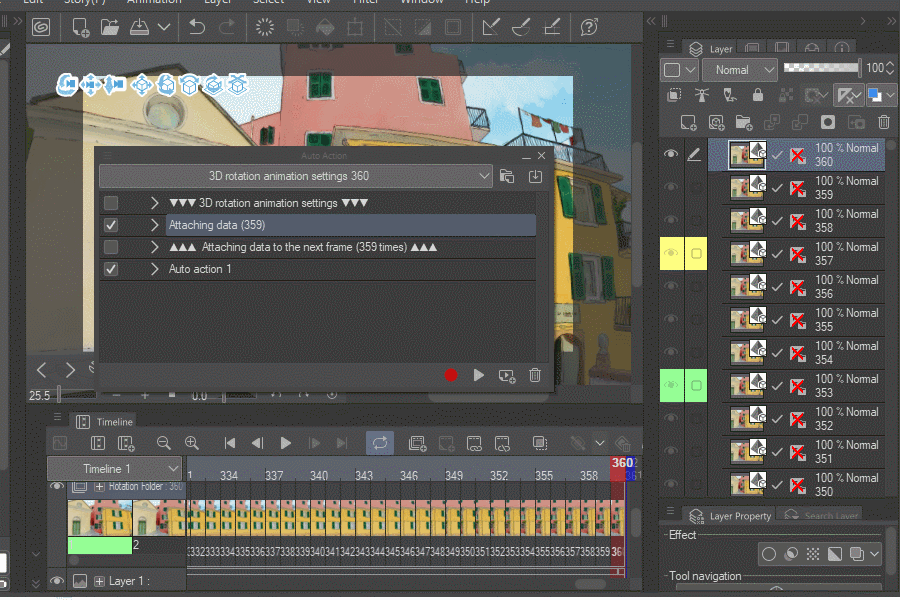
The material has an auto action that copy and paste the model in the 360 frames, so go to Window/Auto action, and there, just play the action name <Attaching data (359)>, let the action finish, it will take some time.
Finally you can play the animation. There are multiple applications for this technique using the Sphere material, one is making the animation yourself by moving every model to the position, or creating your own templates. My YouTube video explains how.
Thank you, If you have any questions please ask, I'll try to answer all the questions, and please visit the YouTube video I made, there is a more in deep explanation there.
Users who liked this post


Comment