
My Entire Process - What's YOUR workflow?
After being asked multiple times how to paint a webcomic, I thought I'd make a start to finish video on how to start the painting process of a panel. This process works for webcomics and illustrations, and again, is my own personal workflow. Use what parts are helpful to you.
So, paint along with me as I showcase how each of the previous videos: the Speed Up Your Webcomic Process video and the 3D Reference Masterclass come together to form a workflow that I find both efficient and fun.
Hope it helps!
-Aerow
P.S. I make a webcomic in my spare time, if you want some fantasy / adventure / romance vibes, give it a read. Who knows, might help the algorithm like our story :)
Building a Workflow
Building a process that you find both fun and officiant can be a bit daunting at the start. It's important to keep in mind that this workflow will change and grow as you learn more and more about the creation process itself.
My personal process can be boiled down like so:
1- Rough Sketch
2- 3D Reference and finding inspiration reference (very important, don't skip!)
3- Final Sketch
4- Inking
5- Flatting
6- Painting the Background
7- Painting Overall Shadows
8- Painting Detailed Shadows
9- Compositing the Final Image
10- Export and Post!
1 - Rough Sketch
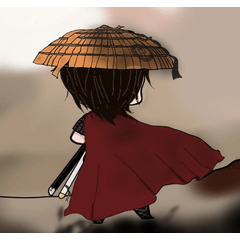
This one is very clean for my rough sketch, I'll be honest with you. I did it prior to the video (oops) and then tidied it up for the video itself. My roughs are never this clean haha, I just wanted it to be easy for you guys to see what it was I was going for... rather than my normal rough sketches.
Don't feel like you need this level of tightness for a rough.
2- Reference
Building reference is super important. For this illustration, I have reference for:
Initial Pose Reference
3D Character Reference
Ambrosia's Character Turn Around Reference
Color Reference
Yes, I have ALL of that pulled up on my secondary monitor as I'm working. It's super important to get reference! If you aren't sure how to make 3D reference inside Clip Studio, please refer to the video I made last month that shows how!
3 - Final Sketch
Using all of the reference I go ahead and start my final sketch. When I make a final sketch, I use two layers: one layer for the body itself and one for the clothing/armor/accessories.
It's very important that you learn human anatomy for yourself when drawing over 3D reference. The models are super helpful for perspective, but not much else. They inherently lack muscle definition and bone landmarks that are vital to making good human drawings. So! Even though you are using reference, you really really must know anatomy to make the best of it!!
4 - Inking
Inking in Clip Studio Paint is the best experience I've had from a drawing software, hands down. And that's not just because I'm making a CSP tutorial, that's my genuine opinion. I've used Photoshop, Autodesk Sketchbook Pro, Paint Tool Sai, Illustrator.... none of them compete in my mind because of one very important reason:
CSP has vector line art layers.
They have been a game changer in my comic and illustration process. I seriously save so much time by using them!
If you aren't sure what vector layers are, I covered them in a previous video as well:
5 - Flatting
Flats are easy and take very little time thanks to the paint bucket tool. I cover the settings I use for mine in the "Make Webcomics Faster" video posted above.
Aside from using the paint bucket tool, it's important for my workflow that I flat on a separate layer from the inks. It makes the painting process faster and creates a non-destructive workflow. Which is imperative for comic creation! The faster you can make edits to your work for your editor, the easier it is to keep on a fast schedule!!
6 - Painting the Background
For painting the backgrounds, I love to peruse Clip Studio's library of assets. For this illustration, I used a cloud brush that I found for FREE! It works really well and responds to the canvas being rotated, so I can make the clouds feel like they are wrapping around her in space.
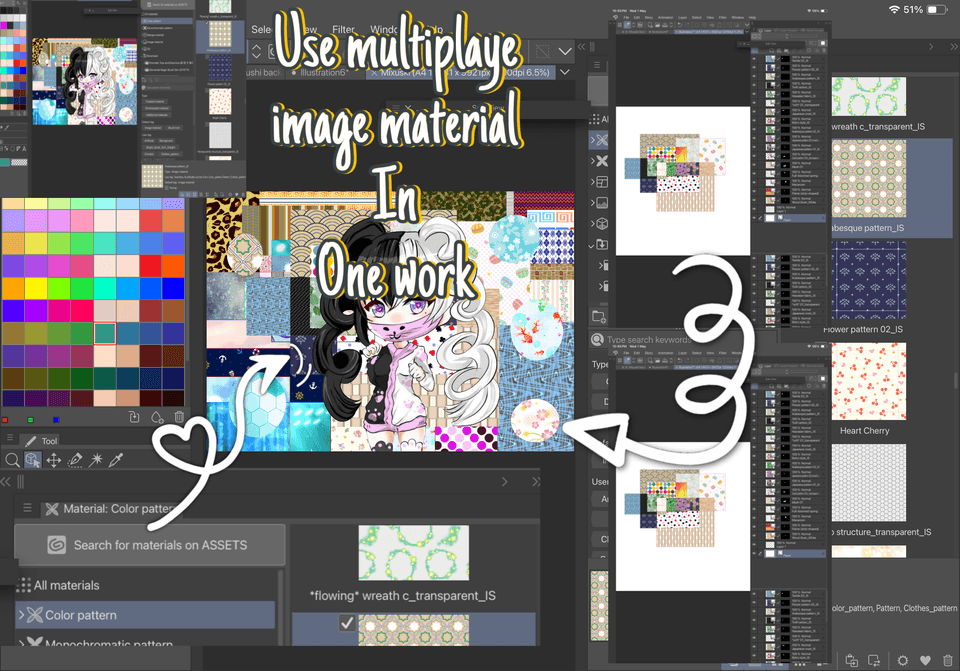
If you haven't checked out the Asset Library, I highly suggest you do. I use it constantly for things like: freckle brushes, fabric seam brushes, chainmail pattern brushes, etc.
7 - Painting the Overall Shadows
The next step for me is painting the shadows. I make a new layer and clip it to the flats (using a clipping mask) and paint in the shadows using ONE color. This color is dependent on the illustration itself, so for example this one the shadows will be blue and the highlights will be yellow.
I try to keep this pass loose and quick, not interested in detail work but the overall shadows that are being cast. I do design my shadows to draw the viewer's eye through the piece, rather than be completely 'accurate' sometimes... but I'd rather make pretty art that perfectly accurate art anyway. But that's my preference.
Once I finish the shadows, I set the layer to Multiply and pull down the opacity to my liking.
I repeat this same process for the highlights using a new layer set to Screen or Overlay and paint in using a yellow color.
8 - Painting the Detailed Shadows
So this next part is basically painting the entire image one section at a time, using color accurate shadows and highlights.
I use the previous passes as reference to make sure it all aligns correctly. This pass is for subtle changes in color that give an illustration more detail and realism.
This section takes the longest but honestly has the best pay off for me. The great thing about this part of the process is that you can do it in any software because CSP can export to .PSD files (photoshop document files). These file types can be accepted by SAI, Photoshop, Sketchbook Pro, etc!!
9 - Compositing the Final image
This is where the whole piece comes together! In this step I composite the painted/illustrated layers with the CSP shadow/lighting passes that I did previously into one cohesive piece.
The biggest tip I can give for this section is to keep the whole illustration in mind. If some of your shadows don't align with your painted sections, you'll have to go through and fix them. The important thing is to make your illustrated colors match the color tinted shadow pass.
10 - Export
Exporting in CSP is super easy, you can save your illustration as a JPG or a PNG for easy social media posting.
I highly recommend using PNGs as they are lossy meaning that the compression done on the image shouldnt pixelate as easily and will give you the best looking image for your final.
Ending Thoughts
If you just read the breakdown here instead of watching the video, I highly suggest watching it as well. It's not just a speedpaint, I talk the entire painting process through and some of the little tips I throw in along the way I didn't cover in this write up. (because there are a lot!)
I hope this helps you build your own workflow for your comic/illustrations. Remember that it should be a fun process that is non-destructive and gives you the greatest result for the time you invest!!
If you have questions leave them as comments in the youtube video so I can find them. If you have a video idea you'd like me to cover next time, please feel free to comment them as well!
PS shameless comic plug inserted here
Cheers,
Aerow from The Gentleman Panda
Users who liked this post


Comment