Understanding Fish-eye Lens
Hello, I’m Manh Ho. I’ve been using Clip Studio Paint for five years now.
Before Clip Studio Paint ver 2.0. I drew fisheye lens line by line and it took me quite some times to finish the drawing.
But now, it only take me one minute or two to make a fisheye lens ruler that is ready to use.
This feature is really useful for someone who like to draw backgrounds in fisheye lens such as myself.
In this tutorial, i’ll explain fisheye lens in a simple way and share my experience applying the fisheye ruler of CSP ver 2.0 to my drawing.
*𝐍𝐨𝐭𝐞𝐝
If there is something you’re not fully understand while watching the vid, I recommend reading this tutorial all the way through in text.
The video version is like a shorter version of the tutorial, it still has all the main ideas, but I explain the fish-eye lens more clear in the text version.
1. How a human’s eyes see things
Image holding a picture frame in front of you. This will represent for your Field of view (FOV).
The FOV is the extent of the observable world that is seen at any given moment.
As us human has two eyes in front of our head. A binocular FOV of human eyes is around 114 degrees of view horizontally. The vertical range is around 150 degrees. *Note that the eye movements are excluded in the visual field’s definition.
We’re used to zooming and cropping our (FOV) to look into particular scene. So we only see the world in straight lines.
But what if your FOV is a “wide angle” which includes everything to your left and right, above and below you?
Or what if each of your eye lies on each side of your head just like a bird or a fish?
All these straight line will appear as curvy lines.
We call it a “Fish-eyes lense” effect.
Let me explain.
Image you’re standing on the side of the road. On the other side of the road in front of you, there’s a house. Alongside of the road also has some street lights.
You turn the camera around and take 3 pictures from left to right without changing your eye level. Let’s name each of these camera position in order A, B and C.
Perspective is defined as the relationship between objects in the scene.
Since you stand close to the house (B), it appears closer on the camera.
Both ends of the road (A) (C) are far to you.
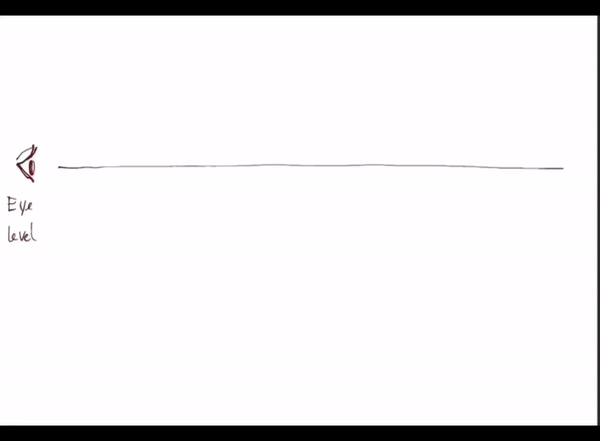
Since you don’t move and the road you take is the only one.
Let’s combine these 3 pictures with different angles of perspective into 1 spherical perspective seamlessly.
This is how a fish see, WIDE VIEW!
2. Understanding Five-point and Six-point perspective
The CIRCLE or len in 5-point perspective or 6-point perspective represents your FIELD OF VIEW.
5-point perspective is a circle with 5 vanishing point.
There is a horizon line.
Two vanishing point at both ends of the circle horizontally.
Another two at both ends of the circle vertically.
For the last one, you can put it anywhere in the circle depend on how you put on your camera position.
With this system of perspective, you can illustrate 180 degrees of visual space around you.
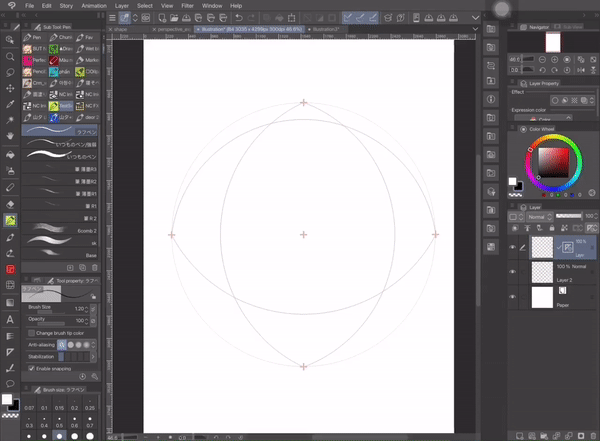
6-point perspective is just a 5-point perspective with a missing focal point. To get the whole picture, you would have to turn around and look at the scene BEHIND you to find that last point.
It will be hard to understand a little bit. Let’s image you’re a bird with two eyes on the sides of your head.
Birds have a complete or a nearly complete 360-degree visual field. Which means you can see both your front and your back AT THE SAME TIME.

What we’ve learned
The CIRCLE represent your FIELD OF VIEW.
5-point perspective is a 180-degree of visual field around you.
6-point perspective is a total 360-degree of visual field around you.
Here is the panorama image of a cafe i exported from Clip Studio Paint official asset. This is an example for 6-point perspective when you flattern your 360-degree visual field into 2D paper.
It’s weird when you can see both your front and your back at the same time right ? Birds and fishs are ok with this thou. Can’t blame us human with eyes all located anteriorly on our head. We call it banana pan perspective, or just panorama.
I’ll talk more about this maybe in another tutorial in the future.
4. Analyzing your sketch
In my opinion, although 5-point and 6-point perspective are both for wide view angle, 5-point perspective appears to be a little ‘flat’, while 6-point perspective appears to be more extreme.
5-point perspective is quite symmetrical, it creates a feeling just like looking through a door's peephole.
Because its features are to create only 180-degree of visual field, 5-point perspective brings narrow and oppressive feeling to the drawing.
6-point perspective on the other hand, has additional focal point which means it has more freedom.
With 360-degree of the visual field, this kind of perspective brings more depth and space to the drawing.
Remember, there’s no right or wrong, depending on what feelings you want to bring up in your drawing, choose your ruler wisely.
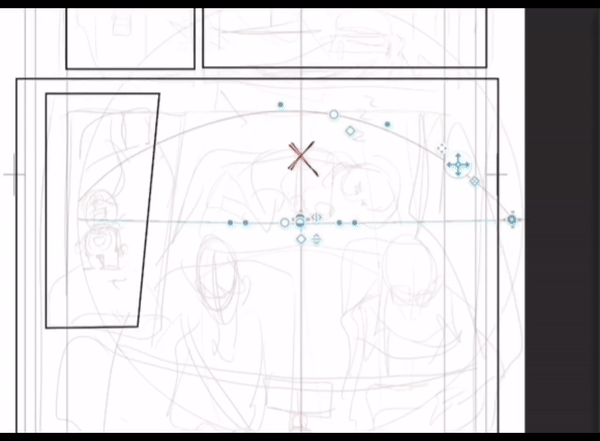
For example, let’s use my art. The left sketch is ok on it own, the buildings look tall, the sky brings some spaces to the drawing, but something is missing. It looks still, there’s no movement. So, I choose 6-point perspective instead. This brings more depth and windy feel as the car is running.
The horizon and the focal points are also important.
You need to set up your camera position before applying perspective ruler.
Analyzing your sketch.
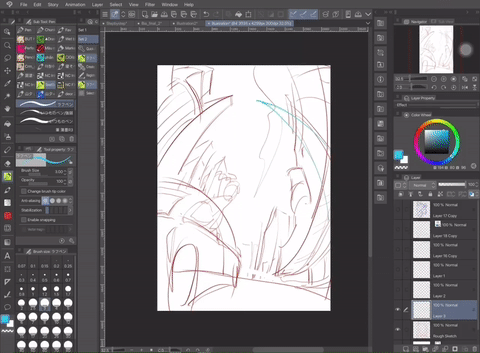
Ask yourself, is what you draw above or below the eye level, is it on the left, or on the right, or in the middle of the circle.
Once you can answer these questions, you can easily adjust the ruler to fit in your sketch.
3. How to create Five-point and Six-point perspective ruler
There’re two ways to create a fisheye perspective ruler in CSP 2.0
. Use [perspective ruler] tool
. Or you can just
5-point perspective ruler: [Layer] menu -> [Ruler/Frame] -> [Create perspective ruler] -> 2-point perspective (+fisheye box ticked)
6-point perspective ruler: [Layer] menu -> [Ruler/Frame] -> [Create perspective ruler] -> 3-point perspective (+fisheye box ticked)
The first way is:
Use [Perspective ruler] tool -> In [Tool prorperty box] -> Choose [Add vanishing point] (remember to tick in [Add fisheye] box).
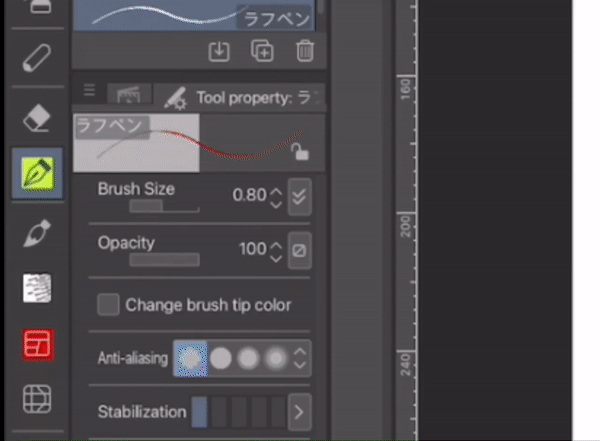
This tool is quiet hard to use. At first try, you might not get the right size of the circle, it might be a little too big or a little too small.
But don’t worry. You can adjust the size easily with these settings below.
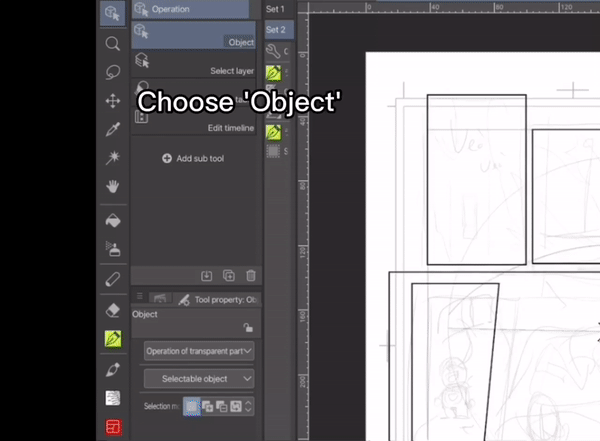
Choose ‘Object’ tool, click on the Ruler icon on the layer you’re working on -> the [Edit perspective ruler] will appear in [Tool propery] box -> Open [Sub tool detail] -> Adjust these settings: [Distortion strength] and [Field of view] to get the right size.
After that, let’s add just more vanishing point and the ruler is ready to use.
The second way is more convenient, it also create focal points for you.
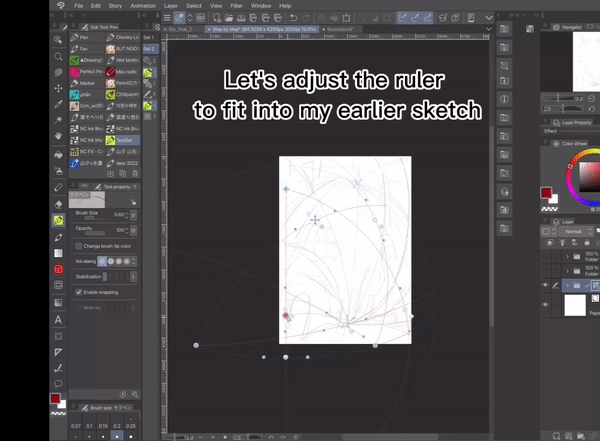
All you have to do is adjust these settings [Distortion strength] and [Field of view] to make it fit into your sketch.
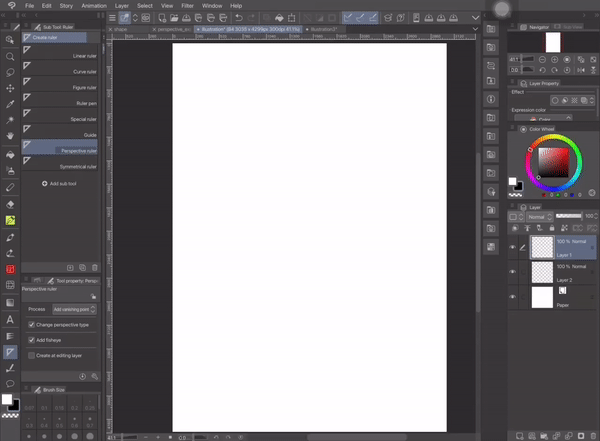

Drag and move the controllers on the fisheye perspective ruler until it fit right to your sketch intend.
5. Use the ruler as guide to draw
Pen will snap to the ruler if you tick in [enable snapping] box
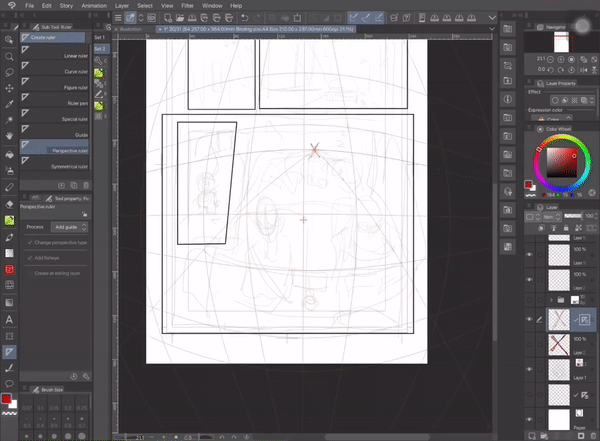
Turn on the [grid] settings and use them as guides to draw.
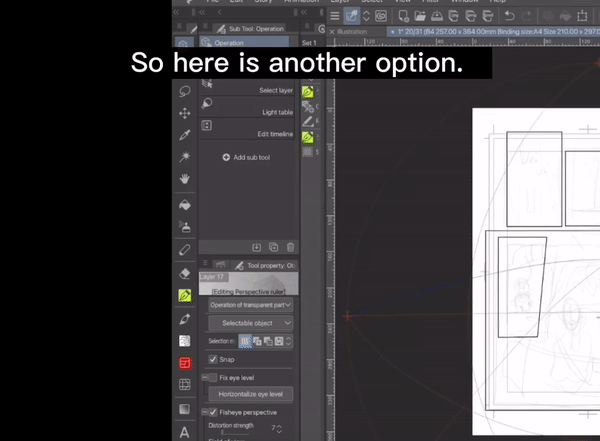
If you don’t like grid like i do. Here is another option: choose [Perspective ruler] tool -> Choose [Add guild] and add more guides as you like.
Now i can see my art clearly under those guild lines.
6. Conclusion
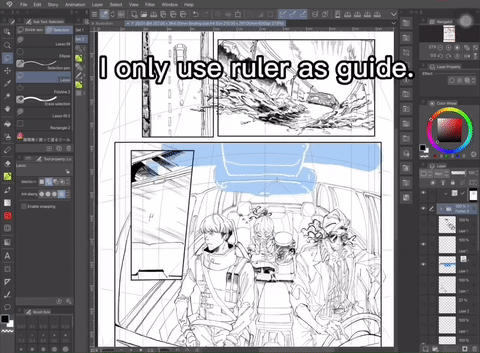
I only use ruler as guild, i think it has more feel to the lineart if you draw straight lines by hand.
After all, perspective in general is a tool to bring feelings into art, and fisheye lens alone have already brought certain feelings to the drawing.
What important is your intension and how you use fisheye lens to bring these intension up for your viewers to see.
I hope these tips help.
Thank you for reading my tutorial to the end.


Comment