Animate eyes (blink) in CSP for beginners
Introduction
Hello, I'm bluero, today I will give you a small introduction of how we can animate in clip studio paint, this time I will show you a very simple and easy way to animate the eyes or the blinking of these with a ready-made illustration, you can follow this small guide even if you have the version of clip studio pro or ex.
1.- Open illustration that we want to animate
This animation will start from an illustration already done, this is mine.
2.- Timeline
We will make the [Timeline] window visible to do so we go to [Window] and press [Timeline]
A new window will appear that will look like this
Now we will create a new timeline, we click on the following icon
A new window will appear with different options, but for this animation we are only interested in knowing about [Velocity(R)] and [Duration]
[Speed] is the number of frames per second, basically the more frames per second there are, the more detailed and fluid the animation can be.
It can be complex to understand, but it is quite simple, think about the following:
an animation is basically many static images that as they change, the illusion of movement is produced, the amount of images that there will be per second is defined in [Speed] or also known as FPS (frames per second).
For this animation I will use 24 FPS.
Comparison between an animation of 12 FPS and 24 FPS

[Duration] is basically what our animation is going to last in this case as the [speed] is 24 and we already said that it corresponds to frames per second we assume that for every second of animation there are 24 frames, in this case I will do an animation that lasts only 1 second is why we put 24 in duration.
We accept and we will see something like this
3.- Organize layers / folders to animate
Next I have the layers of my illustration divided into groups, I usually work with many layers, in case your illustration is all in one layer you will have to separate the eyes from everything else or if you want to paint on top of it.
This time we only care about the groups/layers that have to do with the eyes, as you can see I have a group called "eyes lineart" (blue) and another group called "eyes color" (orange) as its name indicates in a group I have the lineart and in the other the color.
you can see that hiding each group in the [Timeline] also hides it.
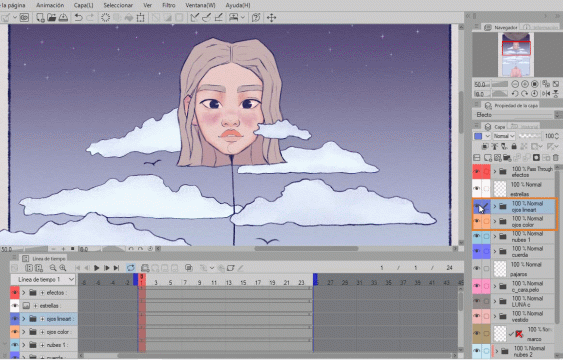
It is necessary that we group the lineart with the color, to do so we have to select the groups that belong to the eyes with CTRL you can keep both groups selected, now we go to [Layer] > [Create folder and insert layer] and a new group with lineart and color in it.
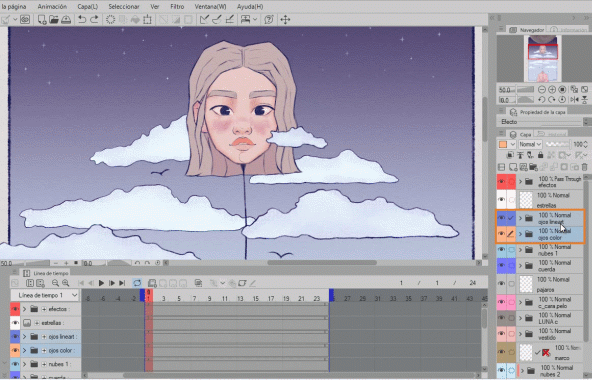
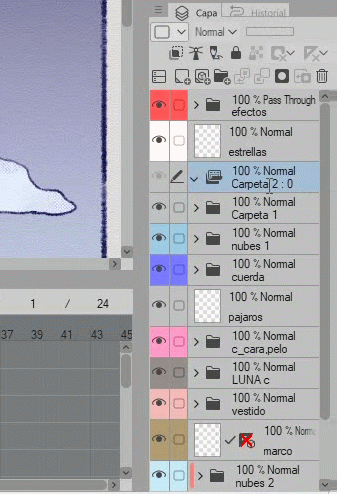
When animating it is necessary to create Animation Folders, to do so we will:
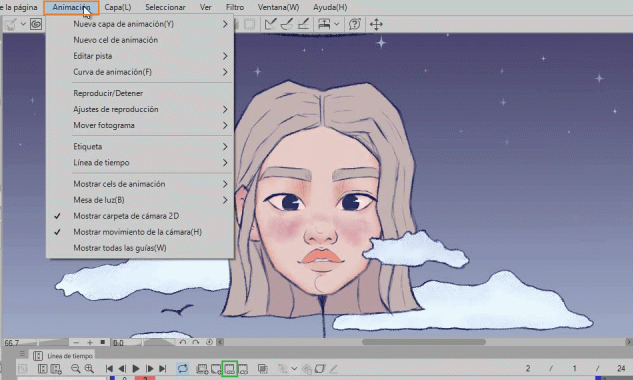
[Animation] > [New animation layer] > [Animation folder] and an animation folder will be created

In case it gets complicated, the first icon is an [Animation Folder} the second icon is a regular [Layer Group].
Next we are going to rename the animation folder I will call it "eyes" and I will drag the group of layers inside the animation folder after this I will name it "1" I recommend that the name be short so it will be easier to identify it in the Line of weather
IMPORTANT: Once an Animation Folder has been created, each layer or group inside it will now be called ANIMATION CEL and this is how it will be recognized in the timeline
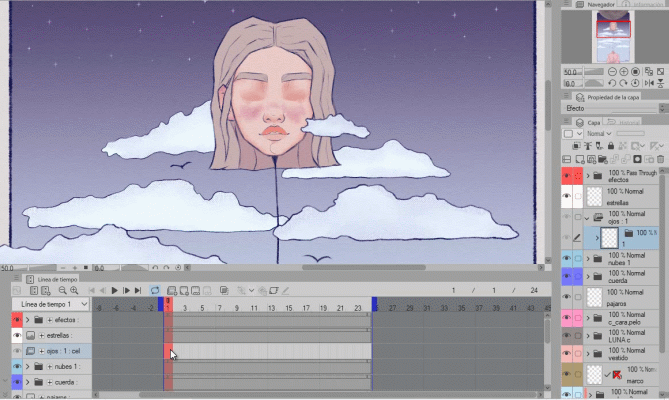
You may notice that when you move the group to the animation folder with the lineart and color that is now called (1) the eyes are no longer visible in the timeline, don't worry it's completely normal
We position ourselves in the Timeline where the animation folder called "eyes" is, to make the eyes visible again we must [Specify cels], we just do:
Right click and a window will appear where we will look for the name of the group in this case "1" and we will press it and the eyes will be visible again.
You can also do it the longer way is:
[Animation] > [Edit track]> [Specify Cels] or press the icon that is enclosed in the green box, personally I find it more comfortable to use the right click.
5.- Eyes
It's time for us to start drawing to make a basic blink animation we will only need 3 drawings: open eyes, semi open and closed eyes or even just two (open and closed), if you want something more produced you can always add more drawings in between.
To be able to animate the eyes, we must first draw, in my case I already have the eyes open, we only need to make the eyes closed and the eyes semi-closed.
5a.- Eyes closed (2)
What we will do is duplicate the layer "1" which has the color and the line of the eye, we go to [layer] > [duplicate layer] and an exact copy of "1" will be created automatically named as "2" and in it we will draw the closed eyes for this animation.
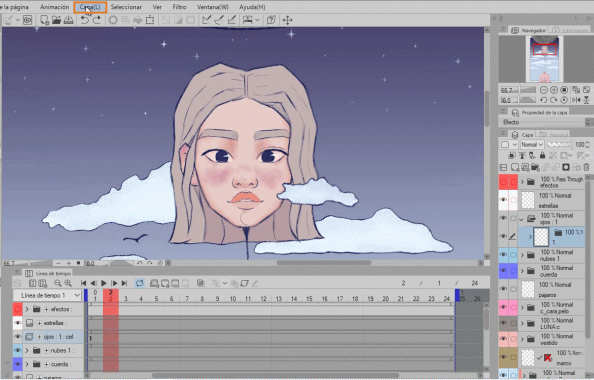
It will not appear in the timeline, it is necessary that we manually make the cel "2" visible, we position ourselves in the Timeline, right click, the window will appear and there we select "2"
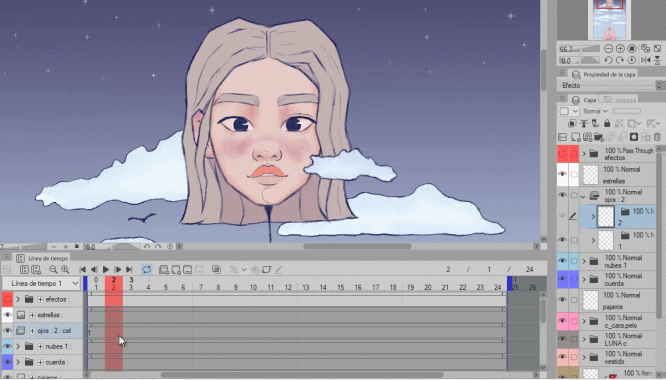
We are going to hide the color group (orange) and the brightness of the eyes as well as anything other than the lineart so as not to have distractions when drawing.
in group 1 (eyes open) I hide the color and brightness:
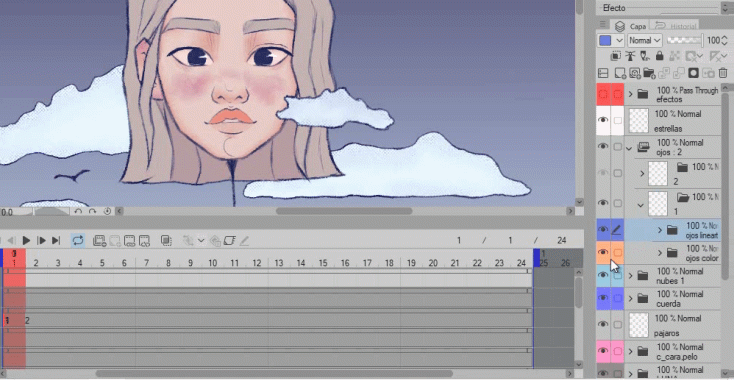
And in group 2 (where we will draw the closed eyes) I hide the color layer (orange) and I eliminate the brightness of the eyes since we will not use it since the eyes are closed, I will also erase the eye line since when it is closed it that we already have is useless and I will draw from 0 on the same layer called "eyes"
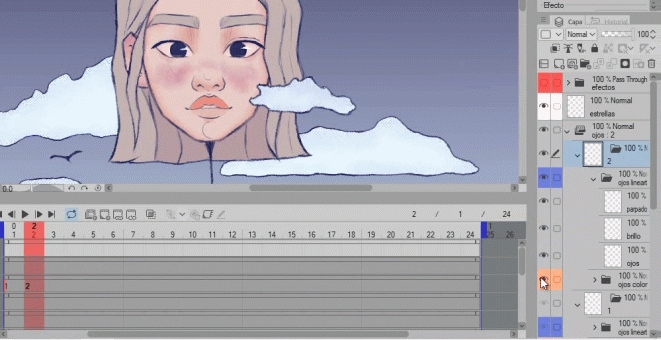
We are going to activate the [Onion paper] this option is useful to be able to visualize the previous drawings (green color) as the following ones (pink color) in the timeline, we will use it to be able to draw correctly based on what we already have.
As you can see the 2 is empty in it we will draw the closed eyes and when activating the onion skin we see the open eyes (1) in green color so we can easily continue.
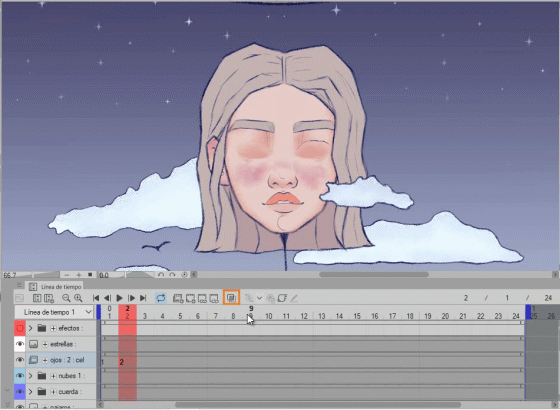
Using the onion paper we will draw the closed eyes and at the end we will have something like this, clearly it will vary depending on the drawing style you have or even if they are human eyes or not.
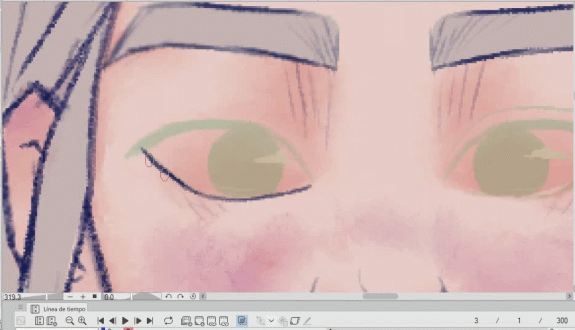
We will continue with the color of the closed eye (2), we eliminate the color group since it does not work for the closed eyes, we create a new layer and there we color
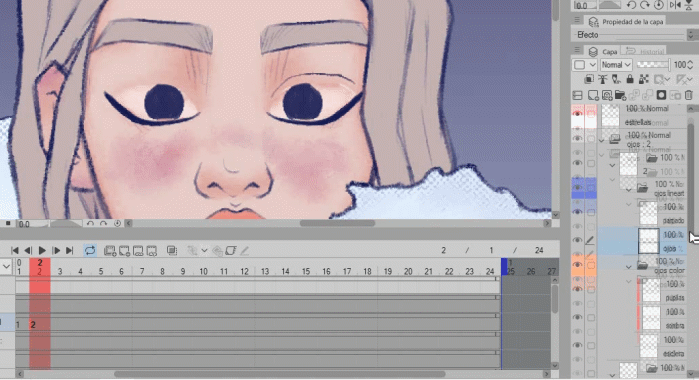
After coloring the result would be something like this
So we would have "1" and "2"
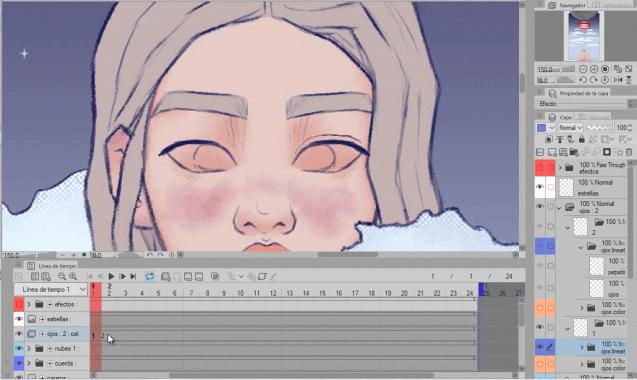
Although with these two drawings we can perfectly achieve our blinking, in order to make it look more natural and fluid we will make one last drawing.
5b.- Half-open eyes (1a)
Now we have to make an intermediate drawing between 1 (open eyes) and 2 (closed eyes) this drawing will be the semi-open or semi-closed eyes as you wish to call them.
We are going to drag cel 2 along the timeline to leave a frame between 1 and 2 and there position a new cel, the one with the semi-open eyes (1a)

Now we select group 1 (cel 1) and just as we did before we will duplicate the layer.
[Layer]> [Duplicate layer] and a new layer called 1a will be created
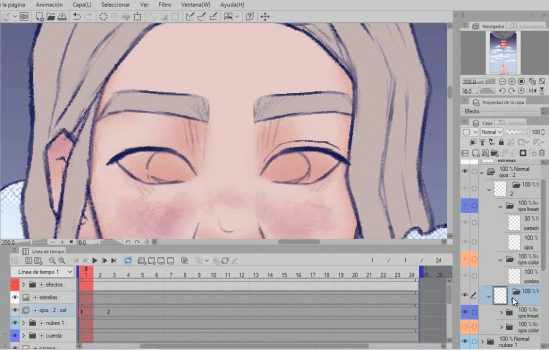
Since it is not visible in the timeline we have to [Specify cels] to make it visible
right click on the timeline and select "1a"
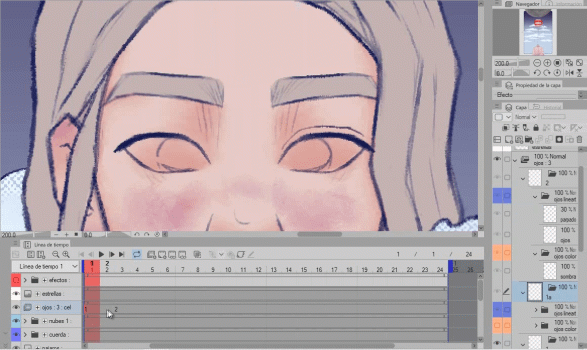
We are going to hide the color of the group "2" (closed eye) to only have the lineart
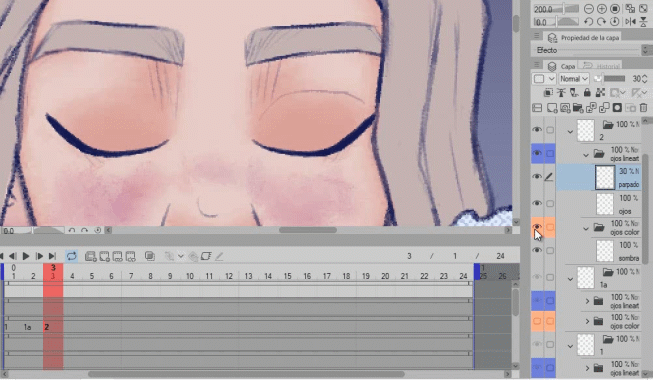
We activate the onion paper to start drawing the semi-closed eye in "1a".
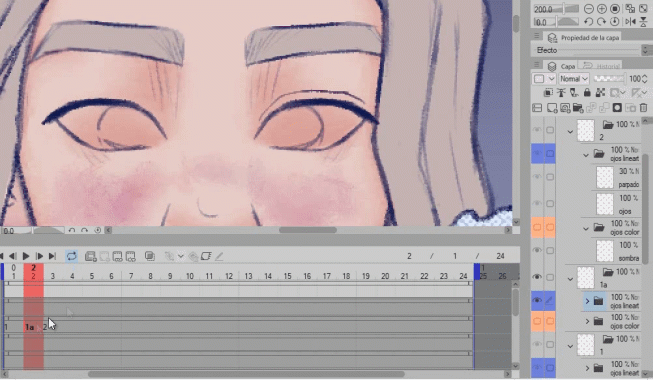
Now we simply draw the semi-closed eye, in my case the selection brush tool helped me to modify the line we already had and then draw.
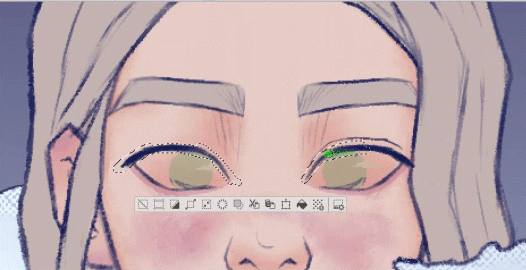
When finished we will have something like this
We make the brightness of the eyes and the color layer (orange) of 1a visible again and modify it so that it goes according to the semi-closed eye
Once that is done, we will have something like this left and we will have finished with the drawings
Finally we make visible the color group and the brightness of the eyes in what corresponds
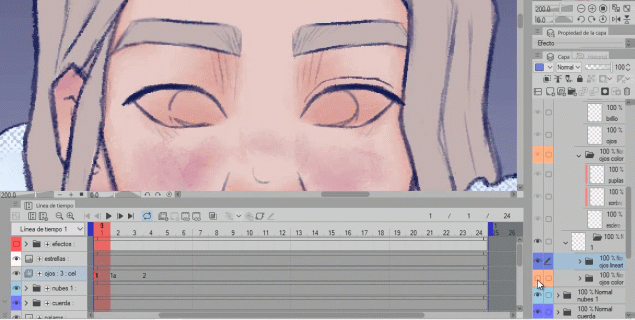
At the end of the drawing process we will have something like this:
1: eyes open
1a: semi-closed eyes
2: eyes closed
6.- Animate
With our drawings done it is time to animate and I want to clarify that this is not the only way to animate the eyes and you can always and I encourage you to experiment around what you are looking for and what you like.
Before starting, the following image is illustrative so that you can know the names of some things which I will name from now on.
The numbers that are in the green box correspond to the frames and those that are in the orange boxes are the animation cels
Now I will give you some examples of the sequence with which you could animate the eyes
6 a.- Blinking "open slow close fast"
This is the basic blink sequence where the eyes will open slower than they will close.
1 (eyes open)_1a (eyes half closed)_2 (eyes closed)_1 (eyes open)
frame 1:1 (eyes open)
frame 2: 1a (eyes half closed)
frame 3: 2 (eyes closed)
frame 4: 1 (eyes open)
In this example we will not leave space between cels they will be positioned one after the other
We will position ourselves in frame 4 and go to [Specify cel] select 1.
As you can see we can use the same cel several times in the same timeline without the need to redraw it.
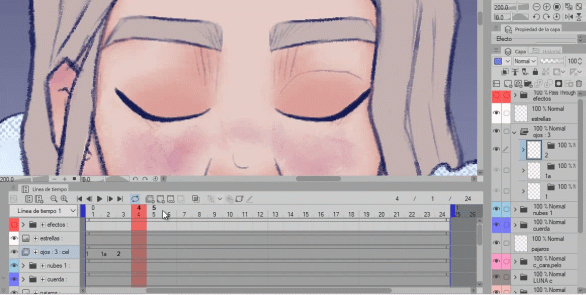
It'll look like this, it's a bit fast for my liking and honestly we can do a lot better, that's what we'll do.

We are going to leave 1 frame of separation between each cel and this will make the blinking look slower and can be better appreciated.
Frame 1: 1 (eyes open)
Frame 3: 1a (eyes semi-closed)
Frame 5: 2 (eyes closed)
Frame 7: 1 (eyes open)
It will look something like this, much better, right?

Now we will do the same, but leaving 2 frames of separation between each animation cell (cel).
Frame 1: 1 (eyes open)
Frame 4: 1a (eyes semi-closed)
Frame 7: 2 (eyes closed)
Frame 10: 1 (eyes open)

I leave you a comparison between:
No gap between each cell, 1 frame apart, and 2 frames apart between cells.
With this we can conclude that the more frames there are of separation between each animation cell, the slower the animation will be and on the contrary, the closer the cells are to each other, the faster the movement will be seen.
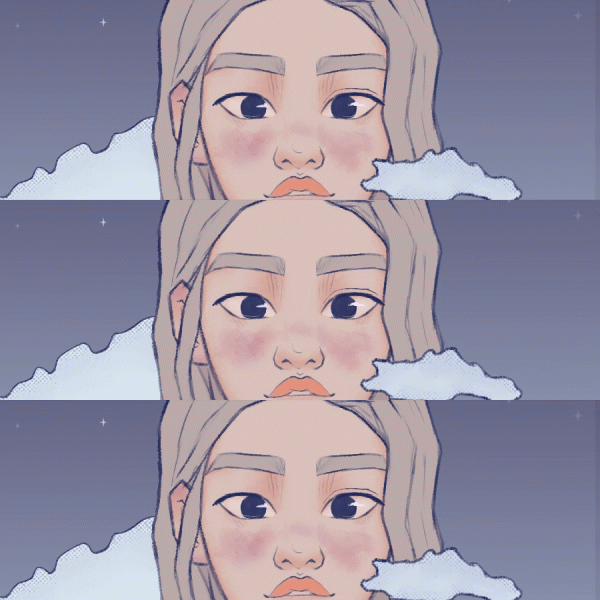
In the other examples I will use the second speed option (that is, leaving 1 frame between each animation cell), remember that you can use the one you like the most and/or the one that is most appropriate for the result you want to achieve.
6 b .- Flashing "close fast open slow"
In this option we will look for the flashing to start slow and end fast.
Frame 1: 1 (eyes open)
Frame 3: 2 (eyes closed)
Frame 5: 1a (eyes semi-closed)
Frame 7: 1 (eyes open)

6 c .- Flashing "opens slowly closes slowly"
In this example we will look for the blinking of the eyes to start slow and end slow.
Personally this is my favorite sequence I feel like it looks more natural.
Frame 1: 1 (eyes open)
Frame 3: 1a (eyes semi-closed)
Frame 5: 2 (eyes closed)
Frame 7: 1a (eyes semi-closed)
Frame 9: 1 (eyes open)

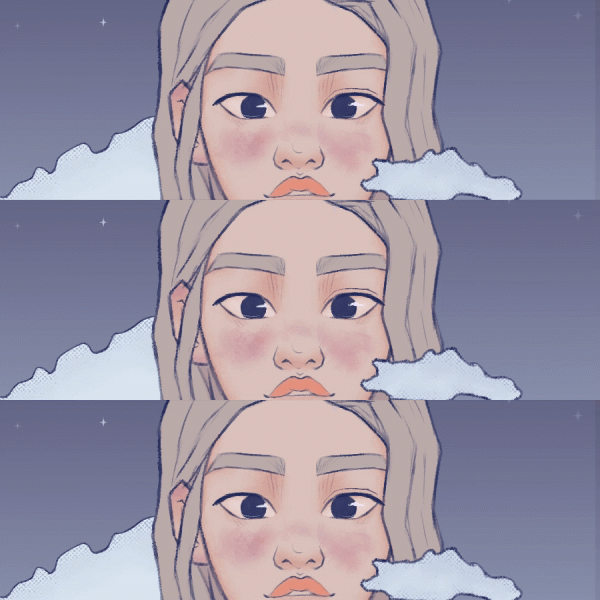
6 d.- Comparison of the 3 blinking examples
This is what the three sequences I shared would look like "open slow close fast", "open fast close slow" and "open slow close slow".
Remember that you can experiment in many ways and achieve the result that best suits you and what you are looking for, also that in this case all the animations are 1 second and that with more animation time the blinking of the eyes can be achieved a lot more natural.
7.- Save animation
Finally we are going to save our animation as a gif.
Go to [File] > [Export Animation] > [Animated Gif]
A window will appear where we will name the file and save it, then the following window will appear.
We adjust the size we want for our gif.
The export range in my case from 1 to 24 which is all the frames.
The speed in 24fps
Unlimited loops if you wish you can choose how many times the gif will be played.
Finally, I recommend having the Dither box activated when doing so, our gif will be much more faithful to the colors of our illustration, especially if you use a lot of colors and/or gradients.
We can also save it as a Movie (mp4 video) so we can share it on Instagram, for example, which does not support gifs.
[File] > [Export Animation] > [Movie]
A window will appear where we give it a name and save it.
Then the following window will appear, we decide the size in which we want to save our video and the frames per second, I recommend that they be 24 fps.
8.- Final animation
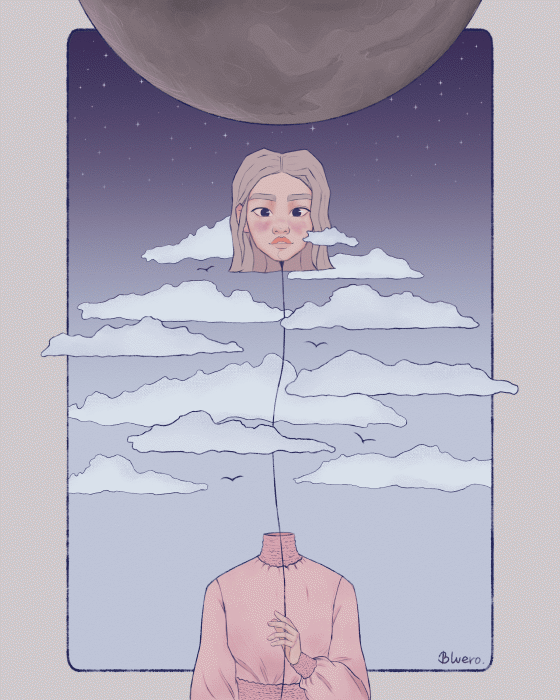
And this would be the final result, a 1 second eye blink animation





Comment