
Intro
Hi everyone, it's Kiiyusan here! I will be showing you how to draw beautiful flowers for your amazing Illustrations. From a single petal to a pretty bouquet!
For this tutorial I will be going in depth about three different Types of flowers to keep it simple!
Let's go!!
Different Types of Flowers and Meanings
Before starting to draw you should think about what type of flowers you want to add to your Illustration. There are many flowers to choose from and all of them have a different meaning, you should choose a flower depending on the theme of your Illustration.
Here are some examples on a few different flowers and their meanings :
Dandelion : Happiness, Joy and Health
Hydrangea : Gratefulness, Honest Emotions and Persevering Love
Lotus : Purity, Beauty and Knowledge
Peony : Prosperity, Wealth and Good Fortune
Gypsophila (Babys Breath) : Purity, Innocence and Love
Lycoris (Red Spider Lily) : Death and Reincarnation
Now that we know what these few flowers mean let's choose three of them to add to our Illustration!
I will be choosing the Hydrangea, the Babys Breath and the Red Spider Lily!
Check References
You should definitely look up references on the internet so you can get a better impression of the flowers, like the different angles and colors.
You can also use your own photos to use as references, taking pictures of flowers on the streets or your own garden is definitely more fun!
Here are some examples from my own photos :
Note : These photos are my own and are only shown as an example. These are not the flowers will be drawing in the following steps!
STEP BY STEP : Hydrangea
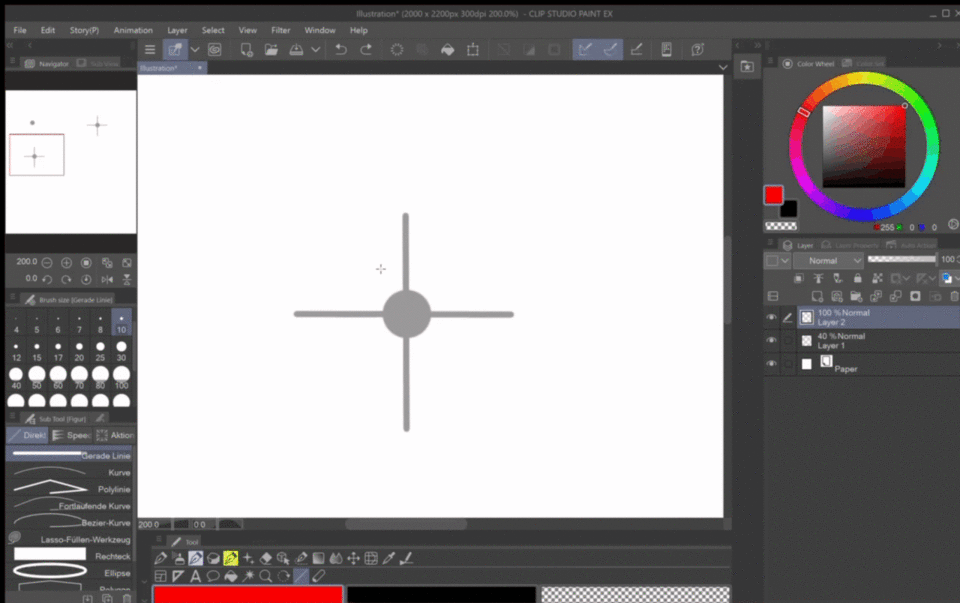
The first thing that I am going to do is to create new canvas by going to "File" then "New".
Next I took the G-Pen (size 70) and drew a dot on the first layer.
Add a new layer and draw a straight line through the dot.
Go to "Figure" tool and use the "Straight Line" brush (size 10).
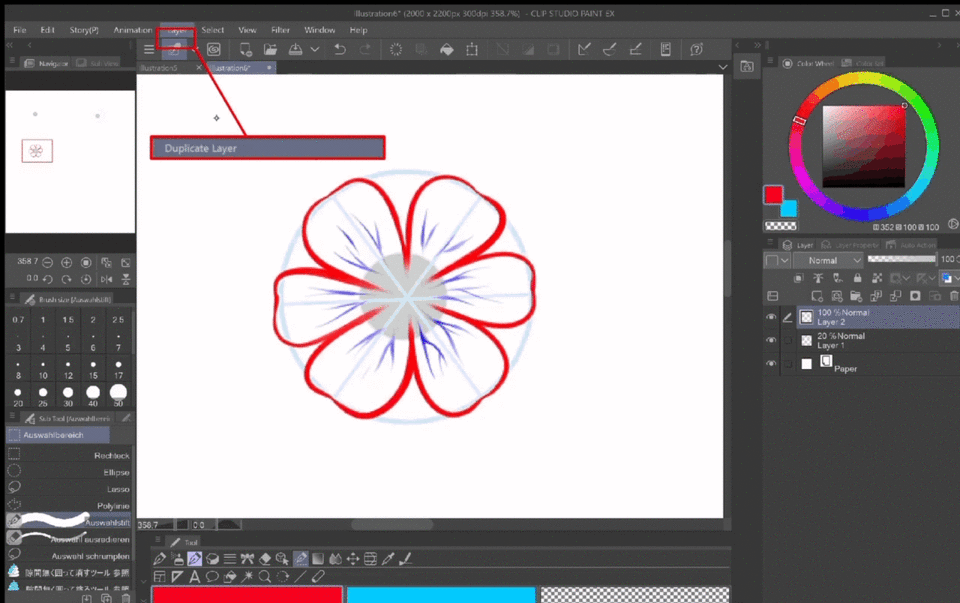
Duplicate the layer and flip/rotate it.
Then merge all 3 layers and turn the opacity down to 40%.
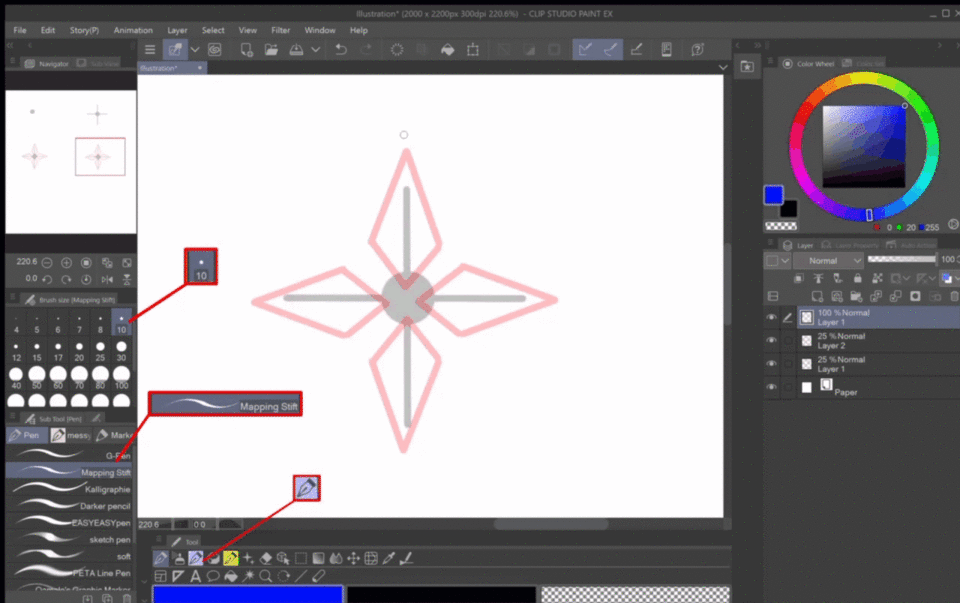
Again add a new layer and draw a kite shaped guideline.
Then duplicate and rotate it until there is one on each line.
Merge these as well.
Now getting to the petals.
Go to "Pen" and choose the "Mapping brush".
Draw your first petal and duplicate it, rotate and place one on each kite and merge all.
You can also adjust the position of the petals by going to the "Selection area" tool and using the "Selection pen".
Then add a small circle (red) and fill the parts in between (green).
Make sure all the petals are on one layer, then lock their lineart and color it with black.
Now moving onto the coloring part.
Add a layer below the lineart, take the "Fill" tool and fill in all the petals.
Make sure to refer all layers and adjust the width of the filled area through "Close gap".
There will still be small parts that won’t be colored.
You can take the "Paint unfilled area" brush and fill them out as well (green area).
Color the middle with orange, lock the base color layer and color the petals with a light pink.
Then take the "Airbrush" and with a darker pink, add a bit of shading in the middle of the flower.
Choosing and even darker shade of pink, go to the lineart layer, lock it and color the whole lineart with it.
Now it’s time for cell shading.
Add a new layer over the base color, clip it to the layer below and set it to multiply.
And add a shadow following the red lines (as marked on the picture).
Lastly go to the lineart layer again and with a soft ereaser, smoothen out the middle.
Then take the soft airbrush and color the edges of the lineart with the same light pink as before.
And it’s done!
STEP BY STEP : Red Spider Lily
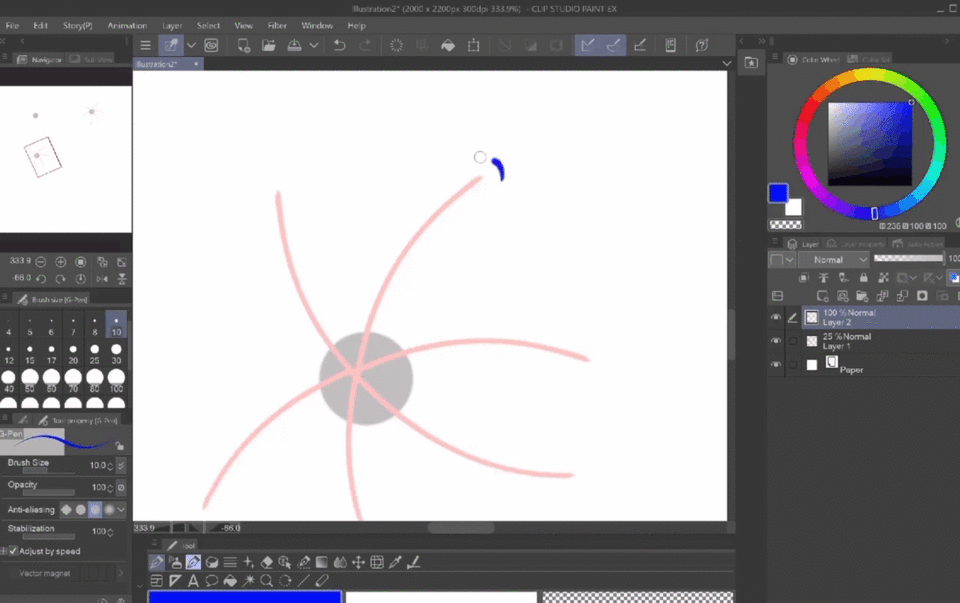
Open up a new canvas again.
Draw a dot again with a size 70 "G-Pen".
Now on a new layer, use the "Figure" tool to draw a straight line again but this time it should be at an angle.
Go to the "Liquify" tool push the line to the top left.
Then bring the line back to the middle of the dot by using the "Move layer" tool.
Duplicate the layer where the curved line is on twice and use the "Transform" tool to rotate it till you have something like the image on the right.
Then merge the dot and all the line layers.
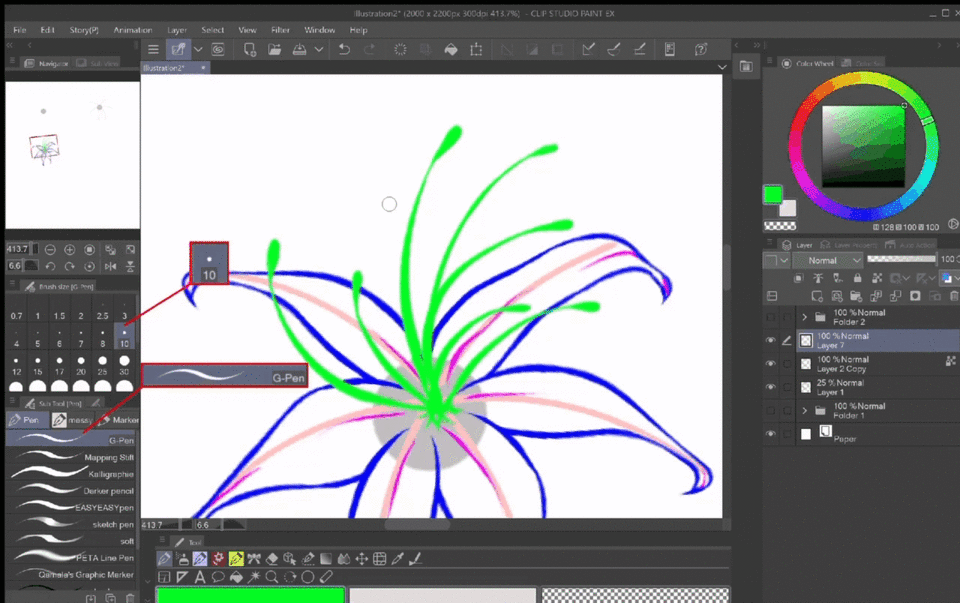
Now I’m going to show you how to draw the petals for the spider lily.
But first, keep the directions of the curved lines in mind.
Turn the opacity of the guidelines down to 25% and add a new layer.
Brush: G-Pen, Size 10
Again add a new layer and finish up the flower.
Merge the lines and color them black.
Now moving on to the coloring.
Add a layer below the lineart and fill it in with a rather darker red. Again you can take the "Paint unfilled area" brush and fill in all the small parts.
Lock the base colors and take a soft airbrush (size 100) to softly shade the middle with a very dark red.
Also lock the lineart layer and using the same dark red, color the lines.
Lastly take a quite bright red and airbrush the edges of the lineart and base color.
This one is also finished!
STEP BY STEP : Gypsophila (Babys Breath)
Open up a new canvas again.
Draw a dot again with a size 70 "G-Pen".
This time add an new layer and draw a circle around the dot and add three straight lines right within the circle.
The two following gifs show you how I drew these petals.
To summarize: I added a new layer, took a size 10 G-Pen and drew almost heart shaped forms. Then I added some detail on each petal and corrected the middle where they all meet by erasing and re-drawing.

Then I duplicated them and adjusted them by enlarging and erasing.
Use the "Selection area" tool -> "Selection pen" to help you.
Turn off the guideline layer and keep doing the step I just explained untill you have something like in the image below.
And make sure to merge all the petal line layers.
Now on the same layer, add a couple of dots in the middle (still using the G-Pen), lock the lines and color them with a light grey tone.
Now add a new layer below the lineart and fill in the petals withe the the "Fill" tool and of course you can again use the "Paint unfilled area" brush (which you can find under the "Sub tool" of the "Fill" tool) and color in every small detail.
Lock the base color layer and color it with light grey.
Lastly we are going to soft shade the petals.
For this go to the lineart layer, then take the "Auto select" tool and click on the first row of petals.
Taking the soft airbrush, go back to the case color layer and with the same grey as the lineart, carefully shade the petals.
In oder to get as many small post as possible, while using the "Auto select" tool, make sure to adjust the "Tolerance" setting accordingly.
Here is an example:
And after shading all the petals, the last flower from my tutorial is also done!
Quicker methods using brushes and assets
The CSP Assets store has a huge variety of flower themed brushes and materials you can add to your Illustrations.
Or you can make your own brushes using the finished drawings you made!
Like me!
You can find my brushes on the CSP Assets store!
Examples
Here are some examples on how I used the flowers for my own art!
__________________________________My Instagram: https://www.instagram.com/kiiyusan/
Users who liked this post


Comment