
INTRODUCTION
Hi everyone, my name is Jing. Today, I will talk about how to understand and master the [FILL TOOL] in Clip Studio Paint. To follow along with me, you can watch the coloring tutorial on my Youtube video below. We’ll discuss the [SUBTOOL] and [TOOL PROPERTIES] labelled here.
These are great tools used to facilitate creation of quick silhouettes or doing color flats, especially when there are multiple layers involved in a document or if the line art is not that perfect. This tutorial will also show you how I troubleshoot issues when I stumble upon roadblocks.
1) ABOUT THE ARTWORK
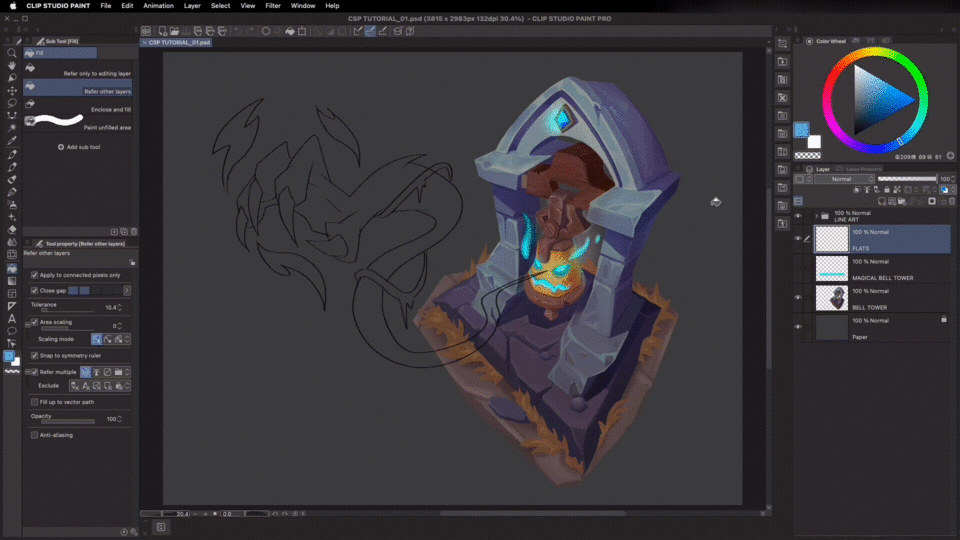
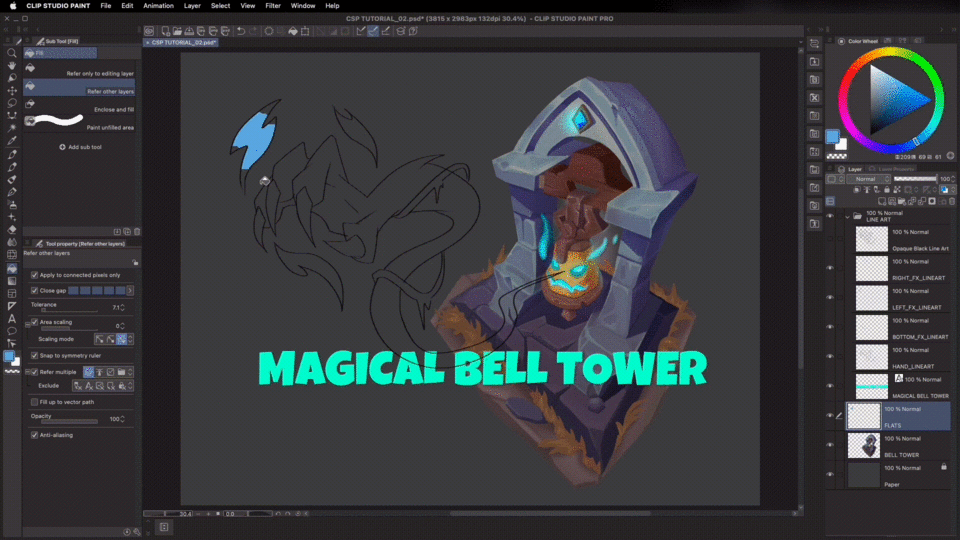
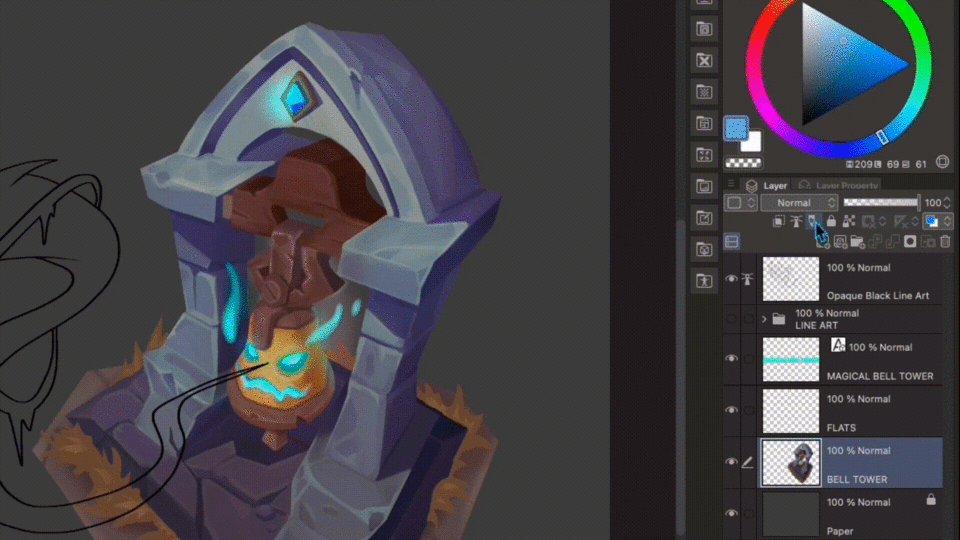
I did this piece for the upcoming spooky season (see gumroad store in youtube description box). So, to get into that vibe, I drew this “Magical Bell Tower” here. We’ll be using the line art of the ghost hand here to demo Fill Tool techniques. I’ve created my Flats Layer just below my Line Art layer.
The [FILL TOOL] can be generally found on the left of the interface, the icon looks just like a paint bucket. You can easily hotkey it by pressing the letter “G.” What we’ll look out for next are the [SUBTOOL] and [TOOL PROPERTY] windows. If for some reason, you’re not able to find the [SUBTOOL] and [TOOL PROPERTY] you can always go to the [WINDOW MENU] and you should be able to find the [SUBTOOL] and [TOOL PROPERTY].
1] REFER TO ALL LAYERS
First and foremost, I’ll make sure to I select [REFER TO OTHER LAYERS] Sub Tool. The REFER TO MULTIPLE] box in the Tool Property, has different options to choose from: [ ALL LAYERS, REFERENCE LAYER, SELECTED LAYER AND LAYER IN FOLDER].
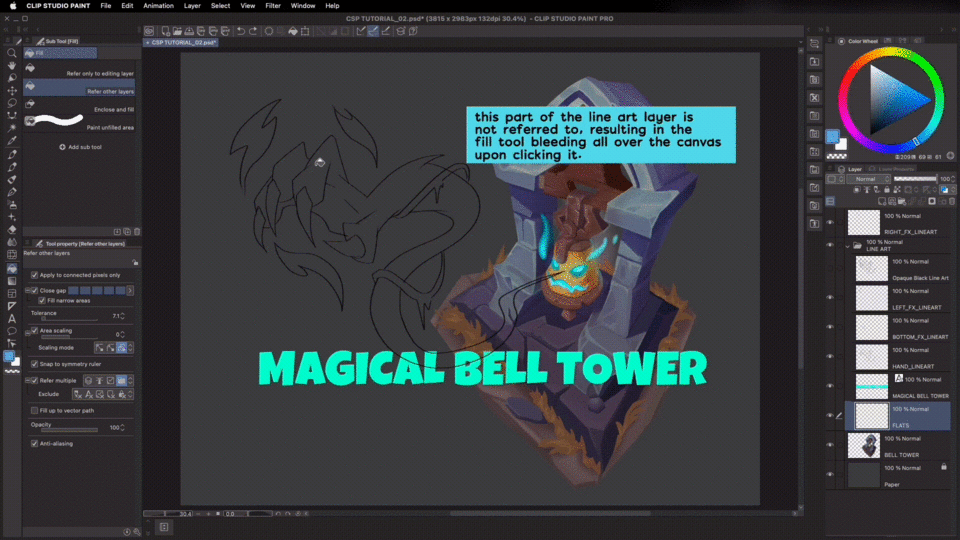
Once I select [ALL LAYERS] enabled, and try to fill in my drawing, you’ll see that it effectively fills inside the line art since Clip Studio Paint sees all the layers in the document while the Fill Tool is active and whichever layer is seen, the Fill Tool will refer to that and take it into consideration. So the reason why the Fill Tool actually stopped where the Bell Tower is, is because it could still see it. Once I hide the Bell Tower, what happens is, the Fill Tool will continue to fill the line art.
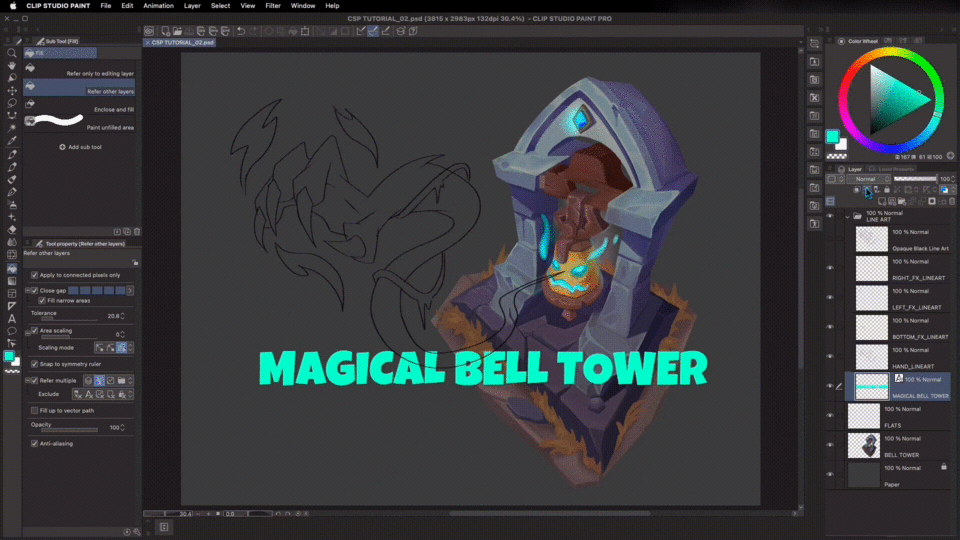
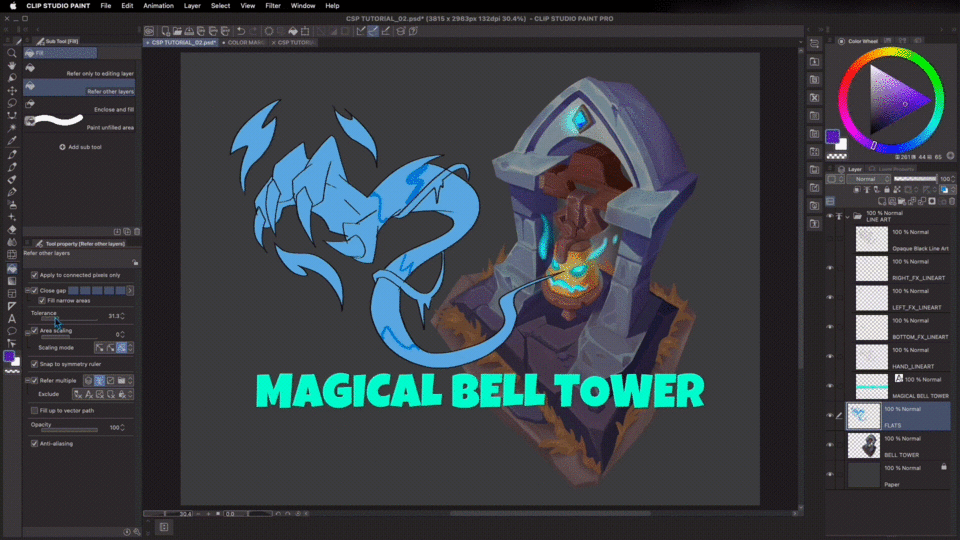
2] REFER TO REFERENCE LAYER + APPLY TO CONNECTED PIXELS ONLY
This is actually great for filling in a specific part of the line art or in this case, a text layer, given that it is in separate layer. This solution is very ideal especially if there are numerous line art layers in your document..and it’ll help the Fill Tool isolate what exactly needs to be filled in.
Let’s say I want Clip Studio Paint to only see the "Magical Bell Tower Text." In order for that to happen, I will have to set it to be my Reference Layer by clicking the light house icon, which says [SET AS REFERENCE LAYER] or I can right click on the layer thumbnail itself. The Fill Tool will now treat this layer as the only layer(s) to be referred to. So if I fill the outside of the text, the background gets colored.
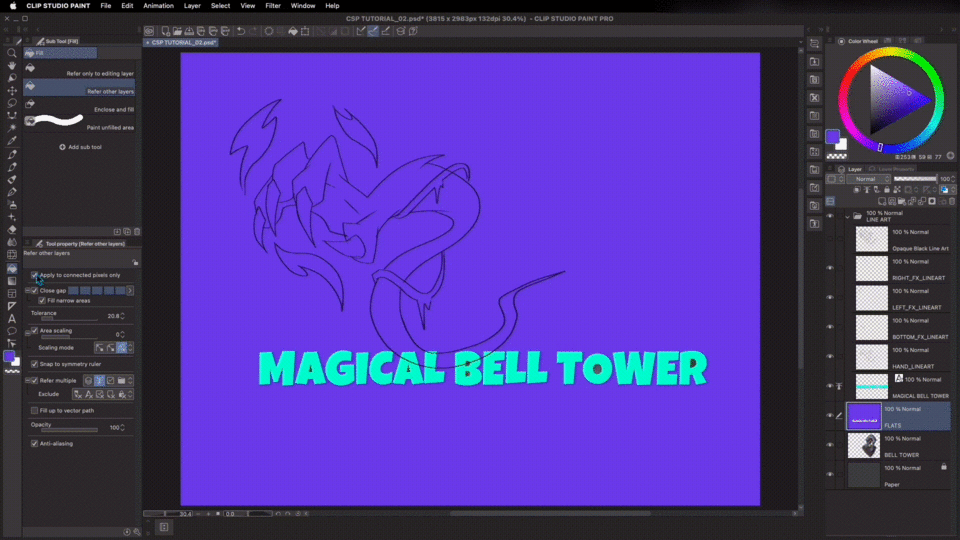
Unfortunately, there are color leftovers and it would be quite painstaking for me to individually fill those in. Another trick is that, if I uncheck [APPLY CONNECTED PIXELS ONLY], what this does is that Clip Studio Paint fills in similar colors whether they are next to each other or not, such as the areas in between the letters. If I click inside the text layer, it only fills the text itself. If I had checked [APPLY TO CONNECTED PIXELS ONLY], it would get filled partially. So, having this unchecked helps with filling all of the letters which have the same colors.
3] SELECTED LAYER
To make this feature work, I'll select [LAYERS SELECTED] and check [APPLY TO CONNECTED PIXELS ONLY] Again, I'll select my Flats Layer first (where you want the fill to be). While holding the CMD or CTRL button, I'll go ahead and check the layers you wanted to refer to. I’ve selected my floating elements here for demonstration.
4] LAYER IN FOLDER
For this feature to work, I'll switch mode to [LAYER IN FOLDER]. Try to keep in mind that the Flats Layer should be inside the referred group folder. Now, if I separate this line art layer from the group, Fill Tool won’t refer to it anymore. Only the layers inside a particular folder will be referred to, anything outside the group folder will not be taken into account.
5] CLOSE GAP + FILL NARROW AREAS
Let’s discuss what the [CLOSE GAP] feature is. If I try to fill a part of the line art here, the Fill Tool will bleed, but if I try to check the [CLOSE GAP] box, you can see that it set up to 2 bars. If I try filling it again, and it would still bleed. If I bump this up to 5 bars, you can see that it was enough for it to be filled. The [CLOSE GAP] setting can be maxed up to 50.
You can see that the tip here below didn’t receive much of a fill.
What I do to solve that, is to go to [WINDOW MENU], and then hover to [SUBTOOL DETAIL], then unhide [FILL NARROW AREAS] and click on the checkbox.
Then I’ll reduce the [TOLERANCE] to about 0.7, to decrease the margin of the Fill Tool. As you can see, it fills up the narrow tip of the line art effectively.

6] TOLERANCE also known as COLOR MARGIN
I’ll switch to [REFER TO ALL LAYERS] mode and delve into the [TOLERANCE] property. To demonstrate, I’ll use my bell tower to show how the this property works. This is used to specify how much of the neighboring color should be filled according the point source clicked. The key is that the result will depend on which point source I click from, as well as on the tolerance amount.
For example, my mission is to fill the lit area of the building. With a tolerance of 5, Clip Studio Paint will search for pixels that can be considered as similar colors, but only going so far since our tolerance is only set to 5. If I increase it to 10, the color will spread even more since the color tolerance will think that I wanted to consider more of the similar colors based on the exact color point source I clicked from earlier.
You can see that this area of the building’s roof has much more similar colors because it is in shadow. If I make the roof's darker color as my newly clicked point source, and then bump it up to 20, the [TOLERANCE] property will fill most of the roof’s area in shadow. Similarly, if I reduce the tolerance to 15 and click on this new point source, a lot of area will be covered since this part is almost in complete shadow with less color variation. Note that if your tolerance is too high, an amount of 70 for example, the color fill bleed all over since there will be more consideration that the neighboring pixels are all the same color.
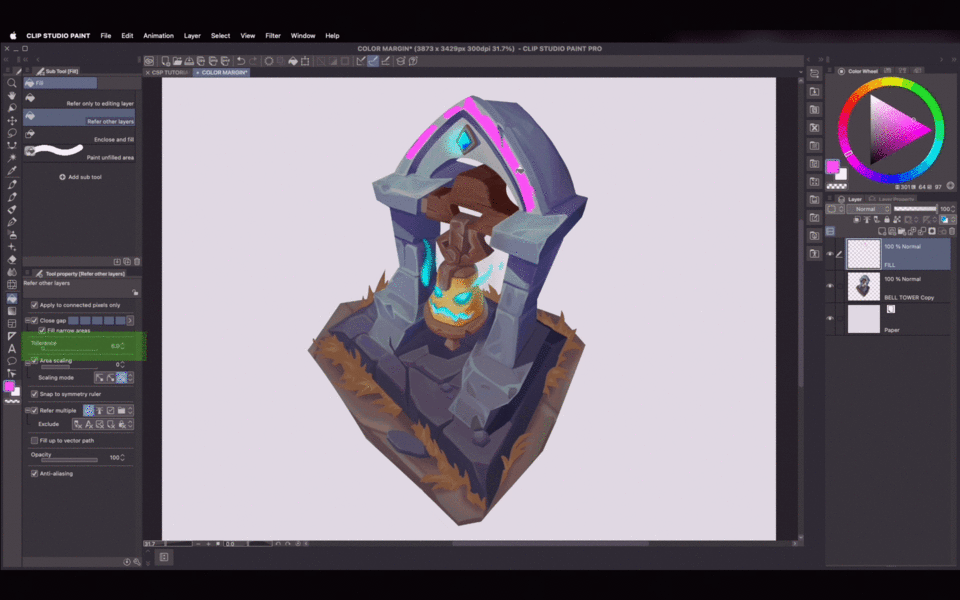
You can also use [TOLERANCE] in other ways. Let’s say I want to introduce some detail into my flats. I’ll set up my line art group to [REFERENCE] here. This is a quick way to lay in different colored patterns. Always note that the higher the tolerance, Clip Studio Paint will think colors are the same.The lower the tolerance, it will think that the colors are different.
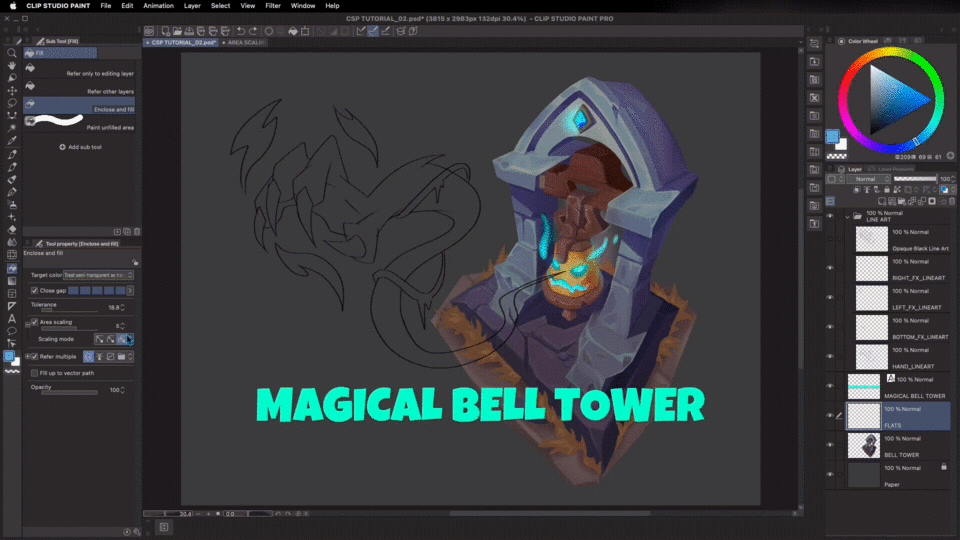
7] AREA SCALING
This is used to control the amount of bleeding of fill colors in the line work, to a certain extent. You can access various area scaling settings with the plus button. The rectangle and round setting will result in a fill that is shaped according to its name. l always try to do this with the darkest pixel setting selected though. That way, the fill won’t bleed over the line art too much. Area scaling will also depend on the size of the artwork, again it’s really a matter of tweaking until you get the result that you want.
Area scaling result also depends on the thickness of the line quality. If I lessen the opacity of these lines, you’ll see how much the Fill Tool bled into the line work. If you use the rectangle or round scaling setting…if the area scaling is high, it will bleed outside the line art.


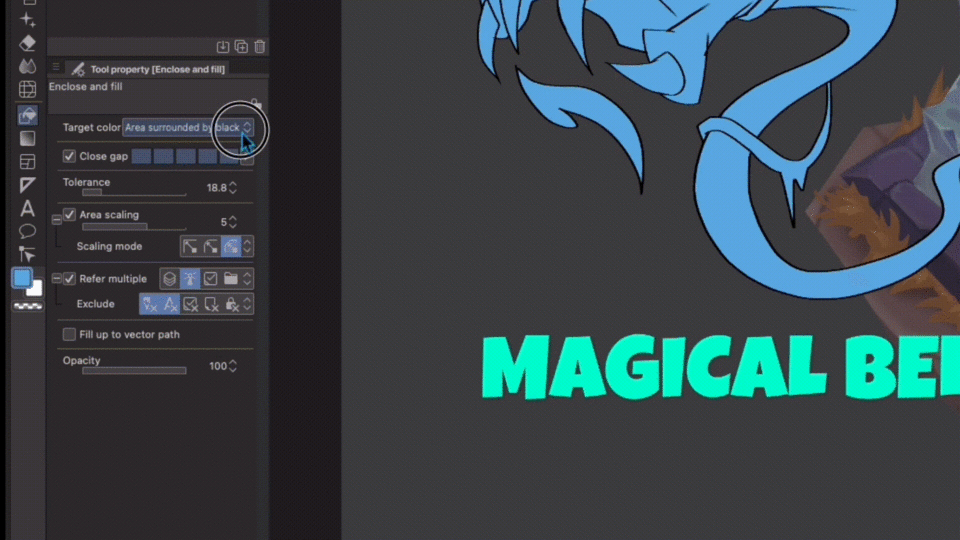
8] ENCLOSE AND FILL + PAINT UNFILLED AREAS (Introduction to Exclude Options)
If I want to do quick silhouette fills, I will use the [ENCLOSE and FILL TOOL] or [PAINT UNFILLED AREAS]. It’s easier to do this only with the line art layers and no other layers around. However, I do have a bell tower layer and text layer visible and when I use the [ENCLOSE and FILL TOOL] , in [TARGET COLOR] set to [TREAT SEMI-TRANSPARENT AS TRANSPARENT], it does not yield desirable results.
To solve this, in [TARGET COLOR], I select [AREA SURROUNDED BY BLACK]. I have made my semi-transparent line work into opaque black by duplicating and then merging it multiple times. I will then set the black line art to [REFERENCE] so that the sub tool will fill in a shape conforming to the line art later. In order for the Fill Tool not to recognize the Bell Tower Layer, I will set it as a Draft Layer or simply right click on the layer thumbnail itself and then go to [LAYER SETTINGS] > SET AS DRAFT LAYER. I’ll go back to refer multiple and hit the plus button to show other [EXCLUDE OPTIONS]: like Draft, Text, Editing Layer, Paper Layer and Locked Layers. For the purposes of this tutorial I will only exclude the Text Layer and Draft Layer. Once I enclose and fill, the text and bell tower are excluded from being filled.
Another trick in color shading is setting the [TARGET COLOR] to [TARGET ALL COLORS] and then creating a layer on top (shadow guideline ) of the silhouette fill. Afterwards, I can enclose and fill designed shadow shapes to get an easy read on the artwork. The same exact process can be done with [PAINT UNFILLED AREAS]. However, the line art should be opaque and no gaps in order for this to work.
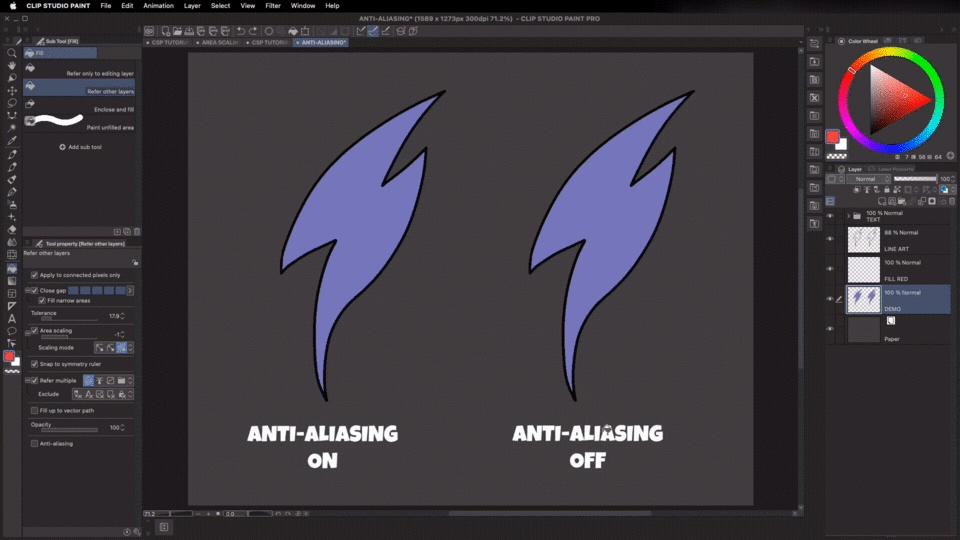
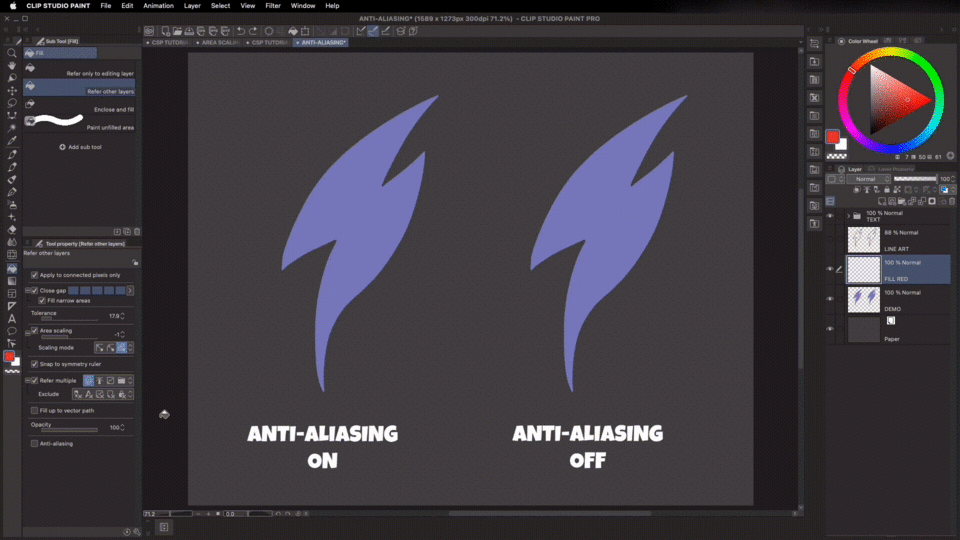
9] ANTI-ALIASING
Here, we have two line drawings. The drawing on the left is filled with the [ANTI-ALIASING] ON and the drawing on the right is filled with the [ANTI-ALIASING] OFF. Notice that the shape filled with anti-aliasing has blurry or semi-transparent edges while the latter has crisp edges. It is recommended that the [ANTI-ALIASING] remains unchecked for the tolerance tool to identify colors better and to have cleaner fills.
For example, if I reduce my Area Scaling to -1, filling this purple shape with crisp edges on the right with anti-aliasing on, the fill will result in semi-transparent red and purple hues in the extremities of the purple shape, even though it has 100% hard opaque edges.
10] CLOSING
Thank you for reading this tutorial on learning how to use the Fill Tool in Clip Studio Paint. Hope you learned something new and try these techniques out! If you enjoyed this tutorial, hit the like and subscribe button for more art content. If you have any questions or art topics you’d like me to cover next, comment them below and I’ll get back to you soon. See you on the next video and happy painting!
You can find me on:
GUMROAD STORE:https://brushimpact.gumroad.com
INSTAGRAM: https://www.instagram.com/brushimpact/
TIKTOK: https://www.tiktok.com/@brushimpact
Thank you so much for your support!
Users who liked this post


Comment